
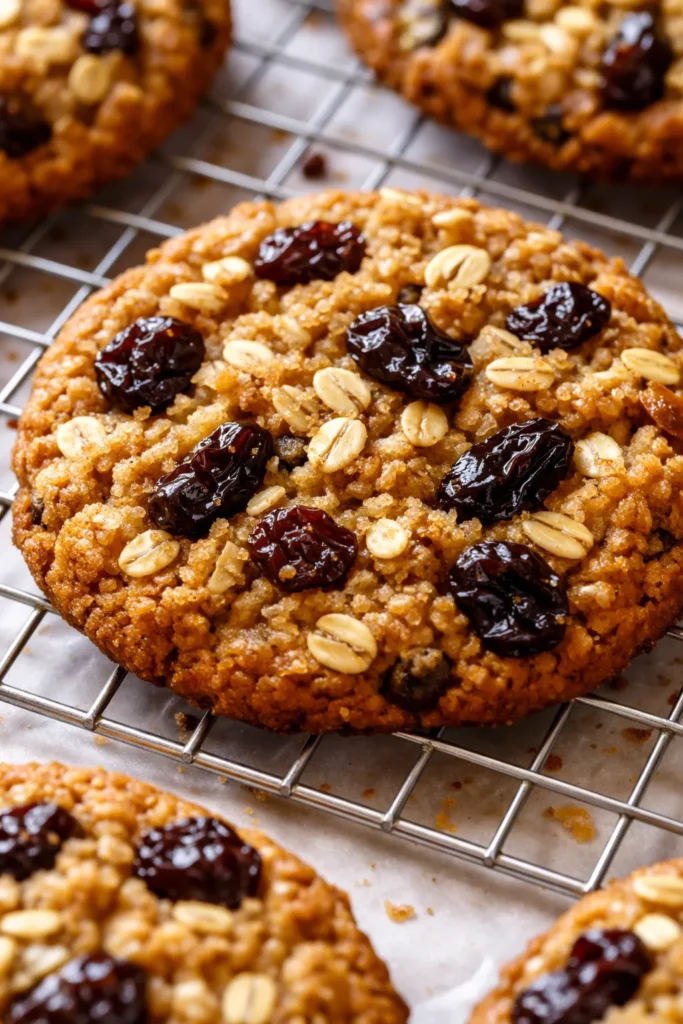
I have a strong memory of biting into an oatmeal raisin cookie as a kid, fully convinced it was chocolate chip. We’ve all been there! But a truly great oatmeal raisin cookie — the one with the soft, bendy center, the slightly crisp edge, and raisins that have plumped up instead of turning into hard little pebbles — is worth crossing the room for. This is that cookie.
The short version: These come together in one bowl, take about 35 minutes start to finish, and stay soft for nearly a week. No stand mixer required, and no dry, dusty raisins allowed.
I’ve tested this batch more times than I can count — somewhere around 40, if I’m being honest. My kids now request them over chocolate chip, which felt like a betrayal at first, until I tasted one warm from the pan. Now I get it.
- Serves: 24 cookies (though “serving size” is negotiable)
- Hands-On Time: 20 min | Total Time: 35 min
- Difficulty: Easy — my 9-year-old can make these solo
- Cost per serving: ~$0.25 per cookie
- Calories: ~180 per cookie
- Dietary Notes: Easily adaptable for gluten-free and nut-free
(Photo above: A stack of golden-brown oatmeal raisin cookies on a simple white plate, morning light catching the craggy oat edges and visible dark raisins. One is broken in half to show the soft, dense interior — no dry, cakey crumbs here.)
The One Step Everyone Skips (Don’t Skip It)
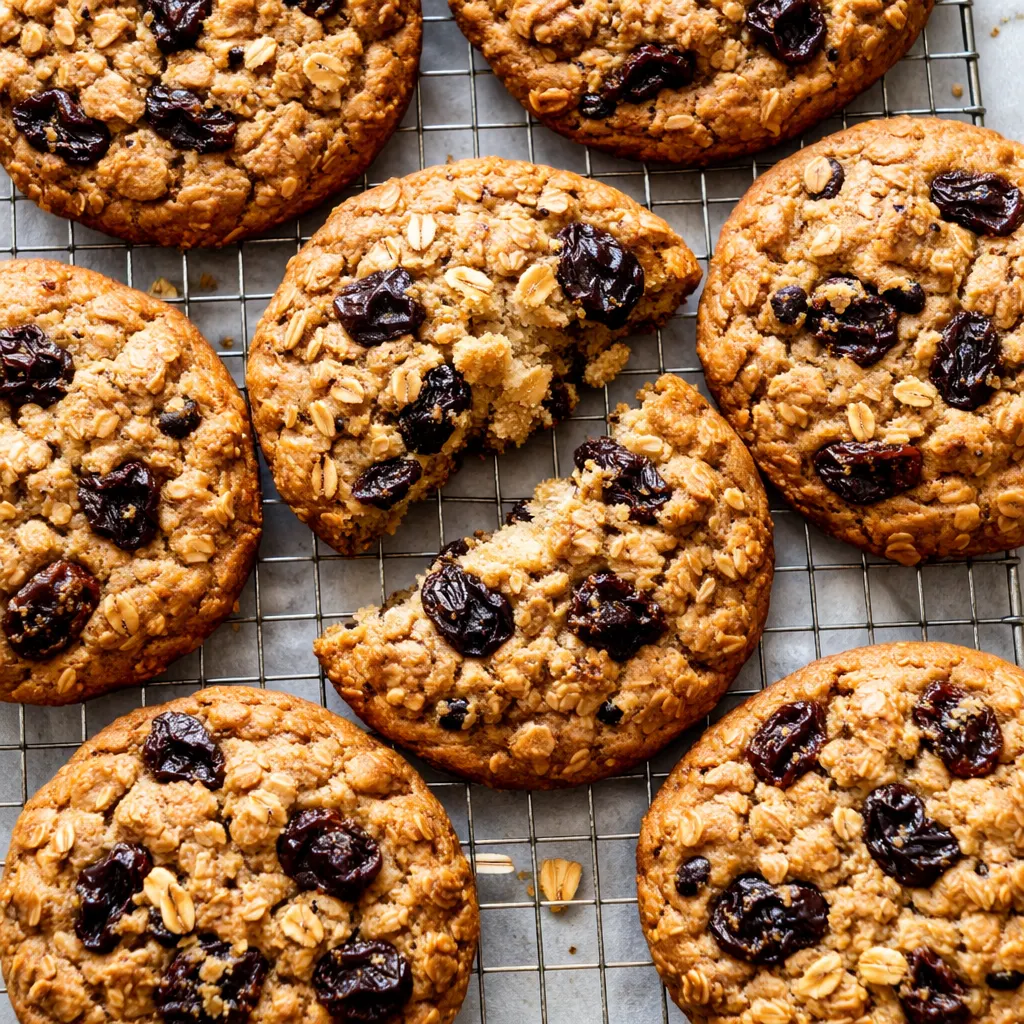
Dry raisins are the enemy of a chewy cookie. They suck the moisture right out of your batter as it bakes, leaving you with a cookie that’s hard by day two and raisins that feel like little pebbles. The fix is almost laughably simple: soak them.
Ten minutes in hot water (or bourbon, if you’re me and it’s a weekend) plumps the raisins so they stay juicy inside the cookie. They release that moisture back into the dough as the cookie bakes, which means the whole thing stays tender longer. It’s not a secret technique — it’s just a step everyone is too impatient to do. Don’t be that person.
The result is a cookie that bends instead of breaks. The edges have that slight crunch, but the center is soft and almost fudge-like. It stays that way for days, assuming your family doesn’t demolish them in the first hour. Which they will.
Ingredients Worth Talking About
- 1 cup (2 sticks) unsalted butter, melted and slightly cooled: Melted butter is the key to chewy cookies. It coats the flour proteins in a way that prevents too much gluten formation, keeping things tender. No need to cream cold butter — just melt it and let it sit for a minute.
I’ve used salted butter in a pinch and just skipped the added salt. Works fine, but taste the dough first if you go that route. - 1 cup packed dark brown sugar: Dark brown sugar has more molasses than light, which means more moisture and a deeper, almost butterscotch flavor. This is not the time for light brown sugar.
My kids can smell the difference when I use light brown. Dark is non-negotiable in this house. - ½ cup granulated sugar: Granulated sugar helps with the slight spread and gives the edges that crispness. You need both sugars for the right texture balance.
- 2 large eggs: Room temperature if you remember to take them out, straight from the fridge if you don’t. I’ve done both and honestly can’t tell a difference.
- 1½ teaspoons vanilla extract: Pure vanilla is better, but imitation works. Just don’t skip it entirely — it rounds out the oat flavor.
- 1½ cups all-purpose flour: Spoon and level it. Scooping straight from the bag packs in too much flour and gives you a dry, cakey cookie.
- 1 teaspoon baking soda + 1 teaspoon cinnamon + ½ teaspoon salt: The cinnamon is optional but I strongly recommend it. It makes the kitchen smell like a bakery and complements the oats without overwhelming them.
- 3 cups old-fashioned rolled oats: Not quick oats, not steel-cut. Old-fashioned oats have enough texture to hold up but soften just enough in the bake to meld with the dough.
Quick oats turn these into mush. Steel-cut oats stay too crunchy. I learned this the hard way. - 1½ cups raisins: Dark raisins, not golden. Golden raisins are drier and have a milder flavor. Dark raisins soak up moisture better and have that tangy-sweetness that cuts through the buttery dough.
What to Pull Out Before You Start
- Two baking sheets: Rimmed, ideally. I use half-sheet pans. If you only have one, let it cool completely between batches or the raw dough will melt before it hits the oven.
- Parchment paper: Non-stick spray works too, but parchment means zero cleanup and no burned bottoms.
- A medium cookie scoop: A 1½-tablespoon scoop gives you perfectly even cookies. I fought the scoop for years and finally gave in. Best decision I’ve made.
- Wire rack: For cooling. Transferring them to a rack stops the carryover cooking so they stay soft instead of overbaking on the hot pan.
Here’s How I Do It
This goes fast once you start, so read through once before you get going. The hardest part is waiting for the raisins to soak, and that’s barely a wait at all.
Preheat and prep: Set your oven to 350°F with a rack in the middle. Line two baking sheets with parchment paper.
- Soak the raisins: Place the raisins in a small bowl and cover them with hot tap water (or warm bourbon, if you’re feeling fancy). Let them sit for 10 minutes while you prep the rest. Drain them well before adding to the dough — you don’t want extra liquid. (📸 Photo tip: The raisins should look plump and glossy, not wrinkly and dry.)
- Mix the wet ingredients: In a large bowl, whisk the melted butter, dark brown sugar, and granulated sugar together until smooth and combined, about 30 seconds. Add the eggs and vanilla and whisk until it’s pale and slightly thickened, another 30 seconds.
- Add the dry ingredients: Stir in the flour, baking soda, cinnamon, and salt with a rubber spatula or wooden spoon. Mix until just combined — a few streaks of flour are okay. Overmixing gives you tough cookies.
- Fold in the oats and raisins: Add the drained raisins and oats. Fold gently until evenly distributed. The dough will be thick and a little sticky, which is exactly right. (📸 Photo tip: The dough should hold together when pressed but still look slightly craggy.)
- Chill the dough (this matters): Cover the bowl and pop it in the fridge for 15 minutes. This lets the oats absorb some moisture and firms up the butter so the cookies don’t spread into thin pancakes.
- Scoop: Use your cookie scoop to portion out balls of dough, placing them 2 inches apart on the prepared baking sheets. I fit 12 per sheet. I usually sprinkle a tiny bit of flaky sea salt on top right before baking — it’s optional but wonderful.
- Bake: Bake one sheet at a time for 10 to 12 minutes. The edges should be golden brown and set, but the centers will still look soft and slightly puffy. That’s your cue. Don’t wait for the centers to look done — they firm up as they cool.
- Tap and cool: Remove from the oven and tap the pan firmly on the counter. This deflates the cookies slightly and creates that signature crinkly top. Let them cool on the pan for 5 minutes, then transfer to a wire rack to cool completely.
- Repeat: Scoop the remaining dough and bake the second sheet. If the first batch disappears before the second one is done, I don’t blame you.
How I Meal Prep These for the Week
I make a double batch of dough on Sunday and we’re set for school lunches and after-school snacks all week. The secret is scooping the dough into balls before freezing, so I can bake whatever we need in 12 minutes flat.
- Fridge: Scooped dough balls in an airtight container for up to 4 days. Bake straight from the fridge — just add 1 minute to the bake time.
- Freezer: Yes! Scoop the dough onto a parchment-lined tray and freeze until solid (about 30 minutes). Transfer to a freezer bag. Bake from frozen for 14 minutes — no need to thaw.
- Reheat: A quick 8 seconds in the microwave makes a day-old cookie taste fresh from the oven. Or toss them in a 300°F oven for 5 minutes to crisp the edges back up.
Things I Wish I’d Known the First Time
- Don’t overbake: The biggest mistake people make is waiting until the centers look fully set. They continue to cook on the hot pan, so pulling them when they’re just slightly underdone is the right move. Even if you mess this up and overbake them a little, they’ll still be good — just a little crunchier than planned.
- Room temperature eggs matter less than you think: I’ve used cold eggs straight from the fridge and warm eggs that sat out all day. The difference is negligible. Don’t stress about it.
- A cookie scoop is your friend: I fought using a scoop for years because I thought it was unnecessary. Then I spent years with misshapen, unevenly baked cookies. Just get the scoop. It costs eight dollars and it will change your cookie game.
- Flaky salt makes everything better: A tiny sprinkle of flaky sea salt on top before baking elevates these from “good homemade cookie” to “bakery cookie that you definitely paid too much for.” It takes two seconds and costs nothing. Do it.
Swaps That Actually Work
- Chocolate chip version: Swap the raisins for a heaping cup of semi-sweet chocolate chips. My kids prefer this version. I love both equally (but secretly prefer the raisins).
- Dried cherries & dark chocolate: Swap the raisins for dried cherries and add ½ cup dark chocolate chunks. This is the “fancy adult” version I make when friends come over.
- Gluten-free: Use certified gluten-free old-fashioned oats and substitute the all-purpose flour with a 1:1 gluten-free baking blend. I’ve tested this with Bob’s Red Mill and King Arthur — both work perfectly.
- Nut-free but crunchy: Add ½ cup toasted sunflower seeds or pepitas. They add the same crunch as walnuts but keep everything nut-free for school lunch boxes.
Questions I Get About This Recipe All the Time
Q: Why did my cookies turn out dry and crumbly?
A: Ugh, I’ve been there. The most common culprit is too much flour. If you scoop your flour straight from the bag with the measuring cup, you’re packing in way more than you need. Spoon it into the cup and level it off with a knife. The second culprit is overbaking. Pull them when the centers still look soft!
Q: Can I use quick oats instead of old-fashioned rolled oats?
A: I wouldn’t. Quick oats are cut much finer and they absorb liquid differently. They’ll give you a cookie that’s more cakey than chewy, and you’ll lose that nice, hearty texture. Stick with old-fashioned if you can. If old-fashioned is all you have, just soak them in the wet ingredients for 10 minutes before adding the flour — that helps.
Q: How long do these last? Can I freeze the baked cookies?
A: Stored in an airtight container at room temperature, they stay soft for 5 days (if they last that long). Yes, you can freeze the baked cookies too — just layer them with parchment paper in a freezer-safe container. They thaw in about 10 minutes at room temp, or give them 8 seconds in the microwave for that fresh-baked feel.
Q: What do you serve with these?
A: A cold glass of milk is the classic choice, and it’s classic for a reason. But I also love them with a scoop of vanilla ice cream crumbled on top, or alongside a hot cup of coffee for an afternoon treat. My kids love them crumbled over yogurt for breakfast, which I am fully on board with.
More Recipes My Family Makes on Repeat
If you liked this one, here are a few others that get the same reaction at our table:
- Brown Butter Banana Bread — The one I make every time the bananas on the counter turn spotty.
- Crispy Chocolate Chip Cookies — For when you want a thinner, crispier cookie with that perfect butterscotch edge.
- One-Bowl Blondies — All the flavor of a cookie, none of the scooping.
These cookies have become the default bake in my kitchen for good reason. They’re simple enough for a Tuesday afternoon, impressive enough for a bake sale, and they make the whole house smell like the best kind of Sunday. I’ve made them on busy school mornings, lazy weekend afternoons, and late nights when I just needed something good to come out of the oven. They deliver every single time.
If you try it, drop a comment below — I love hearing how it goes for you! Tag me on Pinterest so I can see your batch.
📌 These chewy oatmeal raisin cookies stay soft for days and taste like they came from a real bakery — save this recipe for your next weekend baking project.
The Chewiest Oatmeal Raisin Cookies You’ll Make at Home (My Secret Soaking Step)
Equipment
- Baking sheets
- Parchment Paper
- Cookie Scoop
- Wire Rack
Ingredients
Wet Ingredients
- 1 cup unsalted butter, melted and slightly cooled (2 sticks)
- 1 cup dark brown sugar, packed
- 1/2 cup granulated sugar
- 2 large eggs
- 1 1/2 teaspoons vanilla extract
Dry Ingredients
- 1 1/2 cups all-purpose flour, spooned and leveled
- 1 teaspoon baking soda
- 1 teaspoon cinnamon
- 1/2 teaspoon salt
Add-ins
- 3 cups old-fashioned rolled oats
- 1 1/2 cups dark raisins
Instructions
- Preheat and prep: Set your oven to 350°F with a rack in the middle. Line two baking sheets with parchment paper.
- Soak the raisins: Place the raisins in a small bowl and cover them with hot tap water (or warm bourbon). Let them sit for 10 minutes while you prep the rest. Drain well before adding to the dough.
- Mix the wet ingredients: In a large bowl, whisk the melted butter, dark brown sugar, and granulated sugar together until smooth and combined, about 30 seconds. Add the eggs and vanilla and whisk until pale and slightly thickened, about 30 seconds.
- Add the dry ingredients: Stir in the flour, baking soda, cinnamon, and salt with a rubber spatula or wooden spoon until just combined. A few streaks of flour are okay — do not overmix.
- Fold in the oats and raisins: Add the drained raisins and oats and fold gently until evenly distributed. The dough will be thick and slightly sticky.
- Chill the dough: Cover the bowl and refrigerate for 15 minutes. This prevents the cookies from spreading too much.
- Scoop: Use a 1½-tablespoon cookie scoop to portion out dough balls, placing them 2 inches apart on the prepared baking sheets. Optionally sprinkle with flaky sea salt.
- Bake: Bake one sheet at a time for 10 to 12 minutes. The edges should be golden and set, but the centers will still look soft and puffy.
- Tap and cool: Remove from the oven and tap the pan firmly on the counter to create crinkly tops. Let cool on the pan for 5 minutes, then transfer to a wire rack to cool completely. Repeat with remaining dough.
Notes
Related Recipes:
 Cheesy Hamburger Casserole Bake That’s Ready in 40 Minutes (No Canned Soup Here)
 Texas Roadhouse Style Baked Salmon with Sweet and Savory Glaze — Ready in Under 30 Minutes
 Moist Lemon Zucchini Bread with a Crunchy Lemon Sugar Top
 Strawberry Shortcake Rice Krispie Treats That Actually Taste Like Shortcake — Ready in 15 Minutes
 Blueberry Oatmeal Cookies That Stay Soft for Days — in Under 30 Minutes
 Air Fryer Chicken and Vegetables That Don’t Taste Like a Regret (30 Minutes, One Pan)