
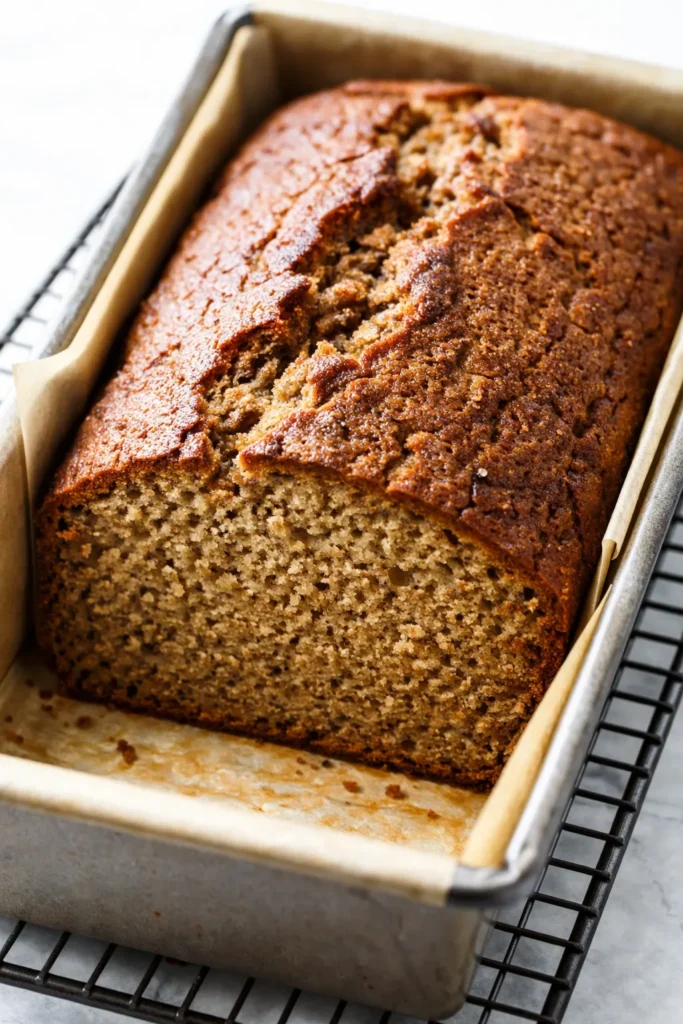
I have made a lot of terrible gluten-free banana breads in my day. Dry, crumbly, sad little loaves that tasted more like cardboard than the warm, comforting breakfast I was craving. This recipe is not that. This is the one my kids actually beg for, the one that disappears from the lunchbox in under 24 hours, the one my gluten-eating friends ask for seconds of. It took me about twenty batches to get it exactly right. You get the shortcut.
The short version: It’s naturally sweetened, uses simple pantry ingredients, and comes out perfectly moist every single time — no weird gums or fussy techniques required.
When my youngest was diagnosed with a gluten sensitivity a few years ago, I was determined not to make him feel left out at snack time. This banana bread has been our Saturday morning staple ever since, and honestly? I don’t miss the regular stuff at all.
- Serves: 8–10 slices
- Hands-On Time: 15 min | Total Time: 1 hr 40 min
- Difficulty: Easy — even on a school morning
- Cost per serving: ~$0.90
- Dietary Notes: Gluten-Free, Naturally Sweetened, Dairy-Free option
(Photo above: A golden-brown loaf of banana bread cooling on a wire rack, with one thick slice cut and placed on a wooden cutting board. The loaf has a beautiful cracked top and a tender, even crumb. Soft morning light from the left.)
The Trick That Makes This Gluten-Free Loaf So Tender (No Gritty Texture Here)
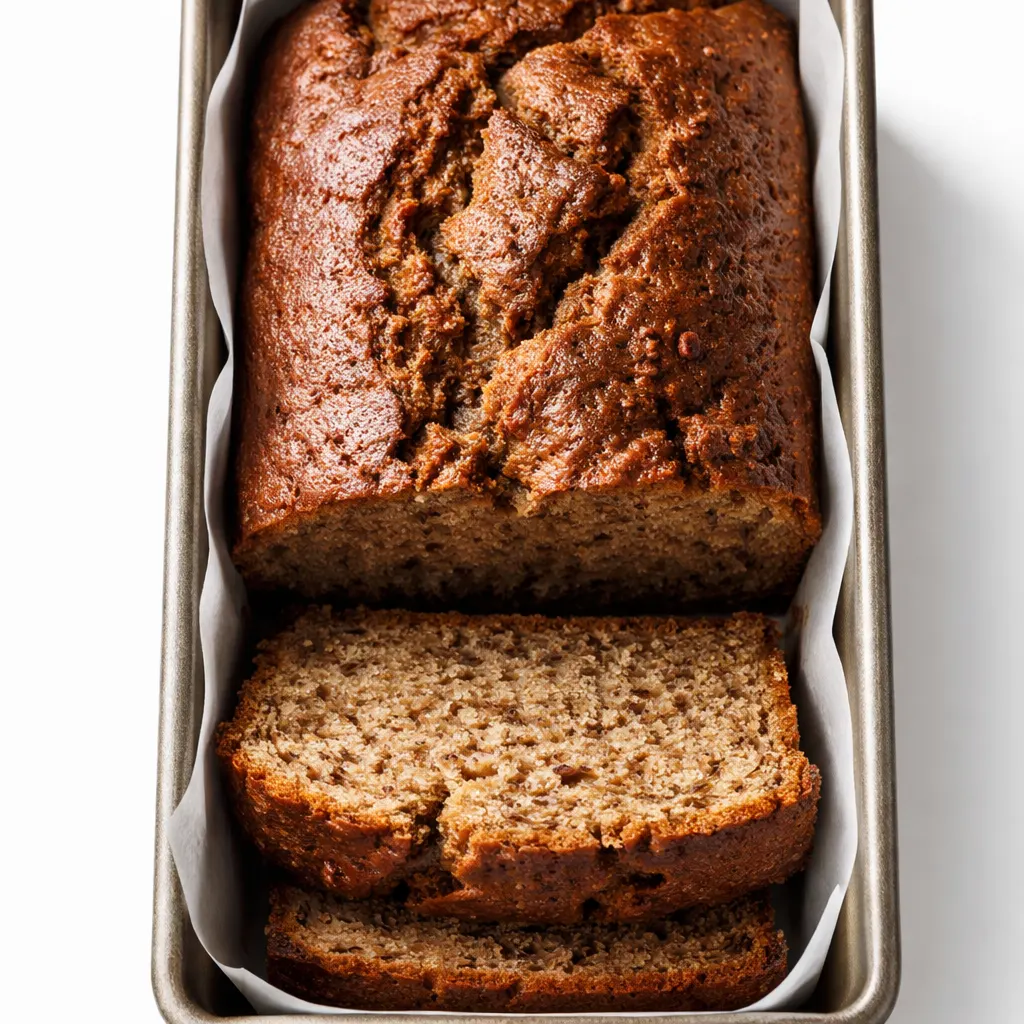
The biggest hurdle with gluten-free baking is texture. Without gluten to build structure and hold onto moisture, things tend to crumble into dust or turn into a gummy, dense paste. This recipe avoids both fates with two very specific moves.
First, we use a blend of oat flour for tenderness and an all-purpose gluten-free flour blend that contains xanthan gum for structure. Second — and this is the non-negotiable step most people skip — we let the batter rest for 30 minutes before it goes into the oven. This gives the flours time to absorb all the moisture from the bananas and yogurt, guaranteeing a soft, cake-like crumb instead of a gritty one.
I almost skipped this rest step the first time I developed this recipe. I’m so glad I didn’t. That little bit of patience is the difference between a loaf that tastes “pretty good for gluten-free” and one that everyone just asks for the recipe.
Everything You Need (With My Honest Notes)
- Overripe Bananas (3 medium, very spotty): This isn’t just about sweetness — spotty bananas are softer and blend into the batter more smoothly, creating a uniform crumb. If you only have yellow bananas, roast them in a 350°F oven for 15 minutes to speed up the ripening. Yes, I’ve done this at 7am.
- Gluten-Free All-Purpose Flour Blend (1 ¾ cups): Look for a blend that already contains xanthan gum, like Bob’s Red Mill 1-to-1 or King Arthur Measure for Measure. If your blend doesn’t have gum, add ½ teaspoon xanthan gum. This is critical for structure.
- Oat Flour (½ cup): This adds incredible tenderness and a slightly nutty flavor that pairs beautifully with banana. Make sure it’s certified gluten-free if you’re sensitive to cross-contamination. You can substitute more GF AP flour, but the texture will be slightly less tender.
- Pure Maple Syrup (½ cup): Liquid sweeteners keep the loaf moist way longer than granulated sugar. Honey works too, but maple lets the banana flavor shine through more clearly.
- Coconut Oil or Avocado Oil (⅓ cup): Coconut oil adds a subtle, lovely flavor, while avocado oil keeps it completely neutral. Both make the bread incredibly moist. Melt it and let it cool slightly before mixing.
- Plain Greek Yogurt (¼ cup): This is the secret to a tender crumb. It adds fat and moisture without making the batter too wet. Use a dairy-free yogurt like Kite Hill if you need it dairy-free.
- Eggs (2 large): Room temperature. Set them on the counter when you start the batter — they’ll be ready by the time you mix.
- Baking Soda & Cinnamon: The baking soda gives it lift, and the cinnamon adds that classic banana bread warmth. Don’t skip either one.
What to Pull Out Before You Start
- Standard 9×5-inch loaf pan (an 8.5×4.5-inch pan works too, just bake a few minutes longer)
- Parchment paper — for easy lifting. Trust me, you don’t want to fight this loaf out of the pan.
- Two mixing bowls (one large, one medium)
- Whisk and a silicone spatula
Let’s Make It (Start to Finish)
This comes together quickly. The hardest part is waiting for the batter to rest. Set a timer, pour yourself a coffee, and thank yourself later.
- Preheat & Prep: Preheat your oven to 350°F. Line your loaf pan with parchment paper, letting about 2 inches hang over the long sides for easy grabbing later. Lightly grease the paper with oil spray.
- Mash the Bananas: In your large bowl, mash the bananas with a fork until mostly smooth with a few small lumps remaining. You should have about 1 cup of mashed banana. (📸 Photo tip: You’re looking for a wet, slightly chunky paste — no large banana chunks left!)
- Mix the Wet Ingredients: Add the melted coconut oil, maple syrup, Greek yogurt, eggs, and vanilla extract to the bananas. Whisk until fully combined and glossy.
- Mix the Dry Ingredients: In a separate bowl, whisk together the gluten-free flour blend, oat flour, baking soda, cinnamon, and salt. This aerates the flour and distributes the baking soda evenly.
- Combine the Batters: Pour the dry ingredients into the wet ingredients. Fold gently with a spatula just until no streaks of flour remain. A few lumps are perfectly fine — overmixing will make it tough! (📸 Photo tip: The batter will be thick and a little shaggy. Stop mixing as soon as the flour disappears.)
- Rest the Batter (This is Magic): Cover the bowl with plastic wrap or a clean towel and let it sit on the counter for 30 minutes. Set a timer. This step is what transforms the texture from gritty to bakery-quality tender. I use this time to wash the few dishes I’ve dirtied and start sipping my coffee.
- Bake: Pour the rested batter into your prepared pan and smooth the top. Bake for 50–60 minutes, until a toothpick inserted in the center comes out clean or with just a few moist crumbs (not wet batter). The top should be deeply golden and cracked. If the top is browning too quickly at minute 40, tent the pan loosely with foil.
- Cool Completely: Let the bread cool in the pan on a wire rack for 15 minutes. Then lift it out using the parchment paper and let it cool completely on the rack before slicing. I know it’s tempting, but cutting it warm will turn it into a crumbly mess. I’ve been impatient too many times — it’s worth the wait.
Sunday Prep = Stress-Free Mornings
This banana bread is a lifesaver for busy weeks. I almost always make two loaves at once — we eat one immediately and freeze the other for the following week. It thaws beautifully and tastes just as fresh as day one.
- Fridge: Store tightly wrapped in plastic wrap in the fridge for up to 5 days. It actually gets even more moist by day two.
- Freezer: YES! This freezes perfectly. Wrap the whole loaf or individual slices tightly in plastic wrap, then again in foil. Freeze for up to 3 months.
- Reheat: Thaw at room temperature, or pop a frozen slice directly in the toaster. The toaster crisps the edges while keeping the center soft — my favorite way to eat it.
Things I Learned the Hard Way (So You Don’t Have To)
- Don’t skip the 30-minute rest. I know it feels like an eternity when you’re craving banana bread. But this step is the single biggest factor between a tender loaf and a gritty one. Gluten-free flours need time to absorb liquid. Give it to them.
- Measure your flour correctly. Scooping your measuring cup directly into the flour bag packs it down, leading to dry, dense bread. Use the spoon-and-level method: spoon the flour into your measuring cup, then level it off with the back of a knife. A small habit that makes a massive difference.
- Overripe isn’t a suggestion — it’s a rule. If your bananas aren’t heavily spotted, this loaf won’t be as sweet or as moist. I keep a bag of black bananas in my freezer at all times specifically for this recipe. They thaw in 20 minutes on the counter and mash up perfectly.
- The toothpick test is your friend. Ovens run differently. Start checking at 50 minutes. A toothpick that comes out with wet batter means it needs more time. A toothpick with a few moist crumbs means it’s done. Letting it cool in the pan is non-negotiable for clean slices.
Swaps That Actually Work (From My Family to Yours)
- Dairy-Free: Use a plain dairy-free yogurt (coconut or almond yogurt work great) and make sure your chocolate chips are dairy-free. I make this version for my nephew and he has no idea it’s different.
- Nut-Free: This recipe is naturally nut-free if you use certified nut-free oat flour and a GF flour blend that doesn’t contain almond flour. Most standard 1-to-1 blends are nut-free, but check the label if it’s a serious allergy.
- Chocolate Chip Banana Bread: Fold in ½ cup of dark chocolate chips or chunks after the rest step. My kids say this is the only acceptable version. I happen to agree.
- Add Some Crunch: Fold in ½ cup of chopped walnuts or pecans along with the chocolate chips. The texture contrast takes this from good to absolutely dangerous.
Questions I Get About This Recipe All the Time
Q: Why did my gluten-free banana bread turn out gummy or dense?
A: Ugh, I’ve been there. The most common culprits are (1) not letting the batter rest — seriously, don’t skip the 30 minutes — or (2) using a gluten-free flour blend that’s heavy on rice flour without enough starch. A high-quality 1-to-1 blend with xanthan gum makes all the difference. Also, make sure you’re measuring your flour with the spoon-and-level method. Too much flour makes a dense loaf every single time.
Q: Can I use coconut flour or almond flour instead of the GF blend?
A: No, I wouldn’t recommend it for this recipe. Coconut flour and almond flour absorb moisture in completely different ways, and the ratios would be way off. If you specifically need a coconut flour banana bread, you’ll want to find a recipe developed for that. This recipe is tested with oat flour and a quality GF AP blend, and it works like a charm.
Q: How do I store this to keep it moist?
A: Wrap it tightly in plastic wrap or store it in a sealed zip-top bag at room temperature for up to 2 days. For longer storage, keep it in the fridge for up to 5 days. I actually think the flavor deepens and the texture gets even better on day two. Just make sure it’s completely covered so the air doesn’t dry it out.
Q: What’s the best way to serve this for breakfast?
A: We love it warmed up with a pat of butter or a drizzle of peanut butter on top. On the busiest mornings, my youngest just grabs a slice as he runs out the door. It’s also fantastic toasted — it crisps the edges while keeping the center soft. For a slightly more decadent treat, serve it with a dollop of vanilla yogurt and a handful of fresh berries.
More Recipes My Family Makes on Repeat
If this banana bread is a hit in your house (and I’m pretty sure it will be), here are a few other gluten-free favorites from my kitchen that get the same reaction:
- [INTERNAL LINK PLACEHOLDER: Healthy Gluten-Free Chocolate Chip Muffins] — They’re impossibly fluffy, and my kids eat them for breakfast and call them dessert.
- [INTERNAL LINK PLACEHOLDER: The Best Gluten-Free Pancakes] — Fluffy, golden, and so easy you’ll never buy a mix again. Weekends were made for this recipe.
- [INTERNAL LINK PLACEHOLDER: One-Bowl Gluten-Free Banana Oatmeal Cookies] — Soft, chewy, and made with just a few pantry staples. Perfect for lunchboxes.
I hope this recipe becomes a staple in your kitchen the way it has in mine. It’s one of those rare recipes that feels indulgent but is actually good for you — and that’s my favorite kind of recipe to share. Leave a comment below if you give it a try, and tag me on Pinterest so I can celebrate with you!
📌 Save this healthy gluten-free banana bread recipe to your “Gluten-Free Breakfast or Snacks” board — it’s the one you’ll come back to again and again when you need something easy, delicious, and guaranteed to disappear.
Healthy Gluten-Free Banana Bread That Doesn’t Taste Healthy — Finally (Moist, Easy & Kid-Approved)
Equipment
- 9×5-inch loaf pan
- Parchment Paper
- Large Mixing Bowl
- Medium Mixing Bowl
- Whisk
- Silicone spatula
Ingredients
Banana Bread
- 3 medium overripe bananas, mashed (about 1 cup)
- 1 3/4 cups gluten-free all-purpose flour blend (with xanthan gum)
- 1/2 cup oat flour (certified gluten-free)
- 1/2 cup pure maple syrup
- 1/3 cup coconut oil or avocado oil, melted
- 1/4 cup plain Greek yogurt (or dairy-free)
- 2 large eggs, room temperature
- 1 teaspoon baking soda
- 1 teaspoon cinnamon
- 1/2 teaspoon salt
- 1 teaspoon vanilla extract
Instructions
- Preheat oven to 350°F. Line a 9×5-inch loaf pan with parchment paper, leaving overhang on the long sides. Lightly grease the paper with oil spray.
- In a large bowl, mash the bananas with a fork until mostly smooth with a few small lumps remaining (about 1 cup).
- Add melted oil, maple syrup, yogurt, eggs, and vanilla to the mashed bananas. Whisk until fully combined and glossy.
- In a separate bowl, whisk together gluten-free flour, oat flour, baking soda, cinnamon, and salt.
- Pour the dry ingredients into the wet. Fold gently with a spatula just until no streaks of flour remain. Do not overmix; a few lumps are fine.
- Cover the bowl with plastic wrap or a towel and let the batter rest at room temperature for 30 minutes. This step is essential for a tender crumb.
- Pour the rested batter into the prepared pan and smooth the top. Bake for 50–60 minutes, until a toothpick inserted in the center comes out clean or with a few moist crumbs. If the top browns too quickly after 40 minutes, tent loosely with foil.
- Cool the bread in the pan on a wire rack for 15 minutes. Then lift it out using the parchment paper and cool completely on the rack before slicing. Cutting while warm will cause crumbling.
Notes
Related Recipes:
 Twice Baked Breakfast Potatoes for a Lazy Sunday: The Only Brunch Dish You Actually Want to Make
 The Starbucks Pink Drink Recipe with the Perfect Coconut Milk Float
 Starbucks Vanilla Bean Copycat Recipe That Costs a Fraction of the Drive-Thru — and Tastes Better
 The Perfectly Pillowy Chocolate Chip Milk Buns (Tangzhong Method)
 Baked Protein Pancake Bowls That Are Fluffy, Golden, and Ready in 25 Minutes (Hands-Free)
 Blueberry Crumble Cheesecake That’s Actually Worth the Oven Time