
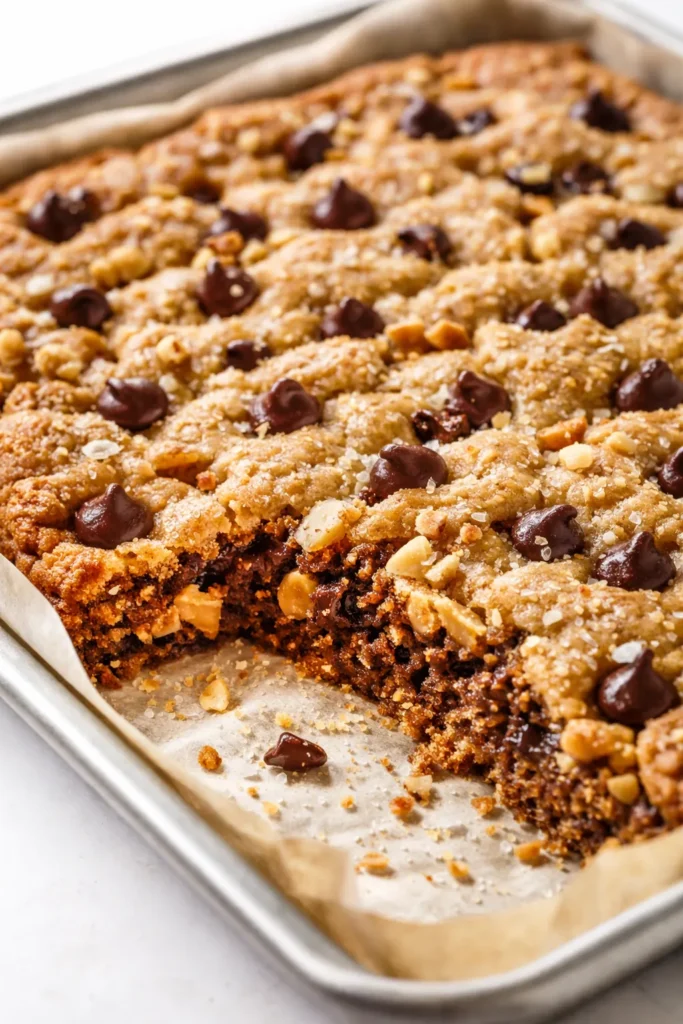
That first cut into a warm, gooey chocolate chip cookie cake — the kind where the edges are crisp and the center is still soft — is the kind of moment that makes everyone at the table go quiet for a second. I’ve brought this to birthdays, potlucks, and even a small dinner party where the host said “no dessert” (I brought it anyway). Every single time, someone asks for the recipe before the last crumb’s gone.
The short version: One bowl, one sheet pan, zero fuss — a giant cookie that’s buttery, chewy, and ready to serve in half an hour.
I’ve made this version at least two dozen times, tweaking the butter-to-sugar ratio until it had exactly the right spread — not too puffy, not too flat. My goddaughter requested it for her “fancy” birthday party (she’s seven, so “fancy” means sprinkles and a candle). It passed the test.
- Serves: 12 as dessert (or 8 very generous slices)
- Hands-On Time: 15 min | Total Time: 30 min
- Difficulty: Easy enough for a school night, impressive enough for a party
- Cost per serving: ~$0.50
- Calories: ~345 per slice
- Dietary Notes: Naturally nut-free if you skip the optional pecans; can be dairy-free with plant-based butter and chocolate chips
(Photo above: overhead shot of the finished cookie cake on a light-wood cutting board, cut into eight wedge-shaped slices, with a small ramekin of vanilla ice cream and a few scattered chocolate chips on the board. Natural side light, warm afternoon tone.)
The Trick That Keeps It Chewy (Not Cakey)
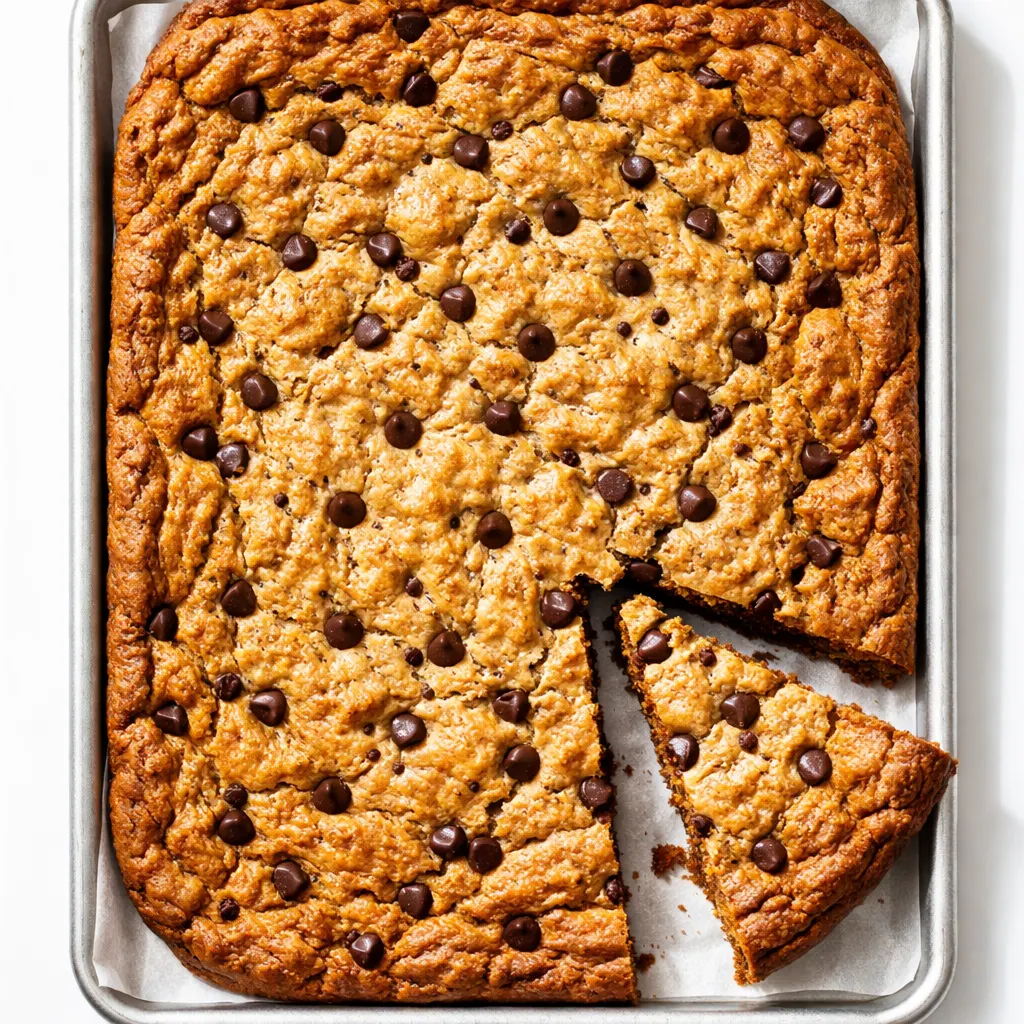
Most cookie cakes go wrong because they use too much butter or leavener — you end up with a puffy, cake-like disc that’s fine but not the chewy, crackly thing you wanted. My fix is two‑fold: first, I use melted butter (not softened) for extra chewiness without extra spreading. Second, I press a handful of extra chocolate chips into the top right before baking — they stay whole, create little pools of chocolate, and make the surface look gorgeous without any extra work.
The result is a cookie cake that’s crisp at the edges, tender in the center, and full of pockets of melted chocolate in every bite. It’s the same texture you’d get from a perfect drop cookie, but on a giant scale — and that’s the whole point.
Skip the step where you chill the dough? Totally fine here. We’re not aiming for a super thick, bakery-style cookie — this is meant to be quick and satisfying, and the thin layer bakes evenly without chilling.
Ingredients That Actually Matter (And One You Might Skip)
- 2 sticks (1 cup) unsalted butter, melted: Melted butter is the cheat code for chewiness. It coats the flour differently than creamed butter, giving you that dense, fudgy texture. I’ve used salted butter in a pinch — just reduce the added salt to ½ teaspoon.
- 1 cup packed light brown sugar + ¼ cup granulated sugar: Brown sugar for moisture and that almost-caramel flavor; white sugar for a touch of spread and crisp edges. Don’t sub all brown — you’ll lose the structure. My kids (the little ones I borrow) can’t tell the difference if I use dark brown sugar, so use what you have.
- 2 large eggs: Room temperature so they emulsify smoothly. Cold eggs will seize the melted butter.
- 2 teaspoons vanilla extract: Real, not imitation. It’s the backbone of the flavor here.
- 2 ¼ cups all-purpose flour: Scoop and level — don’t pack it. Too much flour makes a dry, crumbly cake. I’ve tested with 1:1 gluten-free flour and it works, but the texture is a little more tender.
- 1 teaspoon baking soda: Not powder — soda gives the right lift. It’s activated by the brown sugar’s acidity.
- 1 teaspoon kosher salt: If you only have table salt, use ½ teaspoon. Salt balances the sweetness and makes the chocolate taste more chocolate-y.
- 2 cups semisweet chocolate chips (plus ⅓ cup for the top): I like Ghirardelli or Guittard for big, melty pools. The extra chips pressed on top are a visual non-negotiable. Sometimes I swap ½ cup for chopped dark chocolate — the irregular bits melt into puddles.
- Flaky salt (for finishing, optional but highly recommended): This is Tiffany’s signature: a light sprinkle right when the cookie comes out of the oven. It adds texture and a savory edge that makes everyone ask what the secret is. Don’t skip it.
What to Pull Out Before You Start
- Half-sheet pan (13×18 inches) — a light-colored metal pan gives the most even browning. Dark pans can over-brown the bottom.
- Parchment paper — non-negotiable for easy removal. Use a full sheet that overhangs the edges for handles.
- Large mixing bowl — any bowl will do; you’re doing this all by hand.
- Whisk and rubber spatula — whisk the wet ingredients, fold the dry with a spatula (you don’t want to overmix with a whisk).
- Cooling rack — if you have one. If not, just slide the parchment onto a counter after five minutes.
Here’s How I Do It (No Fancy Skills Required)
This goes fast — read through once before you start. Everything happens in one bowl, which is exactly what I want on a Tuesday night.
Preheat and prep the pan: Set oven to 350°F with a rack in the middle. Line your half-sheet pan with parchment, leaving an overhang on two sides (like handles). No need to grease.
- Melt the butter: Melt 2 sticks butter in the microwave or a small saucepan. Let it cool for a minute — it should be warm but not hot (you don’t want to cook the eggs).
- Mix sugars and butter: In your large bowl, whisk together the melted butter, brown sugar, and granulated sugar until smooth and slightly lighter in color — about 30 seconds. It should look like wet sand. (📸 Photo tip: The mixture should be glossy and uniform, no streaks of butter.)
- Add eggs and vanilla: Whisk in the eggs one at a time, then the vanilla. The batter will look a little loose and shiny — that’s right. (📸 Photo tip: It should be smooth and emulsified — if it looks curdled, your butter was too hot. No worries, just keep whisking and it’ll come together.)
- Fold in the dry ingredients: Add flour, baking soda, and salt directly to the bowl. Fold with a spatula just until no white streaks remain — a few small lumps are fine. Overmixing makes the cookie cake tough. I’m serious, stop as soon as you don’t see flour.
- Add the chocolate chips: Fold in 2 cups of chocolate chips. The dough will be thick and studded with chocolate.
- Press dough into the pan: Scrape the dough onto the prepared sheet pan. Use a spatula or your hands (lightly oiled) to press it into an even rectangle — it should be about ¼-inch thick. Leave a little room around the edges because it will spread slightly. Don’t worry about perfection; rustic edges look homemade and charming.
- Press extra chips on top: Sprinkle the reserved ⅓ cup of chocolate chips evenly over the surface and press them in gently so they stick. This is what makes the finished cookie look like it came from a bakery. Trust me.
- Bake: Bake 14–17 minutes, rotating the pan halfway through. The edges should be deep golden brown, and the center should look set but still soft — it will puff slightly and then fall as it cools. Overbaking gives you a hard, dry cookie, so err on the side of underdone. When I’m feeling lazy, I pull it at 14 minutes and let it finish setting on the counter. Works every time.
- Finish with flaky salt: The moment it comes out of the oven, sprinkle a generous pinch of flaky salt over the hot cookie. This step is non-negotiable in my kitchen — it makes the chocolate taste richer and gives the top a delicate crunch.
- Cool and serve: Let the cookie cool on the pan for 10 minutes, then use the parchment handles to lift it onto a cooling rack. Cut into wedges or squares with a sharp knife. Serve warm — plain, with ice cream, or with a drizzle of cream. (📸 Photo tip: For serving, transfer to a wooden board and cut into wedges like a pizza. One wedge per plate with a scoop of vanilla ice cream reads instantly as “dessert that was planned.”)
How I Meal Prep This for the Week
I make a full-sized cookie cake on Sunday, let it cool completely, then wrap it tightly in foil. It stays perfectly soft on the counter for up to three days (if it lasts that long). For grab‑and‑go lunches, I cut individual squares and store them in a container with a slice of bread — the bread absorbs excess moisture and the cookie stays chewy.
- Fridge: Wrap in foil and keep at room temperature. The fridge dries it out. If you must refrigerate, seal in an airtight container with a paper towel and bring to room temp before serving.
- Freezer: Yes — wrap the whole cooled cookie (or individual slices) tightly in plastic wrap, then foil. Freeze for up to 3 months. Thaw at room temperature for 30 minutes, or reheat slices in a 300°F oven for 5 minutes.
- Reheat: Oven is best — 300°F for 5–7 minutes brings back the crisp edges and melty chips. The microwave works in a pinch (15 seconds on a plate), but the texture gets a little softer. I say oven or nothing.
Things I Wish I’d Known the First Three Times
- Light-colored pan, always. The first time I used a dark nonstick sheet pan, the bottom burned before the center set. Invest in a standard aluminum half-sheet pan or line a dark pan with parchment and potentially reduce temp by 25°F.
- Don’t overmix after the flour goes in. I know you’re tempted to keep stirring until it’s glassy smooth — resist. Overdevelopment of gluten gives you a bread‑like texture, not a tender cookie. Stop at “just combined” and trust the process.
- Press those extra chips in firmly. If you just scatter them on top, they’ll fall off when you cut. Gently press each chip into the dough so they’re anchored. It also creates little craters that catch the flaky salt.
- Let it cool completely before cutting for clean edges. I know warm gooey cookie is life, but if you cut it too soon, you’ll get a crumbly mess. Give it 20 minutes of cooling and the knife will glide through. Even if you mess this part up a little, it’ll still taste amazing — I’ve eaten many warm, messy slices and regretted nothing.
Swaps That Actually Work
- Dairy‑Free: Use plant‑based butter (like Miyoko’s) and dairy‑free chocolate chips. I’ve tested with both, and the texture is almost identical — just let the vegan butter melt completely and cool slightly before adding eggs. My dairy‑allergic nephew ate three slices without blinking.
- Nut‑Free: This recipe is naturally nut‑free as written. Just make sure your chocolate chips don’t have a “may contain” warning if you’re serving someone with severe allergies.
- Gluten‑Free: Use a 1:1 gluten‑free flour blend (I like King Arthur Measure for Measure). Add ½ teaspoon xanthan gum if your blend doesn’t already include it. The texture will be a little more tender and slightly less chewy, but it’s still delicious. My gluten‑free friend declared it “better than the real thing” — I’ll take it.
- Kid‑Friendly S’mores Version: Swap ½ cup of chocolate chips for mini marshmallows and press a few crushed graham crackers into the top before baking. This is what I make for sleepovers — they devour it.
- Fancy Guest Version: After baking, drizzle with melted dark chocolate and sprinkle with toasted pecans or flaky salt. Serve with a small dollop of whipped cream and a few fresh raspberries — the color contrast makes it look like you spent an hour on it.
Questions I Get About This Cookie Cake All the Time
Q: Why did my cookie cake puff up like a cake?
A: Ugh, I’ve been there. Two most likely reasons: you overmixed the flour (developing gluten) or you used baking powder instead of soda. Check your leavener! If you used powder, the extra lift creates a cakey texture. Next time, mix the dry ingredients just until no flour streaks remain — a few lumps are fine. You’ve got this next time.
Q: Can I make this with milk chocolate chips?
A: Yes, but know that milk chocolate is sweeter and melts faster, so the cookies will be slightly softer and sweeter overall. I personally prefer semisweet because it balances the brown sugar. If you go milk chocolate, consider reducing the sugar by 2 tablespoons. I’ve tested this swap with my friend’s kids — they loved it.
Q: How long does this keep? Can I freeze it?
A: Wrapped tightly in foil at room temperature, it stays fresh for 3 days (if it lasts that long). For longer storage, freeze the whole cookie or individual slices: wrap in plastic, then foil, then slide into a freezer bag. Thaw at room temperature or reheat straight from frozen in a 300°F oven for 8 minutes. The oven revive is key — microwave makes it soft and sad. No, thank you.
Q: What do you serve with this?
A: For an everyday treat, nothing — just a glass of milk. For dessert, vanilla ice cream is the classic pairing because the cold creaminess contrasts with the warm cookie. I also love a dollop of unsweetened whipped cream (the tang cuts the sweetness) and a handful of fresh berries. For a brunch situation, slice it into small squares and serve alongside coffee — my mom calls it “breakfast cookie cake,” and I don’t argue.
More Recipes My Family Makes on Repeat
If you liked this one, here are a few others that get the same reaction at our table:
- [INTERNAL LINK PLACEHOLDER: Chewy Salted Tahini Chocolate Chip Cookies] — The secret ingredient makes them impossibly tender, and everyone asks what’s in them.
- [INTERNAL LINK PLACEHOLDER: 20‑Minute Skillet Brownie with Ice Cream] — One pan, zero bowls, maximum chocolate melt — perfect for last‑minute guests.
- [INTERNAL LINK PLACEHOLDER: Brown Butter Banana Bread That Stays Moist for Days] — The nutty brown butter turns a classic into a show‑stopper; my dad requests it for every visit.
This is the kind of dessert that disappears before you’ve finished your coffee — and that’s exactly the point. Make it for a birthday, a Tuesday, or just because you want to smell something warm and chocolatey in the oven. The leftovers (if there are any) are dangerous straight from the foil the next morning.
If you try it, drop a comment below — I love hearing about the variations you come up with. And tag me on Pinterest or Instagram so I can see your beautiful cookie cake slices!
📌 Save this sheet pan chocolate chip cookie cake recipe for your next birthday party or potluck — it’s one bowl, 30 minutes, and always the first thing to disappear from the table.
One-Bowl Sheet Pan Chocolate Chip Cookie Cake
Equipment
- Half-sheet pan (13×18 inches)
- Parchment Paper
- Large Mixing Bowl
- Whisk
- Rubber Spatula
- Cooling rack
Ingredients
Wet Ingredients
- 1 cup unsalted butter, melted (2 sticks)
- 1 cup packed light brown sugar
- 1/4 cup granulated sugar
- 2 large eggs, room temperature
- 2 teaspoons vanilla extract
Dry Ingredients
- 2 1/4 cups all-purpose flour, scooped and leveled
- 1 teaspoon baking soda
- 1 teaspoon kosher salt
Add-ins and Finish
- 2 cups semisweet chocolate chips
- 1/3 cup semisweet chocolate chips (for topping)
- Flaky salt, for finishing (optional but recommended)
Instructions
- Preheat oven to 350°F. Line a half-sheet pan with parchment paper, leaving overhang on two sides.
- In a large bowl, whisk together melted butter, brown sugar, and granulated sugar until smooth and slightly lighter in color, about 30 seconds.
- Whisk in eggs one at a time, then vanilla extract. The mixture should be loose and shiny.
- Add flour, baking soda, and salt directly to the bowl. Fold with a spatula just until no white streaks remain – do not overmix.
- Fold in 2 cups of chocolate chips until evenly distributed. The dough will be thick.
- Scrape dough onto prepared pan. Press into an even rectangle about ¼-inch thick, leaving a little room around the edges for spreading.
- Sprinkle reserved ⅓ cup chocolate chips over the surface and press them gently into the dough so they stick.
- Bake 14–17 minutes, rotating the pan halfway. Edges should be deep golden brown and center set but still soft.
- Immediately out of the oven, sprinkle flaky salt over the hot cookie. Let cool on pan for 10 minutes, then lift using parchment onto a cooling rack.
- Cut into wedges or squares. Serve warm, plain or with ice cream.
Notes
Related Recipes:
 Twice Baked Breakfast Potatoes for a Lazy Sunday: The Only Brunch Dish You Actually Want to Make
 The Perfectly Pillowy Chocolate Chip Milk Buns (Tangzhong Method)
 Bagel Breakfast Sliders That Taste Like a Diner Breakfast — in 25 Minutes
 Cheesy Hamburger Casserole Bake That’s Ready in 40 Minutes (No Canned Soup Here)
 Lemon Capellini Salad for Late Summer Evenings: Bright, Tangy, Ready in 20 Minutes
 Creamy Garlic Tagliatelle That Looks Like a Restaurant Dish in 20 Minutes