
The first time I tested these, I made the mistake of bringing them to a friend’s dinner party. Everyone asked for the bakery name. I had to confess it was just crushed cookies, heavy cream, and a whole lot of strategic layering. The best recipes are just good secrets, right?
The short version: A no-churn frozen dessert bar with a crunchy pretzel-cookie crust, a salted caramel ribbon, and a buttery toffee topping that makes people lose their minds.
I’ve made this for every summer gathering for two years now. It’s the first thing to disappear, every single time. Even my neighbor — who only eats “bakery quality” desserts — asked for the recipe. That’s the kind of win I live for.
- Serves: 9–12 as a dessert bar
- Hands-On Time: 15 min | Total Time: 35 min (+ 4 hrs freezing)
- Difficulty: Easy enough for a Tuesday, impressive enough for Thanksgiving
- Cost per serving: ~$2.50
- Calories: ~380 per serving
- Dietary Notes: Naturally vegetarian. Can be made gluten-free with GF pretzels and cookies.
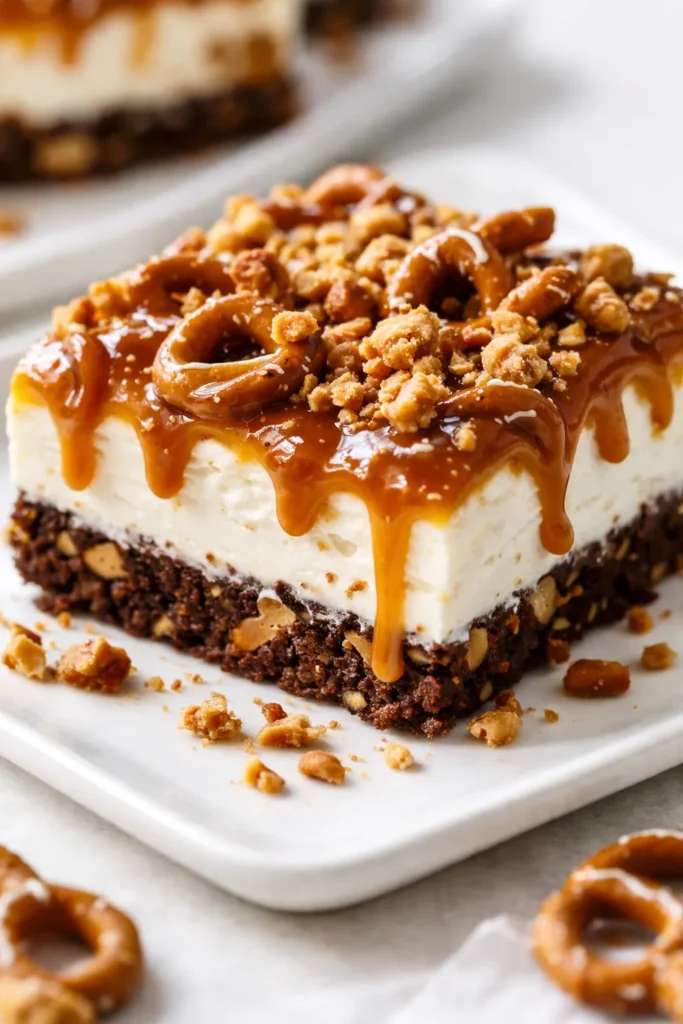
(Photo above: An overhead shot of a perfectly sliced Caramel Ribbon Crunch Bar on a dark slate board. The distinct layers are visible — a dark chocolate crust, a creamy no-churn filling threaded with thick amber caramel ribbons, and a chunky pretzel-toffee topping. Natural window light hitting the golden caramel swirls.)
The Architecture of the Perfect Frozen Bar
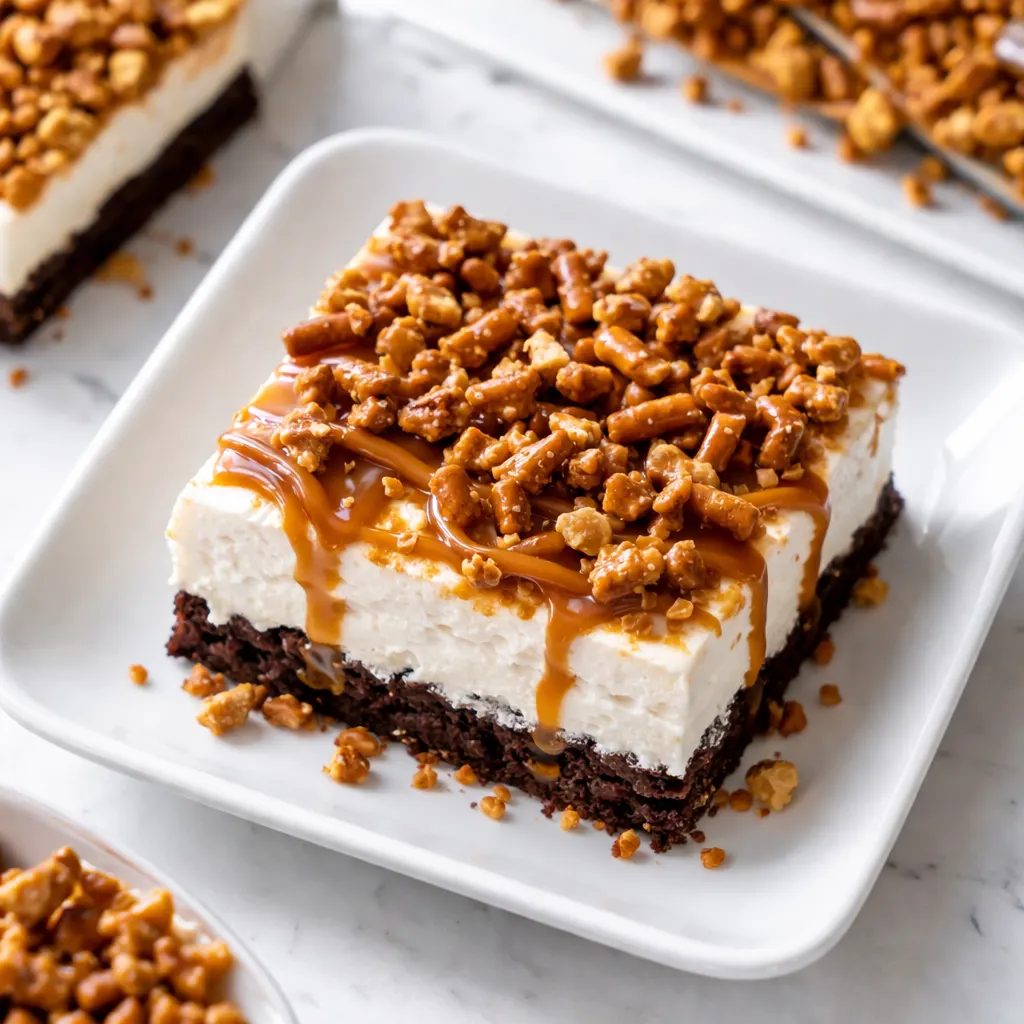
There are three layers here, and each one is doing specific work so the final bite feels expensive.
The crust: Most no-bake crusts crumble the second you try to cut a clean square. Baking this one for just 10 minutes changes everything — it firms up enough to hold the weight of the filling and slices cleanly straight from the freezer.
The filling: No-churn isn’t just the easy way out. It’s intentionally softer than regular ice cream, which means you can slice these bars immediately without cracking a tooth or waiting for thawing. The texture is closer to a frozen mousse — dense, creamy, luxurious.
The ribbon: You want distinct veins of caramel, not a muddy swirl. The trick is to dollop, not pour, and swirl just twice. I learned this the hard way. My first pan looked like chocolate milk. We still ate it, but it wasn’t pretty.
Ingredients Worth Talking About
- For the crust: 1 1/2 cups crushed chocolate wafer cookies (or Oreos, filling removed), 5 tbsp melted butter, 1/4 cup mini pretzels, crushed. The pretzels in the crust are non-negotiable. They add a salt hit that makes the caramel taste deeper. My family picks around the pretzels if I use too many, so I keep it to a 3:1 cookie-to-pretzel ratio.
- For the no-churn filling: 2 cups heavy cream, 1 can (14 oz) sweetened condensed milk, 1 tsp vanilla extract, 1/4 tsp kosher salt. I call this the magic cream because it saves me from having to make a custard. My kids call it “the one I’m not allowed to eat before dinner.” We’re both right.
- For the caramel ribbon: 1/2 cup high-quality store-bought salted caramel sauce (or homemade dulce de leche). Do not use the thin jarred ice cream topping. It’s too runny and will sink to the bottom. You want something thick enough to dollop.
- For the crunch topping: 1 cup chopped mini pretzels, 1/2 cup toffee bits (or chopped Skor bar), 3 tbsp melted butter, 2 tbsp brown sugar. This adds the shatter factor. Without it, the bars are good. With it, they’re the bars people text you about at 10pm on a Friday.
What to Pull Out Before You Start
- 8×8 square baking pan (metal freezes faster than glass)
- Parchment paper (for the sling lift — crucial for clean slices)
- Food processor (or a zip-top bag and a rolling pin, I don’t judge)
- Hand mixer (or a stand mixer, if you want to feel professional)
- Small skillet (for the crunch topping)
The Method: From Crumb to Crunch
This goes fast, so read through once before you start. The hardest part is waiting for them to freeze — and I promise it’s worth it.
- Make the crust: Preheat the oven to 350°F. Line your 8×8 pan with parchment paper, leaving an overhang on two sides. In a food processor, pulse the chocolate wafers and pretzels until fine crumbs form. Drizzle in the melted butter and pulse until it looks like wet sand.
- Bake the crust: Press the mixture firmly into the prepared pan. Use the bottom of a flat measuring cup to get it even — you want it compact. Bake for 8–10 minutes, until it smells toasty. Let it cool completely. (📸 Photo tip: You want the crust to look compact and even, not loose and crumbly. Press hard!)
- Make the filling: In a large bowl, combine the sweetened condensed milk, vanilla, and salt. In a separate bowl, whip the heavy cream to stiff peaks. Fold the whipped cream into the condensed milk mixture until smooth. Spread half of this over the cooled crust.
- Add the caramel ribbon: Dollop half of the caramel sauce over the filling in small spoonfuls. Take a knife and swirl it through the filling just twice. You want ribbons, not a full swirl pattern. Over-swirling makes the caramel disappear into the filling. Trust me on this one.
- Repeat the layers: Spread the remaining filling on top, then dollop and swirl the remaining caramel.
- Make the crunch topping: In the same small skillet (less dishes to wash), melt the butter and brown sugar together. Toss in the chopped pretzels and toffee bits. Stir until everything is coated. Sprinkle this over the top of the bars immediately, before it clumps.
- The waiting game: Freeze for at least 6 hours, or overnight. Use the parchment sling to lift the block out of the pan. Let it sit at room temperature for 5 minutes, then use a hot, dry knife to slice cleanly. (📸 Photo tip: Wipe the blade clean between each cut for that perfect, sharp-edged bar. A hot knife is the only way to get bakery-style edges.)
My shortcut: Sometimes I skip the skillet step and just press the raw pretzels and toffee bits on top. It’s faster, and my kids actually prefer it because the pretzels stay extra crunchy.
How I Prep These Ahead of Time
I make the full recipe, slice it, and wrap the individual bars in plastic wrap. They go straight from the freezer into lunchboxes or my hand for a late-night snack. I make a double batch on Sundays and we’re set for the week.
- Fridge: Store in an airtight container for up to 3 days. They will soften significantly, so I only do this if I’m serving them within a few hours.
- Freezer: Tightly wrapped, they last a month. But honestly, they never last that long at my house. The biggest risk is someone finding the foil packet in the back of the freezer.
- Reheat: Don’t microwave these. Just let them sit out for 5–7 minutes to soften slightly before eating.
Things I Learned After Making This 20 Times
- The hot knife trick is non-negotiable. Run your knife under hot water, dry it off, and slice. The knife glides through the frozen layers without cracking the crust or smearing the caramel. Wipe clean between cuts. This is the single most important step for making these look like they came from a bakery window.
- Don’t over-soak the crust. If your crust feels too wet when you press it into the pan, add a tablespoon more cookie crumbs. A soggy crust is the result of too much butter, and it will crumble when you cut. You want it to hold together like a sturdy sandcastle.
- Taste your caramel before you swirl it. If your caramel sauce is cloyingly sweet, add a pinch of flaky salt to the ribbon layer before swirling. It balances the whole bar and makes the pretzel crunch pop. Even if you mess this step up a little, it’ll still taste good — I’ve done it.
- The topping goes on after the filling. If you bake the topping with the crust, it gets soggy. Adding it fresh, just before freezing, keeps it shatteringly crisp. This was my biggest “aha” moment, and it changed everything about how these bars turn out.
Make It Yours (Because I Know You’re Already Thinking About It)
- Gluten-Free: Use GF chocolate sandwich cookies and GF pretzels for the crust. Everything else in this recipe is naturally gluten-free, so it’s an easy swap.
- Chocolate-Peanut Butter: Swirl in 1/4 cup peanut butter with the caramel. Use peanut butter cookies for the crust instead of chocolate wafers. This version disappeared fastest at my last potluck.
- Mocha Version: Add 1 tbsp instant espresso powder to the heavy cream before whipping. It cuts the sweetness and adds a coffee note that makes the caramel taste even deeper. This is the adult version, and I make it for dinner parties.
- Dairy-Free: Use a dairy-free cookie crust, full-fat coconut cream (chilled and whipped) instead of heavy cream, and a vegan sweetened condensed coconut milk. The texture is slightly softer, but the flavor is incredible. My dairy-free friend requests this for every gathering.
- Extra Salty: If you’re a salt fiend like me, sprinkle a few flakes of Maldon sea salt on top of the caramel ribbon before the final layer of filling. It creates little salty pops that are wildly addictive.
Questions People Ask Me About This Recipe
Q: Why did my filling come out ice-crystal-y?
A: Ugh, I’ve been there. This usually happens if the mixture wasn’t whipped enough, or if it thawed and refroze. Whip the cream to stiff peaks — really stiff — and make sure you aren’t letting the finished bars sit out on the counter. Straight to the freezer, and you’ll be fine.
Q: Can I use homemade caramel sauce?
A: Absolutely. Just make sure it’s thick and at room temperature. A thin, warm caramel will sink to the bottom and create a sticky layer instead of beautiful ribbons. I’ve tested this with both homemade and store-bought, and both work as long as the caramel is spoonably thick.
Q: How long will these keep in the freezer?
A: They’re best within the first two weeks. After that, the pretzels in the topping can start to lose their crunch. If that happens, just sprinkle some fresh crushed pretzels on top before serving. That trick works every time.
Q: What’s the best way to get clean cuts?
A: Hot knife, cold bar. Run the knife under the hottest water, dry it completely, and slice. Wipe the blade clean between each cut. Repeat the hot water step if the knife starts to drag. It’s the only way to get those sharp, bakery-style edges that make people think you bought these somewhere fancy.
Q: What do you serve with these?
A: Honestly, nothing — they’re the whole show. But if I’m feeling extra, I’ll drizzle a little extra warm caramel sauce over the top right before serving. My kids love them with a scoop of vanilla ice cream on the side, which is totally ridiculous and decadent, and I support it fully.
More Desserts That Disappear in Minutes
If these Caramel Ribbon Crunch Bars are a hit (and they will be), here are a few other recipes from my kitchen that get the same reaction:
- [INTERNAL LINK PLACEHOLDER: Salty & Sweet Peanut Butter Squares] — No-bake, 10 minutes, and my husband’s most-requested recipe. He calls them “the reason I married you.”
- [INTERNAL LINK PLACEHOLDER: No-Bake Oreo Cheesecake Bars] — The filling is so creamy, and it slices like a dream. My go-to for summer barbecues.
- [INTERNAL LINK PLACEHOLDER: Salted Dark Chocolate Chunk Cookies] — The one cookie recipe I make when I need a guaranteed winner. They’ve never let me down.
Look, I know there are a hundred frozen dessert recipes out there. But this one — with the pretzel crunch, the caramel ribbons, and that impossibly creamy no-churn center — is the one my friends text me about. It’s the one I bring to every block party. It’s the one that looks like a project but feels like a secret weapon. Make it once, and you’ll see what I mean.
If you try it, drop a comment below and tell me which layer you liked best. Or tag me on Instagram — I love seeing your caramel swirls.
📌 Save this Caramel Ribbon Crunch Bars recipe for your next gathering — a no-bake frozen dessert that looks like a million bucks but comes together in 35 minutes.
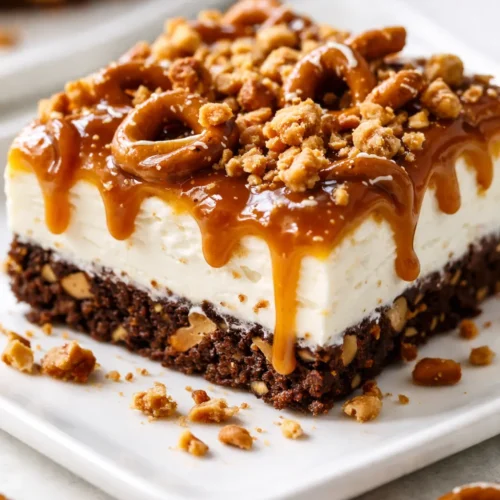
Caramel Ribbon Crunch Bars
Equipment
- 8×8 Square Baking Pan
- Parchment Paper
- Food Processor
- Hand Mixer
- Small skillet
- Sharp Knife
Ingredients
For the Crust
- 1 1/2 cups crushed chocolate wafer cookies (or Oreos, filling removed)
- 5 tbsp melted butter
- 1/4 cup mini pretzels, crushed
For the No-Churn Filling
- 2 cups heavy cream
- 1 can (14 oz) sweetened condensed milk
- 1 tsp vanilla extract
- 1/4 tsp kosher salt
For the Caramel Ribbon
- 1/2 cup high-quality store-bought salted caramel sauce
For the Crunch Topping
- 1 cup chopped mini pretzels
- 1/2 cup toffee bits (or chopped Skor bar)
- 3 tbsp melted butter
- 2 tbsp brown sugar
Instructions
- Preheat the oven to 350°F. Line an 8×8 pan with parchment paper, leaving an overhang on two sides.
- In a food processor, pulse the chocolate wafers and pretzels until fine crumbs form. Drizzle in the melted butter and pulse until it looks like wet sand.
- Press the mixture firmly into the prepared pan using the bottom of a flat measuring cup. Bake for 8-10 minutes until it smells toasty. Let cool completely.
- In a large bowl, combine the sweetened condensed milk, vanilla, and salt. In a separate bowl, whip the heavy cream to stiff peaks. Fold the whipped cream into the condensed milk mixture until smooth.
- Spread half of the filling over the cooled crust. Dollop half of the caramel sauce over the filling in small spoonfuls. Swirl through the filling just twice to create ribbons.
- Spread the remaining filling on top, then dollop and swirl the remaining caramel sauce.
- In a small skillet, melt the butter and brown sugar together. Toss in the chopped pretzels and toffee bits until coated. Sprinkle this over the top of the bars immediately.
- Freeze for at least 6 hours or overnight. Use the parchment sling to lift the block out of the pan. Let sit at room temperature for 5 minutes, then use a hot, dry knife to slice cleanly. Wipe the blade clean between each cut for sharp edges.
Notes
Related Recipes:
 Twice Baked Breakfast Potatoes for a Lazy Sunday: The Only Brunch Dish You Actually Want to Make
 The Starbucks Pink Drink Recipe with the Perfect Coconut Milk Float
 Starbucks Vanilla Bean Copycat Recipe That Costs a Fraction of the Drive-Thru — and Tastes Better
 The Crispiest Breakfast Egg Sandwich You’ll Make at Home (No Soggy Bread)