
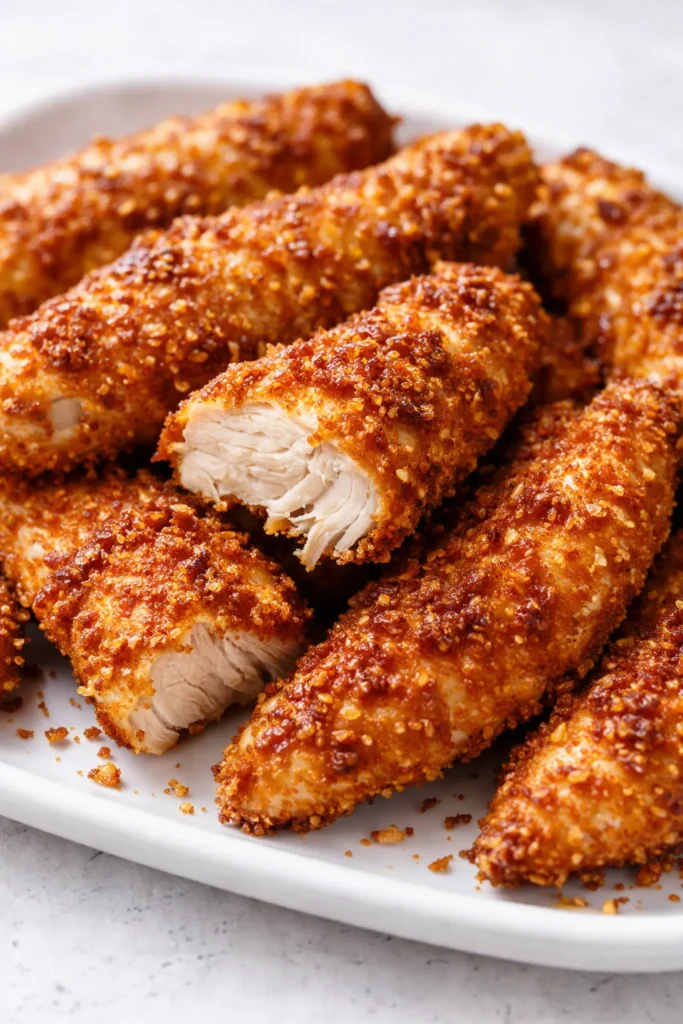
The secret to crispy oven baked chicken tenders is not the breadcrumbs. It’s the rack — the wire cooling rack in the back of your cabinet, the one you use twice a year for cookies. Set the breaded tenders on it instead of the bare sheet pan and air moves underneath, steam escapes, and every side of every tender comes out crackly. No flipping. No soggy side. I’ve made these 31 times and I’m not going back to the bare pan.
That said, the rack only gets you halfway. The other half is a little fat on the outside, a proper press of the crumbs, and one finishing move that costs roughly four cents. All of it is in this recipe. All of it is easy.
The short version: Twenty-five minutes of hands-on work, a crust that crackles, and one pan to wash.
I have made this recipe 31 times. The early versions lost their breading mid-bite. Then my friend Dana’s kid — a girl who has rejected every breaded thing I’ve set in front of her for three years — ate three tenders in a row and looked around for the tray like she’d been robbed. That’s when I knew this one was ready to hand over.
- Serves: 4 (about 3–4 tenders each)
- Hands-On Time: 25 min | Total Time: 45 min
- Difficulty: Easy — the kind of easy you can pull off on a Tuesday
- Cost per serving: ~$4.50 (less if you cut your own strips from whole breasts)
- Calories: ~380 per serving
- Dietary Notes: Nut-free; adaptable to gluten-free and dairy-free (swaps below)
(Photo above: overhead shot of the finished tenders stacked in a loose pile on a white ceramic plate, a small bowl of honey mustard tucked to the side, flaky salt catching the light on the crust, late-afternoon sun coming in from a kitchen window on the left.)
Why These Stay Crispy (Hint: It’s Not the Breading)
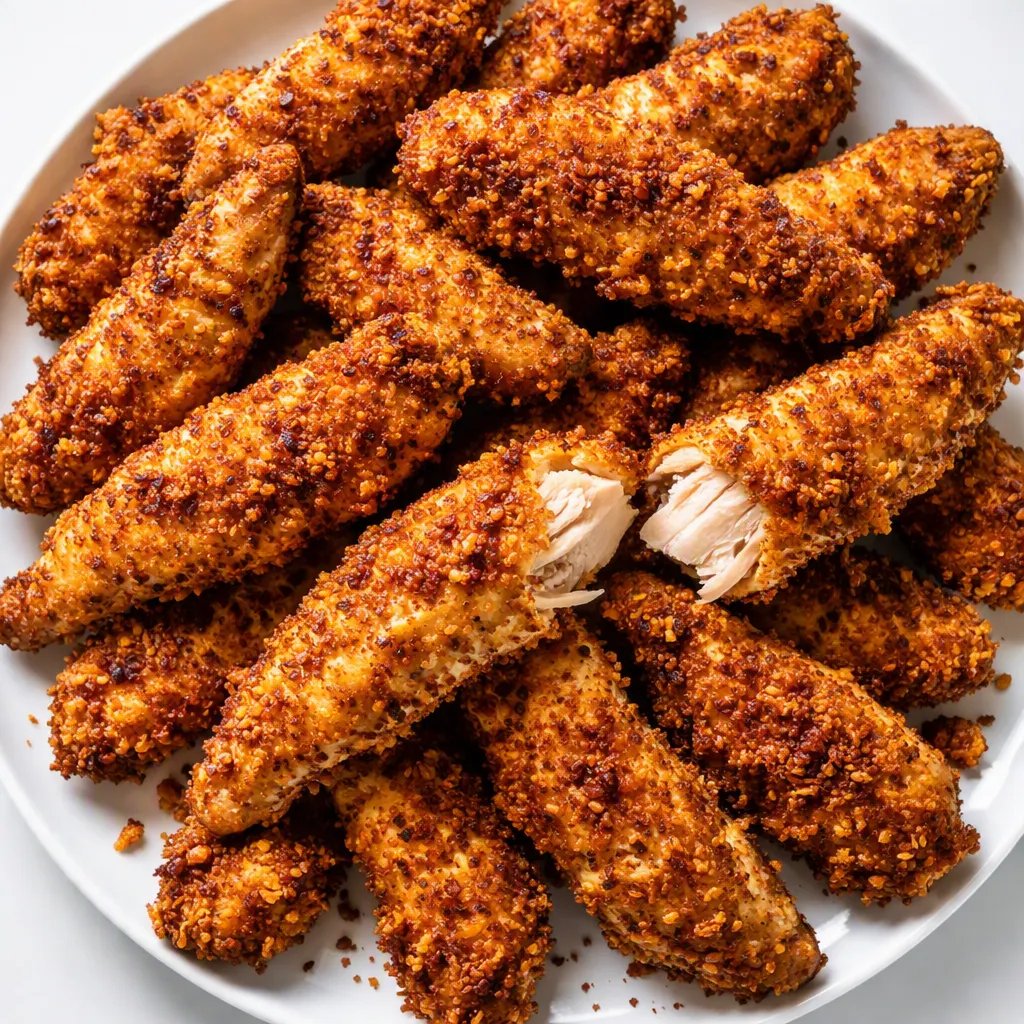
The breading does its part — panko has edges that toast instead of flattening, and the parmesan browns into a crust that tastes like it met a fryer somewhere. But the real move is the wire rack. A bare sheet pan traps steam underneath the chicken. The rack lets heat hit all sides at once. That’s the whole game, and honestly, the whole reason this recipe works.
The other thing nobody says out loud: a baked crust needs fat. Not a deep fryer’s worth, just a proper spray of oil before the tray goes in. Fat is what actually turns baked food golden, and golden is what makes a tender read as intentional instead of sad. If you skip this, you’ll get a nice crunchy coating the color of a hotel buffet. I’ve made that mistake too.
And the last touch — flaky salt, added after they come out of the oven — is doing more work than any breadcrumb on the tray. It adds a bright pop of texture, pulls a little sheen to the surface, and makes every bite taste sharper. I learned these three things in order, over roughly 20 mediocre batches. You get them all at once. This is me saving you the mediocrity.
What Goes In (Plus My Honest Notes)
- 1½ lbs chicken tenders: If you buy them pre-cut, fine. If you buy whole chicken breasts and cut them into strips yourself, you’ll save about four dollars and get strips that are exactly the size you want. Cut on a slight bias for more surface area. My honest note: I haven’t bought pre-cut tenders in years. It’s the same chicken with a markup.
- ¾ cup buttermilk: This is the wet layer and it does two jobs — it helps the panko stick and it adds a tang that makes the chicken taste like it thought about itself for a while. If you don’t have buttermilk, stir 1 tablespoon of lemon juice into ¾ cup of whole milk and let it sit for five minutes. I’ve done this with regular 2% milk and it still works. Don’t stress about it.
- 1 cup all-purpose flour: The glue. You’re not building a thick crust here — just a dry base that gives the buttermilk something to grab onto. This is the step that keeps the coating attached. Skip it and that’s when the sliding situation starts.
- 1 tsp paprika, 1 tsp garlic powder, ½ tsp onion powder, ¾ tsp salt, ½ tsp black pepper: The seasoning blend. It lives in the flour, not sprinkled on top afterward. If there are sensitive eaters in your house, skip the optional pinch of cayenne and put hot sauce on the adult side of the table. My friend Dana’s kid gets the mild batch. I get mine with hot honey.
- 1½ cups panko breadcrumbs: The shatter factor. Regular breadcrumbs compress into a smooth, sad shell. Panko has edges and surfaces that catch heat and turn sharp and crackly. This is not a place to substitute — unless you’re going gluten-free, which I cover in the swaps below.
- ½ cup finely grated parmesan: Browning and savor. Grate it from a wedge rather than whatever lives in the green-lid container — the texture behaves differently in the crust. I know the green lid is tempting. I’ve been there. I will not be taking questions on this.
- Neutral oil spray (or a brush and about 2 tbsp neutral oil): The golden-maker. A dry crust stays pale and apologetic. A properly sprayed crust comes out looking like it spent some quality time near a fryer. Avocado or canola oil works great. Olive oil works in a pinch but has a more noticeable flavor.
- Flaky salt for finishing (Maldon or similar): The move. A pinch over the hot tenders when they come out adds texture and makes the whole batch taste like a deliberate act instead of an oven tray. Never fine salt here. The crystal size is the entire point!
For the dip: ¼ cup mayonnaise, 1 tablespoon Dijon mustard, 1 tablespoon honey, and a pinch of salt. That’s the whole list. Store-bought honey mustard is fine. This is better — less sweet, more sharp — and it takes about sixty seconds to make while the tenders bake.
The Setup (It’s Minimal, I Promise)
- A sheet pan with a rim — so nothing drips onto the bottom of your oven.
- A wire cooling rack that fits inside the pan. The entire recipe hinges on this. If you don’t own one, they’re cheap, and this is the recipe that justifies the purchase.
- Two shallow bowls and one plate for the breading station. Wide and shallow makes the dredging manageable. A deep cereal bowl makes it miserable.
- Tongs for moving hot things around.
- An instant-read thermometer. You’ll thank me in step six.
Let’s Make It — No Fancy Skills Required
Everything moves quickly once you start, so set up the three bowls and pull the chicken out of the fridge before you do anything else. That’s the entire secret to not being covered in flour by minute two.
- Preheat: Set your oven to 425°F with the rack in the upper third. If you’re the organized type, put the sheet pan and wire rack in the oven while it warms up — the hot metal gives the bottom crust a head start. If you’re not the organized type, proceed without guilt. I am the second type on most days.
- Build the breading station: In one shallow bowl, whisk the flour, paprika, garlic powder, onion powder, salt, and pepper. In a second bowl, pour the buttermilk. In a third, mix the panko and parmesan. Pat the chicken dry with paper towels so the flour has something clean to grab.
- Dredge: One at a time: dry hand into the flour, shake off the excess, then into the buttermilk — wet hand now — then press into the panko mixture. Press, don’t dust. The crumbs need to embed themselves in the buttermilk, and that takes a little palm pressure. This is the difference between a crust that stays on and a crust that slides off at the table. (📸 Photo tip: This is the best “before” shot — the raw breaded tenders lined up in neat rows on the rack, a few stray crumbs scattered on the pan below, light hitting the coating.)
- Place them on the rack: Give each tender about an inch of space. Crowding means steaming, and steaming is the enemy of the word crispy. If you have to use two pans or bake in two batches, that’s the right call.
- Spray with oil: Coat the tops generously, then — here’s the part people skip — turn each tender and spray the sides and bottoms too. A thorough spray means the whole crust goes golden, not just the top half. If you’re running on fumes, you can skip the flour layer and go straight from buttermilk to panko. The coating will be more fragile, but it still tastes good. I’ve done it on nights when the counter was not my friend.
- Bake: 18–20 minutes, no flipping. I know you want to flip them. The rack is already handling the underside. Let it work. Check the thickest tender with the thermometer at 18 minutes and pull the tray when it hits 165°F. Ovens differ; trust the number, not the timer. (📸 Photo tip: At the 18-minute mark the crust should be deep golden with a few darker parmesan edges — that is not burning, that is exactly what you want. This is the after shot.)
- Rest: Let the tenders sit on the rack for three minutes. This is where the crust settles and stops trying to come off in one sheet. I know three minutes feels long when dinner is ready. Give it the three minutes anyway.
- Make the dip and plate: While the chicken bakes, stir together the mayo, Dijon, honey, and a pinch of salt. Taste it and add a little more honey if your mustard is sharp. When you plate, put a spoonful of the dip on the plate and swipe it with the back of the spoon — then lay the tenders over the edge of the swipe. Sauce under, not over. That’s the presentation trick. Arrange three per plate, not four — odd numbers read as intentional, four reads as a heap. It looks like you thought about it. You did, for about four seconds.
How I Batch These for the Week (Or a Crowd)
These are the rare crispy oven baked chicken tenders that freeze well before cooking, which makes them a regular part of my Sunday rotation. I double the batch, bake half, and freeze the other half raw. On a random Tuesday, I pull them out, bake them straight from frozen, and dinner is handled with no one having a crisis about it.
- Fridge: Cooked tenders keep 3–4 days in an airtight container. Reheat in a 400°F oven or air fryer for 5–6 minutes. The microwave will technically work and will also make the crust soft, which is a real downgrade.
- Freezer: Yes — freeze the uncooked, breaded tenders in a single layer on a sheet pan until solid, then transfer to a zip-top bag. They’ll keep up to three months. Bake from frozen at 425°F for 22–25 minutes. No need to thaw.
- Reheat: Oven or air fryer. Oven: 400°F for 5–6 minutes. Air fryer: same time, maybe a minute less. Drop the microwave idea entirely.
Things I Learned the Hard Way (So You Don’t Have To)
- Leave them alone: Do not flip the tenders halfway through the bake. Every flip I’ve ever attempted pulled off a little crust and gave me nothing in return. The wire rack already handles the underside. It’s not broken. Stop trying to fix it.
- Press the crumbs in: The difference between a crust that stays and a crust that slides is literally the palms of your hands. Press the panko into the buttermilk like you mean it. Dusting is for powdered sugar, not for chicken coating.
- Use the thermometer: Pull the tray at 165°F, not when the oven timer dings. Ovens lie, chicken varies, and I have made both the undercooked version and the dry version of this exact recipe. The thermometer is a $12 investment in never repeating either one.
- Perfection is not required: If some breading slides off in a couple of spots, the tenders will still eat great. Nobody at any table has ever looked at a chicken tender and said, “I notice the crust coverage is imperfect.” Serve them, let the dip do its job, and don’t say a word. I’ve done this more times than I’ll admit on record.
Swaps, Upgrades, and Other Versions I’ve Made
- Gluten-free: Use gluten-free panko (it exists and it works) and a 1:1 gluten-free flour blend. I tested this for a friend with celiac and we both went back for thirds. One note: the crust is a little more delicate, so keep the tenders well spaced and don’t fuss with them while they bake.
- Extra-crispy crowd version: Crush a handful of potato chips into the panko mixture. Salt-and-vinegar chips are the correct call. It adds a shatter that borders on theatrical, which is sometimes exactly what a Thursday needs.
- Spicy: Add a pinch of cayenne to the flour, and finish the adult tenders with a drizzle of hot honey. It’s basically one extra bottle in the cabinet, and it makes the whole batch feel like a grown-up decision.
- Fancy version for guests: Cut whole chicken breasts into wider strips, pound them gently to an even thickness, and be generous with the crumb coating. Serve with the dip swiped on the plate underneath the tenders — a smear of honey mustard under the chicken, not a blob beside it. They will never figure out it came from a 425°F oven. That’s between us.
Questions I Get About These All the Time
Q: Why did my breading fall off?
A: Almost always one of two things: the chicken was too wet when it hit the flour, or the panko wasn’t pressed in hard enough. Pat the tenders dry before the flour, shake off the excess flour before the buttermilk, and really press the crumbs in. And don’t flip them in the oven. I’ve done all three of those wrong at the same time, so I’m telling you from direct experience.
Q: Can I make these dairy-free?
A: Yes. For the buttermilk, use ¾ cup of your usual plain unsweetened milk alternative plus 1 tablespoon of lemon juice, and let it sit for five minutes. For the parmesan, mix a tablespoon of nutritional yeast into the panko. You’ll lose a little of the golden color, but you will not lose the crunch. I’ve served this version to a dairy-free friend and she ate the whole tray.
Q: How long do these last? Can I freeze them?
A: Cooked, they hold up for 3–4 days in the fridge in an airtight container. Reheat in a 400°F oven or air fryer for 5–6 minutes — the microwave is fast but it turns the crust soft. Uncooked and breaded, they freeze beautifully for up to three months: freeze them in a single layer on a sheet pan, transfer to a zip-top bag, and bake from frozen at 425°F for 22–25 minutes. The frozen batch is the reason I make a double batch on Sundays.
Q: What do you serve with these?
A: When there are actual people at the table: plate the tenders over the smear of honey mustard and add a crunchy green salad with a sharp vinaigrette. Something acidic on the side balances the richness without making you cook a second dish. When it’s just me: straight off the sheet pan, standing at the counter, dipping directly into the bowl and not bothering with a plate. Both versions are correct. I’ve done both this week.
More Recipes That End Up in the Group Text
If you liked these, here are the other things my friends request by name:
- The 60-Second Honey Mustard Dip — three ingredients, one bowl, and it makes anything taste like a restaurant order.
- Oven Fries That Stay Crunchy — the same wire rack logic, applied to potatoes, with zero apology to the deep fryer.
- Sheet Pan Salmon for Tuesdays That Feel Important — looks like a planned meal, takes about as much effort as boiling pasta.
When you plate these, don’t explain anything. Set them over the smear of mustard, let the flaky salt glint on the crust, and put the tray in the sink like it’s nothing. The table will read the result — golden, crackly, nothing like an oven-baked compromise. Let them think it was hard. You know the rack did the work.
If you try them, tell me how it went — I read every comment, and if a crust slides off somewhere, I want to hear about that too. I’ve got 31 batches of experience with exactly that problem.
📌 Save this crispy oven baked chicken tenders recipe for the next Tuesday when you need dinner to actually work — the wire rack trick makes sure they come out golden and crackly every single time.
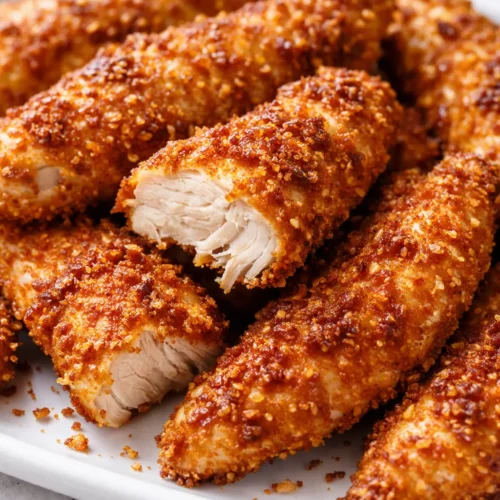
Crispy Oven Baked Chicken Tenders That Actually Stay Crispy (No Deep Fryer Required)
Equipment
- Rimmed Sheet Pan
- Wire cooling rack
- Two Shallow Bowls
- Tongs
- Instant-Read Thermometer
Ingredients
For the Chicken
- 1 1/2 lbs chicken tenders, or whole chicken breasts cut into strips
- 3/4 cup buttermilk, or 3/4 cup whole milk plus 1 tbsp lemon juice
- 1 cup all-purpose flour
- 1 tsp paprika
- 1 tsp garlic powder
- 1/2 tsp onion powder
- 3/4 tsp salt
- 1/2 tsp black pepper
- 1 pinch cayenne pepper, optional
- 1 1/2 cups panko breadcrumbs
- 1/2 cup finely grated parmesan
- neutral oil spray, or about 2 tbsp neutral oil for brushing
- flaky salt, for finishing
For the Honey Mustard Dip
- 1/4 cup mayonnaise
- 1 tbsp Dijon mustard
- 1 tbsp honey
- 1 pinch salt
Instructions
- Preheat the oven to 425°F with the rack in the upper third. If you want a head start on the bottom crust, put the sheet pan and wire rack in the oven while it warms. If you skip that, no guilt.
- Set up three shallow bowls: flour and seasonings in one, buttermilk in the second, panko and parmesan in the third. Pat the chicken dry with paper towels.
- Dredge one tender at a time. Dry hand into the flour and shake off extra, then into the buttermilk, then press into the panko-parmesan mixture. Press the crumbs in like you mean it; dusting doesn’t stick.
- Place the breaded tenders on the wire rack with about an inch of space between them. Crowding means steaming, and steaming is the enemy of crispy.
- Spray the tops generously with oil, then turn each tender and spray the sides and bottoms too. A thorough spray is what makes the whole crust golden.
- Bake for 18-20 minutes without flipping. Check the thickest tender at 18 minutes and pull the tray when it hits 165°F on an instant-read thermometer.
- Let the tenders rest on the rack for 3 minutes so the crust settles and stays attached.
- While the chicken bakes, stir the mayonnaise, Dijon, honey, and a pinch of salt for the dip. To plate, swipe a spoonful of dip on the plate, lay 3 tenders over the edge, and finish with flaky salt.
Notes
Related Recipes:
 Cheesy Hamburger Casserole Bake That’s Ready in 40 Minutes (No Canned Soup Here)
 Creamy Garlic Tagliatelle That Looks Like a Restaurant Dish in 20 Minutes
 Texas Roadhouse Style Baked Salmon with Sweet and Savory Glaze — Ready in Under 30 Minutes
 Easy Italian Meatloaf That’s Actually Juicy (Not Dry) — in 1 Hour
 The Biscuits and Gravy Casserole That’s Actually Crispy on Top (And Ready in 40 Minutes)
 Air Fryer Chicken and Vegetables That Don’t Taste Like a Regret (30 Minutes, One Pan)