
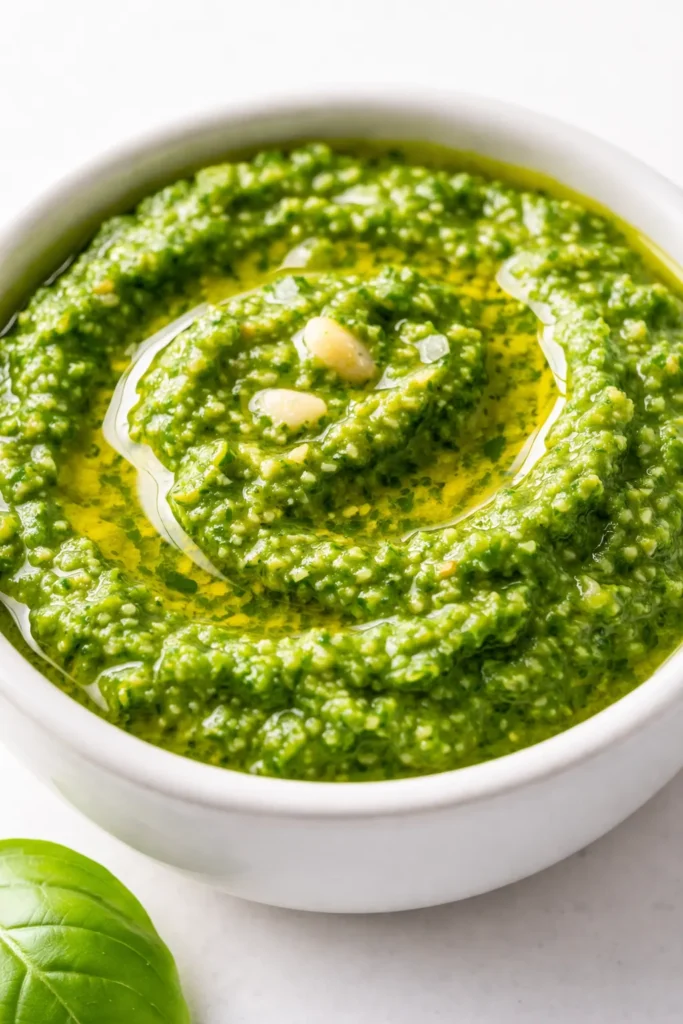
That first whiff when you walk into the kitchen — bright, garlicky, so green you can practically taste the summer — that’s what this fresh basil pesto does to a room. I make it every time my basil plant starts to take over the windowsill, and by the end of the week my family’s putting it on everything from eggs to chicken to plain toast. The best part? It takes about as long as boiling pasta water, and you can freeze it for months. This is the only pesto recipe you’ll need.
The short version: Blanched basil, good nuts, real Parmesan, and a food processor — five minutes, no fuss, and it won’t turn brown on you by dinner.
I’ve tested this about twenty times across three summers, tweaking the balance of garlic to oil to lemon. This version is the one my picky nephew asked for seconds of. That’s my gold standard.
- Serves: Makes about 1 cup (generous for 1 lb pasta)
- Hands-On Time: 5 min | Total Time: 10 min
- Difficulty: Easier than you think — even on a Tuesday after work
- Cost per serving: ~$1.50 (less if you grow your own basil)
- Calories: ~120 per 2-tablespoon serving
- Dietary Notes: Naturally vegetarian, gluten-free. Vegan option below.
(Photo above: Overhead shot of a small ceramic bowl filled with vibrant green pesto, a wooden spoon resting across the rim, natural light from a nearby window, with a few whole basil leaves scattered on the wooden board next to it.)
The Blanching Trick That Keeps Your Pesto Green
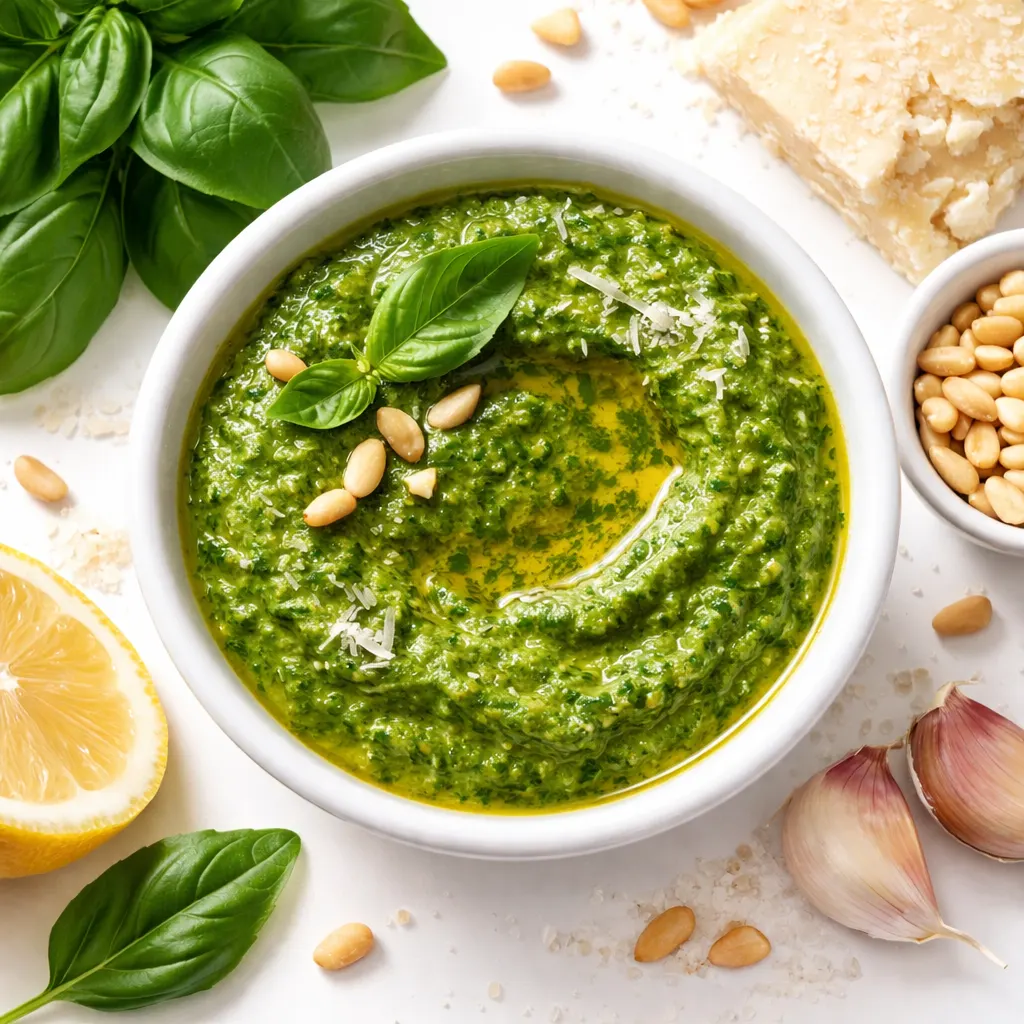
Here’s the thing about fresh basil pesto: if you skip this one step, it’ll start turning brown the second the blade hits the basil. Enzymes, oxidation — I don’t need the science words. What I know is that blanching the basil for ten seconds in boiling water, then shocking it in ice water, locks in that electric green color. It also stops the basil from getting that slightly bitter edge that raw basil can develop when it sits.
I learned this after making pesto for three years that looked gorgeous for exactly thirty minutes, then faded into something I’d be embarrassed to serve to guests. Now it stays that beautiful bright green for days in the fridge, and even longer in the freezer. The extra step takes sixty seconds. Don’t skip it.
Ingredients Worth Talking About
- 3 cups packed fresh basil leaves (about 2 large bunches): This is the star. Don’t use the pre-washed grocery bags if you can help it — garden basil has more flavor.
I buy mine at the farmers’ market in summer and grow a pot on my fire escape the rest of the year. It’s worth the windowsill space. - ⅓ cup pine nuts or walnuts: Pine nuts are classic and buttery, but walnuts are half the price and still delicious. Toasting them brings out the nutty flavor.
My kids can’t tell the difference. I don’t tell them. - 2 medium garlic cloves: Use fresh garlic, not jarred. Two cloves give a nice punch without overpowering.
If your garlic is huge and scary, use one and a half. - ½ cup freshly grated Parmigiano-Reggiano (about 1.5 oz): Real Parmesan, not the green can. It melts into the pesto and adds salty, umami depth.
I grate this while the nuts are toasting — multitasking at its finest. - ⅓ cup good extra-virgin olive oil, plus more for covering: Use something you’d actually dip bread in. But don’t use your expensive finishing oil — save that for drizzling at the end.
The oil is what carries the flavor, so it matters. I use a decent bottle from Trader Joe’s. - 1 tablespoon fresh lemon juice (from about ½ lemon): This brightens everything and helps preserve the green color.
Taste it before you add it — if your basil is super floral, you might want a little less. - ½ teaspoon flaky sea salt, plus more to taste: Start here. The Parmesan brings salt, so you can always add more later.
I’ve oversalted pesto exactly once. Never again.
What to Pull Out Before You Start
- Small saucepan for blanching the basil
- Bowl of ice water (big enough for the basil to dunk)
- Fine-mesh strainer to drain the basil
- Food processor or high-speed blender (don’t use a mini chopper — it won’t get the texture right)
- Small skillet for toasting the nuts
- Rubber spatula to scrape every last bit out of the processor
If you don’t have a food processor, a blender works — but pulse, don’t blend on high. You want some texture left, not a puree.
Let’s Make It — Step by Step
This goes fast, so read through once before you start. The blanching step happens in under a minute, so have everything ready.
Blanch the basil: Bring a small pot of salted water to a boil. Have the ice water bowl ready. Drop the basil leaves in and stir — 10 seconds, no more. They’ll turn bright green immediately. Scoop them out with a slotted spoon or pour through a strainer, then plunge into the ice water. Drain well and squeeze out as much water as you can with your hands. You don’t want a watery pesto.
- Toast the nuts: In a dry small skillet over medium heat, toast the pine nuts or walnuts for 2–3 minutes, shaking the pan frequently, until they smell nutty and are lightly golden. Don’t walk away — they burn fast.
(📸 Photo tip: The nuts should look like they’ve barely changed color but smell amazing. Golden spots are fine; black spots are bad.) - Blitz the garlic and nuts: In the food processor, pulse the garlic and cooled nuts until they’re finely chopped — about 5–6 pulses. No need to go to a paste yet.
- Add the basil and Parmesan: Add the blanched, squeezed basil and the grated Parmesan. Pulse again until everything is combined and the basil looks broken down. It’ll look a little clumpy.
- Stream in the oil: With the processor running, slowly pour the olive oil through the feed tube. Let it run until the pesto comes together into a thick, spreadable paste. You might need to stop and scrape down the sides once.
This is the moment it goes from a bunch of green chunks to something that looks like pesto. I love this part. - Season and finish: Add the lemon juice and ½ teaspoon salt. Pulse once or twice to combine. Taste it on a spoon or a piece of bread. Add more salt if needed, but remember the Parmesan is salty — I usually end up at about ¾ teaspoon total.
(📸 Photo tip: The finished pesto should be thick enough to hold its shape when you drop a spoonful on a plate, but not dry. It should have a glossy sheen from the oil.)
How I Meal Prep This for the Week
I make a double batch on Sundays and use it all week. The trick is storing it properly: a thin layer of olive oil on top keeps the air out, and it stays bright green for at least a week. I’ve also frozen it in ice cube trays for months — pesto cubes are a lifesaver for quick pasta nights.
- Fridge: Transfer to an airtight jar (I use a small mason jar). Smooth the top and drizzle with a thin layer of olive oil to seal. Keeps for up to 1 week.
- Freezer: Spoon into ice cube trays (about 1 tablespoon each). Freeze until solid, then pop out the cubes and store in a zip-top bag. Keeps for 3 months. Thaw overnight in the fridge or drop a frozen cube into hot pasta.
- Reheat: Never microwave pesto — it splits the oil. Instead, toss it with hot pasta and a splash of pasta water; the heat thaws it perfectly.
Things I Wish I’d Known the First Time
- Do not over-process. You want some texture — little flecks of nuts and basil. A totally smooth, paste-like pesto looks sad and feels like baby food. Pulse, don’t run on full speed.
- Blanch every time, even if you’re using it immediately. It’s not just for storage — it also mellows the raw basil astringency. I’ve done side-by-side tests, and the blanched version always tastes sweeter and more balanced.
- Taste before you add extra salt. Parmesan is salty. The first time I made pesto, I added a full teaspoon and ended up with a salt lick. Start with ½ teaspoon and work up.
- Reserve some pasta water when you use it. A tablespoon of starchy water per serving thins the pesto into a sauce that hugs the pasta. It’s the difference between dry, clumpy pasta and a silky bowl of summer.
Swaps That Actually Work
- Vegan version: Swap the Parmesan for 2–3 tablespoons nutritional yeast and add an extra pinch of salt. My vegan friend says this is the closest she’s found. I still use real Parmesan, but she makes her own batch and it’s good.
- Nut-free version: Use sunflower seeds or pepitas (shelled pumpkin seeds). Toast them the same way. They’re both mild and creamy. My kid with a nut allergy eats this on everything.
- Spicy variation: Add ½ teaspoon red pepper flakes with the garlic, or a small fresh jalapeño (seeds removed) in step 2. I do this for the adult dinner after the kids are in bed.
- Herb mix: Replace ¼ of the basil with parsley, mint, or arugula for a different flavor. Mint is great with lamb or peas. Summer basil is too precious to mess with, but off-season grocery store basil often needs a boost.
- Lemon zinger: Add zest from ½ lemon along with the juice for extra brightness.
Questions I Get About This Recipe All the Time
Q: Why did my pesto turn brown?
A: You probably skipped the blanching, or you stored it without covering the top with oil. The enzymes in raw basil react to air and turn brown fast. Blanching deactivates those enzymes, and the oil layer blocks oxygen. Fix it next time — this batch is still fine to eat, just won’t look as pretty.
Q: Can I use a blender instead?
A: Yes, but pulse it rather than running on high. Blenders tend to liquefy everything and you’ll end up with a dressing, not a pesto. If that’s what you want, go for it, but it won’t have the same chunky texture. Also, you may need to scrape the sides more often.
Q: How long does pesto last in the fridge? Can I freeze it?
A: In the fridge, with a good oil layer on top, it stays bright for about 5–7 days. Freezing is excellent: spoon into ice cube trays, freeze solid, then transfer to a bag. Use within 3 months. Thaw in the fridge overnight or drop a frozen cube into hot pasta.
Q: What do you serve with pesto besides pasta?
A: Oh, so many things. Mix it into scrambled eggs or fold it into mayonnaise for a quick aioli. Spread it on a sandwich with mozzarella and tomato. Swirl it into tomato soup. Toss it with roasted potatoes. I even put a dollop on grilled fish. My kids love it on pizza instead of tomato sauce.
More Recipes My Family Makes on Repeat
If you liked this one, here are a few others that get the same reaction at our table:
- Homemade Pasta from Scratch — The perfect partner for this pesto, and easier than you think.
- Caprese Salad with Burrata — Another summer classic that lets basil shine.
- Easy Bruschetta with Tomatoes — The best way to use up a bumper crop of tomatoes alongside your pesto.
This pesto has become my summer security blanket. I make a batch the day basil hits the farmers’ market, and I know I have at least a dozen good meals ahead of me. If you try it, drop a comment below — I love hearing how it goes for you. And if you snap a photo, tag me on Pinterest so I can see that bright green bowl.
📌 This fresh basil pesto recipe stays bright for days — save it for your next summer pasta night or meal prep Sunday.
Fresh Basil Pesto That’s Ready in 5 Minutes and Stays Bright for Days
Equipment
- Small saucepan
- Bowl of ice water
- Fine-Mesh Strainer
- Food Processor
- Small skillet
- Rubber Spatula
Ingredients
- 3 cups packed fresh basil leaves
- 1/3 cup pine nuts or walnuts
- 2 cloves garlic
- 1/2 cup freshly grated Parmigiano-Reggiano
- 1/3 cup extra-virgin olive oil, plus more for covering
- 1 tablespoon fresh lemon juice
- 1/2 teaspoon flaky sea salt, plus more to taste
Instructions
- Blanch the basil: Bring a small pot of salted water to a boil. Have a bowl of ice water ready. Drop the basil leaves in and stir — 10 seconds, no more. They’ll turn bright green immediately. Scoop them out with a slotted spoon or pour through a strainer, then plunge into the ice water. Drain well and squeeze out as much water as you can with your hands.
- Toast the nuts: In a dry small skillet over medium heat, toast the pine nuts or walnuts for 2–3 minutes, shaking the pan frequently, until they smell nutty and are lightly golden. Do not let them burn.
- In the food processor, pulse the garlic and cooled nuts until they’re finely chopped — about 5–6 pulses.
- Add the blanched, squeezed basil and the grated Parmesan. Pulse again until everything is combined and the basil looks broken down.
- With the processor running, slowly pour the olive oil through the feed tube. Let it run until the pesto comes together into a thick, spreadable paste. Scrape down the sides once if needed.
- Add the lemon juice and ½ teaspoon salt. Pulse once or twice to combine. Taste on a piece of bread and add more salt if needed (remember the Parmesan is salty).
Notes
Related Recipes:
 The Perfectly Pillowy Chocolate Chip Milk Buns (Tangzhong Method)
 Bagel Breakfast Sliders That Taste Like a Diner Breakfast — in 25 Minutes
 Cheesy Hamburger Casserole Bake That’s Ready in 40 Minutes (No Canned Soup Here)
 Creamy Garlic Tagliatelle That Looks Like a Restaurant Dish in 20 Minutes
 Texas Roadhouse Style Baked Salmon with Sweet and Savory Glaze — Ready in Under 30 Minutes
 Easy Italian Meatloaf That’s Actually Juicy (Not Dry) — in 1 Hour