
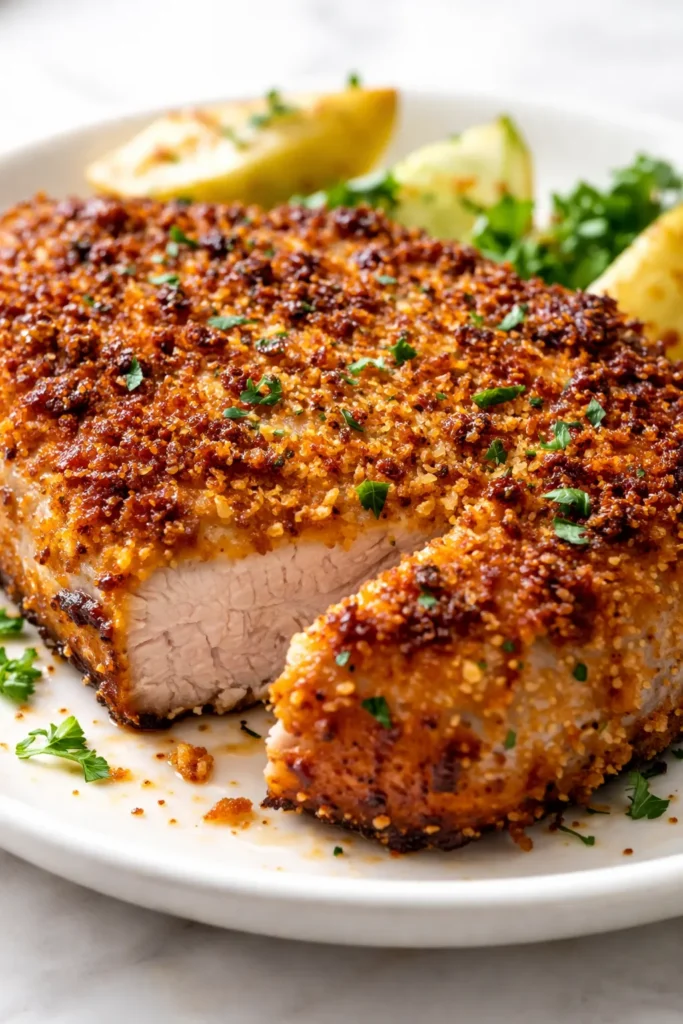
Let’s be honest — pork chops have a bit of a reputation. Dry, bland, tough. I’ve been there plenty of times, staring at a sad piece of meat and wondering where I went wrong. But this crispy parmesan crusted version? It’s the recipe that completely changed the way my family looks at pork chops. We’re talking a golden, crunchy, cheesy crust that actually stays put, and a center that stays juicy without any fancy brining or complicated steps. It comes together in one skillet and works every single time.
The short version: Juicy pork chops with a crispy, cheesy crust — on the table in 25 minutes flat.
I’ve tested this with thin chops, thick chops, boneless, bone-in, and even chicken. This method is the one that finally worked for my family, and I’m betting it’ll work for yours too.
- Serves: 4 as a main dish
- Hands-On Time: 15 min | Total Time: 25 min
- Difficulty: Easy — even on a busy Tuesday
- Cost per serving: ~$3.50
- Calories: ~420 per serving
- Dietary Notes: Contains dairy and gluten (GF option listed below)
(Photo above: Golden brown pork chop resting on a wooden cutting board, the crispy parmesan crust visible and intact, a light sprinkle of fresh parsley and a lemon wedge on the side, warm evening light from the left.)
Why This Parmesan Crust Actually Stays Crispy (No, Really)
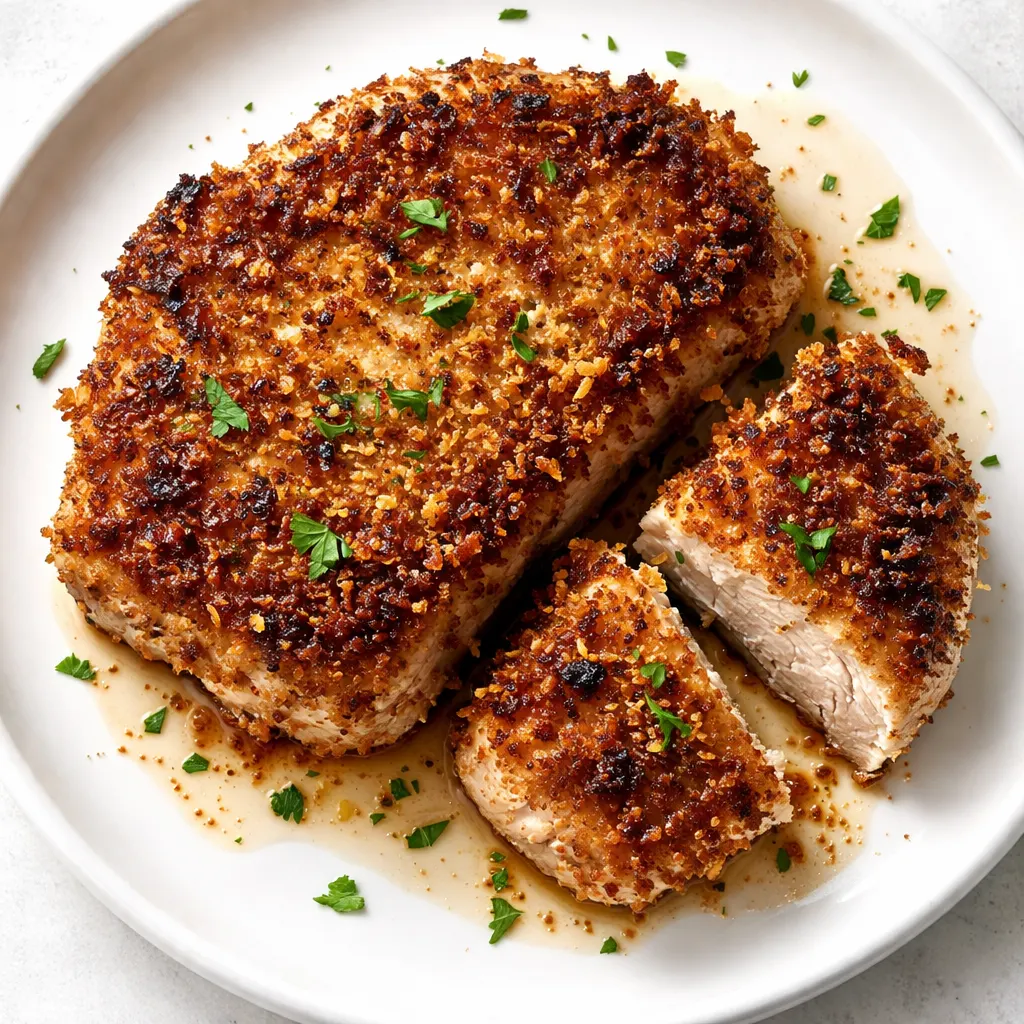
The problem with most crusted pork chops is that the breading slides right off or turns soggy within minutes. This version fixes that. Freshly grated parmesan melts slightly into the panko, creating a cheesy shell that bonds to the meat. The panko adds serious crunch without absorbing too much oil, and the butter in the skillet gives it that deep, nutty flavor you can’t get from oil alone.
I learned the hard way that pre-shredded parmesan is the enemy here — it has added starches that keep it from melting properly. A block of the real stuff makes all the difference.
Ingredients Worth Talking About
- 4 boneless pork chops (1-inch thick): Thick chops are key for staying juicy. Thin chops cook too fast and the crust won’t have time to develop properly.
- 1/2 cup freshly grated parmesan: Buy the block, grate it yourself. It melts into the panko and creates that golden crust. Pre-shredded won’t give you the same result.
- 1/2 cup panko breadcrumbs: Flakier and lighter than regular breadcrumbs. They stay crisp even after resting.
- 1/4 cup all-purpose flour: Helps the egg stick to the pork. My kids can smell the difference when I skip this step — it keeps the crust from sliding off.
- 2 large eggs: The glue that holds everything together.
- 2 tablespoons unsalted butter + 1 tablespoon olive oil: Butter for flavor, oil to keep it from burning.
What to Pull Out Before You Start
- A large cast-iron or stainless steel skillet — 12-inch is perfect. Non-stick works too, but you won’t get quite as much browning.
- Three shallow bowls — for the breading station.
- A meat thermometer — honestly, this takes the guesswork out. Not optional if you want perfectly juicy chops.
Let’s Make Them (Step by Step)
The breading station moves fast, so set everything up before you start. Once you get going, it’s smooth sailing.
Prep and heat: Pat the pork chops dry with paper towels. Season both sides generously with salt, pepper, and a pinch of garlic powder. (📸 Photo tip: Patting the pork dry is the most important step here — it helps the flour stick and gives you a better sear.)
- Set up the breading station: In the first bowl, place the flour. In the second, beat the eggs with a splash of water. In the third, mix the panko and freshly grated parmesan together.
- Bread the chops: Dredge each chop in the flour, shaking off the excess. Dip into the egg, letting the excess drip off. Press firmly into the panko-parmesan mixture, making sure it’s fully coated on both sides. (📸 Photo tip: Press the breading in firmly — this is what keeps it from falling off in the pan.)
- Heat the skillet: Add the butter and olive oil to the skillet over medium heat. Swirl the pan until the butter is melted and foaming, but not browning.
- Sear the chops: Carefully lay the breaded pork chops in the skillet. Make sure not to crowd the pan — cook in batches if needed. Let them sit without moving for 4-5 minutes, until the bottom is deep golden brown.
- Flip and finish: Flip the chops carefully. Cook for another 4-5 minutes, until the internal temperature reaches 145°F on the meat thermometer. The crust should be golden and the cheese should be bubbling in places.
- Rest: Transfer the pork chops to a cutting board and let them rest for 5 minutes. This keeps the juices from running out when you cut into them.
How I Meal Prep These for the Week
I make a double batch on Sundays sometimes, and we’re set for quick lunches or easy dinners. They reheat beautifully if you use the right method.
- Fridge: Store in an airtight container for up to 4 days. Reheat in a 375°F oven or air fryer to bring back the crunch.
- Freezer: Yes! Bread the chops uncooked, place them on a sheet tray to freeze solid, then transfer to a freezer bag. Cook from frozen — just add 2-3 minutes per side.
- Reheat: Air fryer at 350°F for 5 minutes is my go-to. The oven works too (375°F for 10 minutes). The microwave will make the crust soggy, so I’d avoid it here.
Things I Wish I’d Known the First Time
- Use a meat thermometer: I can’t stress this enough. Pull the pork at 145°F and it will be perfectly juicy. Overcooking is the #1 reason people end up with dry chops.
- Don’t move the pork around in the pan: Drop it in and leave it alone. Let that crust form and release naturally. If you try to flip too early, the breading will stick to the pan and peel off.
- Buy the block of parmesan: Pre-grated parmesan contains cellulose, which stops it from melting properly. Grating it yourself takes 30 seconds, and you’ll taste the difference.
- Let them rest: I know it’s tempting to dig in right away, but those 5 minutes are crucial. The juices recirculate into the meat instead of flooding your cutting board.
Swaps That Actually Work
- Gluten-Free: Use almond flour instead of regular flour, and gluten-free panko. The crust won’t be quite as crunchy, but it’s still delicious. My sister-in-law uses this version and swears by it.
- Spicy: Add 1/2 teaspoon of cayenne or red pepper flakes to the panko-parmesan mixture. I do this for the adults sometimes — my kids stick to the original.
- Chicken: This works great with boneless, skinless chicken breasts or thighs. Pound them to even thickness and cook until 165°F internal.
- Baked Version: Place the breaded chops on a wire rack over a baking sheet. Spray with cooking spray and bake at 425°F for 15-20 minutes, then broil for 2 minutes to crisp up the top.
Questions I Get About This Recipe All the Time
Q: Why did my crust fall off in the pan?
A: Ugh, I’ve been there. It usually happens for two reasons: either the pan wasn’t hot enough when you added the pork, or you moved it around too soon. Let the crust set for a full 4-5 minutes before you even think about flipping. It should release easily when it’s ready.
Q: Can I make this with thin pork chops?
A: You can, but you’ll need to adjust the timing. Thin chops cook much faster, so reduce the cook time to 2-3 minutes per side. Keep an eye on the internal temp — overcooking happens fast with thin cuts.
Q: How long do leftovers last?
A: Up to 4 days in an airtight container in the fridge. For reheating, skip the microwave. A 375°F oven for 10 minutes, or an air fryer at 350°F for 5 minutes, will bring the crunch right back.
Q: What do you serve with these?
A: We love them with mashed potatoes and a simple green salad. Roasted green beans or asparagus work great too. My kids actually love dipping them in a little marinara sauce on the side, which I never would have guessed.
More Recipes My Family Makes on Repeat
If you liked this one, here are a few others that get the same reaction at our table:
- Garlic Butter Chicken Thighs — The juiciest chicken thighs in a rich garlic butter sauce.
- Easy Sheet Pan Salmon — My go-to for nights when I need a healthy dinner on the table fast.
- Creamy Tuscan Chicken — Rich, creamy, and packed with sun-dried tomatoes and spinach.
These crispy parmesan crusted pork chops honestly saved my weeknight dinner rotation. I hope they save yours too.
If you try them, drop a comment below — I love hearing how it goes for you!
📌 Crispy parmesan crusted pork chops that stay juicy and not greasy — save this recipe for your next busy weeknight dinner.
Perfectly Crispy Parmesan Crusted Pork Chops (Juicy, Not Greasy, in 25 Minutes)
Equipment
- Large Cast-Iron or Stainless Steel Skillet (12-inch)
- Three Shallow Bowls
- Meat Thermometer
Ingredients
Pork Chops
- 4 boneless pork chops (1-inch thick)
Breading
- 1/2 cup freshly grated parmesan
- 1/2 cup panko breadcrumbs
- 1/4 cup all-purpose flour
- 2 large eggs
For Cooking
- 2 tablespoons unsalted butter
- 1 tablespoon olive oil
Seasonings
- salt, pepper, and garlic powder, to taste
Instructions
- Pat the pork chops dry with paper towels. Season both sides generously with salt, pepper, and a pinch of garlic powder.
- Set up the breading station: In the first bowl, place the flour. In the second, beat the eggs with a splash of water. In the third, mix the panko and freshly grated parmesan together.
- Dredge each chop in the flour, shaking off the excess. Dip into the egg, letting the excess drip off. Press firmly into the panko-parmesan mixture, making sure it’s fully coated on both sides.
- Heat the skillet over medium heat. Add the butter and olive oil, swirling until the butter is melted and foaming but not browning.
- Carefully lay the breaded pork chops in the skillet. Do not crowd the pan — cook in batches if needed. Let them sit without moving for 4-5 minutes, until the bottom is deep golden brown.
- Flip the chops carefully. Cook for another 4-5 minutes, until the internal temperature reaches 145°F on a meat thermometer. The crust should be golden and the cheese bubbling in places.
- Transfer the pork chops to a cutting board and let them rest for 5 minutes. This keeps the juices from running out when you cut into them.
Notes
Related Recipes:
 Cheesy Hamburger Casserole Bake That’s Ready in 40 Minutes (No Canned Soup Here)
 Lemon Capellini Salad for Late Summer Evenings: Bright, Tangy, Ready in 20 Minutes
 Creamy Garlic Tagliatelle That Looks Like a Restaurant Dish in 20 Minutes
 Cucumber Shrimp Salad That Doesn’t Get Soggy — Finally
 Texas Roadhouse Style Baked Salmon with Sweet and Savory Glaze — Ready in Under 30 Minutes
 Grilled Chicken Wraps That Stay Crispy (Even the Next Day) — in 35 Minutes