
The first time I made beef stir fry at home, I chewed for an uncomfortable amount of time. The vegetables were fine. The sauce was decent. But the beef? It was like stir-fried shoe leather. I figured that was just how it went unless you had a flaming wok and twenty years of experience. Then I learned about velveting, and I’ve never gone back to tough beef since. In 45 minutes start to finish, this beef stir fry is the one my kids ask for by name — and the one I make on busy weeknights when I need something that actually tastes like I tried.
The short version: Velvet the beef for 20 minutes, sear it in batches, and this stir fry comes out tender, saucy, and better than takeout.
I’ve made this version at least thirty times now. I’ve tested it with flank steak, sirloin, and whatever sale cut looked good. It works every single time. My nine-year-old, who claims to hate “slippery” sauces, asked for it three weeks in a row. That’s the highest compliment I know.
- Serves: 4 as a main
- Hands-On Time: 30 min | Total Time: 45 min
- Difficulty: Easy once you’ve done it once — the velvet step is the only “extra”
- Cost per serving: About $4.50
- Calories: ~420 per serving
- Dietary Notes: Naturally gluten-free with tamari; easy to make dairy-free
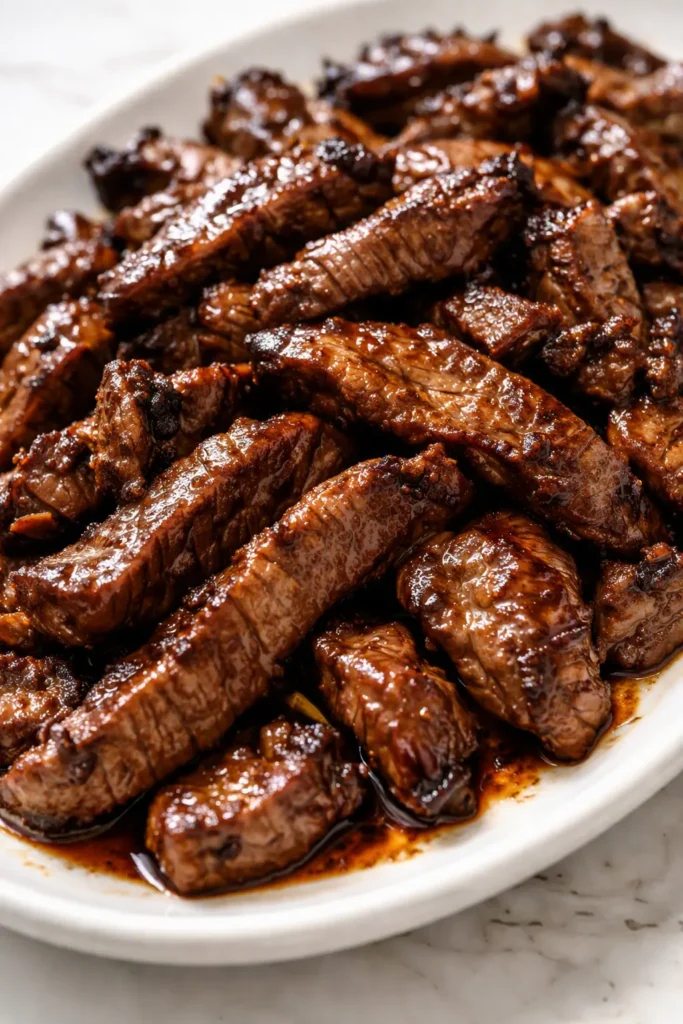
(Photo above: Overhead shot of the finished beef stir fry in a wide ceramic bowl — glossy sauce coating the beef strips, broccoli florets catching the light, and a scattering of toasted sesame seeds and sliced scallions on top. The bowl sits on a light wooden table with a fork resting on the rim and a linen napkin at the corner. Warm natural light from the left makes the sauce look lacquered.)
The Thing That Makes These Actually Tender (Not Chewy)
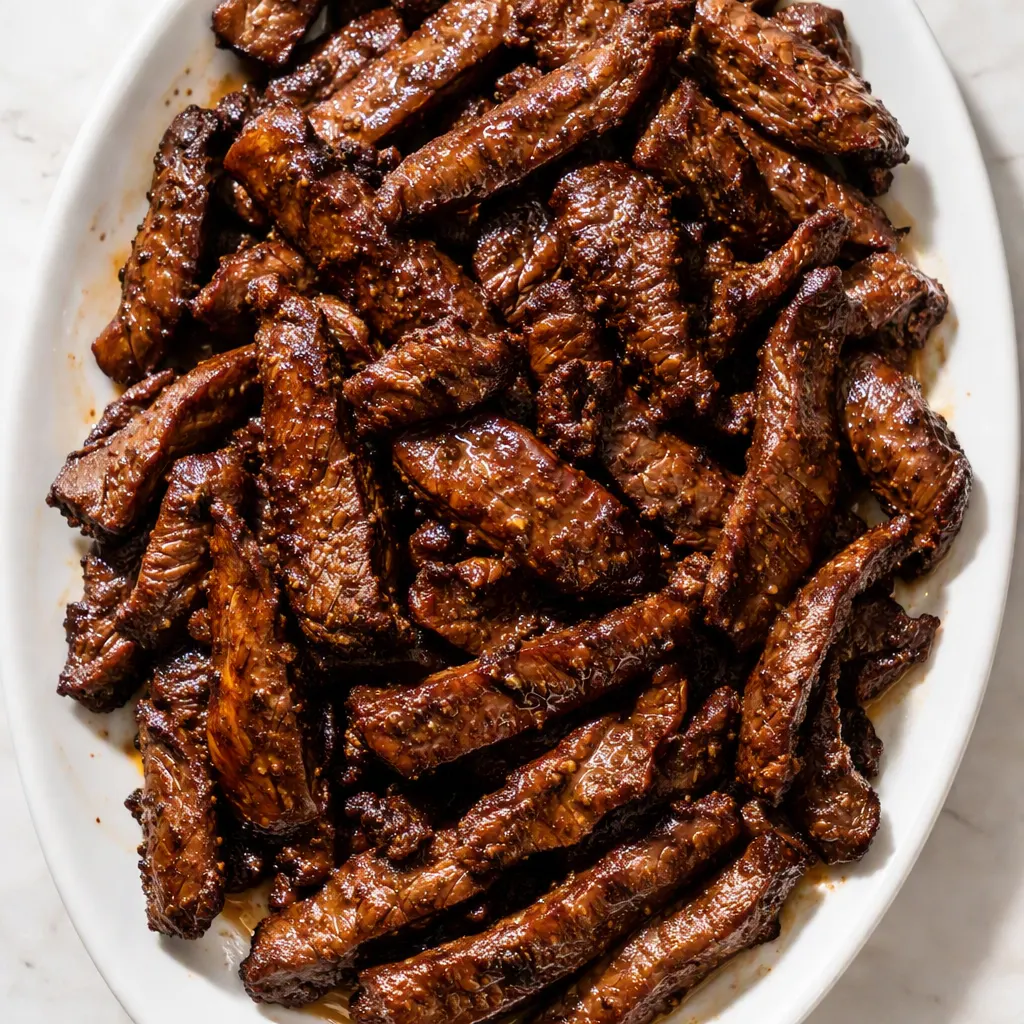
The secret is a technique called velveting. It sounds fancy, but it’s just a quick bath for the beef before it hits the pan. You coat thin slices of beef in a mixture of baking soda, cornstarch, soy sauce, and a little liquid. Let it sit for 20 minutes, rinse it off, and pat it dry. The baking soda gently changes the texture of the meat’s surface so it stays silky and tender even when you cook it fast and hot. That’s it. That’s the whole magic trick.
I learned this after way too many disappointing stir fries where I did everything “right” — got the pan screaming hot, cooked the beef quickly — and it still came out tough. The velvet step fixes it. Trust me on this one. It takes five minutes of hands-on time and it’s the difference between beef that makes you chew for too long and beef that melts.
And here’s what you get for the effort: beef that’s actually soft, vegetables that still have a little snap, and a glossy sauce that coats everything without turning into a puddle. This is the stir fry you want on a Tuesday when you’re tired and need something that feels like comfort.
Everything You Need (And a Few Notes From Me)
- 1 lb flank steak or sirloin, thinly sliced against the grain: This is the cut that does the job. Flank is ideal, but sirloin works great too. If you can only find stir-fry strips, that’s fine — just check they’re not too thick. My tip: pop the steak in the freezer for 15 minutes before slicing. It firms up just enough that you can cut it paper-thin without a fight. My husband thought I was being extra until he saw the difference.
- 1 tsp baking soda: The velvet secret. This is what makes the beef tender. Don’t skip it and don’t go overboard — a full teaspoon is plenty for a pound of meat. This one ingredient changed my entire weeknight stir fry game. I’m not exaggerating.
- 2 tbsp cornstarch, divided: Part of the velvet mixture and part of the sauce thickener. You’ll want it measured and ready before you start cooking.
- 3 tbsp low-sodium soy sauce (or tamari for gluten-free): The salty backbone. Low-sodium is important here because the sauce reduces and can get too salty otherwise. My kids genuinely can’t tell the difference when I use tamari, which makes this a safe weeknight win for us.
- 2 tbsp oyster sauce: This is the umami that makes it taste like takeout. It’s not the star of the show, but it’s doing a lot of quiet work. If you’re vegetarian, a mushroom oyster sauce works, though the flavor shifts a little.
- 1 tsp sugar: Just a pinch of balance. It rounds out the salt and brings the sauce together. My grandmother always said a little sugar makes salt taste saltier and savory taste more savory. She was right.
- 1/3 cup low-sodium chicken or beef broth: The liquid that turns the sauce into something coat-every-rice-grain glossy. Big flavor from a boring ingredient.
- 1 large head of broccoli, cut into small florets: The classic. Small florets are important so they cook fast and stay bright green. My daughter calls these “little trees” and eats them first, which feels like a tiny parenting win.
- 1 large red bell pepper, sliced thin: Color and sweetness. It holds its shape and adds the crunch in a sea of soft.
- 1 cup snap peas, trimmed: The texture contrast. They stay crisp and add a fresh snap to every bite. If you don’t have them, snow peas work too.
- 3 cloves garlic, minced: The aromatic backbone. Don’t skip it.
- 1 tbsp fresh ginger, grated: The bright nose-hitting warmth that makes stir fry taste like stir fry. Grate it on a microplane and you won’t get chunks — that’s the goal.
- 2 tbsp neutral oil (like canola or grapeseed), divided: High smoke point, no flavor competition.
- 1 tsp sesame oil (for the finish): This is the secret last touch. It’s not for cooking — it’s for drizzling over the top right before you serve. If you skip it, you’ll taste what’s missing, I promise.
- Sliced scallions and toasted sesame seeds (for garnish): The final visual and textural layer. Place them deliberately, don’t just shake them on like confetti.
What to Pull Out Before You Start
- A 12-inch wok or large skillet: A wok is ideal, but a large stainless or cast-iron pan works beautifully. Non-stick is okay too, but you won’t get quite the same char.
- A microplane: For the garlic and ginger. You already have one, I’m sure of it.
- A wooden spoon or spatula: Something sturdy to toss everything around.
- A colander: For rinsing the beef after its baking soda bath. Don’t skip this step.
- Paper towels: For pressing that beef dry. Pat, don’t rub.
That’s it. No special gadgets. I used to think I needed a carbon steel wok to make good stir fry — turns out my cast iron skillet does the job just fine.
Let’s Make It (Step by Step)
This goes fast once you start cooking, so read through everything once before you turn on the burner. The whole thing is about 45 minutes including the velvet time, and most of that is hands-off.
Prep and velvet: Slice the beef thinly against the grain. In a bowl, whisk together the baking soda, 1 tablespoon of cornstarch, 1 tablespoon of soy sauce, and 2 tablespoons of water. Toss the beef in this mixture until every strip is coated. Let it sit for 20 minutes at room temperature. This is the step that keeps everything from going tough — worth every minute.
- Rinse and dry: After 20 minutes, transfer the beef to a colander and rinse it thoroughly. This is the part people skip, but you have to do it — you’re washing off the baking soda, not keeping it. Press the beef dry with paper towels. Yes, it takes a few towels. It’s worth it. (📸 Photo tip: The beef should look pink and clean after rinsing — no white coating left. That’s how you know it’s ready.)
- Mix the sauce: In a small bowl, whisk together the remaining 1 tablespoon cornstarch, remaining 2 tablespoons soy sauce, oyster sauce, sugar, and broth. Set it aside near the stove. Stir it once more right before you add it, because cornstarch settles fast.
- Blanch the broccoli: Bring a small pot of water to a boil (or use a kettle). Drop the broccoli florets in for 60-90 seconds. You want them bright green and just barely tender. Drain, rinse with cold water, and set aside. This is my tired-night shortcut — it means the broccoli is guaranteed cooked through and you’re not standing at the stove wondering if it’s done. (📸 Photo tip: The broccoli should be vibrant emerald green here — that’s the color you want for “not overcooked.”)
- Preheat your pan: Place your wok or skillet over high heat and add 1 tablespoon of neutral oil. Wait until it shimmers and you can feel the heat rising. This matters. If the pan isn’t hot enough, the beef steams instead of sears.
- Sear the beef in two batches: Add half the beef in a single layer. Don’t touch it for 60-90 seconds. Let it develop a golden-brown sear. Then flip and cook for another 30-60 seconds until just cooked through. Remove to a plate. Repeat with the remaining oil and beef. Overcrowding the pan is how you end up with gray, steamed beef. Two batches is non-negotiable — I know it feels slower, but it’s actually faster than fixing a soggy mess.
- Cook the aromatics: Turn the heat down to medium, add the garlic and ginger to the pan, and stir constantly for about 20 seconds until fragrant. Don’t let them brown too much — that turns the garlic bitter. The kitchen will already smell incredible here.
- Add the veggies and sauce: Throw in the bell pepper and snap peas. Stir-fry for 2 minutes until they start to soften but still have crunch. Give the sauce one more stir, pour it in, and add the blanched broccoli and the beef. Toss everything together for 2-3 minutes as the sauce thickens and coats every piece. This is the moment when it suddenly looks like takeout and you feel like a genius.
- Finish: Turn off the heat. Drizzle the sesame oil over the top and give it one final toss. Taste and add a pinch of salt if it needs it — though between the soy and oyster sauce, it usually doesn’t.
That’s it. Plate it over rice or noodles, scatter the scallions and sesame seeds with intention, and get it to the table while it’s hot.
How I Meal Prep These for the Week
Stir fry is my Sunday afternoon secret weapon. I make a double batch on Sundays and we’re set for two weeknight dinners. The key is to do the prep on Sunday and the cooking on the night you eat. Slice the beef, velvet it, and store it in a zip-top bag in the fridge for up to 24 hours. Wash and cut the veggies, mix the sauce, and keep them separate. Then stir-frying takes about 10 minutes on the night. That is a gift to future-you.
- Fridge: Store leftovers in an airtight container for up to 3 days. Reheat in a skillet over medium-high heat for a few minutes to keep the beef from getting soggy.
- Freezer: Yes, you can freeze it! Let it cool completely, then store in a freezer-safe container for up to 2 months. The vegetables will soften a bit on thawing, but the beef stays tender. My little one has eaten this as a “thawed lunch” many times and never once complained.
- Reheat: Skillet is best. Microwave works in a pinch but it’ll make the broccoli a little mushier and the sauce not as glossy. Be honest with yourself about the standard you want on a Tuesday.
My Honest Advice After Making This 30-Plus Times
- Don’t skip the baking soda rinse: I know it feels weird to coat your meat in a science experiment and then wash it off. Do it anyway. The difference is night and day. Even if you mess up the timing a little — 15 minutes instead of 20 — it’s still fine. I’ve done it. It’s still so much better than without.
- Cut the beef against the grain: Look at the lines of muscle fiber in the raw beef and slice perpendicular to them. This shortens the fibers so they’re easier to chew. It takes two seconds to check and makes a bigger difference than any pan brand. My husband thought I was overthinking it until he tried both versions side by side.
- Get the pan screaming hot before you add the beef: You know the pan is ready when a drop of water skates across the surface like a tiny hockey puck. If it just sizzles, it needs another minute. A hot pan gives you that golden sear instead of gray steamed meat.
- Have everything prepped before you start: Stir fry is fast once it’s going. If you stop to mince garlic mid-cook, the pan gets too hot and the beef overcooks. I put all my little bowls out on the counter before I even turn on the stove. It feels organized and it means the whole thing comes together in a blaze of controlled chaos.
Swaps That Actually Work
- Gluten-Free: Swap the soy sauce for tamari and double-check your oyster sauce label. Many brands are gluten-free, but some aren’t. There are also good vegetarian oyster sauces that work well here. This is the version I make when we have friends over — nobody has ever known the difference.
- Dairy-Free: This is already dairy-free naturally, which is a nice surprise. Just make sure the broth is dairy-free and you’re done. No changes needed.
- Spicy Version: Add 1-2 teaspoons of chili garlic sauce or sriracha to the sauce mixture. My teenagers love it this way. For the adults-only version, I add some fresh sliced Thai chilis at the end for heat and a little extra kick. My kids need the mild version — I do the spicy one after bedtime.
- Protein Substitution: Chicken or shrimp both work beautifully here. For chicken, use thighs or breasts cut thin and velvet them the same way. For shrimp, skip the velveting and just cook until pink. I’ve done chicken on a night when the store was out of flank steak — it takes the same sauce and veggies like a champ.
- Vegetable Variation: Use whatever you have on hand. Carrots, mushrooms, baby corn, or bok choy all do great. The key is to cut them similar in size so they cook evenly. I’ve cleaned out the crisper drawer more times than I can count with this recipe.
Questions I Get About This Recipe All the Time
Q: Why did my beef turn out tough even though I followed the steps?
A: Ugh, I’ve been there. It’s almost always one of two things. Either you cut it with the grain instead of against it (check the muscle fibers next time and cut perpendicular to them), or you overcrowded the pan so it steamed instead of seared. Cook in two batches like I said above — it’s not a suggestion. Even if you mess up, the velvet step probably still helped. You’ve got this next time.
Q: Can I make this ahead of time?
A: Yes, you can. Cook it completely, cool it fast, and let it hang out in the fridge for up to 3 days. Reheat in a skillet with a splash of water to bring the sauce back to life. The beef stays tender and the flavors actually get even friendlier overnight. Make the rice fresh when you eat it. This is what I do for lunches during the week — it’s better than any sad desk salad that’s for sure.
Q: How long does this last in the fridge? Can I freeze it?
A: It stays good for up to 3 days in an airtight container. And yes, you can freeze it for up to 2 months. The vegetables will lose a little crunch after freezing and thawing, but the beef stays tender because of the velveting. That’s the magic that keeps on giving. My husband and I have eaten freezer leftovers of this more times than I’d like to admit.
Q: What do you serve with this?
A: We do jasmine rice on weeknights — it’s easy and everyone loves it. But honestly, it’s incredible over rice noodles or even just on its own with a side of steamed edamame. My family loves it with extra rice to soak up all the sauce. My daughter eats it with white rice and calls it “sauce soup” — we don’t judge in this house.
More Recipes My Family Makes on Repeat
Stir fry night is run by this recipe, but it’s not the only dish that gets the “make this again” vote at our table. If you liked this one, here are a few others that get the same reaction:
- Sheet Pan Chicken Fajitas — One pan, zero fuss, and the peppers come out perfect every time.
- Easy Garlic Butter Shrimp Pasta — This is our favorite splurge night, and it takes less than 30 minutes.
- Creamy Sun-Dried Tomato Chicken with Spinach — The kind of dinner that feels fancy but secretly only needs one skillet.
Make this on a night when you need something that tastes like a real meal, not just something to get through. When the sauce is glossy, the beef is tender, and everyone at the table is going for seconds, it’s the best kind of reminder that good cooking doesn’t have to be complicated.
If you try it, drop a comment below — I love hearing how it goes for you! And tag me on Pinterest or Instagram so I can see your photos.
📌 This tender beef stir fry recipe with the velveting trick stays juicy even as leftovers — save it for your next busy weeknight dinner when you need something better than takeout.
Beef Stir Fry That’s Actually Tender – With the Velveting Trick Restaurants Use
Equipment
- Wok or Large Skillet
- Mixing bowl
- Colander
- Microplane
- Wooden spoon or spatula
- Paper towels
Ingredients
For the Velvet Marinade
- 1 lb flank steak or sirloin, thinly sliced against the grain
- 1 tsp baking soda
- 1 tbsp cornstarch
- 1 tbsp low-sodium soy sauce or tamari
- 2 tbsp water
For the Stir-Fry Sauce
- 1 tbsp cornstarch
- 2 tbsp low-sodium soy sauce or tamari
- 2 tbsp oyster sauce
- 1 tsp sugar
- 1/3 cup low-sodium chicken or beef broth
For the Vegetables and Aromatics
- 1 head broccoli, cut into small florets
- 1 large red bell pepper, sliced thin
- 1 cup snap peas, trimmed
- 3 cloves garlic, minced
- 1 tbsp fresh ginger, grated
- 2 tbsp neutral oil, like canola or grapeseed, divided
- 1 tsp sesame oil, for the finish
- sliced scallions and toasted sesame seeds for garnish
Instructions
- Slice the beef thinly against the grain. In a bowl, whisk together the baking soda, 1 tablespoon cornstarch, 1 tablespoon soy sauce, and 2 tablespoons water. Toss the beef until every strip is coated and let it sit for 20 minutes at room temperature.
- Transfer the beef to a colander and rinse thoroughly to wash off the baking soda. Press it dry with paper towels. The beef should look pink and clean with no white coating left.
- In a small bowl, whisk together the remaining 1 tablespoon cornstarch, remaining 2 tablespoons soy sauce, oyster sauce, sugar, and broth. Set it near the stove and stir once more right before adding.
- Bring a small pot of water to a boil. Drop in the broccoli florets for 60 to 90 seconds until bright green and just tender. Drain, rinse with cold water, and set aside.
- Place a wok or large skillet over high heat and add 1 tablespoon of neutral oil. Wait until it shimmers. If you drop a bit of water in the pan, it should skate across the surface.
- Sear the beef in two batches. Add half the beef in a single layer and leave it untouched for 60 to 90 seconds until golden brown. Flip and cook 30 to 60 seconds more until just cooked through. Remove to a plate and repeat with the remaining oil and beef.
- Turn the heat down to medium. Add the garlic and ginger and stir constantly for about 20 seconds until fragrant. Do not let them brown too much.
- Add the bell pepper and snap peas and stir-fry for 2 minutes until they start to soften but still have crunch. Stir the sauce once more, pour it in, and add the broccoli and beef. Toss everything for 2 to 3 minutes as the sauce thickens and coats every piece.
- Turn off the heat. Drizzle the sesame oil over the top and give it one final toss. Taste and add a pinch of salt if needed. Serve over rice or noodles with sliced scallions and toasted sesame seeds placed on top with intention.
Notes
Related Recipes:
 Cheesy Hamburger Casserole Bake That’s Ready in 40 Minutes (No Canned Soup Here)
 Creamy Garlic Tagliatelle That Looks Like a Restaurant Dish in 20 Minutes
 Texas Roadhouse Style Baked Salmon with Sweet and Savory Glaze — Ready in Under 30 Minutes
 Easy Italian Meatloaf That’s Actually Juicy (Not Dry) — in 1 Hour
 The Biscuits and Gravy Casserole That’s Actually Crispy on Top (And Ready in 40 Minutes)
 Air Fryer Chicken and Vegetables That Don’t Taste Like a Regret (30 Minutes, One Pan)