
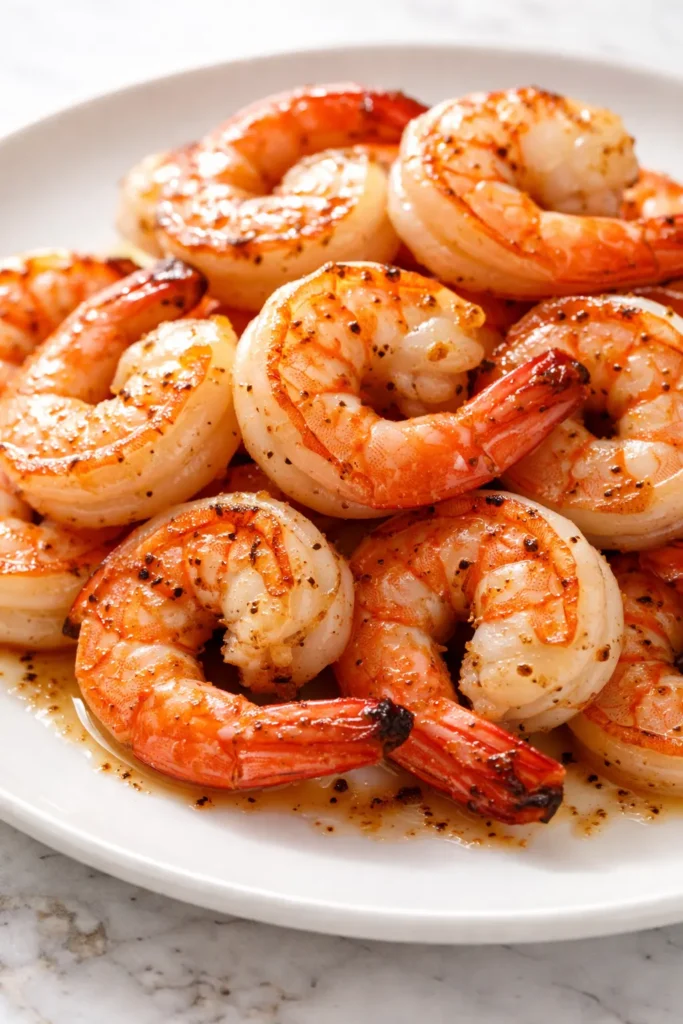
The moment those shrimp curl into tight little C-shapes and turn that perfect pink-orange, I know dinner is saved. In my house, this 10-minute sauté is the weeknight hero that never fails — fast enough for the nights when I’m staring at the fridge wondering what to make, and good enough that my kids have started asking for “that shrimp thing” on repeat.
The short version: Juicy, garlicky, buttery shrimp in exactly 10 minutes — and you don’t need a restaurant to get that perfect sear.
I’ve made this version probably fifty times now, tweaking it down to the exact heat level and timing that give you shrimp that’s tender, not rubbery. My four-year-old says it’s “the best shrimp ever” — which, coming from a kid who picks at most protein, is basically a Michelin star.
- Serves: 4 as a main, or 6 as an appetizer
- Hands-On Time: 10 min | Total Time: 10 min
- Difficulty: Easy — even on a frantic Tuesday
- Cost per serving: ~$3
- Calories: ~200 per serving
- Dietary Notes: Naturally gluten-free, easily dairy-free
(Photo above: Overhead shot of the sautéed shrimp in a large cast iron skillet, glistening with garlic butter and flecked with fresh parsley, natural light from the side catching the golden pan. A small bowl of lemon wedges sits to the right.)
The Secret to Shrimp That’s Never Overcooked
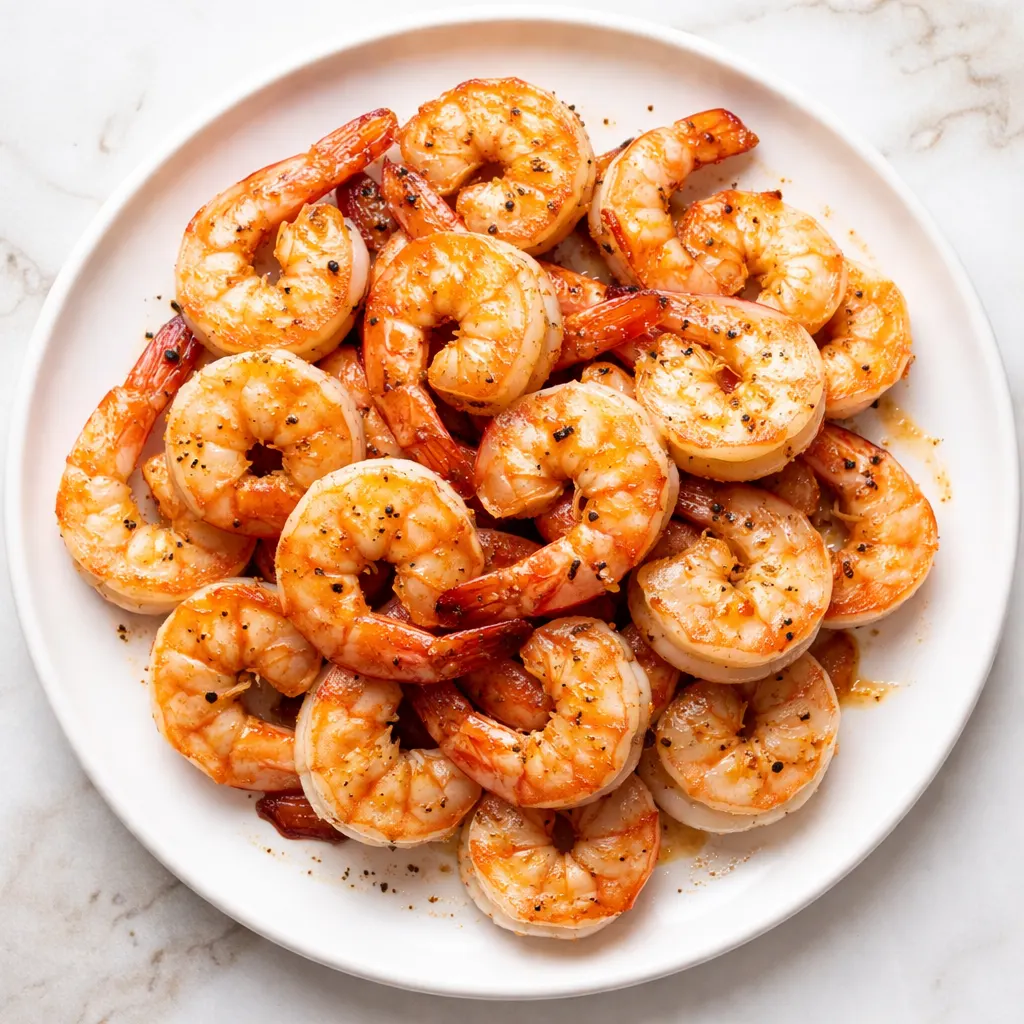
Most people overcook shrimp because they’re afraid to leave it in the pan long enough — but the real problem is usually too much moisture. If you put wet shrimp into a hot pan, you’re steaming it, not searing it. The shrimp releases liquid, the temperature drops, and you end up with gray, rubbery little ovals.
The trick is to pat the shrimp dry with paper towels before you do anything else. Like, really dry. Then use a hot pan and a high smoke-point oil, and don’t crowd the skillet — cook in two batches if you have to. That gives you a golden-brown sear on the outside while the inside stays tender and juicy. I learned this the hard way after way too many batches of sad, watery shrimp.
What this produces: Shrimp that’s opaque and firm, with a slight caramelized edge, coated in a garlic-butter sauce that’s begging to be sopped up with bread or tossed with pasta. In ten minutes flat.
Everything You Need — Plus My Honest Notes
- 1 pound large shrimp (16-20 count), peeled and deveined: The bigger the shrimp, the harder it is to overcook. Leave the tails on for looks and flavor, or take them off for easier eating — I’ve done both. Pro tip: If you use frozen shrimp, thaw them in a bowl of cold water for 10 minutes, then dry them extra well. My kids don’t notice the difference when I skip fresh.
- 2 tablespoons extra-virgin olive oil or avocado oil: Avocado oil has a higher smoke point, which means you can get the pan screaming hot without burning. But olive oil works — just don’t let it smoke. I use avocado oil on weeknights and feel very fancy about it.
- 4 cloves garlic, thinly sliced: Sliced, not minced — thin slices brown more evenly without burning. Minced garlic burns in seconds. Trust me on this one.
- 3 tablespoons unsalted butter: Butter adds that rich, nutty finish. If you’re dairy-free, use a good quality plant-based butter or just extra olive oil — still delicious. My husband thinks the butter is non-negotiable. I make the dairy-free version for my sister and she doesn’t complain.
- 1/2 teaspoon kosher salt, plus more to taste: Salt helps draw out moisture, so don’t skip it — but don’t overdo it either. Start with 1/2 teaspoon and add more at the end if needed.
- 1/4 teaspoon freshly ground black pepper: Freshly ground makes a difference here — pre-ground is fine but the flavor is less punchy.
- 2 tablespoons fresh lemon juice (about 1 lemon): Acid finishes the dish and cuts through the richness. Without it, the butter feels heavy. With it, you get that restaurant-quality brightness.
- 2 tablespoons fresh parsley, chopped: Flat-leaf or curly — I prefer flat-leaf for its mild flavor. But honestly, chives work too. My kids don’t notice the parsley, so I’ve started using it even when I think they’ll complain.
- Optional: red pepper flakes for heat: A pinch if you like heat. I add it sometimes after the kids are in bed.
What to Pull Out Before You Start
- Large (12-inch) skillet: Cast iron or stainless steel works best. Non-stick is okay but won’t give you as good a sear.
- Tongs or a slotted spatula: For flipping the shrimp easily.
- Paper towels: For drying the shrimp — this is not optional.
- Small bowl for the shrimp after cooking (or just serve straight from the pan).
If you don’t have a 12-inch skillet, use a 10-inch one and cook the shrimp in two batches. Crowding the pan is the fastest way to rubbery shrimp.
Here’s How I Do It — No Fancy Skills Required
This goes fast, so have everything ready before you start. The whole thing is about 8 minutes of actual cooking, and you don’t want to be hunting for the lemon while garlic burns.
Prep: Pat the shrimp very dry with paper towels — lay them out in a single layer on a plate and press another paper towel on top. Then season with salt and pepper.
- Heat the pan: Place your skillet over medium-high heat for a good 2 minutes until it’s hot. Add the olive oil and swirl to coat. (📸 Photo tip: You should see thin wisps of smoke rising from the oil — that’s your cue that the pan is ready.)
- Sear the shrimp: Add the shrimp in a single layer — don’t crowd. You should hear an immediate sizzle. Let them cook undisturbed for 2 minutes. The bottoms should turn golden-brown. If you skip this first sear, you’ll lose that crispy edge. I’ve made that mistake.
- Flip and add garlic: Flip each shrimp with tongs. Immediately add the sliced garlic to the pan around the shrimp (not directly on them, so the garlic doesn’t burn). Cook for 1 minute, stirring the garlic gently.
- Add the butter: Drop the butter into the pan. As it melts, tilt the pan slightly and spoon the melted butter over the shrimp — this is called basting. It takes about 30 seconds and makes the shrimp glossy and rich. (📸 Photo tip: The butter should be bubbling and the garlic fragrant — the shrimp will look lacquered.)
- Finish with lemon and parsley: Squeeze the lemon juice over the shrimp, add the parsley (and red pepper flakes if using), and toss everything together for another 30 seconds. The shrimp should be opaque and firm to the touch. When I’m really tired, I skip the basting and just toss everything together — it still tastes amazing.
- Serve immediately: Transfer to a serving platter or straight to plates. Spoon any remaining garlic butter over the top.
Don’t walk away during step 4 — the butter can burn fast. Keep it moving.
How I Meal Prep These for the Week
This recipe is so fast that I rarely batch-cook the finished shrimp — they’re best fresh. But I do prep the ingredients so that cooking takes even less time. On Sunday, I peel and devein the shrimp, slice the garlic, and chop the parsley, then store everything separate. When Thursday hits and I’m exhausted, I can have this on the table in 7 minutes flat.
- Fridge: Cooked shrimp in an airtight container for up to 2 days. Reheat in a hot skillet for 1 minute per side — don’t microwave, or they’ll turn rubbery.
- Freezer: Not recommended. Cooked shrimp get watery and lose texture when thawed.
- Reheat: Skillet over medium-high heat with a tiny splash of water or white wine to loosen the sauce, about 1 minute.
Things I Wish I’d Known the First Time
- Pat the shrimp dry like it’s your job: The #1 mistake is wet shrimp. Even if you’re using frozen-thawed shrimp, take an extra 30 seconds to press them dry with paper towels. I used to skip this and wonder why my shrimp were sad. Not anymore.
- Don’t crowd the pan: If you put too many shrimp in at once, they steam instead of sear. You’ll end up with gray, watery shrimp. Cook in batches if you need to — it only adds 3 minutes total.
- Use large shrimp (16-20 count): Smaller shrimp cook in half the time and are way easier to overcook. Big shrimp are more forgiving and look more impressive on the plate. My local grocery store sells them frozen in a bag — I always grab a bag for emergency dinners.
- Save the lemon finish for the very end: If you add lemon juice too early, the acid can denature the shrimp, making them tough. Squeeze it right before you take them off the heat. Even if you mess up the timing, it’ll still be good — I’ve done it and the kids didn’t complain.
- Taste before you add more salt: The lemon and butter already bring plenty of flavor. Start with the 1/2 teaspoon in the prep, then adjust at the table.
Swaps That Actually Work
- Dairy-Free: Use 3 tablespoons of olive oil or a good plant-based butter instead of dairy butter. The texture is slightly less glossy but the flavor is still fantastic. This is the version I make for my dairy-allergic nephew — he asks for seconds.
- Spicy: Add 1/4 teaspoon red pepper flakes along with the garlic. My husband loves this version; I make it when the kids have already eaten. For a kid-friendly version, skip the heat but add a pinch of smoked paprika — it gives a warm flavor without any burn.
- Lemon-Herb: Add 1 tablespoon fresh thyme or oregano along with the parsley. Lemon and thyme are a classic combo. This is my “fancy for guests” version — takes 30 extra seconds.
- Garlic Butter Pasta: Toss the cooked shrimp with 8 ounces of cooked linguine and a splash of pasta water — dinner for a crowd in 15 minutes.
- Cajun Style: Swap the parsley for 1 teaspoon each of paprika, garlic powder, and onion powder. Add it with the salt. My sister-in-law from New Orleans taught me this — it’s amazing over rice.
Questions I Get About This Recipe All the Time
Q: Why did my shrimp turn rubbery?
A: Ugh, I’ve been there. Almost always it’s from overcooking or overcrowding the pan. For large shrimp, you need only about 3–4 minutes total — 2 minutes on the first side, 1 minute after flipping, then 30 seconds with the butter. If your shrimp are small, cut that time in half. Also, make sure the pan is hot before you add the shrimp — if it’s not screaming hot, they’ll cook too slowly and toughen up. You’ve got this next time.
Q: Can I use frozen shrimp without thawing?
A: Honestly, not for this method. Frozen shrimp release too much water, which means they’ll steam instead of sear. Thaw them first in a bowl of cold water for 10 minutes, then pat dry. If you’re in a real pinch, you can boil them from frozen (just toss them into boiling salted water for 2–3 minutes) but you won’t get that beautiful golden sear. I keep a bag in the freezer and always thaw before cooking — it’s worth the extra 10 minutes.
Q: How long does this last? Can I freeze it?
A: Cooked shrimp keep in the fridge for 2 days max. I don’t recommend freezing — they turn mushy when thawed. For the best texture, make it fresh. But if you have leftovers, reheat them in a hot skillet with a splash of water or white wine for about 1 minute per side. Don’t microwave — it’s a texture tragedy.
Q: What do you serve with sautéed shrimp?
A: I like it over a simple green salad with lemon vinaigrette, or with crusty bread to soak up the garlic butter. It’s also amazing over pasta (throw in some cherry tomatoes), or with rice and steamed broccoli. My kids love it with buttered noodles — they call it “fancy shrimp pasta night.” If I’m feeling extra, I sear some lemon slices in the pan before adding the shrimp — they caramelize and add a burst of brightness.
More Recipes My Family Makes on Repeat
If you liked this one, here are a few others that get the same reaction at our table:
- Garlic Butter Pasta with Shrimp — The same garlic butter magic, but with pasta and a 15-minute total time.
- [INTERNAL LINK PLACEHOLDER: Sheet Pan Lemon Herb Salmon] — Another weeknight hero that cooks on one pan with almost no cleanup.
- [INTERNAL LINK PLACEHOLDER: 5-Minute Oven-Roasted Broccoli] — My go-to veggie side that goes with literally everything.
I love that this recipe has become my emergency dinner when I have nothing planned — it’s fast enough that I can start it after a late work call, and it always feels like a treat, not a scramble. If you try it, drop a comment below — I love hearing how it goes for you!
📌 Save this sautéed shrimp recipe for your next weeknight dinner when you need something fast that feels special — it’s the 10-minute hero every busy cook needs.
Sautéed Shrimp That’s Actually Juicy (Not Rubbery) — in 10 Minutes
Equipment
- Large Skillet
- Tongs
Ingredients
- 1 lb large shrimp (21-25 count), peeled and deveined
- 2 tbsp olive oil or avocado oil
- 3 cloves garlic, thinly sliced
- 2 tbsp unsalted butter (or vegan butter)
- 1/2 tsp kosher salt
- 1/4 tsp red pepper flakes (optional)
- Lemon wedges, for serving
- Fresh parsley, for serving
Instructions
- Prep the shrimp: Place shrimp on a sheet pan lined with paper towels. Pat them completely dry on both sides. Season with kosher salt and red pepper flakes.
- Heat the pan: Heat the oil in a large skillet over medium-high heat until it shimmers — about 2 minutes. You should see thin, wavy lines across the surface.
- Sear the shrimp: Add shrimp to the pan in a single layer. Do not crowd them; work in batches if needed. Cook without moving for 2 minutes, until the edges turn pink and the bottoms develop golden spots.
- Flip and finish cooking: Flip each shrimp with tongs. Cook for 1 more minute on the second side. The shrimp should be opaque and just barely firm to the touch.
- Add garlic and butter: Push the shrimp to the edges of the pan, creating a space in the center. Add the butter and sliced garlic to the center. Let the butter melt and foam for about 30 seconds, swirling the pan occasionally. Then toss everything together so the shrimp are coated in the garlic butter.
- Finish and serve immediately: Remove the pan from the heat. Squeeze a lemon wedge over the top. Sprinkle with fresh parsley. Serve immediately on a platter or over a bed of greens.
Notes
Related Recipes:
 Cheesy Hamburger Casserole Bake That’s Ready in 40 Minutes (No Canned Soup Here)
 Lemon Capellini Salad for Late Summer Evenings: Bright, Tangy, Ready in 20 Minutes
 Creamed Cabbage and Ground Beef Casserole That’s Rich, Tender, and Done in 45 Minutes
 Grilled Peach Burrata Salad That Tastes Like a Fancy Restaurant — at Home in 20 Minutes
 Creamy Garlic Tagliatelle That Looks Like a Restaurant Dish in 20 Minutes
 The Creamy Green Sauce Pasta That Looks Like You Made It for Instagram (But Tastes Even Better)