
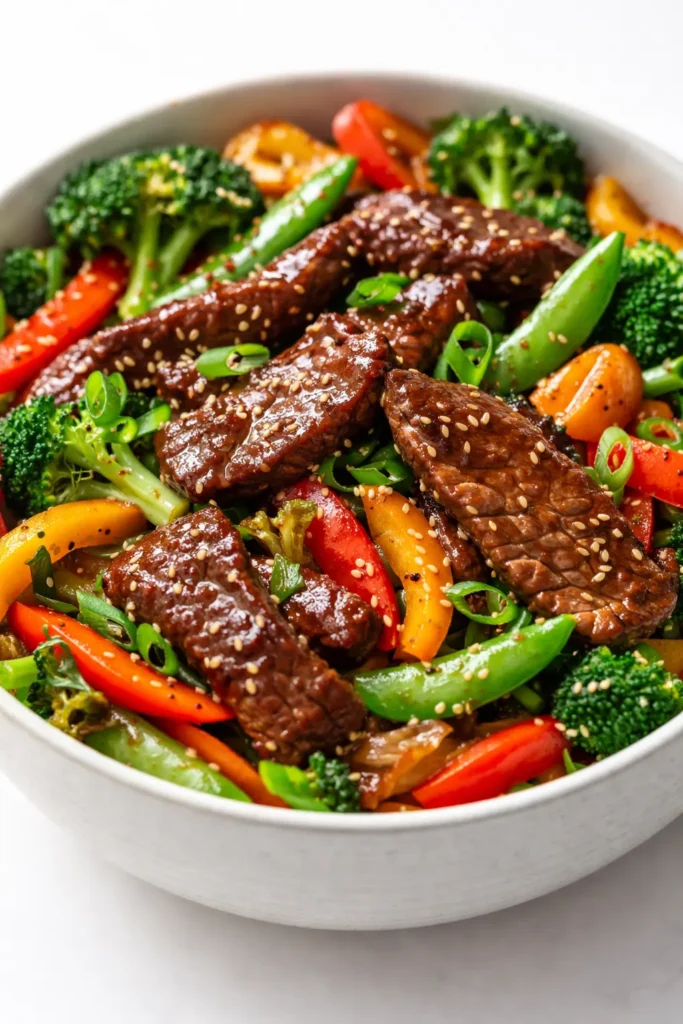
That first sound — the aggressive, restaurant-level sizzle when marbled beef hits a screaming-hot pan — is the kind of kitchen noise that makes everyone wander in asking what’s for dinner. And the answer, if you’ve done it right, is a stir fry that’s genuinely crisp, properly saucy, and nothing like the sad, soggy version most weeknight recipes produce. The vegetables still have bite. The beef is caramelized, not gray. And the whole thing comes together in the time it would take you to scroll through delivery options.
The short version: Twenty minutes, one pan, better than anything you can order from the place down the street.
I’ve made this roughly once a week for the last two winters. It’s the recipe my friends text me about — not because it’s complicated, but because it’s the one they actually make on a Tuesday when they need dinner to be fast and still look like they tried.
- Serves: 4 as a main with rice
- Hands-On Time: 20 min | Total Time: 20 min
- Difficulty: Easy — the only trick is heat management
- Cost per serving: ~$4.50
- Calories: ~410 per serving
- Dietary Notes: Naturally gluten-free with tamari; adaptable for dairy-free, nut-free
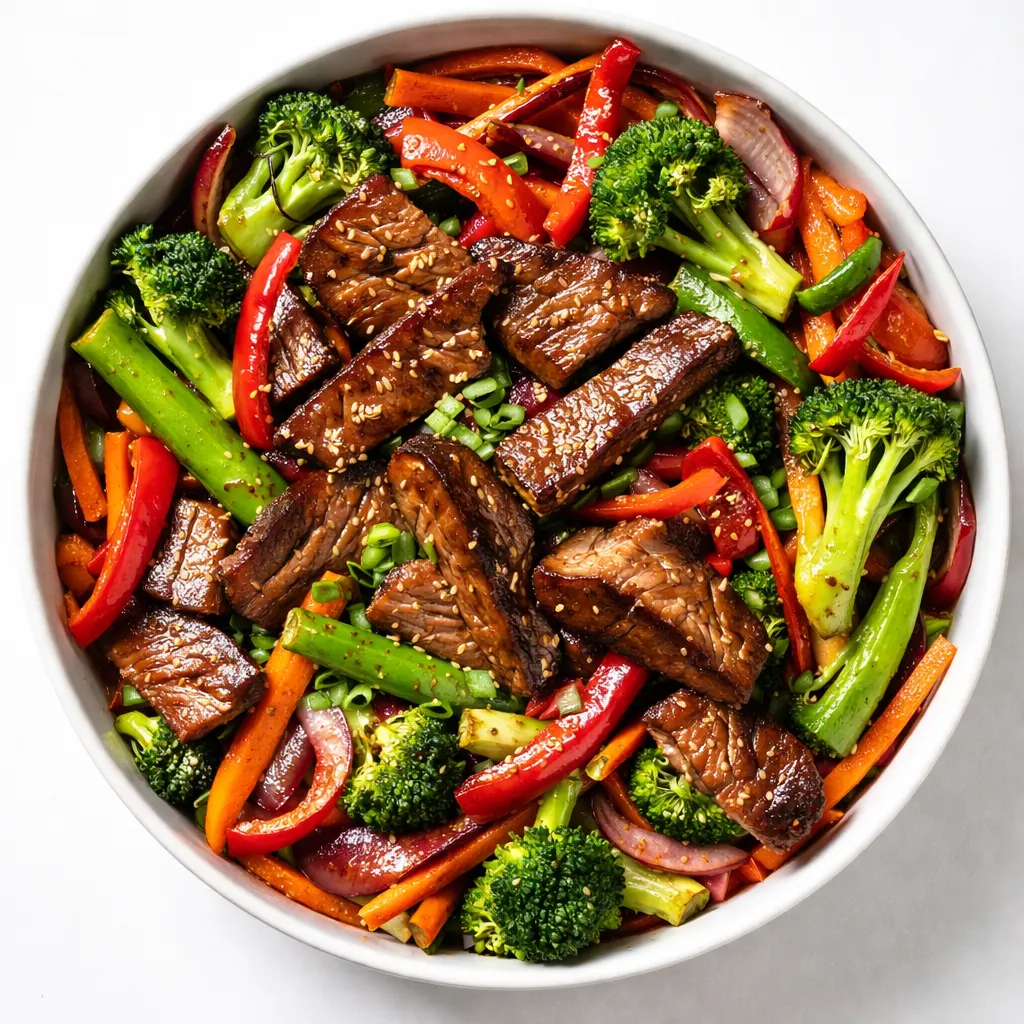
(Photo above: overhead shot of the finished stir fry in a wide, shallow bowl, steam rising, beef and vegetables glossy with sauce, a few sesame seeds scattered on top, natural evening light from a nearby window.)
The Thing That Makes This Actually Crisp (Not Soggy)
The enemy of a good stir fry is steam. When you crowd the pan — or add the sauce too early — the beef releases moisture and starts braising instead of searing. The vegetables go limp. The sauce turns into a puddle. And you end up with something that tastes fine but looks and feels like a cafeteria steam-table special.
Here’s what fixes it: cook in batches, keep the heat high, and add the sauce at the very end. The beef gets a proper sear because it has room to breathe. The vegetables stay bright because they’re in and out of the pan in under two minutes. And the sauce coats everything in a thin, clingy layer instead of pooling at the bottom of the bowl. I learned this the hard way after way too many soggy stir fries that tasted good but photographed like regret.
One more thing: pat the beef dry before it hits the pan. Paper towel, a quick press, done. Wet beef steams. Dry beef sears. That one step does more for the final texture than any fancy marinade.
Everything You Need (And a Few Notes From Me)
- 1 lb flank steak or sirloin, thinly sliced against the grain: Flank steak is my go-to — it’s affordable, slices beautifully, and has enough fat to stay tender under high heat. Sirloin works too if that’s what you have. Slice it about ¼-inch thick, and make sure the knife is sharp. Ragged slices cook unevenly. I usually pop the beef in the freezer for 15 minutes before slicing — it firms up just enough to make thin, even cuts easy. Game changer if you’ve ever struggled with squishy raw meat.
- 2 bell peppers (any color), thinly sliced: Red and orange are sweeter and look better on the plate than green, which can turn a little bitter. Slice them into roughly 2-inch strips so they match the beef in size and cook at the same rate. My friend’s kid refuses to eat green bell peppers but inhales the red ones — so that’s what I use.
- 1 small head of broccoli, cut into florets: Broccoli adds the texture contrast this dish needs — a little earthy, a little crunchy, great for catching sauce. Cut the florets small, about bite-size, so they cook through in under two minutes. Pro tip: if your broccoli stems are thick, peel them with a vegetable peeler and slice them thin — they’re just as good as the florets and nobody should be wasting that part.
- 1 large carrot, julienned or sliced thinly on the bias: Carrot adds sweetness and color. The bias cut gives you more surface area for the sauce to cling to, and it looks nicer on the plate than a plain round slice. If you have a julienne peeler, this takes 30 seconds. If not, just slice thin and call it rustic.
- 3 cloves garlic, minced: Garlic goes in at the last minute — right before the sauce — so it doesn’t burn. Burnt garlic is bitter, and there’s no fixing it. I microplane mine directly into the pan. Even distribution, zero chunks, maximum flavor.
- 1 tablespoon fresh ginger, minced: Ginger and garlic together are the flavor backbone of this whole operation. Fresh matters here — powdered ginger will taste flat and dusty. Peel it with the edge of a spoon — you’ll waste less than with a knife.
- For the sauce: ¼ cup soy sauce (or tamari for gluten-free), 2 tablespoons oyster sauce, 1 tablespoon rice vinegar, 1 teaspoon sugar, 1 teaspoon cornstarch, 2 tablespoons water. The cornstarch is what gives the sauce its glossy, clingy texture — don’t skip it. Whisk everything together in a small bowl before you start cooking so you can add it all at once.
- 2 tablespoons neutral oil (avocado, grapeseed, or peanut): High smoke point oils only — olive oil will burn and taste acrid. Avocado oil is my standard here. Peanut oil is traditional and adds a faint nuttiness, but use what you have.
- For garnish: Sesame seeds, sliced green onions, and a drizzle of sesame oil to finish. This is the plating move that makes it look intentional — the sesame seeds read as texture, the green onions as freshness, and the sesame oil as a glossy finish.
What to Pull Out Before You Start
- A 12-inch skillet or wok — cast iron or carbon steel if you have it, but any heavy pan works. Nonstick is fine but won’t give you the same sear. A wok is ideal because the high sides let you toss everything without spilling, but a large skillet is what most of us have and it works perfectly.
- A small bowl for the sauce (pre-mix everything)
- A plate or tray for the cooked beef while you do the vegetables
- A sharp knife and a cutting board
Let’s Make It (Step by Step)
This one moves fast once you start, so read through the steps once before you turn on the heat. The active cooking time is about 8 minutes total — the rest is prep.
Prep everything first: Slice the beef, chop the vegetables, mince the garlic and ginger, whisk the sauce. Once that flame is on, there will not be time to chop anything. Mise en place sounds fancy but it just means “don’t be the person mincing garlic while your beef burns.”
- Heat the pan: Set your skillet or wok over high heat and let it get aggressively hot — about 2 minutes for cast iron, 90 seconds for carbon steel. Add 1 tablespoon of the oil and swirl to coat. The oil should shimmer the second it hits the pan. (📸 Photo tip: At this point, the pan should be lightly smoking — that’s your cue that it’s hot enough. If you’re not seeing any wisps of smoke, wait another 30 seconds.)
- Sear the beef in batches: Add half the beef in a single layer — don’t crowd it. Let it cook undisturbed for 60 seconds until the bottom is deeply browned. Toss and cook another 30 seconds for medium-rare, or 60 seconds for well-done. Transfer to a plate. Repeat with the remaining beef and another tablespoon of oil if needed. This is the step that makes or breaks the dish. If you dump all the beef in at once, it steams instead of searing and you lose that brown crust. Two batches takes two extra minutes and changes everything.
- Cook the aromatics: Reduce heat to medium-high. Add the remaining ½ tablespoon of oil, then the garlic and ginger. Stir constantly for about 15 seconds until fragrant but not brown. If the garlic starts to darken, pull the pan off the heat for a few seconds — burnt garlic will ruin the whole dish. (📸 Photo tip: You should see the garlic and ginger sizzle immediately — that’s how you know the oil temperature is right.)
- Add the vegetables: Toss in the broccoli, bell peppers, and carrots. Cook for 60–90 seconds, stirring or tossing constantly. The vegetables should turn bright in color and still have a slight crunch — they’ll continue cooking slightly after you add the sauce. If you like your vegetables softer, give them an extra 30 seconds here. I prefer them with bite, because the sauce softens them just enough.
- Add the sauce: Give your pre-mixed sauce a quick whisk (the cornstarch settles fast) and pour it into the pan. Stir immediately to coat the vegetables. The sauce will thicken in about 15 seconds and turn glossy. This is the moment where it all comes together — the color, the sheen, the smell.
- Return the beef: Add the seared beef back to the pan, along with any accumulated juices from the plate. Toss everything together for about 20 seconds until the beef is warmed through and coated in sauce. Don’t let the beef sit in the sauce too long or it will start to lose its sear — just long enough to reheat.
- Finish and serve: Remove from heat. Drizzle with sesame oil, sprinkle with sesame seeds and sliced green onions. Serve immediately over steamed rice. This does not wait well — stir fry is a now-food. Have your rice ready before you start cooking. Even if the sauce pools a little on the plate, don’t stir it into the rice until you’re eating — it looks better on the plate as a separate element.
How I Meal Prep This for the Week
I make a double batch of the components on Sunday and we’re set for two fast weeknight dinners. The trick is storing everything separately — if you combine the cooked elements before reheating, you get a sad, steamy mess that tastes like leftovers. Don’t do it.
- Fridge: Store the cooked beef, cooked vegetables, and sauce in separate containers. They’ll keep for up to 4 days. Reheat the beef and vegetables in a hot skillet for about 90 seconds, then add the sauce and toss. I’ve also just microwaved the components separately and combined them — not as good, but still better than takeout on a night when I have zero energy.
- Freezer: I don’t recommend freezing the finished dish — the vegetables lose their texture completely when thawed. But you can freeze the raw sliced beef (with the marinade, if using) for up to 3 months. Thaw in the fridge overnight before cooking.
- Reheat: Skillet is best — high heat, 60 seconds per side for the beef, then combine. The microwave works in a pinch but the vegetables will be softer and the sauce won’t cling the same way. Be honest with yourself about how much the texture matters to you on a given night.
Things I Wish I’d Known the First Time
- Pat the beef dry: I mentioned this above but it bears repeating. Wet beef doesn’t sear — it steams. A dry surface is the single most important factor for getting that brown crust. Use paper towels, press firmly, and don’t skip it even if you’re in a rush. I know it feels like an extra step you don’t need. It’s the one that matters most.
- Don’t stir the beef for the first 60 seconds: Let it sit in the hot pan without moving. The Maillard reaction needs contact time. If you’re tossing and stirring immediately, you’re interrupting the browning. Set a timer if you have to — 60 seconds of patience changes the flavor entirely. My husband thought I was being precious about this until he tried both versions side by side. Now he’s the one timing it.
- Under-cook the vegetables slightly: They’ll keep cooking after they leave the pan, especially once the hot sauce hits them. Pull them off when they’re still bright and have a little resistance to the bite. What looks “almost done” in the pan will be perfect on the plate. Overcooked broccoli is the number one complaint I get from readers who try this — and it’s always because they cooked it 30 seconds too long.
- Taste the sauce before you add it: This is your only chance to adjust. Too salty? Add a splash of water. Too sweet? Add a drop more rice vinegar. Too flat? A tiny pinch of white pepper or red pepper flakes. Once it’s in the pan and cooked, you can’t un-do it. Dip a clean spoon in, taste it, and adjust. This takes 10 seconds and saves you from a whole dish that’s off.
Swaps That Actually Work
- Gluten-Free: Use tamari instead of soy sauce and a gluten-free oyster sauce (or hoisin sauce, which is usually gluten-free and adds a similar sweetness). I make this version for a friend who has celiac and she says it’s the only stir fry she trusts.
- Dairy-Free: It’s already dairy-free — no changes needed. Just make sure your oyster sauce doesn’t contain any dairy (most don’t, but check the label).
- Nut-Free: Use avocado or grapeseed oil instead of peanut oil. Everything else is naturally nut-free. School lunch safety is the priority here — I default to avocado oil when I’m packing leftovers.
- Spicy Version: Add 1 tablespoon of chili crisp or sambal oelek to the sauce before pouring it in. Or add dried red pepper flakes with the garlic and ginger for a more subtle heat. I do the chili crisp version after the kids have eaten — the adults get a little extra heat and it takes zero extra effort.
- Mild Kid-Friendly Version: Skip the chili entirely and add a tiny extra pinch of sugar to the sauce to balance any bitterness from the broccoli. Serve with extra rice and let them add their own soy sauce at the table if they want. My friend’s seven-year-old calls this “special dinner” and has requested it for three birthdays in a row.
- Protein Swap: Chicken thighs or thinly sliced pork loin both work beautifully. For chicken, cook it about 90 seconds per side instead of 60. For tofu (firm or extra-firm), press it dry, cube it, and sear it in a separate batch before the vegetables. Tofu version is my go-to on Meatless Mondays and it holds up surprisingly well.
Questions I Get About This Recipe All the Time
Q: Why did my beef turn out tough and chewy instead of tender?
A: Ugh, I’ve been there — it’s usually one of two things. Either you sliced the beef with the grain instead of against it (slicing against the grain shortens the muscle fibers so they’re easier to chew), or you cooked it too long and at too low a heat. High heat, fast cooking, and thin slices against the grain — that’s the formula. If you did all that and it was still tough, you might have gotten a less tender cut of beef. Flank steak is reliable, but if you use top round or eye of round, you’ll need to marinate it for at least 30 minutes or accept that it’ll be chewier. You’ve got this next time.
Q: Can I make this without a wok? I only have a nonstick skillet.
A: Yes, and it’ll still be good — but you won’t get quite the same sear. Nonstick pans don’t reach the same high temperatures as cast iron or carbon steel, so the browning will be milder. Here’s what I’d do: preheat your nonstick pan over medium-high heat for a full 3 minutes (don’t go past medium-high or you risk damaging the coating), add the oil, and then add the beef. Cook it in smaller batches than you think you need to compensate for the lower heat. I’ve tested this with a cheap nonstick pan and it still came out better than takeout — just not quite as caramelized.
Q: How long does the stir fry last in the fridge? Can I freeze it?
A: Store the components separately in airtight containers in the fridge for up to 4 days. The sauce will thicken as it sits — just add a splash of water when you reheat. As for freezing: I don’t recommend freezing the finished dish. The vegetables turn mushy and the sauce separates. But you can freeze the raw sliced beef on its own for up to 3 months. Slice it, lay it flat on a parchment-lined baking sheet, freeze for an hour, then transfer to a freezer bag. That way you can pull out exactly what you need. For reheating, a hot skillet for 60–90 seconds per batch is best. The microwave works but the vegetables will be noticeably softer. Choose your priority.
Q: What do you serve with this stir fry?
A: Three things I rotate between: (1) Steamed jasmine rice — the classic, it soaks up the extra sauce and gives you something neutral against the salty-sweet stir fry. I make it in a rice cooker while I prep everything so it’s ready at the same time. (2) A simple cucumber salad — thinly sliced cucumbers with rice vinegar, a pinch of sugar, and sesame seeds. It’s cold and acidic and cuts right through the richness. (3) My lazy version: just extra green onions and sesame seeds on top, and maybe a soft-boiled egg if I want to make it a full bowl situation. My friend always asks for the cucumber salad on the side — she says it makes the meal feel complete.
More Recipes My Family Makes on Repeat
If this one worked for you, here are a few others that get the same reaction at my table:
- Chicken and Broccoli Stir Fry — Same fast technique, slightly different sauce, and my go-to for nights when I have chicken thighs to use up.
- Garlic Ginger Noodle Bowls — All the same flavors but in noodle form, with a jammy egg on top. Ready in 15 minutes flat.
- Sheet Pan Honey Soy Chicken Thighs — Minimal cleanup, maximum flavor, and the sauce is in the same family as this stir fry. My most-requested weeknight recipe.
This is the kind of meal that makes you feel like you have your life together on a Tuesday — even if the rest of the day was chaos. The beef is seared, the vegetables are crisp, the sauce clings to everything like it was made for it.
If you try it, drop a comment below — I love hearing which version you made and how it went for you. The spicy version and the kid-friendly one both get equal love around here.
📌 This beef stir fry with vegetables recipe comes together in 20 minutes with one pan and actual restaurant-quality sear — save it for the weeknight when you need dinner fast and still want it to look like you tried.
Beef Stir Fry with Vegetables
Equipment
- Large Skillet or Wok
- Mixing bowl
Ingredients
- 1 lb flank steak or sirloin, thinly sliced against the grain
- 2 bell peppers (any color), thinly sliced
- 1 small head broccoli, cut into small florets
- 1 large carrot, julienned or sliced thinly on the bias
- 3 cloves garlic, minced
- 1 tablespoon fresh ginger, minced
For the Sauce
- 1/4 cup soy sauce (or tamari for gluten-free)
- 2 tablespoons oyster sauce
- 1 tablespoon rice vinegar
- 1 teaspoon sugar
- 1 teaspoon cornstarch
- 2 tablespoons water
For Cooking & Garnish
- 2 tablespoons neutral oil (avocado, grapeseed, or peanut)
- Sesame seeds, for garnish
- Sliced green onions, for garnish
- Sesame oil, for drizzling
Instructions
- Prep everything first: Slice the beef, chop the vegetables, mince the garlic and ginger, whisk the sauce. Once that flame is on, there will not be time to chop anything. Mise en place sounds fancy but it just means ‘don’t be the person mincing garlic while your beef burns.’
- Heat the pan: Set your skillet or wok over high heat and let it get aggressively hot — about 2 minutes for cast iron, 90 seconds for carbon steel. Add 1 tablespoon of the oil and swirl to coat. The oil should shimmer the second it hits the pan. (Photo tip: At this point, the pan should be lightly smoking — that’s your cue that it’s hot enough. If you’re not seeing any wisps of smoke, wait another 30 seconds.)
- Sear the beef in batches: Add half the beef in a single layer — don’t crowd it. Let it cook undisturbed for 60 seconds until the bottom is deeply browned. Toss and cook another 30 seconds for medium-rare, or 60 seconds for well-done. Transfer to a plate. Repeat with the remaining beef and another tablespoon of oil if needed. This is the step that makes or breaks the dish. If you dump all the beef in at once, it steams instead of searing and you lose that brown crust. Two batches takes two extra minutes and changes everything.
- Cook the aromatics: Reduce heat to medium-high. Add the remaining 1/2 tablespoon of oil, then the garlic and ginger. Stir constantly for about 15 seconds until fragrant but not brown. If the garlic starts to darken, pull the pan off the heat for a few seconds — burnt garlic will ruin the whole dish. (Photo tip: You should see the garlic and ginger sizzle immediately — that’s how you know the oil temperature is right.)
- Add the vegetables: Toss in the broccoli, bell peppers, and carrots. Cook for 60–90 seconds, stirring or tossing constantly. The vegetables should turn bright in color and still have a slight crunch — they’ll continue cooking slightly after you add the sauce. If you like your vegetables softer, give them an extra 30 seconds here. I prefer them with bite, because the sauce softens them just enough.
- Add the sauce: Give your pre-mixed sauce a quick whisk (the cornstarch settles fast) and pour it into the pan. Stir immediately to coat the vegetables. The sauce will thicken in about 15 seconds and turn glossy. This is the moment where it all comes together — the color, the sheen, the smell.
- Return the beef: Add the seared beef back to the pan, along with any accumulated juices from the plate. Toss everything together for about 20 seconds until the beef is warmed through and coated in sauce. Don’t let the beef sit in the sauce too long or it will start to lose its sear — just long enough to reheat.
- Finish and serve: Remove from heat. Drizzle with sesame oil, sprinkle with sesame seeds and sliced green onions. Serve immediately over steamed rice. This does not wait well — stir fry is a now-food. Have your rice ready before you start cooking. Even if the sauce pools a little on the plate, don’t stir it into the rice until you’re eating — it looks better on the plate as a separate element.
Notes
Related Recipes:
 Cheesy Hamburger Casserole Bake That’s Ready in 40 Minutes (No Canned Soup Here)
 Creamy Garlic Tagliatelle That Looks Like a Restaurant Dish in 20 Minutes
 Texas Roadhouse Style Baked Salmon with Sweet and Savory Glaze — Ready in Under 30 Minutes
 Easy Italian Meatloaf That’s Actually Juicy (Not Dry) — in 1 Hour
 The Biscuits and Gravy Casserole That’s Actually Crispy on Top (And Ready in 40 Minutes)
 Creamy Rotel Pasta with Ground Beef That’s Ready in 30 Minutes (No Cans of Soup!)