
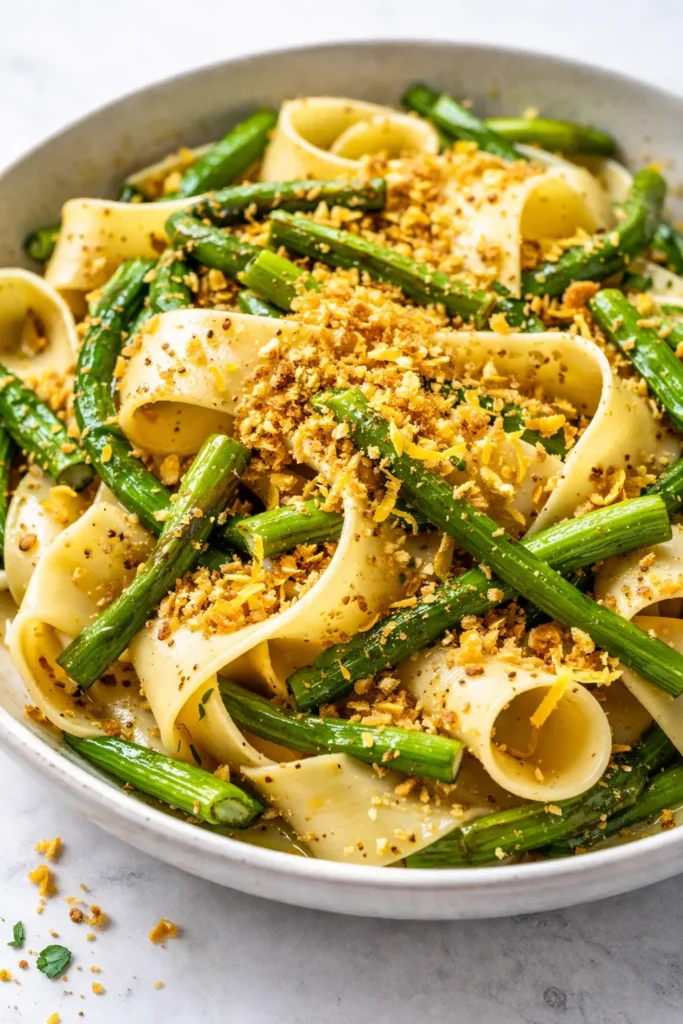
That first bite — where the garlic scapes are just barely tender and the breadcrumbs add this shattery crunch — is the reason I buy three bunches of scapes every spring before I even know what I’m cooking. The green, twisty stalks are garlic’s best seasonal secret: milder than cloves, with a grassy, sweet edge that totally takes over a bowl of pasta in the best way. I stumbled into this combination two years ago when I had a fridge full of scapes from the CSA and a half-eaten box of pappardelle. Now it’s my official “spring has actually arrived” dinner.
The short version: Seven ingredients, one pot, a skillet — and a bowl of pasta that tastes like you planned a whole farmers market trip.
I’ve made this for picky friends who swore they didn’t like “green stuff” in their pasta, and they asked for seconds. It’s that kind of recipe — simple but somehow impressive, in that low-effort way that makes you look like you know what you’re doing. Which you do. It takes twenty minutes, start to finish.
- Serves: 4 as a main, 6 as a side
- Hands-On Time: 20 min | Total Time: 20 min
- Difficulty: Easy — the hardest part is not eating all the breadcrumbs before they hit the pasta
- Cost per serving: ~$3.50 (more if you use fancy pasta, but you don’t need to)
- Calories: ~490 per serving
- Dietary Notes: Naturally vegetarian; can be made vegan with nutritional yeast instead of Parmesan
(Photo above: An overhead shot of a wide, shallow bowl of pappardelle tangled with thin, bright green garlic scapes, scattered with toasted golden breadcrumbs and a few curls of lemon zest. Natural light from a side window, a linen napkin folded nearby, one fork resting on the rim. You can practically smell the garlic.)
Why This Works — No Cheffy Explanations
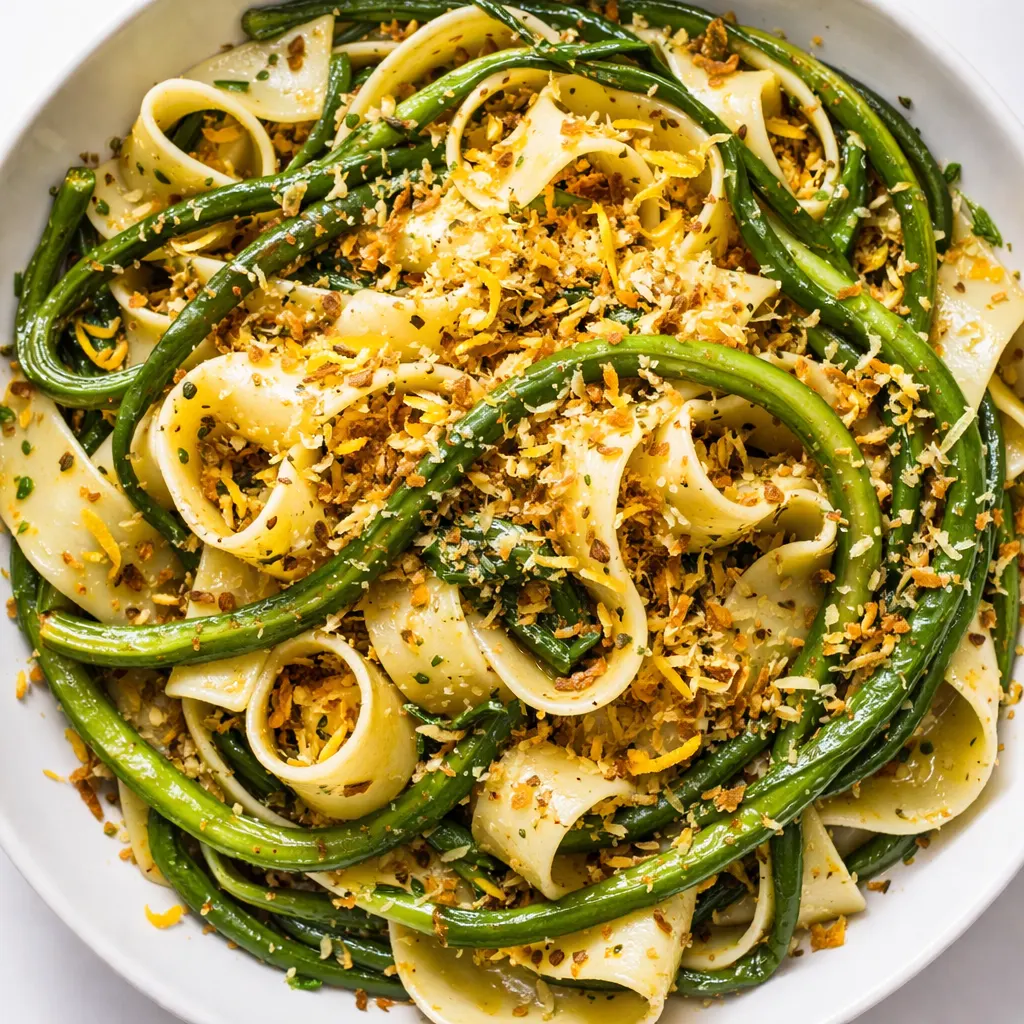
The trick is treating the scapes like a cross between a vegetable and an herb. Most recipes either blanch them into oblivion or leave them raw and tough. I do a quick toss in the pasta water — just long enough to soften the texture without dulling that bright, grassy flavor. The breadcrumbs are not a garnish — they’re the second textural layer. Toasted in olive oil with a pinch of red pepper, they add crunch and a little heat that makes each forkful interesting.
Also: the lemon zest goes in at the very end, not with the cooking. It stays fragrant and sharp, cutting through the richness of the olive oil and cheese. I learned this the hard way after a few batches where the zest just disappeared into the background. Grate it last. Let it sit on top. It matters.
What you get is a bowl of pasta that feels like it’s doing three things at once — silky, crunchy, bright — without any of them fighting each other. It’s the kind of dinner you make on a Tuesday and then immediately text your sister about.
Ingredients Worth Talking About
- 8 ounces garlic scapes (about 2 bunches): The stars. Look for scapes that are firm and bright green, not floppy. If the tips are dried out, just trim them. One tip I wish I’d known earlier: don’t buy them too early in the season — the early ones can be stringy. By mid-June, they’re perfect. My farmers market guy gives me a knowing nod when I grab three bunches.
- 12 ounces dried pasta (pappardelle, fettuccine, or bucatini): Wide noodles catch the scapes and crumbs best. But honestly, any shape works — I’ve used shells in a pinch and it was still great. My kids love this with radiatori because the crumbs get stuck in the little ridges. Whatever you have, it’ll work.
- ⅓ cup panko breadcrumbs: Regular breadcrumbs will work but panko gives that extra-crisp texture. I’ve tried making my own from stale bread and it’s fine, but panko is consistent and I always have it. Gluten-free panko works perfectly here — no one will notice the difference.
- ¼ cup extra-virgin olive oil, divided: Use a good one for finishing — it adds a peppery note that matters. The cheap stuff is fine for the breadcrumbs.
- 1 lemon: Zest and juice. The zest goes on top, the juice goes into the pasta water splash before draining. This little move — a squeeze of lemon in the water — seasons the pasta from the inside out. Learned it from a pasta-maker in Rome, now I do it every time.
- ½ cup freshly grated Parmesan (plus more for serving): Pre-shredded won’t melt the same way. Grate it yourself — it takes thirty seconds and makes a real difference.
- ¼ teaspoon red pepper flakes (optional but recommended): Just enough warmth to wake up the other flavors. Skip if serving to kids who can’t handle heat, but I’ve found most kids don’t mind this level.
- Salt and black pepper to taste
What You’ll Actually Need
- A large pot (4–6 quart) for the pasta
- A 10- or 12-inch skillet — nonstick or stainless, both work
- A box grater or microplane for the Parmesan and lemon zest
- A slotted spoon or spider to fish the scapes out of the boiling water
- Tongs for tossing — not strictly necessary but easier than a spoon
That’s it. No food processor, no special equipment. If you don’t have a spider, use tongs or a slotted spoon.
Let’s Make It — My Exact Process
This moves fast, so read through once before you start. The breadcrumbs take about three minutes, and you don’t want to be scrambling.
Prep the scapes: Rinse them, then trim off the dried tip (about ¼ inch) and the very bottom where it was cut. Cut the scapes into 2- to 3-inch lengths — roughly the same length as your pasta. If any scapes are thick (wider than a pencil), split them in half lengthwise so they cook at the same rate.
- Boil the pasta water: Fill your pot with water (about 4 quarts), salt it generously (I do 2 tablespoons of kosher salt — it should taste like the sea), and bring it to a rolling boil. 📸 Photo tip: When the water is boiling aggressively — big, roiling bubbles — that’s your signal to start the clock. Not a lazy simmer.
- Blanch the scapes: Drop the cut scapes into the boiling water and cook for exactly 1 minute. They should turn bright green and be just tender when pierced with a fork. Use your spider or slotted spoon to transfer them to a plate. The color change is your cue — about 45 seconds in they go from pale green to vibrant, vivid green. Let them cool slightly, then roughly chop into 1-inch pieces. (I do this while the pasta cooks.) 📸 Photo tip: After blanching, the scapes should look like they’ve been painted — that bright, glossy green is what you want.
- Cook the pasta: Add your pasta to the same boiling water and cook until al dente (usually 1–2 minutes less than the box says). Just before you drain, scoop out 1 cup of the pasta water and set it aside. Drain the pasta — don’t rinse it.
- Toast the breadcrumbs: While the pasta cooks, heat 2 tablespoons of the olive oil in your skillet over medium heat. Add the panko and red pepper flakes, stirring constantly. After about 2 minutes, the breadcrumbs will start to turn pale gold. Remove from heat immediately — they’ll continue toasting in the hot pan. Transfer to a small bowl and season with a pinch of salt.
- Combine everything: In the same skillet (no need to wipe it out), add the remaining 2 tablespoons olive oil, the chopped scapes, and a splash (about ¼ cup) of the reserved pasta water. Heat over low heat for 1 minute, then add the drained pasta. Toss with tongs, adding more pasta water a tablespoon at a time if it looks dry. You want a light coating, not a puddle. If you’re tired or your kids are hungry, don’t worry about the perfect consistency — just toss everything together and it’ll still be delicious.
- Finish with cheese and lemon: Remove the skillet from the heat. Add the grated Parmesan and toss vigorously — the residual heat melts the cheese into a creamy, non-stringy coating. Taste and add salt if needed (the cheese is salty, so go easy). Squeeze a little lemon juice over the top if it feels heavy. Transfer to serving bowls.
- Top it off: Sprinkle the toasted breadcrumbs over each bowl, followed by a generous shower of lemon zest (use a microplane) and a few extra flakes of Parmesan. Don’t stir it in — the breadcrumbs should stay crunchy on top.
How I Meal Prep This for Busy Weeks
I make this for quick dinners when I know I’ll have zero patience later. Here’s my Sunday setup: I blanch the scapes (step 2) and store them in the fridge, and toast the breadcrumbs (step 4) and keep them in a sealed container on the counter. Then on a weeknight, all I have to do is boil pasta and toss — takes less than 15 minutes. My kids actually think it’s a treat, which means I’m basically winning at weeknight dinner.
- Fridge: Store blanched scapes in an airtight container for up to 4 days. Toasted breadcrumbs: countertop container, up to a week.
- Freezer: Not recommended for the full dish — the breadcrumbs lose their crunch. But you can freeze the blanched scapes alone for up to 2 months. Just thaw in the fridge overnight before using.
- Reheat: The best way is in a skillet with a splash of pasta water or broth — microwave will make the breadcrumbs soggy. I’ve done it in a pinch, and it’s still fine, but the skillet version is noticeably better.
Things I Wish I’d Known the First Time
- Don’t skip the pasta water step: The starchy water is what turns olive oil and cheese into a silky sauce that clings to every noodle. Adding it hot is key — cold water breaks the emulsion. Trust me, I’ve made that mistake.
- Use good olive oil at the end: The finishing oil is not garnish — it’s flavor. A peppery, grassy olive oil will make the dish taste noticeably more alive. I keep a bottle of the nice stuff just for this recipe.
- Taste the scapes before you add them to the pasta: If they’re still tough after blanching, give them another 30 seconds in the boiling water. Scape thickness varies wildly — thicker ones need more time. My husband thought I was overthinking it until he bit into a stringy one. Now we both taste first.
- Even if you mess up the breadcrumbs (burn them? forget to toast them?), the dish still tastes great: I’ve accidentally left the pan on heat too long and had dark crumbs — still delicious, just a different vibe. Don’t stress. The garlic scape flavor carries everything.
Swaps That Actually Work
- Dairy-Free / Vegan: Omit the Parmesan and use 2–3 tablespoons nutritional yeast instead — stir it in with the pasta water. It won’t get creamy in the same way, but the breadcrumbs and scapes carry the dish. My vegan friend requests this version every time she comes over.
- Gluten-Free: Use gluten-free pasta and gluten-free panko. I’ve done it with a good quality GF fusilli and it works — just be careful not to overcook the pasta (GF pasta gets mushy fast).
- Add Protein: Toss in some cooked shrimp or shredded rotisserie chicken with the scapes in the final step. I do this when I want it to be a full meal — my kids love it with chicken.
- Fancy Guest Version: Double the breadcrumbs and finish with a drizzle of brown butter instead of olive oil. It takes about 3 extra minutes and makes people think you did something complicated.
- No Garlic Scapes? Substitute 6–8 thick asparagus spears, cut into 2-inch pieces (blanch for 1.5 minutes), and add 2 minced garlic cloves to the final toss. It’s a different dish but still very good. I’ve done this in winter when scapes aren’t available.
Questions I Get About This Recipe All the Time
Q: Why are my garlic scapes tough and stringy?
A: Ugh, I’ve been there. Two reasons: either the scapes were already too mature (they should be bright green and flexible, not woody) or you didn’t blanch them long enough. If they’re thick, split them lengthwise before blanching. And if you’re still worried, give them an extra 30 seconds in the water. You’ve got this next time.
Q: Can I make this without cheese?
A: Yes, absolutely. Use the nutritional yeast option above, or just skip the cheese entirely and add an extra splash of pasta water to create a lighter sauce. The lemon and breadcrumbs will do a lot of the heavy lifting. I’ve tested it without any cheese and it’s still worth making — just not as creamy.
Q: How long does this keep? Can I freeze it?
A: The assembled pasta is best fresh — the breadcrumbs get soft after a day in the fridge. But you can store leftovers in an airtight container in the fridge for up to 3 days. To reheat, warm it in a skillet with a splash of water or broth. I don’t recommend freezing the completed dish, but you can freeze the blanched scapes alone (as mentioned above).
Q: What do you serve with this?
A: I usually keep it simple — a green salad with lemon vinaigrette and maybe some crusty bread if I’m feeling extra. But it’s also great with a side of roasted tomatoes (my kids love dipping them in the leftover dressing) and a glass of something crisp like a Pinot Grigio. For a weekend dinner, I’ll add grilled shrimp and call it a feast.
More Recipes My Family Makes on Repeat
If you liked this one, here are a few others that get the same reaction at our table:
- Brown Butter Mushroom Pasta — the kind of dish that makes you forget you’re eating a weeknight dinner.
- Spring Pea and Mint Pesto — takes about 10 minutes and turns any pasta into something you’d serve at a dinner party.
- Easy Braised Chicken with Lemon and Olives — for when you want a one-pot meal that looks like you fussed (you didn’t).
This is the kind of recipe that becomes a seasonal ritual — the first time you make it each year, you remember why you love it. And then you make it every week until scapes disappear from the market.
If you try it, drop a comment below — I love hearing how it goes for your family. Tag me on Pinterest or Instagram so I can see yours!
📌 Pin this garlic scape pasta recipe for spring — a bright, 20-minute dinner that’s perfect for farmers market season and picky eaters alike.
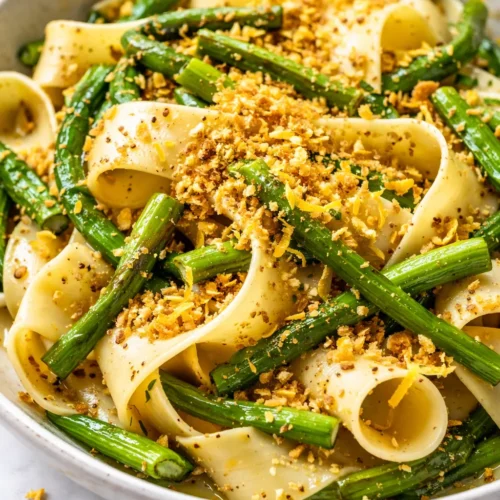
Garlic Scape Pasta
Equipment
- Large pot (4-6 quart)
- 10- or 12-inch skillet
- Box grater or microplane
- Slotted spoon or spider
- Tongs
Ingredients
- 8 ounces garlic scapes (about 2 bunches)
- 12 ounces dried pasta (pappardelle, fettuccine, or bucatini)
- 1/3 cup panko breadcrumbs
- 1/4 cup extra-virgin olive oil, divided
- 1 lemon (zest and juice)
- 1/2 cup freshly grated Parmesan (plus more for serving)
- 1/4 teaspoon red pepper flakes (optional)
- Salt and black pepper to taste
Instructions
- Prep the scapes: Rinse, trim dried tip and bottom. Cut into 2- to 3-inch lengths. If thick, split lengthwise.
- Boil pasta water: Fill pot with 4 quarts water, salt generously (2 tbsp kosher salt). Bring to a rolling boil.
- Blanch scapes: Drop cut scapes into boiling water for exactly 1 minute until bright green and tender. Transfer to a plate with a slotted spoon. Let cool, then roughly chop into 1-inch pieces.
- Cook pasta: Add pasta to same boiling water, cook until al dente (1-2 min less than box). Before draining, reserve 1 cup pasta water. Drain pasta, do not rinse.
- Toast breadcrumbs: While pasta cooks, heat 2 tbsp olive oil in skillet over medium heat. Add panko and red pepper flakes, stir constantly until pale gold, about 2 minutes. Transfer to a small bowl, season with salt.
- Combine: In same skillet, add remaining 2 tbsp olive oil, chopped scapes, and 1/4 cup reserved pasta water. Heat over low heat 1 minute. Add drained pasta, toss with tongs, adding more pasta water as needed for a light coating.
- Finish: Remove skillet from heat. Add Parmesan, toss vigorously until melted and creamy. Taste and adjust salt. Squeeze a little lemon juice if desired. Transfer to serving bowls.
- Top: Sprinkle toasted breadcrumbs over each bowl, then lemon zest and extra Parmesan. Do not stir in.
Notes
Related Recipes:
 Cheesy Hamburger Casserole Bake That’s Ready in 40 Minutes (No Canned Soup Here)
 Lemon Capellini Salad for Late Summer Evenings: Bright, Tangy, Ready in 20 Minutes
 Creamy Garlic Tagliatelle That Looks Like a Restaurant Dish in 20 Minutes
 Texas Roadhouse Style Baked Salmon with Sweet and Savory Glaze — Ready in Under 30 Minutes
 Grilled Chicken Wraps That Stay Crispy (Even the Next Day) — in 35 Minutes
 Easy Italian Meatloaf That’s Actually Juicy (Not Dry) — in 1 Hour