
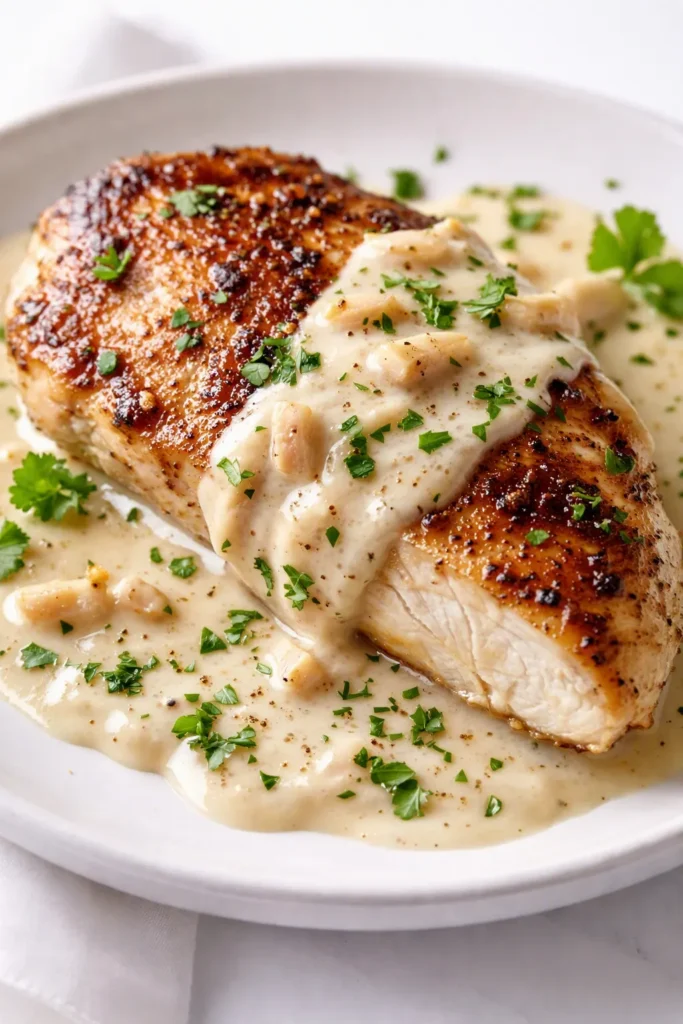
Every creamy garlic chicken recipe I tried before this one had the same problem: the sauce broke, the garlic flavor vanished into the cream, or the chicken dried out while it sat in the pan. This one doesn’t do any of that. It’s golden-seared chicken in a glossy, garlic-bright sauce that coats the back of a spoon, and it’s the recipe my sister texted me about before I’d even cleared the plates.
The short version: Golden-seared chicken in a silky garlic-cream sauce — one pan, 30 minutes, and leftovers that reheat without turning sad.
I’ve made this roughly thirty times since January, which is more than any other recipe on my site, and it’s the one I reach for on the kind of Tuesday that needs to feel like a Friday.
- Serves: 4 as a main
- Hands-On Time: 15 min | Total Time: 30 min
- Difficulty: Easy — the kind of recipe you can make after work without thinking
- Cost per serving: ~$3.75
- Calories: ~520 per serving
- Dietary Notes: Naturally gluten-free; adaptable for dairy-free (see swaps)
(Photo above: overhead shot of the chicken nestled into a glossy garlic-cream sauce in a cast-iron skillet, finished with a scatter of chives and flaky salt, natural morning light coming from the left, a wooden spoon resting on the side.)
The One Thing That Keeps the Sauce Silky (Not Separated)
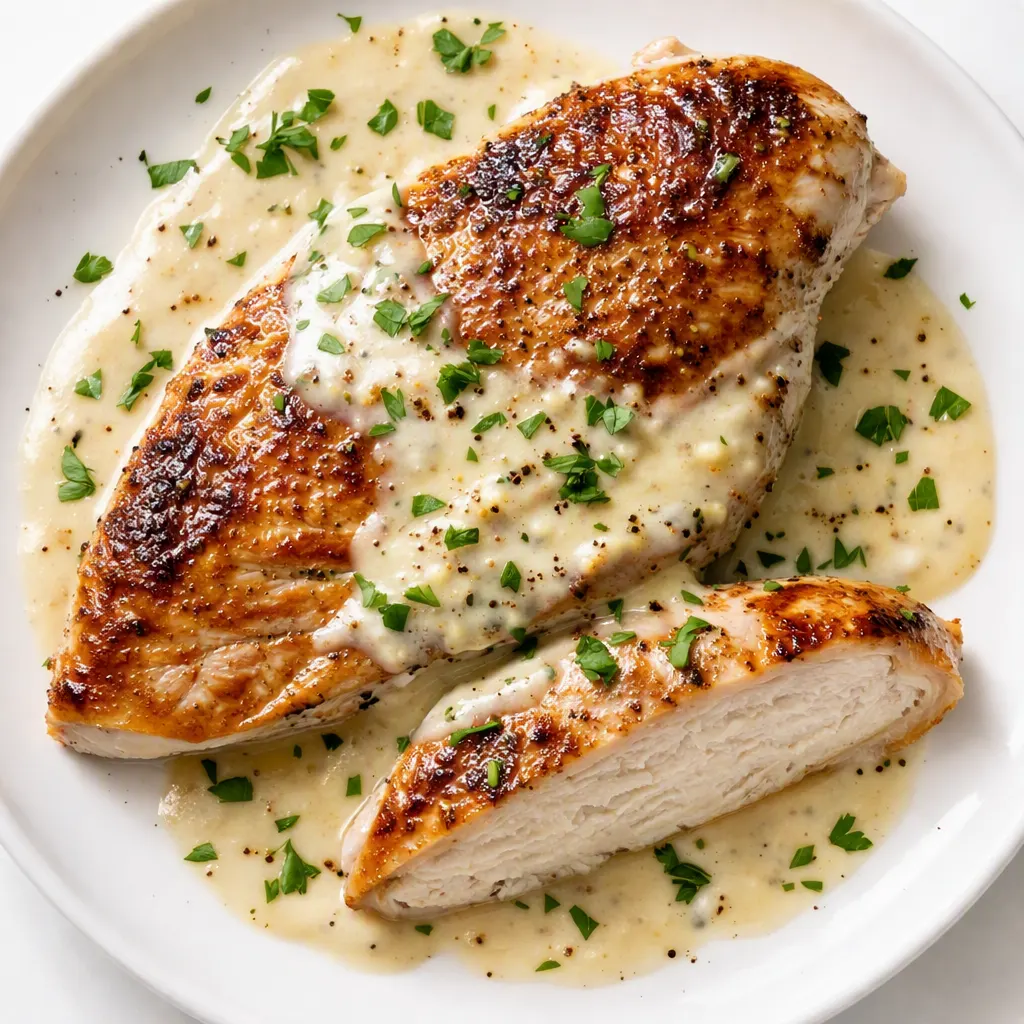
Every version I made before this one had the same failure in a slightly different format: the sauce broke. Usually because I added the cream to a pan that was too hot, or let it boil instead of simmer, and the fat split into glossy puddles that looked curdled and tasted heavy. The fix is boring and reliable — lower the heat, add the cream when the pan is just warm, and let it simmer gently, not aggressively, until it coats a spoon. No chemistry degree required. Just a slightly lower heat than your instinct says.
The other thing nobody tells you: garlic needs a minute before it becomes the star. If you add it and immediately pour in the broth, it never fully cooks and you get that sharp, raw bite that cuts through the cream instead of melting into it. Give it thirty seconds in the warm fat — just until you can smell it across the kitchen — and it turns sweet and deep without disappearing. That sixty seconds is the difference between garlic that’s present and garlic that’s plated.
What this produces is a sauce that’s glossy, garlicky without biting back, and thick enough to cling to the chicken rather than pooling around it. That’s the difference between a dish that looks intentional and one that looks like dinner happened by accident.
What Goes In — Plus My Honest Notes
- 4 boneless, skinless chicken breasts (about 1½ pounds): Thighs work too — they’re harder to dry out, which may be the more honest choice for a Tuesday. I’ve made this both ways and my family has no real preference. I do — thighs. But breasts plate cleaner, and this recipe is as much about the plate as the pan.
- Salt and freshly ground black pepper: Season the chicken the minute you pull it from the fridge, not right before it hits the pan. This is the difference between chicken that tastes seasoned all the way through and chicken that tastes seasoned on the surface, which is not the same thing.
- 1 tablespoon olive oil + 2 tablespoons butter: The butter does the browning, the oil keeps the butter from burning. I learned this after too many pans of brown flecks I tried to pass off as character.
- 8 cloves garlic, minced: Yes, eight. This is the whole point. If you’re reaching for the jarred stuff, stop here and go find fresh — the jarred garlic turns bitter in cream and the difference is worth the thirty seconds of peeling.
- 1 cup chicken broth: This deglazes the pan and carries all the browned bits into the sauce. Use a good one. The watery stuff makes the whole sauce taste thin.
- 1 cup heavy cream: Not half-and-half, not “light” anything. I’ve tested this so you don’t have to. The lower-fat options won’t thicken and the sauce will look thin and sad.
- ½ cup grated Parmesan: Freshly grated from a block. The tub stuff has anti-caking agents that turn the sauce grainy. This is the one place I’m a snob, and it’s a thirty-second snobbery.
- 1 teaspoon lemon juice: This is the contrast that keeps the whole dish from feeling heavy. Add it last, taste immediately, and stop — that one squeeze does more work than any other single ingredient in the pan!
- Fresh chives or tarragon + flaky salt for the finish: Chives cut on a bias, or tarragon if you want something with a little anise magic. This is the garnish doing real work — brightness, texture, contrast. Not decoration.
The Setup (It’s Minimal, I Promise)
- A 12-inch skillet — cast iron or stainless steel. Nonstick works, but you’ll get less browning on the chicken, and browning is the whole foundation. I use cast iron because it holds heat and the chicken actually turns golden instead of merely warm.
- A wooden spoon or flexible spatula — for scraping up the browned bits in the deglaze step.
- A microplane or the small holes of a box grater — for the Parmesan. This is the fastest way to feel smug about your cheese situation.
Let’s Make It (Step by Step)
This moves fast once the pan is hot, so read through once before you start. Most of the steps are under two minutes — the whole thing is done before a pot of pasta would even boil.
Prep: Pat the chicken dry with paper towels. This is the step everyone skips and it’s the reason home-seared chicken looks gray instead of golden. Season both sides with salt and pepper. Mince the garlic and grate the Parmesan so everything is within reach — this recipe moves quickly once it starts.
- Sear the chicken: Heat the oil and butter in the skillet over medium-high until the butter foams and then subsides. Place the chicken in the pan — it should sizzle the moment it touches the surface; if it doesn’t, the pan isn’t hot enough. Cook without moving for 5–6 minutes until deeply golden, then flip and cook 5–6 minutes more until the internal temperature reads 165°F. Transfer to a plate. (📸 Photo tip: This is the color you want — deep amber-brown on the outside, not pale blond. If it looks tan, give it another minute.)
- Bloom the garlic: Lower the heat to medium. Add the garlic to the same pan and stir constantly for 30–45 seconds — just until fragrant. It should smell like garlic bread, not burnt garlic. This is the moment that sets the flavor of the entire sauce, so don’t wander off.
- Deglaze: Pour in the chicken broth and scrape the bottom of the pan with your spoon, loosening all the browned bits. Let it boil for 2–3 minutes until reduced by about a third. That bubbling is flavor — those brown bits are the seasoning the chicken left behind, and you want all of it in the sauce.
- Add the cream: Reduce the heat to low and pour in the heavy cream, stirring. Let it come to a gentle shimmer — not a boil — and cook for 3–4 minutes until it coats the back of a spoon. When you drag your finger through the sauce on the spoon, it should leave a clean line. (📸 Photo tip: That glossy-shimmer moment is the one to photograph — the sauce should look like it’s hugging the pan, not swimming in it.)
- Melt in the Parmesan: Stir in the grated Parmesan and keep stirring until it’s fully melted. The sauce will turn silkier almost immediately.
- Bath the chicken: Return the chicken to the pan, nestling each piece into the sauce so the tops stay exposed — that keeps the golden crust crisp. Let it simmer gently on low for 4–5 minutes so the chicken finishes cooking and the sauce picks up the chicken’s flavor.
- Finish the acid: Squeeze in the lemon juice, stir once, and taste. The sauce should taste bright and rich at the same time; if it tastes flat, add another small squeeze. When I’m tired, this is the step I’m tempted to skip — and it’s the one that makes the difference every single time.
- Plate it like you meant it: Spoon the sauce onto the plate first and smear it toward one side. Set the chicken on the sauce, not beside it. Finish with chives or tarragon placed deliberately — not scattered from a height — and a generous pinch of flaky salt. Sauce under the protein, herbs placed with intention, salt as a final texture. This takes ten seconds and changes everything about how the plate reads.
Make-Ahead Notes for the Week
This is one of the rare creamy dishes that reheats without turning into a sad puddle, though the chicken will never be as crisp as it was the night you seared it. I make a double batch on Sunday and we have it once on Tuesday and once on Thursday. I’ve accepted the slightly-soft crust as the cost of a Thursday that requires no thought at all.
- Fridge: Store in an airtight container for up to 4 days. The sauce thickens as it sits — add a splash of broth or water when reheating to loosen it back up.
- Freezer: Yes, but with one honest note: cream sauces can separate slightly when thawed. It still tastes good; it just won’t look as glossy. Freeze for up to 2 months and thaw overnight in the fridge.
- Reheat: Stovetop over medium-low, stirring gently, until warmed through. The microwave works in a pinch — 90 seconds with a loose cover — but the stovetop keeps the sauce smooth and gives the chicken a chance to re-crisp slightly.
Things I Wish I’d Known the First Four Times I Made This
- Don’t crowd the pan: If your chicken breasts are large, sear them in two batches. When chicken sits too close together, it steams instead of searing, and you lose the golden crust that makes the sauce taste deep. I know it adds five minutes. Accept the five minutes.
- Simmer the cream, don’t boil it: The moment that sauce bubbles aggressively is the moment it’s teetering on the edge of breaking. If it happens, pull the pan off the heat and stir in a cold splash of broth to calm it down. Even if you mess this part up a little, it’ll still taste good — I’ve done it and nobody complained.
- Pull the chicken at 160°F, not 165°F: Carryover heat finishes the job as it rests, and the chicken stays juicy instead of crossing into dry. This is the difference between chicken that’s good and chicken that’s fine.
- Grate your own Parmesan: I know it’s annoying. I know the tub is right there. The anti-caking powder in pre-grated cheese turns the sauce grainy, while the grated-from-the-block stuff melts like actual cheese. Thirty seconds on the microplane and you’ll never think about it again.
Swaps That Actually Work
- Dairy-free: Use full-fat coconut milk from the can — not the carton — and a dairy-free butter substitute. The flavor shifts, but the texture holds beautifully. I’ve made this for my sister-in-law who can’t do dairy, and she asked for the recipe before she finished her plate.
- Spicy version: Add a pinch of red pepper flakes with the garlic. It gives the sauce a slow warmth that builds instead of shouting. My kids prefer the mild version; I do mine with the flakes and a dab of chili crisp on top after the kids go to bed.
- With spinach: Stir in a few big handfuls of baby spinach during the last 2 minutes of simmering and let it wilt into the sauce. It’s the version that makes me feel slightly better about everything.
- Thighs instead of breasts: Use 1½ pounds of boneless, skinless thighs and cook them about a minute longer on each side. They’re nearly impossible to dry out, which is a genuine comfort on a rushed Tuesday.
- For a crowd: Double everything and use a wider Dutch oven. The chicken won’t sear as well in one batch, but a 30-minute sauce that feeds eight is the kind of party trick worth pulling.
The Creamy Garlic Chicken Questions You Might Have
Q: Why did my sauce separate and look curdled?
A: Ugh, I’ve been there. The culprit is almost always heat — the cream boiled instead of simmering, and the fat split. Bring it up gently over low heat and don’t walk away. If it does separate, pull the pan off the heat, add a couple of tablespoons of cold broth, and whisk hard. It won’t be perfectly smooth, but it’ll be salvageable. You’ve got this next time.
Q: Can I make this dairy-free?
A: Yes — I’ve tested it and it works. Use full-fat coconut milk in place of the cream and a dairy-free butter substitute for the sear. The sauce stays glossy and thickens the same way. One honest note: it tastes faintly of coconut, which is pleasant but definitely present. If you want zero coconut flavor, there’s no perfect swap for cream. The dairy-free version is its own thing, and a good one.
Q: How long does creamy garlic chicken last? Can I freeze it?
A: It’ll hold in an airtight container in the fridge for up to 4 days. Reheat gently on the stovetop with a splash of broth — the microwave works, but the sauce is smoother on the stove. Freezing works too, but the cream sauce may separate slightly on thaw. It still tastes good; it just won’t look as glossy. I’d rather you know that going in.
Q: What do you serve with creamy garlic chicken?
A: My default is wide noodles or mashed potatoes — something that catches the sauce. But my kids’ preferred setup is over white rice with the sauce spooned twice: once under, once over. If you want a vegetable that holds its own, go with roasted broccoli or a crisp green salad with a sharp vinaigrette. The acid cuts the cream the same way the lemon does — that’s why a bright salad works so well.
More Recipes My Family Makes on Repeat
If this one lands, here are a few others that get the same reaction at our table:
- One-Pan Lemon Butter Chicken — The weeknight version when I want the same golden crust but a brighter, sharper sauce.
- Brown Butter Pasta With Sage and Parmesan — The side dish that turns this dinner into something someone actually photographs.
- Sheet Pan Chicken Fajitas for Families Who Need Dinner by 6 — For the nights when creamy garlic chicken feels too fancy and everything needs to happen on one pan.
The first time I made this, my sister texted me the next morning to ask if she could come over “again sometime, maybe Thursday.” It’s that kind of recipe — the one you make on a Wednesday and then pretend you’ve been making for years. Plate it, put it on the table, and let the smell do the introduction.
If you make it, drop a comment below and tell me which version your family lands on — I genuinely love hearing how the swaps work in other kitchens.
📌 Creamy garlic chicken in 30 minutes with one pan — save it for the weeknight that deserves to feel like something.
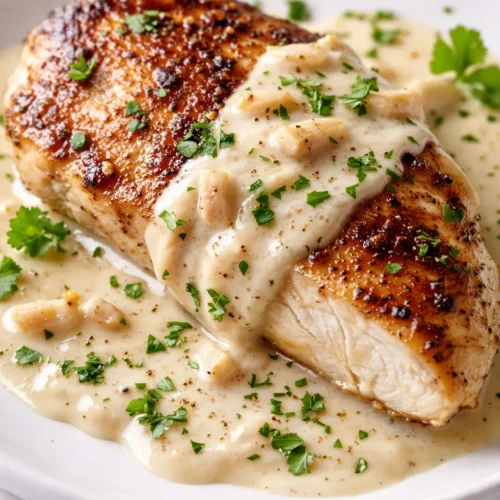
Creamy Garlic Chicken That Tastes Like a Restaurant Dish — in 30 Minutes
Equipment
- 12-Inch Skillet (Cast Iron or Stainless Steel)
- Wooden Spoon or Flexible Spatula
- Microplane or box grater
Ingredients
For the Chicken
- 4 boneless, skinless chicken breasts (about 1½ pounds total)
- Salt and freshly ground black pepper, to taste
For the Sauce
- 1 tablespoon olive oil
- 2 tablespoons butter
- 8 cloves garlic, minced
- 1 cup chicken broth
- 1 cup heavy cream
- ½ cup freshly grated Parmesan cheese
- 1 teaspoon fresh lemon juice, plus more to taste
For the Finish
- Fresh chives, cut on a bias, or fresh tarragon
- Flaky salt, for finishing
Instructions
- Prep: Pat the chicken dry with paper towels and season both sides with salt and pepper. Mince the garlic and grate the Parmesan before you start.
- Sear: Heat the olive oil and butter in a 12-inch skillet over medium-high until the butter foams and subsides. Add the chicken and cook without moving for 5 to 6 minutes until deeply golden. Flip and cook 5 to 6 minutes more until the internal temperature reaches 160°F. Transfer to a plate.
- Bloom the garlic: Lower the heat to medium and add the minced garlic. Stir constantly for 30 to 45 seconds, just until fragrant, not browned.
- Deglaze: Pour in the chicken broth and scrape up the browned bits from the bottom of the pan. Let it boil for 2 to 3 minutes until reduced by about a third.
- Add the cream: Reduce the heat to low and pour in the heavy cream, stirring. Let it come to a gentle shimmer, not a boil, and cook for 3 to 4 minutes until it coats the back of a spoon.
- Melt in the Parmesan: Stir in the grated Parmesan and keep stirring until fully melted and the sauce turns silky.
- Return the chicken: Nestle the chicken into the sauce, keeping the tops exposed. Simmer gently on low for 4 to 5 minutes until warmed through and the sauce has picked up the chicken’s flavor.
- Finish with lemon: Stir in the lemon juice and taste. If it tastes flat, add another small squeeze.
- Plate it: Spoon the sauce onto the plate and smear it to one side. Set the chicken on the sauce, not beside it. Finish with chives or tarragon placed deliberately and a generous pinch of flaky salt.
Notes
Related Recipes:
 Cheesy Hamburger Casserole Bake That’s Ready in 40 Minutes (No Canned Soup Here)
 Creamy Garlic Tagliatelle That Looks Like a Restaurant Dish in 20 Minutes
 Texas Roadhouse Style Baked Salmon with Sweet and Savory Glaze — Ready in Under 30 Minutes
 Easy Italian Meatloaf That’s Actually Juicy (Not Dry) — in 1 Hour
 The Biscuits and Gravy Casserole That’s Actually Crispy on Top (And Ready in 40 Minutes)
 Air Fryer Chicken and Vegetables That Don’t Taste Like a Regret (30 Minutes, One Pan)