
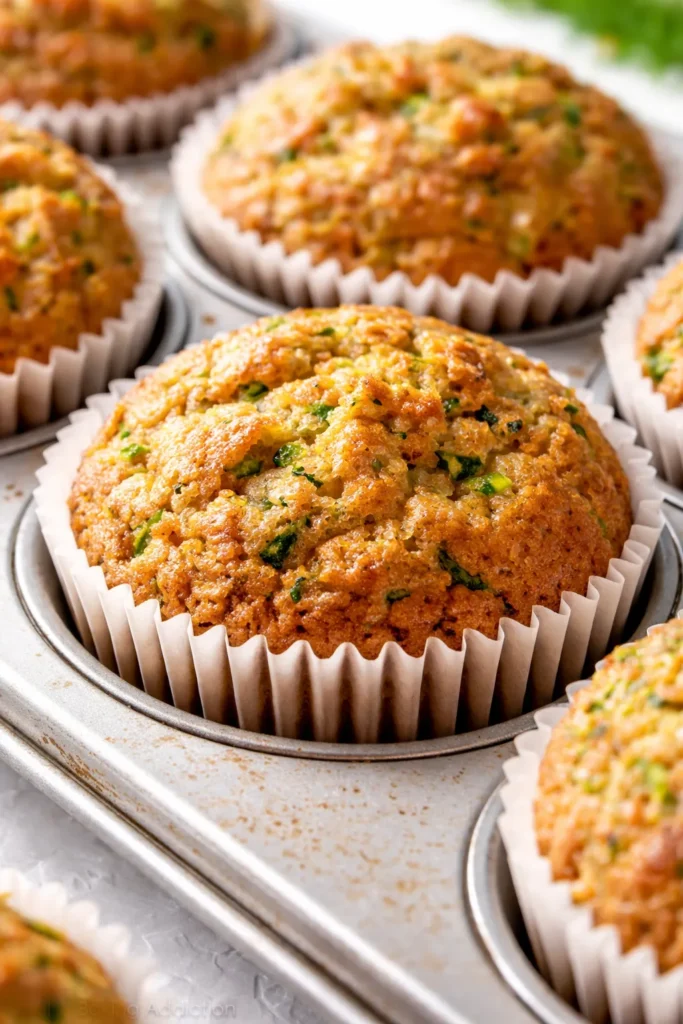
The first time these came out of the oven, I actually said “finally” out loud. Golden domes. Tender crumbs. Not a single sad, dense puck in the batch. Most zucchini muffins promise moisture and deliver a wet brick. These don’t. The trick is handling the zucchini right—which takes about five extra seconds and zero special equipment.
The short version: One bowl, fifteen minutes of hands-on work, and you get twelve perfectly domed muffins that stay tender for four days on the counter.
I’ve tested every zucchini prep method—peeled, unpeeled, squeezed dry, not squeezed—so you don’t have to. The answer is squeeze it, but not completely dry. I’ll explain exactly why below.
- Serves: 12 muffins
- Hands-On Time: 15 min | Total Time: 40 min
- Difficulty: Easy enough for a school morning, impressive enough for a brunch
- Cost per serving: ~$0.65 per muffin
- Calories: ~210 per serving
- Dietary Notes: Naturally vegetarian. Easily adaptable for dairy-free.
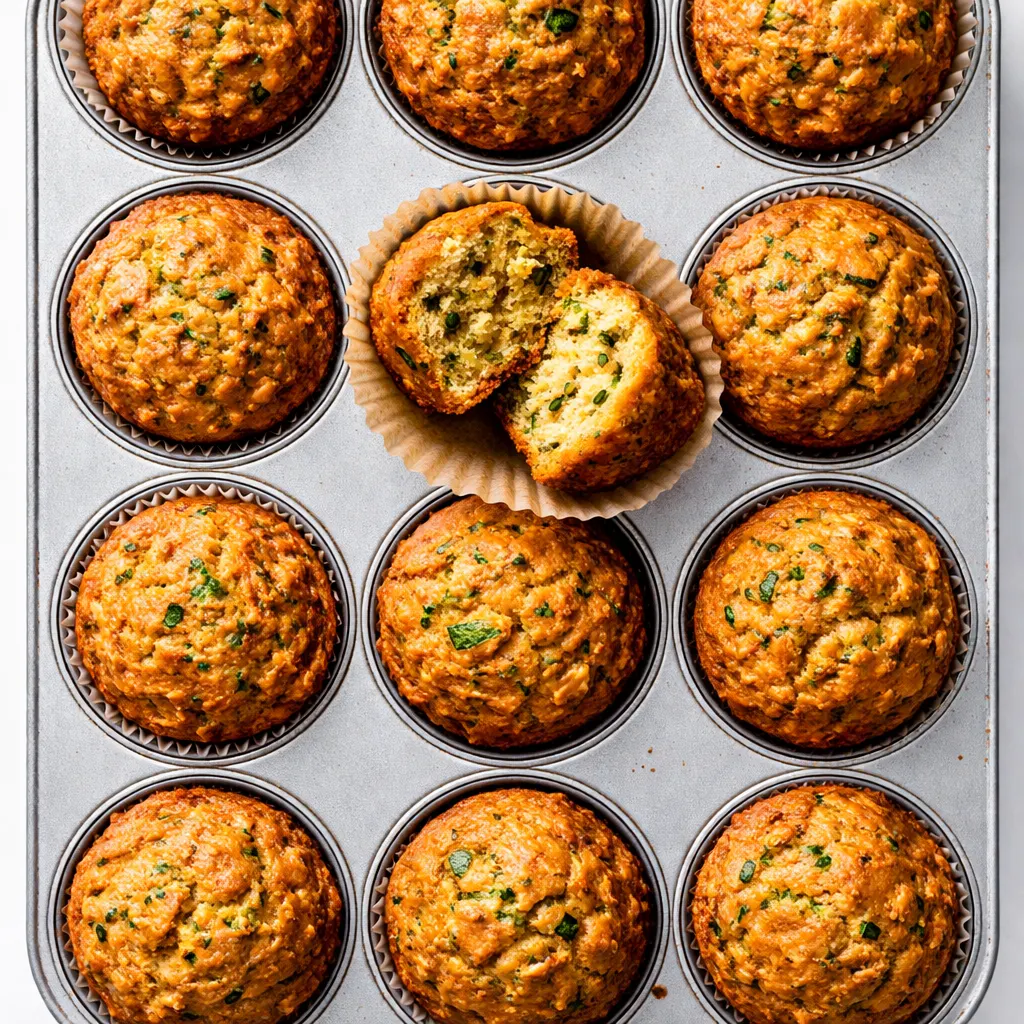
(Photo above: Overhead shot of the muffins on a simple white plate, one cut in half to show the tender crumb and visible zucchini flecks. Morning light from a south-facing window, no artificial styling—just a linen napkin underneath. The domes are golden and slightly cracked at the top.)
The Thing That Makes These Actually Tall (Not Flat)
The enemy of a good zucchini muffin is water. Zucchini releases it, and if you don’t manage it, you get a wet, dense crumb that never rises properly. But if you squeeze it completely dry, you lose the tenderness the zucchini was supposed to provide in the first place.
The fix is simple: shred it, lightly salt it, let it sit for five minutes, and then squeeze it gently—not aggressively. You want some of the moisture out, but not all of it. The remaining moisture creates steam in the oven, which lifts the batter into those perfect domes.
I learned this after three batches of muffins that looked like hockey pucks. This batch was the one that made me text my sister a photo before they’d even cooled.
Everything You Need (And a Few Notes From Me)
- 1 ½ cups shredded zucchini (from about 1 medium zucchini): Don’t peel it—the green flecks are part of the visual identity of a good zucchini muffin. I’ve made this with both peeled and unpeeled, and the unpeeled version looks more intentional every time.
- 1 ½ cups all-purpose flour: Spoon and level it, don’t scoop. Scooping packs in extra flour and gives you a dry muffin. My kids can’t tell the difference when I swap in ½ cup whole wheat, if you’re trying to sneak in extra fiber.
- ½ cup granulated sugar + ¼ cup brown sugar: The brown sugar brings moisture and a hint of molasses. White sugar gives the structure. Skip the brown sugar and they’ll still work, but they won’t be as tender.
- ½ cup neutral oil (or melted coconut oil): Oil stays liquid at room temp, which keeps the muffins tender. Butter would make them taste richer but stiffer at room temp. I use avocado oil—it’s neutral, and I always have it on hand.
- 2 large eggs: These provide the structure that holds the moisture. If you’re using flax eggs, note that they’ll be a bit denser—still good, just not bakery-tall.
- 1 tsp vanilla extract: Obvious ingredient, non-negotiable result. Skip it and the muffins taste flat—I’ve done it on accident and regretted it.
- 1 ½ tsp baking powder + ½ tsp baking soda: Both leaveners are here for a reason. The powder lifts the batter slowly; the soda reacts with any leftover acidity. Make sure your baking powder is fresh—I test mine by dropping a little in hot water. If it doesn’t fizz, it’s dead.
- 1 tsp cinnamon + ½ tsp nutmeg (freshly grated if you have it): The spice profile that makes a zucchini muffin taste like fall, even in July. Nutmeg from a jar is fine. Nutmeg from a whole nut is a ten-second upgrade that makes people ask what’s different.
- ½ tsp salt: Balances the sweetness. I use fine sea salt here—flaky salt is for the top.
What to Pull Out Before You Start
- 12-cup muffin tin — standard size, not jumbo. If you use jumbo, adjust baking time by 5-7 minutes.
- Paper or silicone muffin liners — I prefer paper for the clean look, but silicone if I want the crispiest edges.
- Box grater or food processor shredding disc — box grater is fine, food processor is faster. Both work.
- One large mixing bowl + one whisk — that’s it. No mixer required.
(I use a standard 12-cup tin. If you’re using a dark nonstick tin, check the muffins at 17 minutes—dark pans bake hotter.)
Let’s Make It (Step by Step)
This goes fast, so preheat your oven and line your tin before you touch the zucchini. Trust the process—it’s about 15 minutes of active work.
Step 1: Prep the zucchini
- Shred the zucchini: Shred 1 ½ cups using a box grater or food processor. Transfer to a bowl, toss with a pinch of salt, and let it sit for 5 minutes. (📸 Photo tip: At this stage, you should see beads of moisture on the surface of the shreds—that’s the water you’re drawing out.)
- Squeeze gently: Take handfuls of the shreds and squeeze them over the sink—not aggressively, just enough to stop the flow of excess water. Set aside. Don’t squeeze it bone-dry. You want it damp, not dripping.
Step 2: Mix the wet base
- Whisk the wet ingredients: In a large bowl, whisk the oil, both sugars, eggs, and vanilla until smooth and slightly paler in color—about 30 seconds.
- Add the zucchini: Fold the shredded zucchini into the wet mixture. It will look weirdly separate at this point. That’s fine.
Step 3: Add the dry ingredients
- Whisk the dry ingredients separately (in the same bowl, lazy method): In a small bowl, whisk the flour, baking powder, baking soda, cinnamon, nutmeg, and salt. Or, do what I do: dump the dry ingredients on top of the wet mixture and whisk them together in a separate pile before mixing them in. One less bowl to wash.
- Fold it all together: Gently fold the dry into the wet with a spatula, just until no streaks of flour remain. A few lumps are fine. Overmixing = tough muffins. This is the step where I remind myself: gentle, Tiffany. Gentle.
Step 4: Bake
- Fill the liners: Divide the batter evenly among the 12 muffin cups. Fill them almost to the top—this is what gives you that dome! (📸 Photo tip: The cups should be about ¾ to ⅞ full. Use a cookie scoop for even portions.)
- Sprinkle the tops (optional but encouraged): Sprinkle a pinch of raw sugar or flaky salt on each muffin. The sugar adds a little crunch on top. The salt balances the sweetness. I do a mix of both.
- Bake at 375°F for 18-22 minutes: Bake until a toothpick inserted into the center comes out clean or with just a few moist crumbs. Let them cool in the tin for 5 minutes, then transfer to a wire rack. Don’t skip the cooling step—they finish setting up outside the oven.
Sunday Prep = Stress-Free School Mornings
I make a double batch on Sundays and we’re set for the week. The key is cooling them completely before storing—any trapped steam will make the tops soggy. I cool them on a wire rack for at least 30 minutes before bagging them up.
- Fridge: Store in an airtight container for up to 5 days. They actually get more tender on day two.
- Freezer: Yes! Wrap each muffin individually in plastic wrap, then place in a freezer bag. They keep for 3 months. My kids grab one from the freezer on school mornings—by the time we reach the car, it’s thawed enough to eat.
- Reheat: 15 seconds in the microwave for a just-baked texture. Or split and toast them for a warm, crispy edge.
Things I Wish I’d Known the First Time
- Don’t over-squeeze the zucchini: I know I said it already, but it’s the number one mistake. If you squeeze it completely dry, your muffins will be dense. The moisture is what creates the steam that lifts the batter. Keep it damp.
- Fill the liners high: If you want bakery-style domes, you need to fill the liners almost to the top. Shy filling = shy muffin tops. I use a ¼-cup scoop and it fills standard liners perfectly.
- Check your baking powder: Old baking powder is the reason most muffins fail to rise. If yours has been sitting in the cabinet for a year, buy a new can. I keep a marker on mine and write the date I opened it.
- Let them cool completely: The hardest part is waiting, but cutting into a warm muffin is the fastest way to a gummy interior. Give them at least 20 minutes on the rack. I’ve burnt my tongue more times than I care to admit on muffins I couldn’t wait for.
Make It Yours: Easy Variations
- Chocolate Chip Zucchini Muffins: Fold in ½ cup of semi-sweet chocolate chips along with the dry ingredients. My kids’ favorite version—they don’t even realize there’s zucchini in them.
- Dairy-Free: Use a neutral oil like avocado or coconut oil. The recipe already uses no dairy, so it’s naturally dairy-free as written. Just make sure your chocolate chips are dairy-free if you’re going that route.
- Gluten-Free: Swap the all-purpose flour for a 1:1 gluten-free baking flour. I’ve tested this with King Arthur Measure for Measure and it works. The texture is slightly more crumbly but still very good.
- Nutty & Spiced: Fold in ½ cup toasted walnuts or pecans with the dry ingredients. Add ¼ teaspoon of ground ginger for an extra warm spice note. This is the version I make when I want them to feel like fall in a muffin liner.
- Vegan: Use flax eggs (2 tbsp flaxseed meal + 5 tbsp water, let sit 5 minutes) and ensure your sugar is vegan. The texture will be a bit denser but still tender.
Questions I Get About This Recipe All the Time
Q: Why did my muffins turn out dense and wet?
A: Most likely the zucchini had too much water left in it. Next time, salt it and let it sit for 5 minutes, then squeeze gently. You want some moisture gone, but not all of it. Also, make sure your baking powder is fresh—I’ve been there, and it’s the worst feeling after all that effort.
Q: Can I make these with whole wheat flour?
A: Yes, you can swap up to half the all-purpose flour for whole wheat. If you go 100% whole wheat, they’ll be denser and more earthy. I like a 50/50 mix—my kids don’t notice the difference, and I feel slightly better about the extra fiber.
Q: How long do these last? Can I freeze them?
A: They stay tender in an airtight container on the counter for 4 days. Yes, they freeze beautifully. Wrap each one individually in plastic wrap, pop them in a freezer bag, and they’ll keep for 3 months. To reheat, microwave for 15 seconds or split and toast them. I always make a double batch and freeze half.
Q: What pairs well with these muffins for a brunch spread?
A: They’re great with a simple butter and a drizzle of honey, but honestly, they’re perfect on their own. If I’m doing a full brunch, I’ll serve them alongside a frittata or a yogurt parfait. My kids love them with a glass of cold milk, and I prefer mine with a dark roast coffee. No wrong answers here.
More Recipes My Family Makes on Repeat
If you loved these muffins, here are a few others that get the same reaction at our table:
- Classic Blueberry Muffins — Bursting with blueberries and a crunchy streusel topping.
- Easy Banana Bread — The one that disappears before it’s fully cooled.
- Healthy Carrot Cake Muffins — Basically carrot cake for breakfast, but I tell myself they’re healthy.
These are the muffins I make when I want my kitchen to smell good and my family to feel taken care of—without spending the whole morning baking. They come together in one bowl, they freeze like a dream, and they make even a Tuesday morning feel like a weekend.
If you try them, come back and leave a comment below—I love hearing how they turn out for you. Or tag me over on Pinterest so I can see your batch.
📌 Save this one-bowl zucchini muffin recipe for your next meal prep Sunday — it’s the breakfast bread that makes school mornings easier.
Homemade Zucchini Muffins That Taste Like Bakery — in One Bowl, No Mixer
Equipment
- 12-cup muffin tin
- Paper or silicone muffin liners
- Box Grater or Food Processor (shredding disc)
- Large Mixing Bowl
- Whisk
- Wire cooling rack
Ingredients
- 1.5 cups shredded zucchini (about 1 medium zucchini)
- 1.5 cups all-purpose flour
- 0.5 cup granulated sugar
- 0.25 cup brown sugar
- 0.5 cup neutral oil (avocado or melted coconut oil)
- 2 large eggs
- 1 tsp vanilla extract
- 1.5 tsp baking powder
- 0.5 tsp baking soda
- 1 tsp ground cinnamon
- 0.5 tsp ground nutmeg (preferably fresh-grated)
- 0.5 tsp fine sea salt
Optional Topping
- 1 tbsp raw sugar or flaky salt
Instructions
- Preheat your oven to 375°F. Line a 12-cup muffin tin with paper or silicone liners.
- Prep the zucchini: Shred 1 ½ cups of zucchini using a box grater or food processor shredding disc. Transfer to a bowl, toss with a pinch of salt, and let it sit for 5 minutes. Then gently squeeze handfuls of the shreds over the sink to remove excess moisture—you want it damp, not dripping dry. Set aside.
- Mix wet base: In a large mixing bowl, whisk together the oil, granulated sugar, brown sugar, eggs, and vanilla until smooth and slightly paler, about 30 seconds.
- Fold the shredded zucchini into the wet mixture. It will look separate at this point—that’s fine.
- Add dry ingredients: In a small bowl (or on top of the wet mixture, lazy method), whisk together the flour, baking powder, baking soda, cinnamon, nutmeg, and salt. Then gently fold the dry ingredients into the wet with a spatula just until no streaks of flour remain. A few lumps are fine—do not overmix.
- Divide the batter evenly among the 12 muffin cups, filling each almost to the top (about ¾ to ⅞ full). Use a cookie scoop for even portions. Sprinkle a pinch of raw sugar or flaky salt on each muffin if desired.
- Bake at 375°F for 18–22 minutes, until a toothpick inserted into the center comes out clean or with just a few moist crumbs. Let the muffins cool in the tin for 5 minutes, then transfer to a wire rack to cool completely (at least 20 minutes) before storing.
Notes
Related Recipes:
 Cheesy Hamburger Casserole Bake That’s Ready in 40 Minutes (No Canned Soup Here)
 Texas Roadhouse Style Baked Salmon with Sweet and Savory Glaze — Ready in Under 30 Minutes
 Moist Lemon Zucchini Bread with a Crunchy Lemon Sugar Top
 Strawberry Shortcake Rice Krispie Treats That Actually Taste Like Shortcake — Ready in 15 Minutes
 Blueberry Oatmeal Cookies That Stay Soft for Days — in Under 30 Minutes
 Air Fryer Chicken and Vegetables That Don’t Taste Like a Regret (30 Minutes, One Pan)