
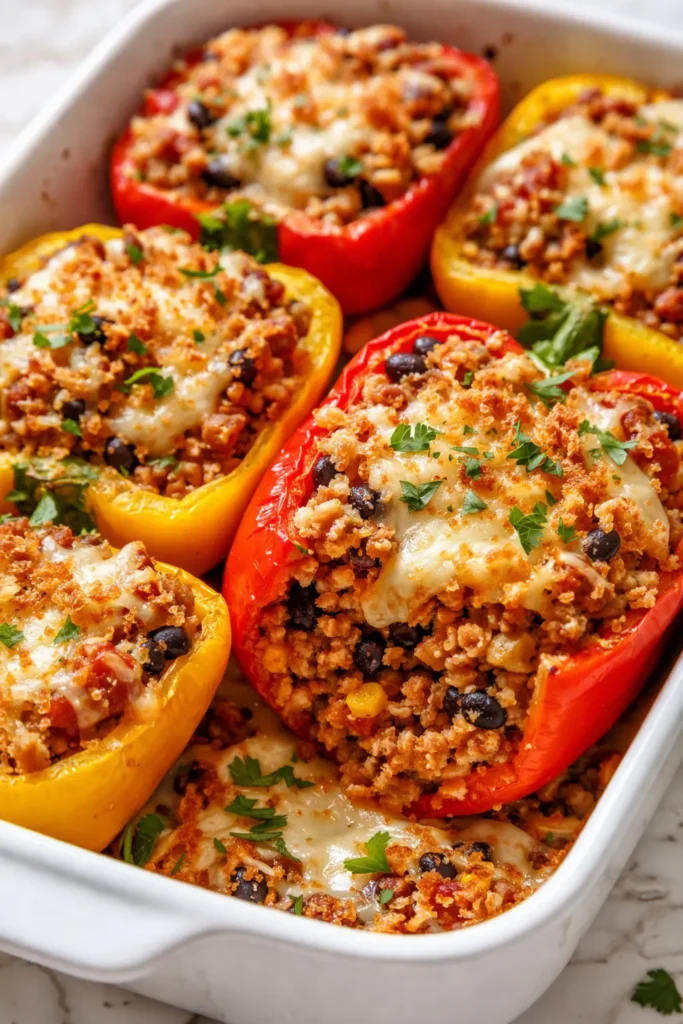
I have very strong feelings about stuffed bell peppers, and they come straight from the eight years I spent making them wrong. Every version I tried came out of the oven looking beautiful and then collapsed into a watery, mushy mess the second I set the pan down. The filling was either sad and dry or swimming in liquid. My husband chewed politely and asked no follow-up questions. Then I figured out the two little steps that change everything, and now these are the ones my kids request for their birthday dinners — no joke, the youngest has asked for them three birthdays in a row.
The short version: About 75 minutes start to finish, with a saucy, cheesy filling that never turns out bland or mushy.
I’ve made this exact batch at least forty times now — for Sunday suppers, for neighbors after surgery, for our small group potluck — and I’ve never once had a soggy pepper or a boring bite. If you’ve only ever had sad stuffed peppers, these are different, I promise.
- Serves: 6 as a main dish (or 12 as a hearty side)
- Hands-On Time: 25 min | Total Time: 75 min
- Difficulty: Easy — even on a school night
- Cost per serving: About $2.75
- Calories: ~385 per stuffed pepper half
- Dietary Notes: Gluten-free with a simple Worcestershire swap / low-carb adaptable
(Photo above: Overhead shot of a white enamel 9×13 baking dish holding six stuffed bell pepper halves — tops golden and bubbly, a spoon pulling one away with a nice cheese stretch, red gingham cloth in the corner, bright morning light from the left. Casual Sunday supper energy.)
The Five-Minute Step That Keeps These Peppers from Falling Apart
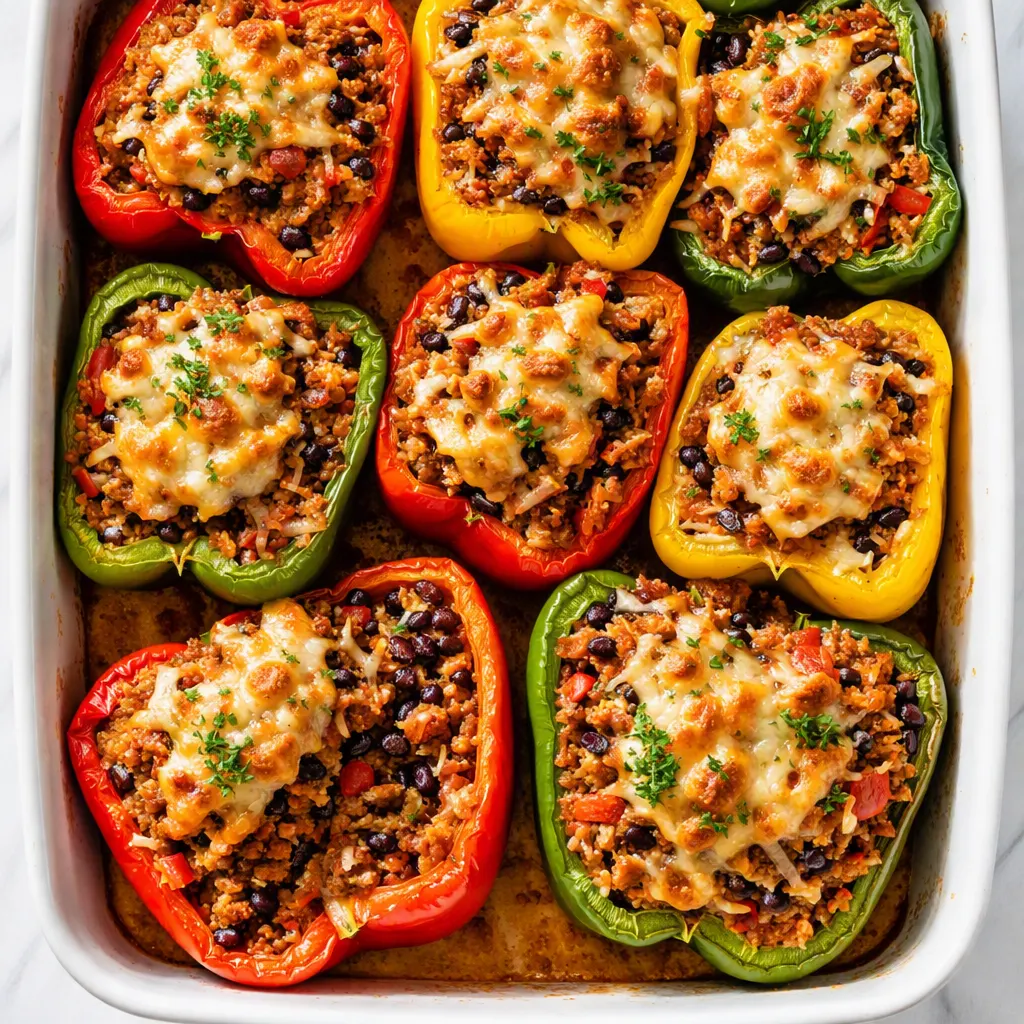
Here’s the honest truth: I spent years skipping the one step that makes everything work because I didn’t think a quick dunk in boiling water mattered. It absolutely does. Parboiling the pepper halves for just three or four minutes before they go in the oven does three things at once — it takes the raw edge off so they actually finish cooking in the oven, it brings out their natural sweetness, and it keeps them bright and firm instead of limp and sad. Without it, you get peppers that are either crunchy on the outside or fall apart entirely while the filling waits for them to catch up.
The other big one? I use chilled leftover rice from the fridge, never warm fresh rice. Warm rice keeps cooking and soaking up juice the whole time it bakes, which turns the middle of your pepper into watered-down mush. Cold rice — even plain takeout rice from the night before — holds its shape and keeps a nice texture.
Together, those two choices give you the stuffed bell pepper that actually works: a tender but sturdy pepper, a thick saucy filling you can scoop with one hand, and a cheese pull on top that makes the kids go quiet at the table.
Everything You Need (With My Honest Notes)
- 6 bell peppers, any color: Green is classic and cheapest, but red, orange, and yellow are sweeter. I buy a mix because my kids handpick the orange ones first every single time. Look for peppers that sit flat when halved — that little detail saves you from a wobbly baking dish.
- 1 lb ground beef (85/20): That ratio — not the super-lean kind — gives you a filling that doesn’t taste dry. If you only have 93/7, add a splash of olive oil when browning.
- 1 cup cooked white rice, cold: Leftover rice is the secret, I’m serious. Day-old rice from the takeout container works perfectly. Fresh rice can work too, just spread it on a sheet pan and let it cool for ten minutes first.
- 1 small yellow onion, finely diced: Sautéed until soft and golden, it melts into the background and makes the whole filling taste richer.
- 3 cloves garlic, minced: I add mine right after the beef is mostly browned so it gets fragrant but doesn’t burn.
- 2 tbsp tomato paste: This is the flavor backbone. It adds that deep, concentrated tomato taste you can’t get from sauce alone.
- 1 can (15 oz) tomato sauce: Plain tomato sauce, not marinara — you want to season it yourself so it tastes like you, not like a jar.
- 1 tbsp Worcestershire sauce: Make sure it’s gluten-free if that matters for your family. It adds that savory “what is that depth?” thing.
- 1 tsp Italian seasoning + ½ tsp smoked paprika: The smoked paprika is my tiny non-negotiable secret. It adds a warmth that makes people tip their head and ask what you put in there.
- 1½ cups shredded sharp cheddar, divided: Sharp cheddar beats mild here, full stop. One cup goes in the filling, the rest goes on top. My family’s version sometimes uses a cheddar-Monterey mix — the Monterey melts a little stretchier.
- ¼ cup grated Parmesan (optional but recommended): I’ve made it both ways. It’s never quite the same without it.
- Salt and black pepper: Season the filling at the very end, after you taste it. Pre-salting the beef always comes out too salty in my kitchen.
- 2 tsp olive oil: For the pan.
- ⅓ cup beef broth or water: Goes in the bottom of the baking dish to create steam. Not optional!
What to Pull Out Before You Start
- A big pot (4 to 5 quarts) for the boiling water — you don’t need a fancy stockpot.
- A 12-inch skillet for the filling. Cast iron, stainless, nonstick — all fine.
- A 9×13 baking dish — ceramic or metal both work; just make sure it’s deep enough that the foil tent doesn’t touch the cheese.
- Tongs for lifting the peppers out of the boiling water.
- A cutting board and a sharp knife — a dull knife will crush the side of a pepper and bruise it.
- Foil for the covered bake.
- A mixing spoon and a liquid measuring cup for the broth.
That’s it. No food processor, no special pans. If you have a fork and a skillet, you’re basically done with this list.
Making Stuffed Bell Peppers: My Exact Process
This goes fast, so let me walk you through it the way I’d talk to myself on a Tuesday evening. I like to pull the rice out of the fridge first and fill my big pot with water so it’s already heating while I chop.
Preheat: Set your oven to 375°F. Add a generous pinch of salt to the pot of water and bring it to a rolling boil while you prep the peppers.
- Halve and clean the peppers: Cut each one straight down the middle through the stem, top to bottom. Pull out the stem, white ribs, and seeds. Rinse them out and set them cut-side down on a towel. (📸 Photo tip: You should see six bright, clean pepper halves in two neat rows — the color really pops at this stage.)
- Parboil for exactly 3–4 minutes: Drop the pepper halves into the boiling water — don’t crowd them, do two batches if you need to. Boil for 3 minutes if you want a little firmness left, 4 minutes for softer. Fish them out with tongs and place them cut-side down on a clean towel. I pat the inside of each one dry with a paper towel too. This is the step that changed everything for me. Don’t skip it. (📸 Photo tip: After boiling, the peppers look noticeably brighter and just barely soft at the edges — they’ll bend slightly when touched.)
- Brown the beef: Heat the olive oil in your big skillet over medium-high heat. Add the ground beef and let it sit for a minute or two before breaking it up — proper browning needs contact with the pan. Break it into small crumbles and cook until no pink remains, about 5–6 minutes. Add the onion and cook for 3–4 more minutes until soft and translucent. Add the garlic and stir for 30 seconds until you can smell it.
- Drain the grease: Tilt the skillet and spoon off the excess fat. Leave about a tablespoon in there for flavor. This keeps the filling rich without being greasy.
- Build the sauce: Stir in the tomato paste and let it cook for 1 minute — this takes the raw edge off. Then add the tomato sauce, Worcestershire, Italian seasoning, smoked paprika, and a few cracks of black pepper. Let it bubble gently for 5 minutes until it thickens into something that looks like a proper chili base.
- Add the rice and cheese: Turn off the heat. Stir in the cold rice, 1 cup of the shredded cheddar, and the Parmesan. Taste it and add salt — I usually add a generous pinch here because cheese brings its own salt. The filling should be thick, not soupy. If it looks dry, splash in a tablespoon of the broth.
- Stuff the peppers: Set the parboiled halves in the baking dish cut-side up. Fill each one generously, mounding the filling above the rim just a little — it bakes down. Top with the remaining ½ cup of cheddar.
- Add liquid and cover: Pour the ⅓ cup of broth (or water) into the bottom of the dish around the peppers, being careful not to wash the cheese off the tops. Cover tightly with foil and bake for 25 minutes.
- Uncover and finish: Remove the foil and bake for another 10–15 minutes, until the cheese is golden and bubbling and the edges of the peppers are starting to wrinkle. The kitchen smells like the entire Sunday of my childhood at this point.
- Rest before serving: This is a step you can’t rush. Let the peppers sit for 5 full minutes on the counter. The filling sets, the peppers firm up, and everything holds together when you scoop it out. I learned this the hard way after one too many plates that looked like pepper soup.
Sunday Prep = Stress-Free Weeknight Dinner
These are practically made for meal prep. I do a double batch on Sundays and we’re set through Wednesday. The best part? You can parboil the peppers and make the filling a day or two ahead, then just assemble and bake when you’re ready.
- Fridge: Assemble the peppers, cover tightly with foil, and refrigerate for up to 24 hours before baking. Add 5 minutes to the covered bake time since you’re starting from cold.
- Freezer: Yes, these freeze great — both unbaked and baked. To freeze unbaked, skip the water in the dish, wrap the whole baking dish well (or transfer to a freezer-safe dish), and freeze. To bake from frozen, add water to the pan, cover with foil, and bake at 375°F for 55–60 minutes, then uncover for the last 10–15 minutes.
- Reheat: The oven is your friend. Warm them at 350°F for 15–20 minutes, covered, so the filling heats through without drying out. The microwave works in a pinch — about 90 seconds on high — but the pepper gets a little softer, and I don’t want you surprised by that.
Things I Wish I’d Known the First Time
- Parboil for three minutes, not ten: I know it’s tempting to give them a long head start in the water so the oven does less work. That’s the fastest road to mush. Three to four minutes is genuinely all they need. Even if you’re short on time, don’t increase it — the oven finishes the job.
- Drain every drop of water from the pepper halves: After parboiling, any water trapped in the bottom will leak out during baking and thin out your filling. Set them cut-side down on a towel and pat them dry on the inside before stuffing. I’ve seen one single tablespoon of trapped water wreck a whole batch.
- Use day-old rice, not fresh: I’ll say it again because it matters that much. Warm rice keeps absorbing liquid and swells up into mush inside the peppers. Cold rice just stays rice. This is the easiest swap in the world, and I promise you’ll taste the difference.
- The water in the pan is not optional: That little puddle of broth creates steam that keeps the peppers moist and helps them cook evenly. If you skip it, you’ll get dry, shriveled peppers with sad, stuck-on bottoms. Even if you forget and they come out a little dry — I’ve done it — they’ll still taste good, just not their best.
- Rest them, even if everyone is starving: Five minutes of patience is the difference between a perfect stuffed pepper half and a plate of stuffing with pepper slices floating in it. Tell the kids the cheese is setting. Works every time.
Swaps That Actually Work for My Family
- Mexican-Style: Swap the Italian seasoning for 1 tablespoon of taco seasoning, add a can of drained black beans, and use salsa instead of half the tomato sauce. Top with pepper jack instead of cheddar. I make this version for taco Tuesdays when I run out of tortillas.
- Dairy-Free: Skip the cheddar and Parmesan entirely, or use your favorite dairy-free shreds — they melt beautifully on top. My nephew is dairy-free, and his version quietly disappears every time he comes over. If you skip the cheese in the filling, add an extra pinch of salt and 2 tablespoons of broth so it doesn’t lose its richness.
- Low-Carb / Keto: Replace the rice with 1½ cups of riced cauliflower. Sauté it in a dry skillet for 3–4 minutes to draw out the moisture before adding it to the filling. It won’t hold together exactly like rice, but it absorbs the sauce beautifully. My sister-in-law eats these weekly.
- Ground Turkey or Italian Sausage: Use 1 lb of ground turkey thighs (dark meat, not breast) or swap half the beef for sweet Italian sausage. If using turkey breast, add a tablespoon of olive oil to the pan. My husband thinks the sausage version is the best thing I cook, hands down.
- No Rice at All: For a heartier swap, use 1 cup of cooked quinoa or 1 cup of cooked lentils instead of rice. Quinoa needs a little extra salt — it’s naturally earthier.
The Stuffed Bell Pepper Questions I Get All the Time
Q: Why are my peppers always mushy, even when I follow a recipe?
A: Ugh, I’ve been there — it’s the saddest dinner disappointment. Nine times out of ten, it’s one of three things: they got boiled too long, they weren’t drained properly after parboiling, or they baked uncovered for too long. Stick to that 3–4 minute parboil, pat them dry inside and out before stuffing, and keep the foil on for the first 25 minutes. And don’t skip the final rest — it genuinely lets the structure firm back up. You’ve got this next time, I promise.
Q: Can I make these gluten-free?
A: Yes! Canned tomato sauce, tomato paste, and cheese are all naturally gluten-free. The only thing to double-check is the Worcestershire — classic Lea & Perrins is gluten-free, but some generic brands add wheat. Swap in a gluten-free version or use a tablespoon of coconut aminos if you need to. The rice, beef, and vegetables make the rest of the recipe totally safe for gluten-free families.
Q: How long do stuffed bell peppers last, and can they be frozen?
A: Cooked peppers keep in a sealed container in the fridge for up to 4 days — those might be my favorite leftovers because the flavors meld overnight. They freeze beautifully for up to 3 months, either assembled and unbaked or fully baked. The best trick I know: freeze the unbaked ones in a 9×13 dish wrapped in two layers of plastic wrap and one layer of foil, then bake straight from frozen for about an hour. The oven keeps that pepper texture so much better than the microwave ever will.
Q: What do y’all serve with stuffed bell peppers?
A: In our house, it’s a simple green salad with a lemon vinaigrette and a warm crusty baguette — the bread soaks up the little bit of sauce left in the dish. For a full southern Sunday supper, I add a side of greens sautéed with garlic and maybe some buttered egg noodles for the kids (they call them “peach noodles” and refuse any other name). These peppers also pair beautifully with roasted green beans, a simple tomato and cucumber salad, or cilantro-lime rice if you want an extra-carb plate. And a big glass of sweet tea, if the weather agrees.
More Recipes My Family Makes on Repeat
If these stuffed bell peppers land well at your table, here are a few others that get the same reaction at mine:
- [INTERNAL LINK PLACEHOLDER: Easy 20-Minute Skillet Lasagna] — All the cozy Italian flavor without the whole layering production. My kids think it’s a treat every single time.
- [INTERNAL LINK PLACEHOLDER: Oven-Baked Tacos That Stay Crispy] — The perfect Friday-night crowd pleaser, and they honestly hold up better than fried sometimes.
- [INTERNAL LINK PLACEHOLDER: One-Pot Creamy Tomato Sausage Pasta] — One skillet, thirty minutes, and a dinner that tastes like you simmered it all day.
I really do hope these stuffed bell peppers make it onto your table soon — whether that’s for a busy Tuesday dinner, a Sunday meal prep session, or a birthday kid who can’t stop asking for them. Make a double batch and you’ll have lunch sorted for the rest of the week.
If you try them, drop a comment below and tell me how they went — I love hearing about the picky eaters who came back for seconds.
📌 These stuffed bell peppers stay perfectly tender with a saucy, cheesy filling — save this recipe for your next Sunday meal prep.
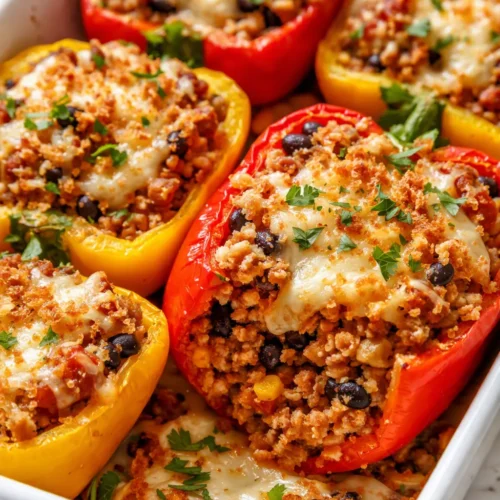
Stuffed Bell Peppers That Don’t Turn Out Soggy or Bland — Finally
Equipment
- Large pot (4 to 5 quarts)
- 12-inch skillet
- 9×13 Baking Dish
- Tongs
- Cutting board
- Sharp Knife
- Aluminum Foil
- Mixing spoon
- Liquid Measuring Cup
Ingredients
- 6 bell peppers, any color
- 1 lb ground beef (85/20)
- 1 cup cooked white rice, cold (day-old preferred)
- 1 small yellow onion, finely diced
- 3 cloves garlic, minced
- 2 tbsp tomato paste
- 1 can (15 oz) tomato sauce
- 1 tbsp Worcestershire sauce
- 1 tsp Italian seasoning
- ½ tsp smoked paprika
- 1½ cups shredded sharp cheddar, divided
- ¼ cup grated Parmesan (optional but recommended)
- salt and black pepper, to taste
- 2 tsp olive oil
- ⅓ cup beef broth or water (for the pan)
Instructions
- Halve and clean the peppers: Cut each pepper straight down the middle through the stem. Remove the stem, white ribs, and seeds. Rinse and set cut-side down on a towel.
- Parboil for exactly 3–4 minutes: Drop the pepper halves into boiling water in batches if needed. Boil 3 minutes for firmer peppers or 4 minutes for softer. Remove with tongs, set cut-side down on a clean towel, and pat dry inside with a paper towel.
- Brown the beef: Heat olive oil in a large skillet over medium-high heat. Add ground beef, let it brown without stirring for a minute or two, then break it into crumbles and cook until no pink remains, about 5–6 minutes.
- Add onion and garlic: Stir in the diced onion and cook 3–4 minutes until soft and translucent. Add the garlic and cook 30 seconds until fragrant.
- Drain excess grease: Tilt the skillet and spoon off extra fat, leaving about a tablespoon for flavor.
- Build the sauce: Stir in tomato paste and cook 1 minute. Add tomato sauce, Worcestershire, Italian seasoning, smoked paprika, and black pepper. Let it bubble gently for 5 minutes until thickened.
- Add rice and cheese: Turn off the heat. Stir in cold rice, 1 cup of shredded cheddar, and Parmesan. Taste and add salt if needed. Filling should be thick, not soupy.
- Stuff the peppers: Place parboiled halves cut-side up in a 9×13 baking dish. Mound filling over the top and sprinkle with remaining ½ cup cheddar.
- Bake covered: Pour ⅓ cup broth or water into the bottom of the dish. Cover tightly with foil and bake at 375°F for 25 minutes.
- Uncover and finish: Remove foil and bake 10–15 minutes more, until cheese is golden and peppers are tender. Rest 5 minutes before serving.
Notes
Related Recipes:
 Cheesy Hamburger Casserole Bake That’s Ready in 40 Minutes (No Canned Soup Here)
 Creamy Garlic Tagliatelle That Looks Like a Restaurant Dish in 20 Minutes
 Texas Roadhouse Style Baked Salmon with Sweet and Savory Glaze — Ready in Under 30 Minutes
 Easy Italian Meatloaf That’s Actually Juicy (Not Dry) — in 1 Hour
 The Biscuits and Gravy Casserole That’s Actually Crispy on Top (And Ready in 40 Minutes)
 Air Fryer Chicken and Vegetables That Don’t Taste Like a Regret (30 Minutes, One Pan)