
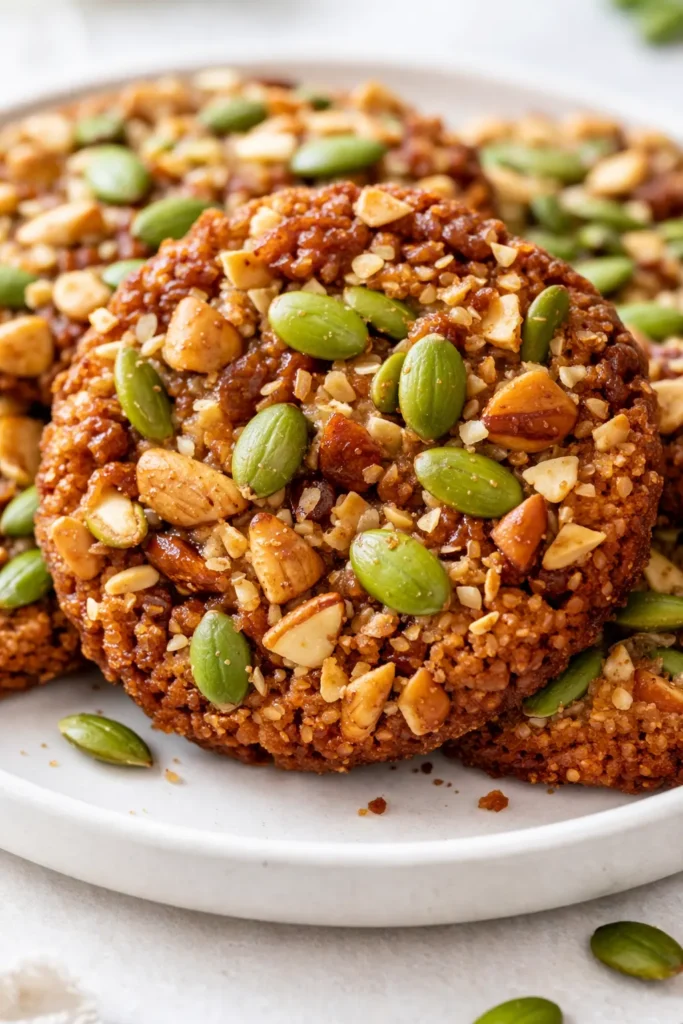
The problem with most “healthy cookies” isn’t the lack of sugar — it’s the lack of intention. A sad, crumbly blob that tastes like desperation doesn’t help anyone. These are different. They have edges that snap, a center that chews, and exactly enough salt to make you forget they’re made mostly from oats, dates, and things you’d sprinkle on a smoothie bowl. I make a batch every Sunday and somehow they’re gone by Tuesday afternoon.
The short version: These come together in one food processor in 15 minutes and taste like a bakery cookie that happens to be good for you.
I’ve tested this recipe about seven times to get the texture right — not too dry, not too sticky, just enough structural integrity to hold up in a lunchbox without crumbling into a sad pile of seeds. My husband, who actively distrusts “healthy baking,” ate four in a row the first time I made them. That’s the endorsement that matters most in my house.
- Serves: 18 cookies
- Hands-On Time: 15 min | Total Time: 30 min
- Difficulty: Easy — your food processor does the heavy lifting
- Cost per serving: ~$0.60
- Calories: ~145 per cookie
- Dietary Notes: Naturally gluten-free, dairy-free, and refined sugar-free
(Photo above: overhead shot of a stack of golden-brown cookies on a simple linen napkin, a few loose almonds and pumpkin seeds scattered around the base, warm afternoon light from the side throwing soft shadows and making the edges look exactly as crisp as they are.)
The Trick That Makes These Actually Craveable
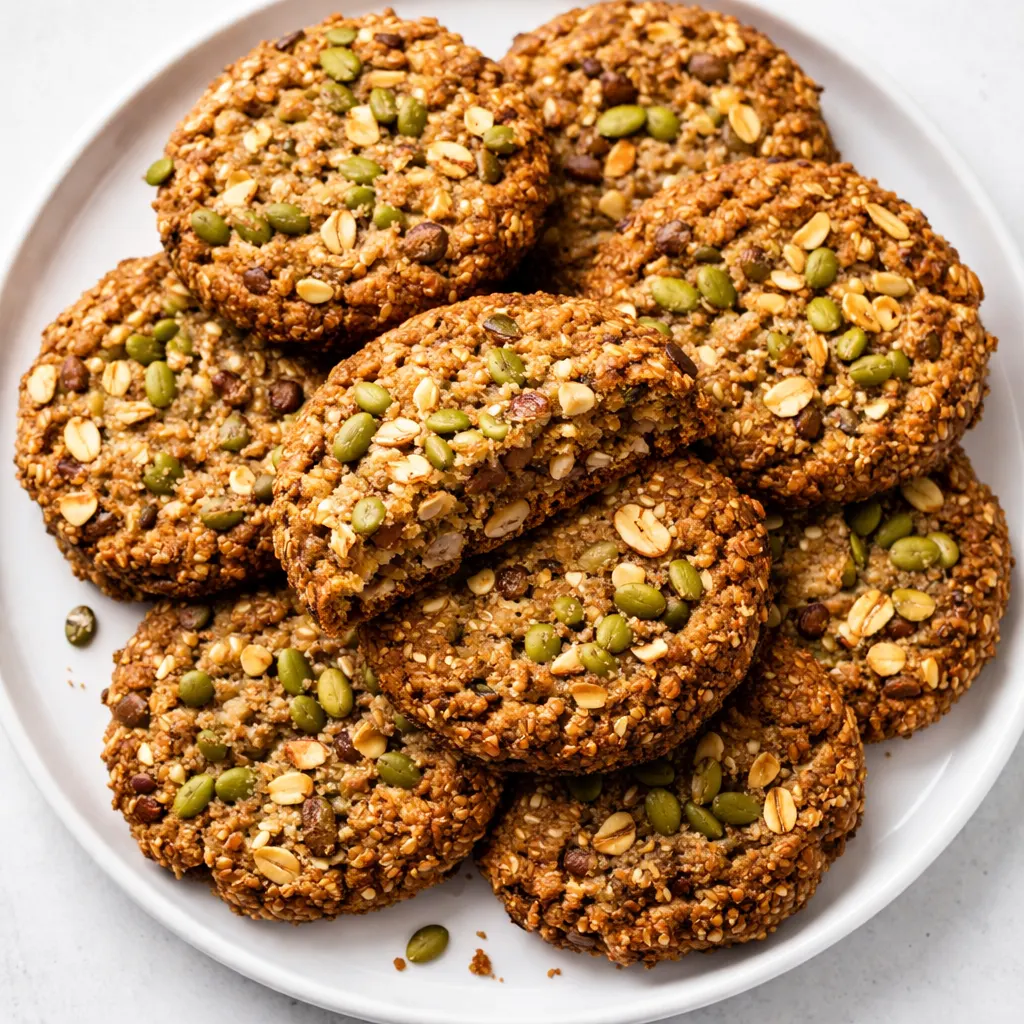
A cookie that’s just sweet is boring. By the time you finish one, you’re reaching for another just to feel something interesting. These work because they give your mouth a few different things to pay attention to — a salty hit from the flaky salt on top, a bitter edge from the toasted seeds, a chewy center that doesn’t dissolve instantly.
The single most important step is toasting the nuts and seeds first. It takes four minutes in a dry pan and it wakes up their natural oils in a way that no amount of baking can replicate. If you skip this step, the cookies are fine. If you do it, they’re the ones people text you about later.
The other non-negotiable is the salt. Don’t skip it. Salt is what makes a healthy cookie taste like a real cookie. It balances the sweetness from the dates and pushes the flavor of the toasted seeds forward. It’s doing more work than any other ingredient in this bowl.
Ingredients That Earn Their Keep
- 1 cup Medjool dates, pitted (about 8-10 dates): These are the sticky, caramel-y base that holds everything together without a grain of refined sugar. If your dates are hard and stiff, soak them in hot water for 10 minutes and drain well before using. This is the step that prevents dry cookies. I learned this the hard way after my first batch crumbled into dust.
- 1 very ripe banana (about 4 oz): Adds moisture and binds the dough without making it taste like banana bread. The riper the better — brown spots are ideal.
- 1/2 cup natural almond butter (or any nut/seed butter): Provides fat for richness and structure. Use the kind where the oil is mixed in, not the super-runny separated stuff. My grocery store brand works perfectly here.
- 1 1/2 cups rolled oats (certified gluten-free if needed): Half of these get ground into flour, the other half stay whole for texture. If you only have quick oats, they’ll work but the texture will be softer.
- 1/3 cup raw almonds, roughly chopped: Adds crunch. Toasted first, always.
- 1/4 cup raw pumpkin seeds (pepitas): These toast up bright green and add that savory, earthy note that makes the cookie interesting. My kids pick these out and eat them first, which I choose to interpret as a compliment.
- 1/4 cup raw sunflower seeds or hemp hearts: I use hemp hearts in the summer because they’re lighter. Sunflower seeds give a more substantial nutty crunch.
- 1 tablespoon chia seeds or flaxseed meal: They absorb moisture and help bind the dough. You won’t taste them, but the texture would be wrong without them.
- 1/2 teaspoon kosher salt (plus flaky salt for finishing): The flaky salt on top is not optional. It’s the visual and flavor finish that makes the cookie look like a bakery product.
- 1/2 teaspoon vanilla extract: Rounds everything out.
- 1/2 cup dark chocolate chips (optional but recommended): I use 60% cacao. They melt into pockets that make the cookie feel like a reward, not a health project.
The Setup (It’s Minimal, I Promise)
- Food processor (a small one works, but you’ll need to scrape the sides)
- Baking sheet (half-sheet or standard)
- Parchment paper or silicone baking mat
- Cooling rack
- Small skillet for toasting (though you can use the oven if you’re already preheating)
Let’s Make Them (It’s Faster Than Ordering Delivery)
This goes fast once you start, so read through once and get your ingredients measured before you turn on the oven. The whole process takes about 15 minutes of active work.
Preheat and prep: Set your oven to 350°F. Line a baking sheet with parchment paper or a silicone mat.
- Toast the nuts and seeds: In a dry skillet over medium heat, add the almonds, pumpkin seeds, and sunflower seeds. Toss or stir frequently for 3-4 minutes until the pepitas start to pop and the almonds smell warm and toasty. Don’t walk away from the pan — seeds burn fast. Pour onto a plate to cool. (📸 Photo tip: “You’re looking for the pepitas to turn bright green and the almonds to look slightly darker at the edges. That’s the sweet spot.”)
- Make the oat flour: Add 1/2 cup of the rolled oats to your food processor. Pulse for about 20 seconds until it looks like a coarse flour. Add the remaining 1 cup of whole oats and pulse just once or twice to combine.
- Blend the wet base: Add the pitted dates, banana, almond butter, salt, and vanilla to the food processor. Process for 30-45 seconds until the dates are broken down into a smooth, sticky paste. You may need to scrape down the sides once. The mixture should hold together when squeezed.
- Combine everything: Add the cooled toasted nuts and seeds, chia seeds, and chocolate chips (if using). Pulse 5-6 times until just combined. You want the mix-ins evenly distributed but still in distinct pieces. (📸 Photo tip: “The dough should look studded, not homogenous. You want pockets of texture in every bite.”)
- Scoop and shape: Using a 2-tablespoon scoop or a heaping spoonful, portion out the dough. Roll into balls and place on the prepared baking sheet about 2 inches apart. Flatten each ball to about 1/2-inch thickness — these cookies do not spread in the oven, so if you skip this step you’ll get thick pucks instead of cookies. Wet your hands slightly if the dough is too sticky to flatten easily.
- Bake: Bake at 350°F for 12-14 minutes. The edges should be golden brown and the center should still look slightly soft. They will firm up as they cool, which is crucial to remember. Overbaking by just 2 minutes can make them dry.
- Finish and cool: Immediately after removing from the oven, sprinkle a few flakes of finishing salt over the tops. Let the cookies cool on the baking sheet for 10 minutes, then transfer to a wire rack to cool completely. Do not skip the cooling step. I know you want to eat one immediately. I’ve done it. It’s crumbly. Wait the 10 minutes.
How I Meal Prep These for the Week
I make a double batch on Sundays and my husband packs one in his gym bag every morning. By Wednesday, he’s asking when I’m making more. The key is to cool them completely before storing — any residual heat turns the edges soft.
- Fridge: Store in an airtight container for up to a week. Layer parchment between stacks if you’re stacking more than two deep.
- Freezer: Yes, they freeze beautifully. Freeze flat on a baking sheet, then transfer to a freezer bag. They’ll keep for 3 months. Eat them frozen for a chewy-cold texture or pop one in a 300°F oven for 5 minutes.
- Reheat: 300°F for 5 minutes brings back the crisp edges. The microwave will make them soft — fine for an emergency, but not ideal.
Things I Learned After the First 3 Batches
- Over-processing is the enemy of texture: Stop pulsing the dough once the oats are incorporated and the mix-ins are distributed. If you keep going, you’ll end up with a uniform paste that bakes into dense, hockey-puck-like objects. You want to see distinct oats and seeds in the dough.
- Date softness matters more than you think: Hard, dry dates won’t break down properly in the food processor, leaving behind sticky bits that don’t integrate. If your dates feel stiff, soak them in hot water for 10 minutes. Pat them dry before adding them to the processor. I skipped this once on a tight timeline and ended up with unrepeatable vocabulary in my kitchen.
- Flatten them more than you think is right: These cookies don’t spread. At all. What you see is what you get. If you form them into balls and toss them in the oven, you’ll get round domes that are undercooked in the center and overbaked on the outside. Flatten to 1/2 inch minimum. Even if you mess up the shape a little, they’ll still taste great — I’ve made some truly ugly batches that disappeared just as fast.
- Use the good salt on top: The flaky Maldon or Jacobsen salt is worth it here. A few crystals on top of each cookie right out of the oven adds a crunch and a pop of salinity that transforms the whole experience. Table salt dissolves. Flaky salt announces itself.
Swaps That Actually Work (and One That Doesn’t)
- Nut-free version: Swap the almond butter for sunflower seed butter and replace the almonds with additional sunflower seeds or shelled hemp seeds. The color will be slightly darker, but the texture holds up perfectly. This is the version I make for my nephew’s lunchbox — he has no idea it’s the “healthy” swap.
- Vegan friendly: This recipe is already dairy-free if you skip the chocolate chips or use a vegan brand. The banana and dates are the only binders, so it works without eggs. Make sure your chocolate chips are dairy-free if that matters to you.
- Dried fruit instead of chocolate: Dried cherries, chopped apricots, or raisins work beautifully in place of the chocolate chips. I do a tart cherry version in the fall that tastes like a slightly sweet granola bar.
- Swap the banana: No banana? Use 1/4 cup unsweetened applesauce instead. The cookies will be slightly less sweet and a bit more tender. Adjust the oats by adding an extra tablespoon if the dough feels too wet.
- Spiced version: Add 1/2 teaspoon cinnamon and 1/4 teaspoon nutmeg to the dry ingredients for a chai-spice vibe. This is my favorite cold-weather adaptation.
Questions I Get About These Every Time I Post Them
Q: Why did my cookies turn out dry and crumbly?
A: Ugh, I’ve been there. Nine times out of ten, it’s because the dates were too dry or the cookies overbaked. Make sure your dates are soft and sticky — soak them if you’re unsure. And pull the cookies at the 12-minute mark, even if they look soft. They set up as they cool. Overbaking by two minutes makes the difference between “chewy” and “dry.” You’ve got it next time.
Q: Can I make these peanut butter instead of almond butter?
A: Absolutely. Any creamy nut or seed butter works here. Just avoid the super-runny, natural-separated kind that needs to be stirred for five minutes. Go with one that’s emulsified enough to hold its shape on a spoon. I’ve tested it with peanut butter and it’s fantastic — my kids actually prefer it that way.
Q: Can I make these without a food processor?
A: You can, but it’s a bit more work. You’ll need to finely chop the dates by hand (they’ll be sticky, use a knife sprayed with cooking spray) and grind the oats in a blender or just leave them whole. The texture will be different — more rustic, less cohesive — but the flavor will still be great. I’ve done it when my food processor was in the dishwasher and it worked fine, just took an extra 10 minutes.
Q: What do you serve with these?
A: They’re great on their own with coffee or tea. My kids grab one for an after-school snack with a glass of milk. I’ve also crumbled one over a bowl of vanilla yogurt and it was genuinely excellent. For a slightly more decadent pairing, warm one up and add a scoop of vanilla ice cream — the hot-cold thing works really well here.
More Recipes My Family Makes on Repeat
If you liked this one, here are a few others that get the same reaction at our table:
- My Go-To Seedy Granola Bars — Chewy, crunchy, and sturdy enough to survive a backpack
- 3-Ingredient Banana Oat Pancakes — The easiest Saturday morning win in my rotation
- Dark Chocolate Chia Pudding — Tastes like dessert, takes 5 minutes to throw together
These are the cookies that disappear from my counter in 48 hours. People always act surprised when I tell them what’s inside — dates, oats, seeds, no refined sugar — and I never get tired of that reaction. They taste like effort without actually requiring much.
If you make a batch, tag me on Instagram or Pinterest — I genuinely love seeing your version of these. Drop a comment below and let me know what mix-ins you used. I’m always looking for a new combination to try.
📌 Healthy nut and seed energy cookies that actually taste like a real bakery treat — save this one for your next Sunday meal prep session!
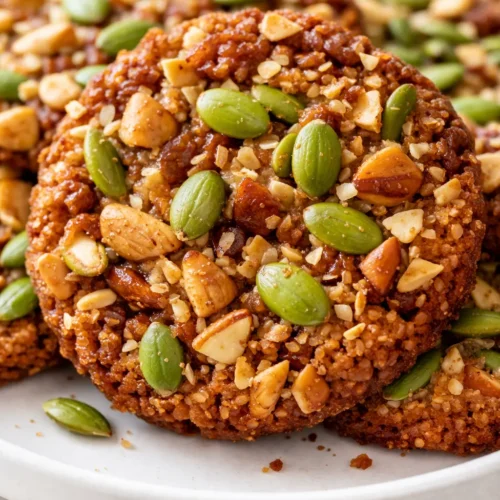
Healthy Nut and Seed Energy Cookies
Equipment
- Food Processor
- Baking Sheet
- Parchment Paper
- Cooling rack
- Small skillet
Ingredients
Wet Base
- 1 cup Medjool dates, pitted (about 8-10 dates)
- 1 large very ripe banana (about 4 oz)
- 1/2 cup natural almond butter (or any nut/seed butter)
- 1/2 teaspoon vanilla extract
- 1/2 teaspoon kosher salt
Dry Base
- 1 1/2 cups rolled oats (certified gluten-free if needed)
Add-ins
- 1/3 cup raw almonds, roughly chopped
- 1/4 cup raw pumpkin seeds (pepitas)
- 1/4 cup raw sunflower seeds or hemp hearts
- 1 tablespoon chia seeds or flaxseed meal
- 1/2 cup dark chocolate chips (60% cacao, optional)
- to taste flaky sea salt (for finishing)
Instructions
- Preheat your oven to 350°F. Line a baking sheet with parchment paper or a silicone mat.
- Toast the nuts and seeds: In a dry skillet over medium heat, add the almonds, pumpkin seeds, and sunflower seeds. Toss or stir frequently for 3-4 minutes until the pepitas start to pop and the almonds smell warm and toasty. Pour onto a plate to cool.
- Make the oat flour: Add 1/2 cup of the rolled oats to your food processor. Pulse for about 20 seconds until it looks like a coarse flour. Add the remaining 1 cup of whole oats and pulse just once or twice to combine.
- Blend the wet base: Add the pitted dates, banana, almond butter, salt, and vanilla to the food processor. Process for 30-45 seconds until the dates are broken down into a smooth, sticky paste. You may need to scrape down the sides once.
- Combine everything: Add the cooled toasted nuts and seeds, chia seeds, and chocolate chips (if using). Pulse 5-6 times until just combined. You want the mix-ins evenly distributed but still in distinct pieces.
- Scoop and shape: Using a 2-tablespoon scoop or a heaping spoonful, portion out the dough. Roll into balls and place on the prepared baking sheet about 2 inches apart. Flatten each ball to about 1/2-inch thickness. Wet your hands slightly if the dough is too sticky.
- Bake at 350°F for 12-14 minutes. The edges should be golden brown and the center should still look slightly soft. They will firm up as they cool.
- Finish and cool: Immediately after removing from the oven, sprinkle a few flakes of finishing salt over the tops. Let the cookies cool on the baking sheet for 10 minutes, then transfer to a wire rack to cool completely.
Notes
Related Recipes:
 Apple Rose Pastry Blooms That Look Like a Patisserie Display (With Zero Fancy Skills Needed)
 The Only Strawberry Shortcake Recipe That Works Every Time
 Fudgy Zucchini Brownies You’d Never Guess Are Hiding a Vegetable
 The Buttermilk Scones You’d Never Guess Are This Flaky (and Easy)
 Mixed Berry Crumble Bars That Look Like a Bakery Window (But Cost Pennies)
 The Healthy Breakfast Cookie You’d Never Guess Is Actually Good for You