
I’m not a loyal person when it comes to store-bought ice cream. I’ll buy anything once if the flavor name is pretentious enough. But the one I keep coming back to — the one I’ve spent an embarrassing amount of money on — is the one with the brownie pieces and the dark fudge ribbon. It’s the perfect food. So naturally, I had to figure out how to make it better at home, in my tiny Brooklyn kitchen, without a $500 ice cream maker attached to my counter.
The short version: This is a no-churn brownie chocolate swirl ice cream with a cream cheese base that stays scoopable and real brownie chunks that don’t turn into ice cubes.
I tested this across five gallons of whole milk and two boxes of brownie mix so you don’t have to. The first batch was a muddy, delicious disaster. This version is the one I bring to dinner parties where I want to pretend I didn’t just stir things together in a loaf pan. Because that’s exactly what I did.
- Serves: 1 quart (generous 4 servings)
- Hands-On Time: 20 min | Total Time: 6 hours 20 min (mostly freezing)
- Difficulty: Easier than making cookies — and less cleanup.
- Cost per serving: ~$2.50 (the heavy cream and the chocolate are the only real line items)
- Calories per serving: ~450 (listen, it’s a dessert. live a little.)
- Dietary Notes: Vegetarian. Easily adapted dairy-free and gluten-free.
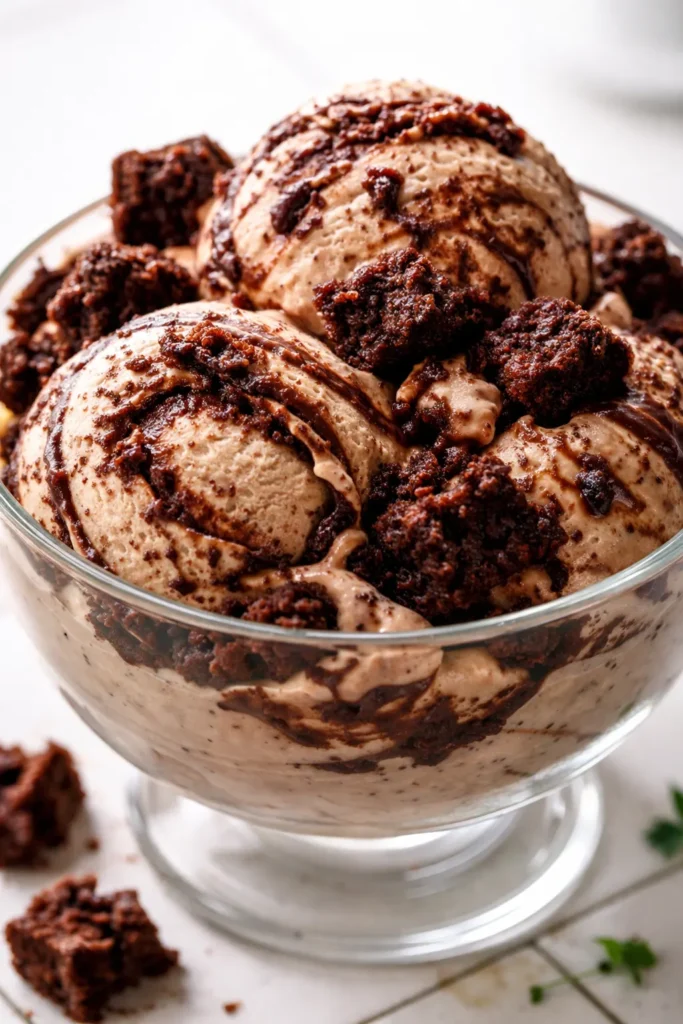
(Photo above: An overhead shot of a quart-sized loaf pan of brownie chocolate swirl ice cream, partially scooped out. The deep navy bowl it’s served in makes the dark chocolate base look almost black, with glossy, jagged fudge ribbons running through it and craggy, lighter brownie chunks studded throughout. Natural light from a north-facing window catches the gloss of the swirl.)
The Three Decisions That Make This Ice Cream Exceptional
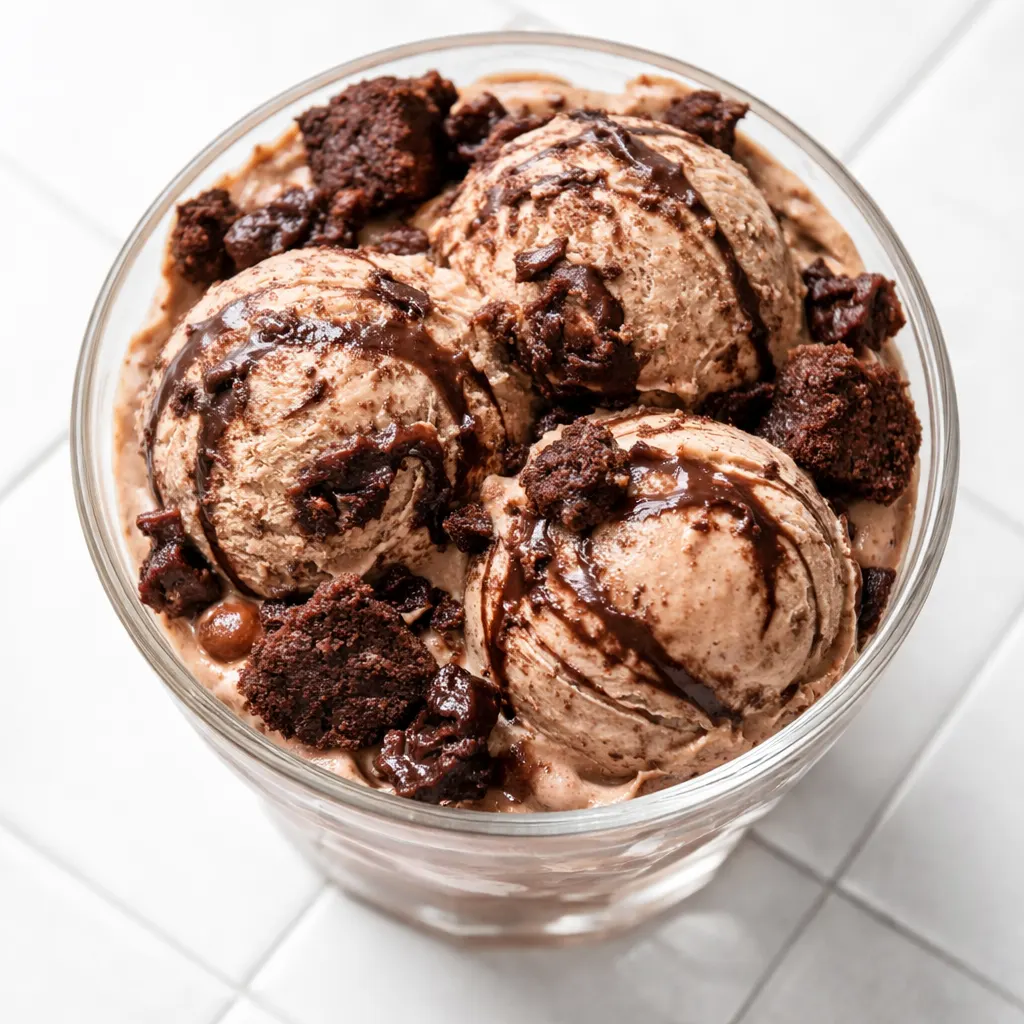
1. Cream cheese in the base. This is the trick that separates good homemade ice cream from great homemade ice cream. It sounds weird. It’s not weird. The cream cheese adds a tiny tang that cuts the sweetness of the brownies, and more importantly, it physically prevents the ice cream from freezing into a brick. You get a scoopable, creamy pint from the first hour to the last frozen spoonful. No wait time. No microwaving for ten seconds to soften it.
2. Freeze your brownie chunks first. This is the step you will be tempted to skip. Don’t. If you fold warm or even room-temperature soft brownies into the cold base, they dissolve. You end up with chocolate-flecked ice cream — delicious? Yes. What we’re after? No. I cube them small, spread them on a plate, and freeze them solid for an hour. They stay chewy, distinct, and provide that structural contrast in every bite.
3. The swirl is a ribbon, not a streak. A good swirl has volume, thickness, and flexibility. It should bend and fold over on itself when you scoop. I use a combination of chopped dark chocolate, a smidge of coconut oil (for that artful gloss), and a spoonful of corn syrup (which keeps it from freezing into a brittle solid). It freezes soft enough to pull apart but stays thick enough not to sink to the bottom of the loaf pan.
Everything You Need (And a Few Notes From Me)
- For the Brownie Bits:
- 1 box of brownie mix: I use Ghirardelli or Duncan Hines Chewy Fudge. I’m not above a boxed brownie mix — especially when the real star is the ice cream.
- 1 large egg + 1 extra yolk: The extra yolk makes the brownies fudgier rather than cakey, which matters when they freeze.
- 1/3 cup melted butter: Swap this for the oil the box calls for. Butter adds flavor and a better texture for freezing.
- 2 tbsp milk: Just if the batter looks too thick. You want a spreadable consistency.
- For the Ice Cream Base:
- 1 block (8 oz) full-fat cream cheese, softened: Full-fat is non-negotiable here. Low-fat cream cheese can separate when frozen.
- 1/2 cup granulated sugar
- 1/4 cup unsweetened cocoa powder: Dutch-processed, if you have it. It’s darker, smoother, and makes the base look like midnight.
- 1 tsp vanilla extract
- 1/2 tsp kosher salt: Do not skip. It keeps the sweetness in check.
- 1 cup heavy cream
- 1/2 cup whole milk
- 4 oz dark chocolate (70% cacao), melted and slightly cooled: This is what gives the base its deep chocolate body. Don’t use chocolate chips — they have stabilizers that mess with texture. A chopped bar is best.
- For the Fudge Swirl:
- 3 oz dark chocolate (70% cacao), chopped
- 1 tbsp coconut oil or unsalted butter
- 1 tbsp corn syrup
- Pinch of flaky salt
The Tools You’ll Actually Need
- A loaf pan (9×5): It sounds specific, but a narrow container creates a deeper pint, which means less surface area for ice crystals. Your standard loaf pan is the ideal ice cream vessel. I promise you already own one.
- A hand mixer or stand mixer
- A rubber spatula
- A small sheet pan or a plate for freezing the brownie chunks
Here’s How I Do It
This moves fast once you start, so I recommend reading through once before you do anything. Most of these steps are under 30 seconds each. The only real waiting is the freezing.
Prep the brownies: Preheat your oven to 350°F. Spray an 8×8 baking pan (or, if you want to use the loaf pan you already have out, it works too — just keep an eye on the time). Mix the brownie batter according to your box’s instructions with my tweaks: use the egg plus the extra yolk, the melted butter instead of oil, and a splash of milk. Pour it into the pan.
- Bake the brownies: Bake for 20-22 minutes. I underbake by a solid 2-3 minutes from what the box recommends. Fudgy is better than dry. A dry brownie will freeze into a crumbly mess. Let them cool completely in the pan, then turn them out onto a cutting board.
- Cube and freeze: Cut the brownies into precise 1/2-inch cubes. This size matters. Smaller than that and you don’t get a satisfying chew. Bigger and they freeze too hard. Spread the cubes on a plate or small sheet pan in a single layer and pop them in the freezer for at least 1 hour. Do not skip this.
(📸 Photo tip: The brownies should look like dark, fudgy dice. If they’re crumbling when you cut, your knife isn’t sharp enough, or they’re too dry.) - Make the fudge swirl: While the brownies are freezing, make the swirl. Combine the chopped dark chocolate, coconut oil, corn syrup, and a pinch of flaky salt in a small heatproof bowl. Microwave in 30-second bursts, stirring between each, until smooth and glossy. It should look like very thick hot fudge. Set it aside to cool slightly while you make the base. (📸 Photo tip: The swirl should be thick enough to hold its shape on a spoon for a few seconds before slowly sliding off.)
- Make the ice cream base: In a large bowl, beat the softened cream cheese with the sugar, cocoa powder, vanilla, and kosher salt. Use a hand mixer or stand mixer and really go for it — you want absolutely no lumps. This is the only part that requires a little arm work. Once it’s smooth, with the mixer running on low, slowly stream in the heavy cream and the milk. Mix until just combined — don’t whip it into whipped cream. Finally, fold in the cooled, melted dark chocolate with a spatula. Stop folding as soon as it’s one uniform, dark chocolate color.
- Assemble the ice cream: Pour half the base into your loaf pan. Scatter half the frozen brownie chunks over the top. Drizzle about a third of the fudge swirl over the brownies. Use a butter knife to gently create figure eights and air pockets in the mixture — this creates those beautiful interior veins of fudge. Repeat with the remaining base, the rest of the frozen brownies, and another drizzle of fudge swirl. Finish by saving a bit of the swirl to top the whole thing and a few perfect brownie pieces for appearances.
- Freeze: Press a piece of plastic wrap directly onto the surface of the ice cream (this prevents ice crystals from forming on top). Cover the pan with another layer of plastic wrap or a lid. Freeze for at least 6 hours, but overnight is genuinely better. Patience, patience.
How I Make This Ahead (Because You Should)
This is truly the ideal make-ahead dessert. It needs a solid 6 hours in the freezer to set up properly, so there’s no last-minute scramble. I often make the brownies and cube them one day, then assemble the next. It’s the most relaxed hosting dessert you’ll ever make.
- Fridge: The assembled (unfrozen) base will sit covered in the fridge for up to 24 hours if you need to split the steps. Just be sure to bring it back to room temp slightly before freezing so it freezes evenly.
- Freezer: The finished ice cream keeps perfectly in an airtight container for up to 3 weeks. Mine lasts about 3 days.
- Reheat / Soften: Let it sit on the counter for 5-7 minutes before scooping. If you’re impatient (I am), run your ice cream scoop under hot water between scoops.
Things I Wish I’d Known the First Time
- Don’t over-swirl. Two passes with that butter knife is plenty. You want distinct veins of fudge and pockets of brownie, not a homogeneous gray-chocolate mess. Less is genuinely more here.
- Check your cocoa. If your base is bland, it’s not you — it’s the cocoa. Natural cocoa is fine but can taste dusty. A Dutch-processed cocoa (like Cacao Barry Extra Brute or Droste) gives that deep, dark, almost fudge-like flavor to the base. Worth the swap.
- Use a sharp knife for the brownies. A dull blade will shred your brownies into crumbs. You want clean cubes. A serrated knife actually works beautifully here — it saws through without crushing.
- Cover it tight. That layer of plastic wrap directly on the surface is not negotiable. It’s the difference between a creamy pint and one with an icy, sandy top layer. Trust me on this one.
Swaps That Actually Work
- Gluten-Free: Use a gluten-free brownie mix (I like King Arthur Measure for Measure). The recipe stays exactly the same. I’ve tested this for a friend who can’t have gluten and she didn’t believe me.
- Dairy-Free: Use a high-quality vegan cream cheese (Miyoko’s is my go-to), full-fat canned coconut cream in place of the heavy cream, and oat milk for the whole milk. Use dairy-free chocolate and butter. The texture is slightly denser but still incredibly good — let it sit out for 10 minutes before scooping.
- Mint Chocolate: Add 1/2 teaspoon of peppermint extract to the base and fold in crushed, freeze-dried mint leaves (or just the extract). This is my personal Fourth of July party move.
- Salted Fudge: Add a generous sprinkle of flaky sea salt (like Maldon) over the final fudge layer before freezing. It cuts the richness perfectly.
The Questions Everyone Asks Me About This Ice Cream
Q: Why are my brownie chunks rock hard?
A: You either baked them too long or cut them too big. Stick to a 1/2-inch dice and underbake them by a whisper. If they’re already frozen solid, let the ice cream sit out for 10 minutes before scooping — it’ll soften them up.
Q: Can I make this with an actual ice cream maker?
A: Yes, absolutely. Prepare the base as written, but chill it thoroughly in the refrigerator (at least 2 hours) before churning. Churn according to your machine’s instructions, then fold in the frozen brownie chunks and the fudge swirl by hand before freezing in the loaf pan.
Q: The brownies got soggy and disappeared!
A: That happens if you fold them in while they’re still warm, or if your base is too warm. That’s why I insist on freezing the chunks solid first. A frozen brownie repels moisture and stays intact.
Q: How long does this keep in the freezer?
A: About 3 weeks in an airtight container with plastic wrap pressed onto the surface. After that, the texture starts to decline. Fat chance it lasts that long, though.
More Recipes My Family Makes on Repeat
If you liked this one, here are a few others that get the same reaction at our table:
- Salty Dark Chocolate Tahini Cookies — The only cookie recipe I make that disappears faster than these brownies
- Miso Caramel Gluten-Free Blondies — Sweet-salty, chewy, and nobody guesses the secret
- The Only Hot Fudge Sauce I Make — This is the exact one I use for the swirl
This is the kind of thing you make once and then get asked about indefinitely. Have a simple answer ready. The actual answer is just good technique and one good loaf pan.
If you make a batch, drop a comment below — I genuinely love hearing how it goes for you.
📌 Brownie chocolate swirl ice cream with a no-churn method and real brownie chunks — save this for your next weekend baking project.
Brownie Chocolate Swirl Ice Cream That Tastes Like a Brooklyn Dessert Bar — No Machine Required
Equipment
- Loaf pan (9×5)
- Hand mixer or stand mixer
- Rubber Spatula
- Small sheet pan or plate
- Heatproof bowl
- Microwave
- Oven
- 8×8 baking pan
Ingredients
For the Brownie Bits
- 1 box brownie mix (Ghirardelli or Duncan Hines Chewy Fudge)
- 1 large egg
- 1 extra yolk
- 1/3 cup melted butter
- 2 tbsp milk (optional)
For the Ice Cream Base
- 8 oz cream cheese, softened
- 1/2 cup granulated sugar
- 1/4 cup unsweetened cocoa powder (Dutch-processed)
- 1 tsp vanilla extract
- 1/2 tsp kosher salt
- 1 cup heavy cream
- 1/2 cup whole milk
- 4 oz dark chocolate (70% cacao), melted and cooled
For the Fudge Swirl
- 3 oz dark chocolate (70% cacao), chopped
- 1 tbsp coconut oil or unsalted butter
- 1 tbsp corn syrup
- 1 pinch flaky salt
Instructions
- Preheat oven to 350°F. Spray an 8×8 baking pan. Mix brownie batter according to box instructions, using 1 egg plus extra yolk, melted butter instead of oil, and a splash of milk. Pour into pan.
- Bake for 20-22 minutes until just set but still fudgy. Let cool completely in pan, then turn out onto a cutting board.
- Cut brownies into 1/2-inch cubes. Spread on a plate in a single layer and freeze for at least 1 hour.
- Meanwhile, make fudge swirl: Combine 3 oz chopped dark chocolate, 1 tbsp coconut oil, 1 tbsp corn syrup, and a pinch of flaky salt in a heatproof bowl. Microwave in 30-second bursts, stirring until smooth. Set aside to cool slightly.
- In a large bowl, beat softened cream cheese with sugar, cocoa powder, vanilla, and salt until smooth. With mixer on low, slowly stream in heavy cream and milk until just combined. Fold in melted dark chocolate.
- Pour half the base into a loaf pan. Scatter half the frozen brownie chunks. Drizzle a third of fudge swirl. Gently swirl with a butter knife. Repeat with remaining base, brownies, and swirl. Finish with reserved swirl and a few brownie pieces on top.
- Press plastic wrap directly onto surface. Cover and freeze for at least 6 hours or overnight.
Notes
Related Recipes:
 Cheesy Hamburger Casserole Bake That’s Ready in 40 Minutes (No Canned Soup Here)
 Texas Roadhouse Style Baked Salmon with Sweet and Savory Glaze — Ready in Under 30 Minutes
 Moist Lemon Zucchini Bread with a Crunchy Lemon Sugar Top
 Strawberry Shortcake Rice Krispie Treats That Actually Taste Like Shortcake — Ready in 15 Minutes
 Blueberry Oatmeal Cookies That Stay Soft for Days — in Under 30 Minutes
 Air Fryer Chicken and Vegetables That Don’t Taste Like a Regret (30 Minutes, One Pan)