
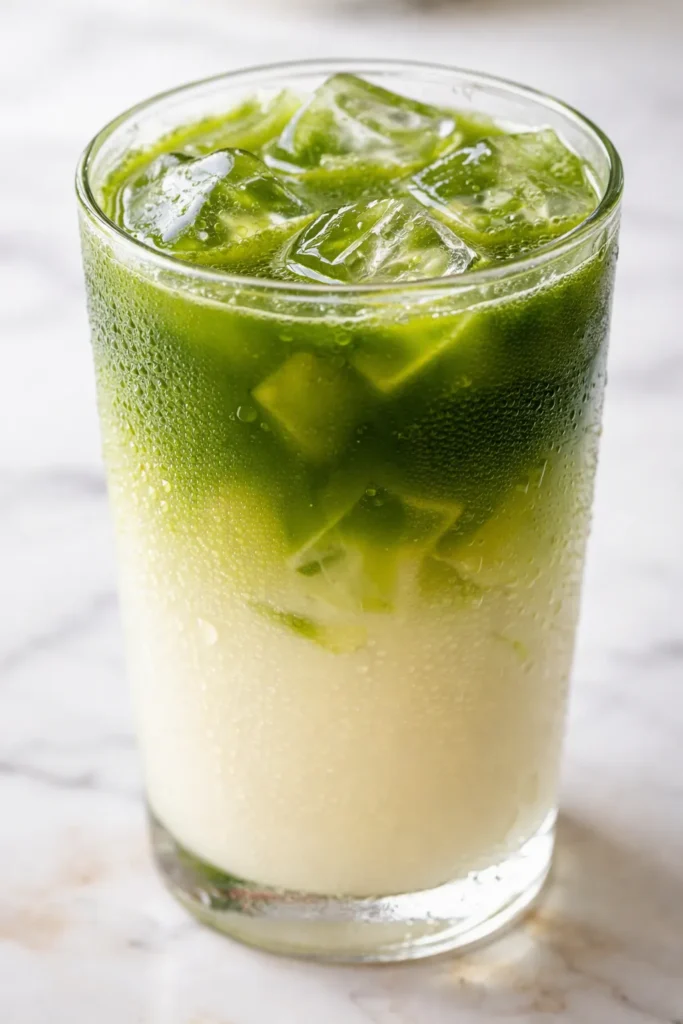
The first time I made this, I stood over the counter staring into the glass like I’d just performed a magic trick. Bright green matcha floating on a cloud of vanilla milk, ice cubes suspended between the layers, the whole thing looking exactly like the vanilla matcha iced tea from the café down the street — the one they charge nine dollars for in a glass that’s fine but definitely not fine enough for that price. It took me five minutes. It costs about a dollar fifty. I have not ordered one since.
The short version: Matcha, vanilla milk, and a 30-second pour that makes it layer instead of mix. That’s the whole trick.
I tested every way to make this at home after my corner café closed last winter — and by tested, I mean I made roughly forty slightly-too-bitter drinks and sent a concerning number of texts to my friend Dana about the color of the foam. This is the version that finally worked. The recipe is barely a recipe. The method is everything.
- Serves: 1 (doubles cleanly — the layers hold up in both glasses)
- Hands-On Time: 5 min | Total Time: 5 min (plus 10 min once, to make the vanilla syrup if you don’t keep it around)
- Difficulty: Easy enough for a weekday morning when you’re half awake
- Cost per serving: About $1.50 once you own matcha (the tin is the upfront cost)
- Calories: ~120 per tall glass with whole milk
- Dietary Notes: Gluten-free and vegetarian; easily vegan with oat milk
(Photo above: two tall glasses of vanilla matcha iced tea on a dark wood counter in early afternoon light, the gradient from white milk at the bottom to bright green matcha at the top clearly visible through the glass. A long spoon and one vanilla bean pod rest beside the glasses. No props that don’t get used.)
The One Step That Makes It Look Like a Café Drink (No, Not the Matcha)
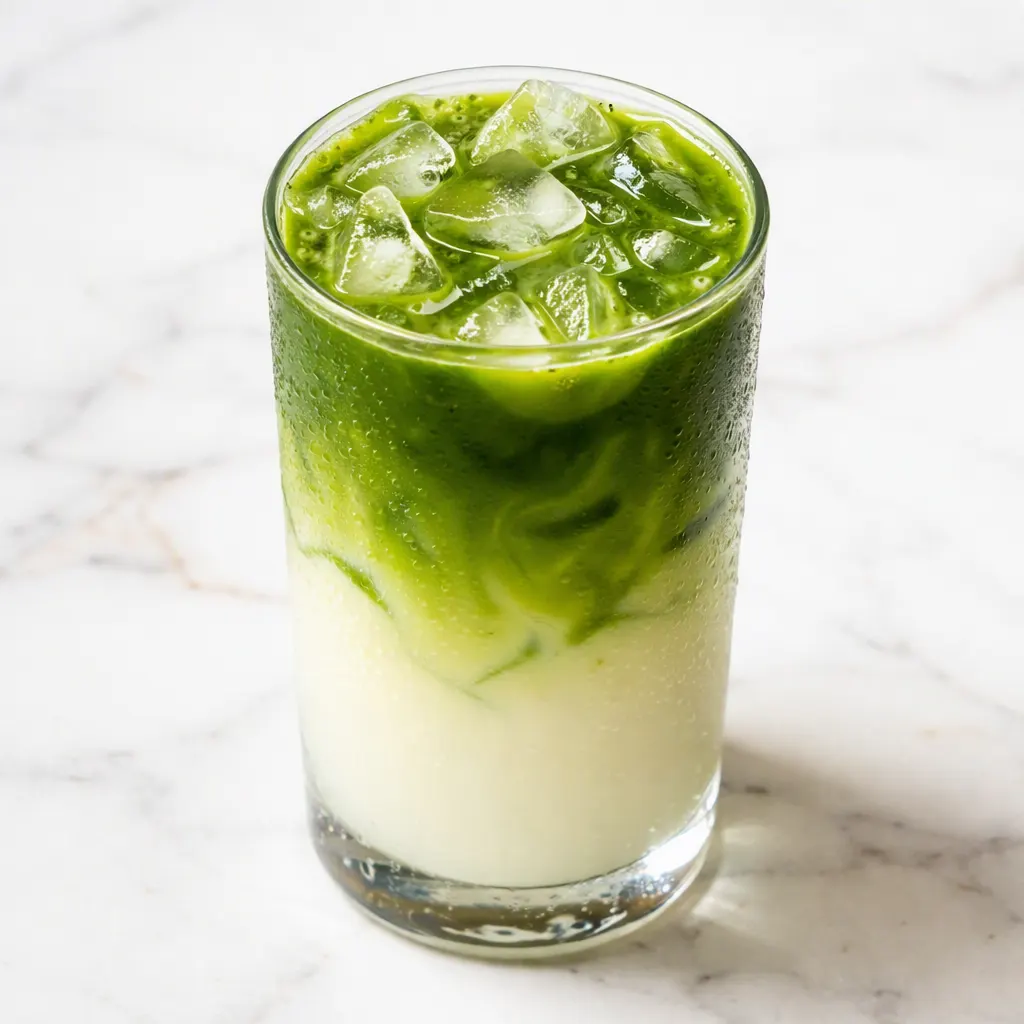
The difference between a good iced matcha and one that looks like it came from a place with a wood-paneled menu is the pour. Everything else — the sifting, the water temperature — is about taste. The pour is about presentation. And for this drink, the presentation is half the point.
Matcha is heavier than milk, so if you pour it straight into the glass, it plunges down and turns the whole thing into one swampy pale green. But pour it slowly down the back of a spoon held against the inside of the glass, and it lands softly on top of the milk instead. For about ten minutes, you get a drink that looks like a sunset in reverse.
That’s the whole trick. The layers eventually merge — that’s normal and good, because the vanilla flavor mixes in slowly as they do. But the first ten minutes belong to the visual. This drink doesn’t need a garnish. The layers are the garnish. A mint sprig would fight the vanilla, and an edible flower is just theater. Restraint is the move here.
Everything You Need (And the Notes I’d Give a Friend)
- 1 teaspoon matcha powder: Ceremonial grade if you can swing it. Culinary grade works for baking, but in a cold drink where the flavor is the whole event, you’ll notice the difference — grassier and a little harsh. One good tin lasts months because you only use a teaspoon at a time. My grocery store started carrying a decent ceremonial-grade tin, and it honestly changed my entire cold-drink situation.
- 3 tablespoons hot water (175°F — not boiling): The water temperature is the difference between sweet and bitter. Boiling water scorches matcha. I heat mine just below a boil and let it sit for a full minute before pouring. I learned this the hard way after a week of bitter failures. My friends did not warn me. I am warning you.
- 2 tablespoons vanilla syrup: Recipe below — it takes 10 minutes and makes enough for weeks. Store-bought vanilla syrup (the coffee shop kind) works too; just use a little less because it tends to be sweeter. Honey and maple change the whole flavor and clump in cold milk. The syrup dissolves instantly, which is why it’s non-negotiable for the smooth version.
- ¾ cup cold milk: Whole milk has the body to hold the layer. Oat milk is my second choice — get the barista-grade kind, the one that’s creamy and full-fat, not the thin refrigerated one. Almond milk is too thin and the matcha drops straight through it like a stone.
- Ice: Large cubes melt slower and keep the layers intact longer. I use the big silicone trays meant for cocktails for all my iced drinks and I cannot go back. Regular small freezer ice works in an emergency. The layers just don’t last as long. It’s fine. Still drinkable.
For the vanilla syrup (makes about 16 servings):
- 1 cup water + 1 cup white sugar: Equal parts keeps it at the right consistency for dissolving instantly in cold milk. It takes the same 10 minutes to double, so double it.
- 1 vanilla bean, split and scraped (or 2 teaspoons vanilla extract): The bean gives you those tiny black flecks that make a drink look homemade in the best way. Extract is nearly indistinguishable once it’s in a cold drink. I use a real bean on weekends and extract on Tuesdays. Both are good. One photographs better.
What to Pull Out Before You Start
- A matcha whisk (chasen) or a small electric milk frother: The chasen is traditional and works beautifully. The electric frother is about $12 and takes the guesswork out. I own both and reach for the electric one on work mornings.
- A fine mesh strainer: For sifting. This is not a decorating move — it prevents lumps and the bitter pockets that come with them.
- A tall clear glass: The glass is the plate here. This drink in an opaque mug is a crime. You need to see the layers.
- A long-handled spoon: For the pour — the back of the spoon is what makes the matcha land softly.
- A small saucepan: Only if you’re making the syrup from scratch.
Let’s Make It (Step by Step)
This goes fast once you’ve done it once. The first time, read through the steps so you know what’s coming — the sifting and whisking take about a minute, and the pour takes ten seconds.
- Make the vanilla syrup (once, ahead of time): Combine 1 cup sugar and 1 cup water in a small saucepan over medium heat. Stir until the sugar dissolves — about 3 minutes, no need to boil. Take it off the heat, add 1 split vanilla bean or 2 teaspoons of extract, and let it cool. Pour into a jar and keep it in the fridge. It lasts two weeks. (📸 Photo tip: You should be able to see the tiny black vanilla flecks suspended in the syrup — that’s what’s going to look beautiful in the finished glass.)
- Sift the matcha: Set a fine mesh strainer over a small bowl and press 1 teaspoon of matcha through it with the back of a spoon. It takes 30 seconds and it’s the difference between a smooth drink and one with bitter little pockets of powder. Don’t skip it. (📸 Photo tip: The sifted matcha should look like fine, even green dust with zero lumps — the texture of storybook moss.)
- Whisk with hot water: Add 3 tablespoons of water at 175°F — just below boiling — to the sifted matcha. Whisk in a rapid zig-zag motion until it’s smooth and frothy on top, about 15 seconds with a chasen or one pulse with an electric frother. You’re looking for a layer of fine bubbles on the surface, like the head on a good beer. Not soap suds. When I’m genuinely tired, I skip the whisk entirely and shake the matcha and water in a small jar for 20 seconds. It works. No one at the table knows.
- Build the glass: Fill your glass with the large ice cubes. Pour in ¾ cup cold milk, then add 2 tablespoons of vanilla syrup. Stir the milk and syrup together briefly — the syrup sinks to the bottom if you skip this, and you end up with an unsweet top half and an overly sweet bottom half. That was a sad discovery from my testing phase.
- Pour the matcha over the back of a spoon: Hold the long spoon against the inside of the glass, the bottom of the spoon just above the ice and the handle resting on the rim. Pour the matcha slowly down the back of the spoon. It should land gently on top of the ice and sit there in a layer instead of plunging through. This is the café step. Take the photo now. (📸 Photo tip: This is the money shot — bright green hovering over white, with the ice suspended in between. You’ll see thin strands of matcha start to bleed downward at the edges. That’s your sign it’s working.)
- Serve without stirring: Hand over a straw and let the drinker swirl it themselves. The layers are the point, and the drink tastes different as the matcha slowly bleeds down — brighter and grassier at first, creamier and sweeter at the end. If you’re making two glasses, pour the matcha into both before either gets stirred. Each glass gets one window of perfect layering.
Sunday Prep for a Week of Five-Minute Café Mornings
If you’re going to make this more than once — and you will — spend ten minutes on Sunday making a double batch of vanilla syrup. Then every work morning is: sift, whisk, pour, done. I keep the syrup in a glass jar on the fridge door and the matcha in a sealed tin in a dark cabinet. Matcha clumps if it sees light and moisture, so treat it like the expensive green powder it is.
- Fridge: The vanilla syrup keeps up to two weeks in an airtight jar. The drink itself is best made fresh — the layers separate and the ice dilutes everything after about 15 minutes, so don’t make a big pitcher and expect it to look the same.
- Freezer: The syrup doesn’t need it — the sugar keeps it from freezing solid anyway, and two weeks in the fridge is plenty. But you can freeze brewed matcha in an ice cube tray and use those cubes later for an iced matcha that doesn’t dilute as it melts. That trick is genuinely good.
- Reheat: This is an iced drink, but the hot version takes the same five minutes: whisk the matcha and water, stir in the syrup, and pour hot milk over it. That’s how I get through November.
Things I Wish I’d Known the First Time
- The water temperature is not a detail: Matcha is fussy about heat. Too hot and it goes bitter; too cold and it clumps on the whisk. I wait exactly one minute after my kettle clicks off, which lands right around 175°F. No thermometer required — just a minute of standing there.
- Big ice keeps the layers honest: The gradient doesn’t survive contact with small, fast-melting cubes. Once the drink gets watery, the matcha just diffuses into everything. My friend Dana thought I was being precious about ice until she tried it with the big clear cubes and sent me a photo with no text. The photo said it all.
- If the pour goes wrong, it still tastes right: Sometimes the matcha plunges straight into the milk and you get an even pale green instead of layers. It tastes exactly the same. I’ve done it more times than I care to admit, and every one of those drinks was fine. Say it with me: the layers are optional. The flavor is the point.
- Taste before you sweeten: Matcha brands vary — some are grassier, some have a natural sweetness. Start with 1½ tablespoons of syrup and add more if you need it. The fixed 2-tablespoon rule is a starting point, not a law.
Swaps That Actually Work
- Dairy-free / vegan: Barista-grade oat milk is the answer. It has the right body to hold the matcha layer and doesn’t add a competing flavor. Almond milk is too thin and the matcha just drops through; coconut milk fights the vanilla. Oat or bust, in my kitchen.
- Less sweet: Drop the syrup to 1 tablespoon and add a tiny pinch of flaky salt to the matcha before whisking. It makes the drink taste sweeter with less sugar — a trick I picked up in test kitchens, and it works just as well in a glass of iced tea.
- The dirty version (my personal favorite): Add a double shot of espresso to the milk before the matcha goes in. You get three layers — white, brown, green. I make this when I need the day to feel like it might get interesting.
- Kid-friendly (my nephew’s version): My nephew watched me make this once and now requests “the green milk” whenever he visits. He prefers a splash of chocolate syrup instead of the vanilla. It looks ridiculous and tastes surprisingly good. Use whatever milk is already in the fridge.
- Brunch for a crowd: Skip the syrup in the milk and float the spent vanilla bean pod in the glass as the garnish. Serve the drink lightly sweetened with a small pitcher of extra syrup on the side so guests can dial it in themselves. That’s the host move.
Questions I Get About This All the Time
Q: Why is my matcha bitter?
A: Ugh, I’ve been there. The most common culprit is water that’s too hot — boiling water scorches matcha and makes it taste like lawn clippings. Use 175°F, which means waiting about a minute after the kettle clicks off. Also, if you’re using culinary-grade matcha, it’s naturally more bitter than ceremonial grade. And if you used a whole tablespoon of powder, that’s also too much — one teaspoon is plenty. I’ve made every single one of these mistakes, so this list is from the trenches.
Q: Can I make this dairy-free?
A: Yes, absolutely. Barista-grade oat milk is my first choice — it holds the layer and doesn’t add a competing flavor. I’ve tested almond (too thin), cashew (okay but nothing special), and oat (the winner). If a guest is dairy-free, I don’t tell them it’s oat milk and they don’t ask. That’s the review that matters.
Q: How long does the vanilla syrup last? Can I freeze it?
A: Two weeks in the fridge in a sealed jar. Because it’s equal parts sugar and water, it doesn’t freeze solid and doesn’t need to — two weeks of iced drinks is a lot of iced drinks. If it starts to look cloudy or smells off, toss it. You’ll know. For the longest shelf life, make a double batch and use a clean spoon every time you dip in.
Q: What do you serve with this?
A: For me, it’s a weekend-morning drink — I make it alongside something slightly savory, like a slice of buttered toast with flaky salt or eggs and feta if it’s feeling like a real brunch. On weekdays, it’s my afternoon pick-me-up, and it pairs dangerously well with shortbread. It also handles being the non-coffee option on a brunch table gracefully, though pour it into individual glasses at the last minute — the layers only really perform in the glass.
More Recipes I Make on Repeat
If you’re into the layering thing, these are the next ones I’d send you to:
- Cold Brew with Vanilla Syrup — Same syrup, different caffeine delivery system, and my answer to people who want coffee without tasting coffee.
- Homemade Strawberry Milk — The pink cousin of this drink. Same layering logic, prettier color, no caffeine.
- Brown Sugar Boba Milk Tea — The dessert version of an iced drink that I refuse to apologize for loving.
Make this for the kind of morning that needs to feel like a small event — or for a Tuesday that doesn’t. Both count. The layers only last about ten minutes, so take the photo before you take the first sip.
If you try it, tag me in whatever you make — I have strong opinions about the color of the foam and I’m genuinely curious about yours.
📌 This layered vanilla matcha iced tea recipe looks like a $9 café drink — save it for your next slow weekend morning.
Vanilla Matcha Iced Tea (Thé Glacé Matcha Vanille)
Equipment
- Matcha whisk or electric milk frother
- Fine-Mesh Strainer
- Tall clear glass
- Long-handled spoon
- Small saucepan
Ingredients
- 1 teaspoon ceremonial grade matcha powder
- 3 tablespoons hot water at 175°F
- 2 tablespoons vanilla syrup
- 3/4 cup cold whole milk or barista-grade oat milk
- as needed large ice cubes
For the Vanilla Syrup (makes about 16 servings)
- 1 cup water
- 1 cup white sugar
- 1 vanilla bean, split and scraped (or 2 teaspoons vanilla extract)
Instructions
- Make the vanilla syrup once ahead of time: combine 1 cup sugar and 1 cup water in a small saucepan over medium heat. Stir until the sugar dissolves, about 3 minutes. Take it off the heat, add 1 split vanilla bean or 2 teaspoons of vanilla extract, and let it cool. Pour into a jar and keep it in the fridge for up to two weeks.
- Sift 1 teaspoon of matcha through a fine mesh strainer into a small bowl. This prevents lumps and bitter pockets of powder.
- Add 3 tablespoons of water at 175°F, just below boiling, and whisk in a rapid zig-zag motion until smooth and frothy, about 15 seconds. A single pulse with an electric frother also works.
- Fill a tall glass with large ice cubes. Pour in 3/4 cup cold milk and 2 tablespoons vanilla syrup, then stir the milk and syrup briefly so the syrup does not sink to the bottom.
- Hold a long spoon against the inside of the glass with the bottom just above the ice. Pour the matcha slowly down the back of the spoon so it lands in a layer on top instead of plunging through the milk.
- Serve without stirring. The layers will merge after about ten minutes, so take the photo first and let the drinker swirl it themselves.
Notes
Related Recipes:
 Cheesy Hamburger Casserole Bake That’s Ready in 40 Minutes (No Canned Soup Here)
 Texas Roadhouse Style Baked Salmon with Sweet and Savory Glaze — Ready in Under 30 Minutes
 Moist Lemon Zucchini Bread with a Crunchy Lemon Sugar Top
 Strawberry Shortcake Rice Krispie Treats That Actually Taste Like Shortcake — Ready in 15 Minutes
 Blueberry Oatmeal Cookies That Stay Soft for Days — in Under 30 Minutes
 Air Fryer Chicken and Vegetables That Don’t Taste Like a Regret (30 Minutes, One Pan)