
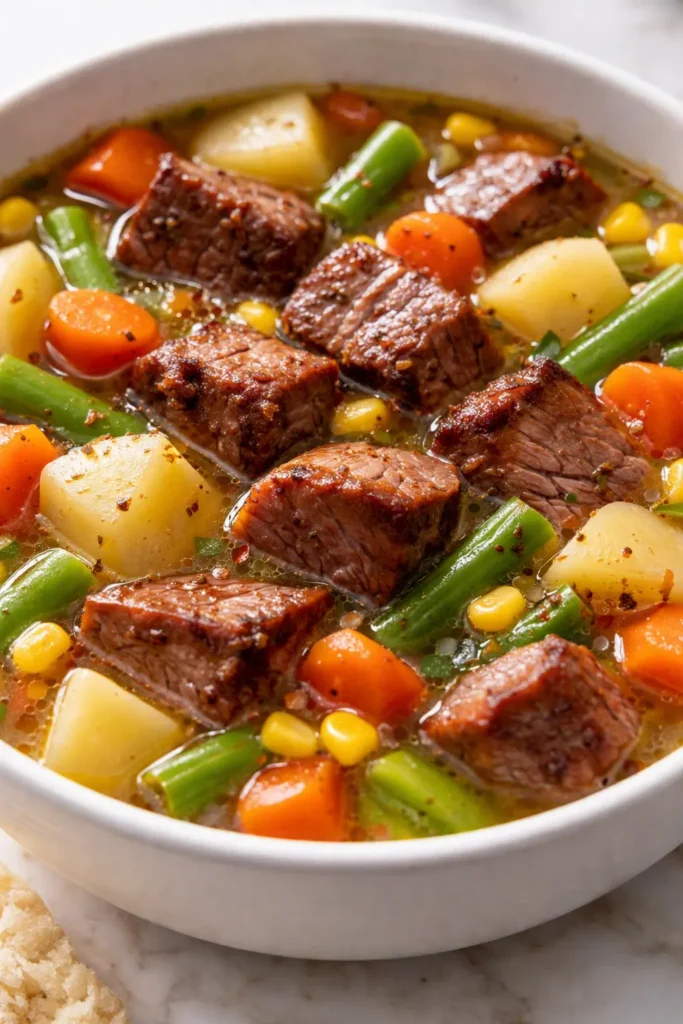
There’s a moment about an hour into simmering this homemade vegetable beef soup when the whole house starts to smell like my grandmother’s kitchen — that deep, beefy, celery-and-carrot aroma that whispers “something good is coming.” Most nights I make this on a Sunday afternoon so we can eat it all week, and by Wednesday my kids are still asking if there’s any “the good soup” left. It’s that kind of recipe.
The short version: You stir for 20 minutes, the pot does the rest, and you get eight generous bowls of rich, chunky comfort that tastes like it’s been bubbling since breakfast.
I’ve made this every winter for the past five years, tweaking and tasting until I got the method exactly right. I’ve learned which step to rush, which step to never skip, and exactly when to add the potatoes so they don’t turn to mush. This is that final version — the one I text to friends when they ask what to make on a cold night.
- Serves: 8 as a main (or 10–12 as a starter with sandwiches)
- Hands-On Time: 20 min | Total Time: 1 hr 45 min
- Difficulty: Easy — it just needs to simmer
- Cost per serving: ~$2.75
- Calories: ~325 per serving
- Dietary Notes: Naturally gluten-free and dairy-free; freezes like a dream
(Photo above: top-down shot of the soup in a big white Dutch oven with steam curling up, a wooden ladle resting on the rim, and a thick slice of crusty sourdough on a breadboard beside it. The broth is deep reddish-brown, studded with tender chunks of beef, bright orange carrots, golden potatoes, and green peas.)
Why This Version Tastes Like It Cooked All Day
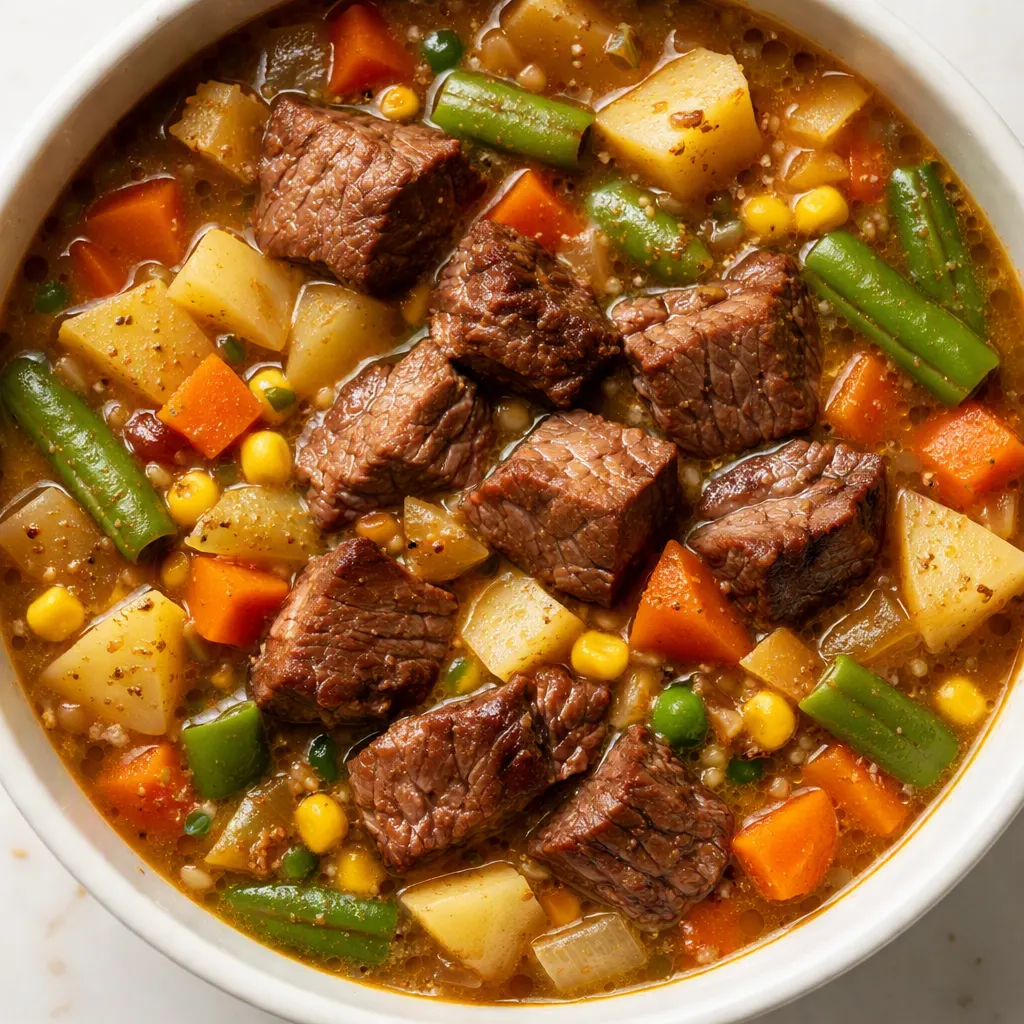
The biggest mistake I see in vegetable beef soup recipes is dumping all the beef into the pot at once. That steams the meat instead of searing it, so you lose that deep, caramelized flavor that makes the broth taste like it’s been going since morning. I brown mine in two batches — it takes about six extra minutes, and it’s honestly the difference between a good soup and a “what did you put in this?” soup.
The other thing that changed everything for me: I add the potatoes and green beans way later than you’d think. If everything goes in at the start, the potatoes break apart and the broth gets cloudy and starchy. Giving the tender vegetables only the last half hour means they keep their shape and their flavor, and the broth stays rich and clean instead of muddy.
And the quiet hero? Worcestershire sauce. Just a tablespoon gives the broth this deep, savory backbone that makes you keep sipping even after your bowl is empty. Nobody can tell it’s in there, but everybody notices when it’s not. I learned that the night I ran out and made it without — never again.
Everything You Need (Plus My Honest Notes)
- 2 lbs beef chuck, cut into 1-inch cubes: Chuck has enough marbling to turn buttery-tender instead of chewy. I’ve tried sirloin in a pinch, but chuck is worth it. Ask your butcher to cube it for you if you want to save your knife hand.
- 2 tbsp olive oil: Any neutral oil works for browning. I use olive because it’s what’s always on my counter.
- 1 large yellow onion, diced: The flavor base for everything. Sweet or white onions work too — just don’t skip it.
- 3 carrots, peeled and sliced into rounds: Slice them a little thicker than you think you should. They soften perfectly but still hold their shape at the end.
- 3 celery stalks, sliced: Non-negotiable for that classic soup aroma. My kids pick it out but swear the soup tastes wrong without it — go figure.
- 4 cloves garlic, minced: Always fresh for this one. The jar stuff turns bitter over a long simmer — I learned that the hard way.
- 2 tbsp tomato paste: This deepens the color and gives the broth that rich, savory-sweet tomato flavor. Don’t skip it! It’s the difference between “tomato water” and “tomato broth.”
- 1 can (14.5 oz) diced tomatoes with their juice: Fire-roasted if you have them — they add a subtle smoky note. Regular diced tomatoes work totally fine.
- 4 cups low-sodium beef broth: Good-quality store-bought is great here. Low-sodium matters so you can control the salt yourself.
- 2 medium Yukon Gold potatoes, diced into 1-inch pieces: They hold their shape better than russets. This is the one variety I stick to — russets turn to mush on me every single time.
- 1 cup fresh or frozen green beans, cut into 1-inch pieces: Frozen green beans are honestly fine here. I always keep a bag in the freezer for nights like this.
- 1 cup frozen corn: Adds a pop of sweetness that balances the savory broth. My kids eat a bowl of just the broth and corn — not kidding.
- 1 cup frozen peas: They go in at the very end so they stay bright green and sweet. Even my pea-skeptical husband eats these.
- 2 bay leaves: They give the broth a subtle herbal depth. Remove them before serving — nobody wants to fish one out mid-bowl.
- 1 tsp dried thyme: The classic soup herb. Fresh thyme works too — use a few sprigs and pull them out before serving.
- 1 tbsp Worcestershire sauce: The secret ingredient for savory depth. When people ask what makes this taste like my grandma’s, this is the answer. I’m not being dramatic; it just is.
- Salt and black pepper: To taste. I season in layers — a pinch here, a pinch there — instead of dumping it all at the end.
- Fresh parsley, chopped, for serving: Optional but pretty. A little green on top makes it look like you tried even when you didn’t.
What to Pull Out Before You Start
- A big heavy pot or Dutch oven (6 to 8 quarts): You need room to brown the beef without crowding it. My 7-quart Dutch oven is my workhorse — a heavy-bottomed stockpot works too.
- A wooden spoon or spatula: For scraping up the browned bits — those are liquid gold.
- A sharp chef’s knife and a big cutting board: You’re dicing a lot of vegetables, so give yourself room to work.
- Measuring cups and spoons: I keep mine in a canister by the stove so I never have to hunt for them.
- A ladle: For serving and for tasting as you go — I always taste at least three times.
That’s genuinely it. No immersion blender, no special equipment. Just a pot and about 20 minutes of chopping.
Let’s Make It (Step by Step)
This soup comes together in stages, but it’s all easy — pour yourself a glass of something, put on a podcast, and enjoy the process. Read through once before you start so you know where you’re going.
- Pat the beef dry and season it: Lay the diced chuck on paper towels and pat it completely dry — this is the secret to a good sear. Sprinkle it lightly with salt and pepper. (If you skip the pat-dry step, the meat steams instead of browning, and you’ll miss out on that deep flavor.)
- Brown the beef in batches: Heat 1 tablespoon of the olive oil in your Dutch oven over medium-high heat. Add half the beef in a single layer — don’t crowd it! — and let it sit undisturbed for 3–4 minutes until it’s deeply browned on one side. Flip and brown the other side. Transfer to a plate. Repeat with the remaining beef and the other tablespoon of oil. (📸 Photo tip: You should see a deep, dark brown crust on the beef and browned bits stuck to the bottom of the pot — that’s exactly what you want. Don’t scrub them off! Those bits are flavor.)
- Sauté the aromatics: Turn the heat down to medium. Add the onion, carrots, and celery to the pot with a pinch of salt. Cook, stirring occasionally, for 6–8 minutes until the onion is translucent and the carrots are starting to soften. (This is the step everyone rushes. Give it the full time — it builds that sweet, savory base that makes the broth taste like it’s been cooking all day. When I’m really tired, I’m tempted to rush here, and I always regret it.)
- Add the garlic and tomato paste: Stir in the minced garlic and cook for 30 seconds until it smells amazing, then add the tomato paste and stir it into the vegetables. Let it cook for 2 minutes, stirring constantly, until it turns a deeper brick-red color. (This step removes that raw, tinny taste from the tomato paste and deepens the whole pot’s flavor.)
- Deglaze the pot: Pour in about 1 cup of the beef broth and use your wooden spoon to scrape up all those browned bits from the bottom. This is where the flavor lives, and you don’t want to waste a speck. (If the bits are stubborn, give them another minute — they’ll release as the liquid warms.)
- Add everything except the quick-cooking vegetables: Stir in the remaining broth, the diced tomatoes with their juice, the Worcestershire sauce, bay leaves, thyme, and the browned beef. Bring it to a boil, then reduce to a gentle simmer, cover, and let it cook for 45 minutes. (Simmer, not boil — a hard boil makes beef tough. You want lazy little bubbles, not a rolling boil.)
- Add the potatoes and green beans: After 45 minutes, stir in the diced potatoes and green beans. Cover and simmer for another 25 minutes, until the potatoes are fork-tender. (This is where I set a timer and go fold laundry or read to my kids. The soup does the work — that’s the beauty of it.)
- Finish with corn and peas: Stir in the frozen corn and peas and let them heat through for about 5 minutes. (📸 Photo tip: The peas should be bright green and still have a little pop, not olive-colored and mushy. The broth should look rich and reddish-brown — if it’s too thick, add a splash of water or extra broth.)
- Season and rest before serving: Fish out the bay leaves. Taste the broth and add salt and pepper — I usually need about 1 teaspoon of salt and a good grind of pepper at this stage. Let the soup sit off the heat for 10 minutes before serving; this lets the flavors settle into each other. Ladle into bowls and top with fresh parsley if you’re feeling fancy. (This resting step matters more than you’d think. The soup tastes better at minute 10 off the heat than right out of the pot. I don’t know the science, but I know the taste.)
How I Meal Prep This for the Week
I make a double batch on Sundays and we’re set until Thursday — this soup genuinely gets better as it sits in the fridge. I portion it into glass containers right after dinner so it’s grab-and-go for lunches, and I always hide one container in the back of the freezer for a week when I don’t feel like cooking.
- Fridge: Store in airtight containers for up to 4 days. The flavors actually meld overnight — tomorrow’s bowl will taste even better than today’s. Reheat gently on the stove or in 60-second microwave bursts, stirring in between.
- Freezer: Yes! This freezes beautifully for up to 3 months. Let it cool completely, then portion into freezer-safe containers or zip-top bags. Label them! I can’t tell you how many mystery containers are in my freezer. Leave a little headroom because the liquid expands.
- Reheat: Thaw overnight in the fridge, then reheat on the stove over medium-low, stirring now and then. The microwave works fine too, but the potatoes are a little better when rewarmed gently on the stove.
Things I Wish I’d Known the First Time
- Sear the meat, don’t steam it: I know it’s tempting to dump it all in and walk away, but crowding the pan drops the temperature and your beef turns gray instead of brown. Two batches, one layer each, no touching for 3–4 minutes. Even if you mess this up a little, the soup will still taste good — I’ve done it — but this one step separates “fine” from “I need this recipe in my life.”
- Season in layers, not just at the end: A pinch of salt when you sauté the vegetables, a little pepper on the beef before browning, and the final taste at the end. If you wait to salt until the end, the broth tastes salty on top but flat underneath. My husband thought I was overthinking it until he tasted a side-by-side version. Now he gets it.
- Skim the foam if you care about a pretty broth: In the first 15 minutes of simmering, you’ll see some foam rise to the surface. That’s just protein and impurities. I skim it with a spoon out of habit, and the broth stays clearer and cleaner-tasting. If you skip it, nobody will notice. But I like my version better, so I skim.
- Don’t over-boil it: A vigorous boil makes the beef tough and the potatoes fall apart. You want a gentle simmer — the kind where a few bubbles break the surface but the pot isn’t shaking. If I catch mine going too hard, I turn it down and walk away. Low and slow is the whole game here.
- Make it a day ahead if you can: Soup might be the only thing in the world that’s better on day two. The flavors keep marrying, the beef gets even more tender, and the whole pot becomes more coherent. We honestly fight over the leftovers in my house. Not a joke.
Swaps That Actually Work
- Gluten-Free: This soup is already naturally gluten-free — just double-check your Worcestershire sauce label (some brands contain gluten) and your broth. Tamari or coconut aminos work as a Worcestershire swap if needed.
- Dairy-Free / Paleo: Naturally dairy-free already. For paleo, swap the potatoes for an extra cup of green beans or diced turnips — turnips hold up beautifully in soup and soak up the broth flavor.
- Slow Cooker Version: Brown the beef and sauté the aromatics on the stove first — don’t skip this! Slow cooker beef that’s not browned first is gray and sad. Then transfer everything except the corn and peas to the slow cooker. Cook on low for 7–8 hours or high for 4–5 hours. Add the corn and peas in the last 30 minutes. It won’t be quite as concentrated as the stovetop version, but it’s still wonderful.
- Spicy Kick: I add a chopped chipotle pepper in adobo sauce (plus a teaspoon of the sauce) when I add the tomatoes. It gives the broth a smoky heat that doesn’t overwhelm. My kids need the mild version, so I only do this when I’m making a pot for the adults. Some nights, that’s worth the extra pot.
- More Vegetables: This is a great clean-out-the-fridge soup. Zucchini, bell peppers, mushrooms, or shredded cabbage all work. Add zucchini in the last 10 minutes so it doesn’t turn to mush. My mom adds okra to hers and swears by it — we just agree to disagree.
- Kid-Friendly Veggie Stealth: Grate an extra carrot or a small zucchini into the pot along with the potatoes. It melts right into the broth, and the kids never notice. I’ve tested this extensively. It works.
Questions I Get About This Recipe All the Time
Q: Why is my beef tough instead of tender?
A: Ugh, I’ve been there. It’s almost always one of two things: the heat was too high (a hard boil will tighten up the meat), or the beef didn’t cook long enough. Chuck needs time to break down — that’s why we simmer for 45 minutes before the potatoes even go in. If your beef is still tough after the full 90 minutes, give it another 20. Low heat, patient simmer, and it’ll get there. You’ve got this next time — and this time too, honestly.
Q: Can I make this in an Instant Pot?
A: Yes! Use the sauté function to brown the beef in batches and soften the aromatics. Then add the broth, tomatoes, Worcestershire, bay leaves, and thyme. Lock the lid and cook on high pressure for 12 minutes with a natural release — let the pressure come down on its own for about 15 minutes; this matters for the beef. Quick-release the rest, then use the sauté function again to add the potatoes, green beans, corn, and peas, and simmer for 15–20 minutes until the potatoes are tender. I’ve tested this and it works. The stovetop is still my favorite for depth of flavor, but the Instant Pot is a close second on busy nights.
Q: How long does this soup last? Can I freeze it?
A: In the fridge, it’s genuinely good for 4 days — in fact, it’s better on day 2. For the freezer, let it cool completely and portion it into containers or bags with a little headspace. Freeze for up to 3 months. One honest note: the potatoes can get a little mealy after freezing and reheating. I either add a small diced potato when reheating if I’m being particular, or I just embrace the softer texture. It’s soup. Nobody’s judging. My tip: freeze some extra corn separately and toss it in when you reheat — it freshens the whole pot right up.
Q: What do you serve with vegetable beef soup?
A: In my house, it’s crusty bread with butter, always. A grilled cheese goes ridiculously well too — we do half-moon slices on the side for dunking. If I want to make it a full meal, I’ll add a simple salad or some roasted Brussels sprouts. Cornbread is my Southern-born mom’s pick, and honestly she’s right. But the real answer? Serve it with whatever bread you have and don’t overthink it. Soup night should be easy.
More Recipes My Family Makes on Repeat
If you liked this one, here are a few others that get the same reaction at our table — the kind that end with someone asking “wait, there’s no more?”
- [INTERNAL LINK PLACEHOLDER: Slow-Cooker Chicken Tortilla Soup] — Big flavor with barely any effort, and it makes the whole house smell amazing by dinnertime.
- [INTERNAL LINK PLACEHOLDER: My Grandma’s Cornbread (The Only One You’ll Need)] — The perfect dunking partner for this soup, golden on the edges and tender in the middle.
- [INTERNAL LINK PLACEHOLDER: Easy Beef Stew with Drop Biscuits] — Same comfort-food energy, but extra cozy with fluffy biscuits baked right on top.
This is the soup I want waiting for me on the stove when the whole family comes home from a cold afternoon — coats on the floor, cheeks pink from the wind, and a pot of something warm that says “you’re home now.” I hope it becomes that for you too.
If you try it, drop a comment below — I love hearing how it goes for you! And tag me on Pinterest or Instagram so I can see your beautiful bowls.
📌 Homemade vegetable beef soup that gets even better the next day — save it for the first cold night of the season when your family needs a warm hug in a bowl.
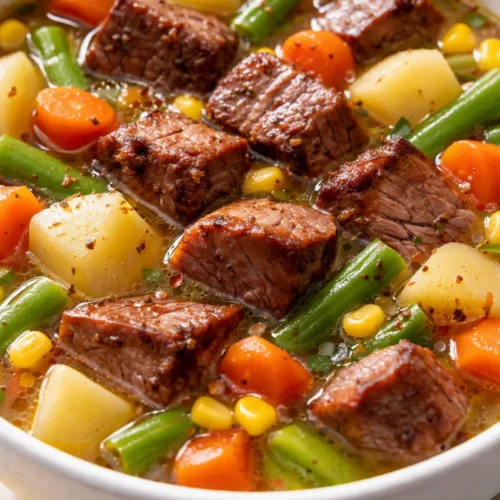
Homemade Vegetable Beef Soup for Cold Nights: Rich, Chunky, and Hug-in-a-Bowl Good
Equipment
- Dutch Oven or Heavy Stockpot (6-8 quarts)
- Wooden Spoon
- Chef’s knife
- Cutting board
- Measuring cups and spoons
- Ladle
Ingredients
- 2 lbs beef chuck, cut into 1-inch cubes
- 2 tbsp olive oil, divided
- 1 large yellow onion, diced
- 3 carrots, peeled and sliced into rounds
- 3 celery stalks, sliced
- 4 cloves garlic, minced
- 2 tbsp tomato paste
- 1 can (14.5 oz) diced tomatoes with their juice
- 4 cups low-sodium beef broth
- 2 medium Yukon Gold potatoes, diced into 1-inch pieces
- 1 cup fresh or frozen green beans, cut into 1-inch pieces
- 1 cup frozen corn
- 1 cup frozen peas
- 2 bay leaves
- 1 tsp dried thyme
- 1 tbsp Worcestershire sauce
- Salt and black pepper, to taste
- Fresh parsley, chopped, for serving (optional)
Instructions
- Pat the beef cubes completely dry with paper towels and season lightly with salt and pepper.
- Heat 1 tablespoon olive oil in a Dutch oven over medium-high heat. Add half the beef in a single layer and let it brown undisturbed for 3-4 minutes per side. Transfer to a plate and repeat with the remaining beef and oil.
- Reduce heat to medium. Add onion, carrots, and celery with a pinch of salt. Cook 6-8 minutes until onion is translucent.
- Stir in garlic and cook for 30 seconds. Add tomato paste and cook 2 minutes, stirring constantly, until it deepens in color.
- Pour in about 1 cup of beef broth and scrape up the browned bits from the bottom of the pot.
- Add remaining broth, diced tomatoes with juice, Worcestershire sauce, bay leaves, thyme, and the browned beef. Bring to a boil, then reduce to a gentle simmer. Cover and cook for 45 minutes.
- Stir in potatoes and green beans. Cover and simmer for another 25 minutes until potatoes are fork-tender.
- Stir in frozen corn and peas. Heat through for about 5 minutes until peas are bright green.
- Remove bay leaves. Taste and season with salt and pepper. Let the soup rest off the heat for 10 minutes before serving. Garnish with fresh parsley if desired.
Notes
Related Recipes:
 Cheesy Hamburger Casserole Bake That’s Ready in 40 Minutes (No Canned Soup Here)
 Creamy Garlic Tagliatelle That Looks Like a Restaurant Dish in 20 Minutes
 Texas Roadhouse Style Baked Salmon with Sweet and Savory Glaze — Ready in Under 30 Minutes
 Easy Italian Meatloaf That’s Actually Juicy (Not Dry) — in 1 Hour
 The Biscuits and Gravy Casserole That’s Actually Crispy on Top (And Ready in 40 Minutes)
 Air Fryer Chicken and Vegetables That Don’t Taste Like a Regret (30 Minutes, One Pan)