
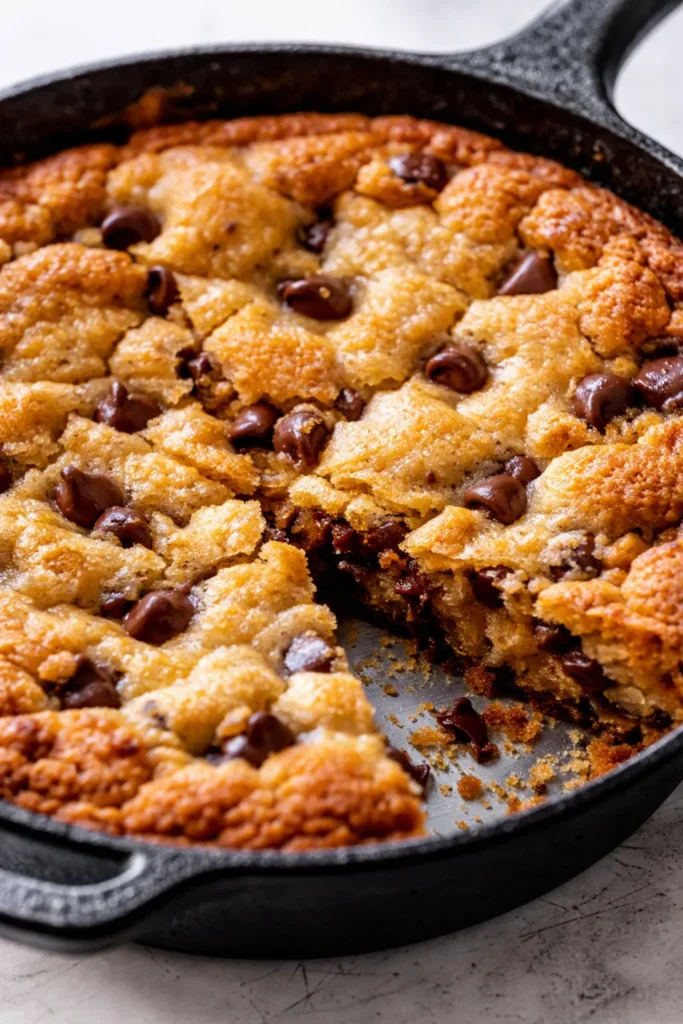
Oh my gosh, you have to make this. My kids have been asking for “the big cookie” for their birthdays instead of actual cake for three years straight now, and honestly? I get it. There’s something about pulling a giant, golden-edged cookie out of the oven — still crackly on top, soft in the middle, with that bakery-style frosting swirl on top — that makes everyone at the table act like you just did something magic. You did, but it’s honestly barely more work than regular chocolate chip cookies.
The short version: One bowl, no mixer required, and it goes from your kitchen to the table in about 30 minutes flat.
I’ve made this cookie cake more times than I can count — for birthdays, for “it’s Tuesday and we survived,” for classroom parties, and once for a friend going through a break-up who needed something that wasn’t a sleeve of store-bought Oreos. It has never once let me down.
- Serves: 8–10 as a dessert or celebration cake
- Hands-On Time: 15 min | Total Time: 30 min
- Difficulty: Easy enough for a school-night whim, impressive enough for a birthday
- Cost per serving: About $0.75
- Calories: ~420 per slice with frosting
- Dietary Notes: Vegetarian. Easily adaptable for dairy-free and nut-free
(Photo above: overhead shot of the finished cookie cake on a white ceramic cake stand in warm afternoon light, one slice already removed showing the soft, fudgy interior, a swirl of chocolate buttercream on top, and a few extra chocolate chips pressed around the edge.)
The Thing That Makes This Actually Taste Like a Cookie (Not a Cake)
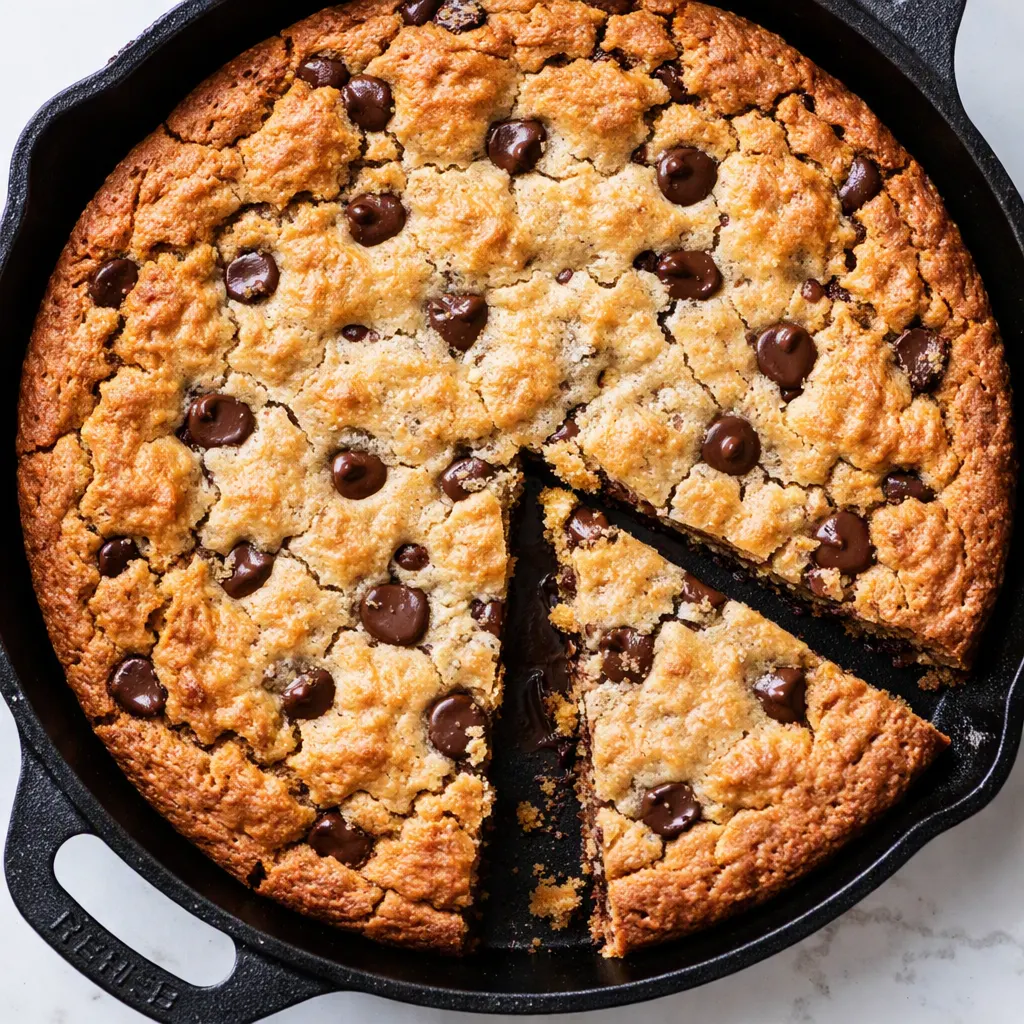
Here’s the thing I figured out after way too many versions that came out fluffy and cakey and wrong: the secret is in the ratio of butter to flour to egg. If you use too much egg, you get cake. If you use too little butter, you get a hockey puck. This recipe lands right in the sweet spot — you get that dense, chewy, slightly fudgy texture that makes a cookie taste like a cookie, even when it’s the size of a dinner plate.
The other non-negotiable? Don’t overmix the dough. I know, everyone says that. But with a cookie cake it matters even more because there’s no scooping into individual portions — it all bakes together in one giant disc. Overmix it and you develop too much gluten, which gives you a tough, bread-like texture instead of that soft, tender crumb you want. Mix just until the flour disappears and you’re done. I’ve made this mistake so many times so you don’t have to.
What you end up with is a cookie that’s crisp around the edges, soft and slightly underdone in the middle, and sturdy enough to hold a thick layer of frosting without crumbling into a mess. That combination — the crackly top, the gooey center, the thick blanket of buttercream — is exactly why this gets requested every single birthday in our house.
Everything You Need (Plus a Few Notes From Me)
- 2½ cups all-purpose flour: Just regular flour. No need for bread flour or cake flour — all-purpose gives the right balance of chew and tenderness. I use unbleached because that’s what’s in my pantry, but bleached works identically here.
- 1 cup unsalted butter, softened: This is the backbone of the whole thing. Make sure it’s actually soft — leave it on the counter for an hour, not 10 minutes. My trick: if you press your finger into it and it leaves a dent without sliding around, you’re good.
- ¾ cup packed light brown sugar: Brown sugar brings the moisture and that deep, caramel-y flavor. Don’t skip it and don’t substitute white sugar — you’ll lose the chewiness. My kids can taste the difference when I’ve tried swapping this, I’m not kidding.
- ¼ cup granulated white sugar: The white sugar helps the edges get that golden, slightly crispy texture.
- 1 large egg + 1 egg yolk: The yolk adds richness without adding too much liquid, which is what keeps this dense and fudgy instead of cakey. Save the leftover white for omelets or throw it in a scramble the next morning.
- 1 teaspoon vanilla extract: Use the real stuff if you have it. It’s one of the only places where I’ll say that out loud. That said, if you only have imitation vanilla, it’ll still taste good. Don’t let anyone shame you.
- 1 cup semisweet chocolate chips: I use about ¾ cup in the dough and save the rest to press on top before baking, so the cookies look studded and pretty. If my kids had their way, this would be 2 cups. I’ve done it. It’s also delicious. There’s no wrong answer.
- 1 teaspoon baking soda: The leavener. Make sure it’s fresh — old baking soda is why flat, sad cookies happen. If you can’t remember when you bought it, it’s probably time for a new box.
- ¾ teaspoon salt: Don’t skip it. Salt makes the chocolate flavor pop and keeps the sweetness from being cloying. I use fine sea salt; table salt works but dial it back to ½ teaspoon.
What to Pull Out Before You Start
- A 10-inch cast iron skillet — this is what I use and it gives the best golden edges. A 10-inch round cake pan works beautifully too. If you only have a 9-inch, that’s fine — your cookie will just be slightly thicker, so add 2–3 minutes to the bake time.
- A large mixing bowl — nothing fancy, just a big bowl
- A sturdy wooden spoon or rubber spatula — no electric mixer needed, which honestly means less cleanup and less fuss
- Measuring cups and spoons
- A cooling rack — this matters so the bottom doesn’t get soggy from trapped steam
Let’s Make It (Step by Step)
This goes fast, so read through once before you start. Everything happens in one bowl, which was my favorite part when I first figured it out — fewer dishes, fewer excuses.
Prep: Preheat your oven to 350°F. Grease your skillet or cake pan with butter or a nonstick spray — don’t skip this even if you have a nonstick pan, because the edges of a cookie cake really want to stick.
- Combine the wet ingredients: In your large bowl, mix the softened butter, brown sugar, and white sugar together with your spoon until they’re well combined and slightly fluffy. About 1–2 minutes of mixing. It won’t get pale and creamy like a mixer would do, and that’s fine — you don’t want to whip too much air in here. If your butter wasn’t soft enough, pop it in the microwave for 10 seconds at a time until it gives. Life is too short to mash hard butter.
- Add the egg, yolk, and vanilla: Crack in the egg and extra yolk, add the vanilla, and mix until everything is fully incorporated. Make sure you scrape the bottom of the bowl with your spatula — butter likes to hide down there.
- Mix the dry ingredients: Add the flour, baking soda, and salt right into the same bowl. Now the important part: mix until just combined, with a few streaks of flour still visible. You’re going to do the rest of the whisking by hand, and this prevents overmixing. (📸 Photo tip: At this stage, the dough should look like a thick, grainy paste with a few floury ribbons — not a smooth ball. That’s exactly what you want.)
- Add the chocolate chips: Fold in ¾ cup of the chocolate chips with your spatula. Don’t overdo the stirring here — just until they’re distributed. When I’m really tired, I microwave a few chips and drizzle them over the baked cookie — it covers a multitude of sins.
- Press the dough into the pan: Transfer the dough to your greased skillet or cake pan. Here’s the secret: don’t just dump and smooth it like a cake batter. Press it with your fingers so the whole thing is even, and really push it toward the edges. The edges bake first, so if they’re too thin, they’ll burn before the middle is done. When I’m feeling fancy, I press the dough slightly higher at the edges to make a gentle “crust” for the frosting to sit inside.
- Press the remaining chips on top: Take the rest of your chocolate chips and gently press them into the dough with your fingertips. This makes the top look intentional and studded when it bakes, instead of the chips getting lost inside the dough. (📸 Photo tip: You should see a nice even pattern of chips when you look at the cookie from above — this is the view everyone will see in your photos.)
- Bake until the edges are golden: Bake at 350°F for 20–24 minutes. The center will still look slightly soft and underdone when you pull it out — that’s what you want. It continues to set as it cools. My oven reliably takes 22 minutes. You know it’s done when the edges are a deep golden brown and the center has just barely puffed up. It should smell like a bakery in your kitchen.
- Cool before frosting: Let it cool in the pan on a cooling rack for at least 20 minutes. Don’t skip this. If you try to frost a warm cookie, you’ll end up with melted buttercream disaster soup. I speak from experience.
How I Meal Prep This for the Week
This is the recipe I make on Sunday when I want my kids to have something to look forward to — and, let’s be honest, when I need a little treat to get through the week too. It keeps wonderfully, which makes it one of my most-recommended make-aheads.
- Fridge: Store in an airtight container at room temperature for up to 4 days. If it’s frosted, I layer wax paper between the cookie and the lid so the frosting doesn’t smear. The fridge works but can dry it out — do room temp if you’re eating it within 4 days.
- Freezer: Yes! You can freeze the whole cookie cake (unfrosted is best) wrapped tightly in plastic wrap and then foil for up to 3 months. If it’s already frosted, freeze it uncovered for an hour first until the frosting is hard, then wrap it.
- Reheat: The best way to bring back that fresh-baked feel is to pop a slice in the microwave for 10–15 seconds. It makes the chocolate chips get melty again and softens the internal crumb — my kids call it “warm cookie mode.” If the frosting is on it, skip the microwave unless you want a melty frosting situation. The oven at 300°F for about 5 minutes works for a whole unfrosted cookie.
My Honest Advice After Making This Too Many Times to Count
- Don’t overbake it, I’m begging you: Pull it when the center still looks underdone. When you pull a cookie cake at 350°F for 22 minutes, the toothpick test still won’t come out clean in the center — that’s normal! It’ll set up as it cools. Overbaking gives you a dry, crumbly cookie cake that crumbles when you slice it. When I first made this, I left it in for 27 minutes and it was basically — a giant cookie crumble, which is fine, but not the beautiful slicy thing you want. Even if you mess this up a little, it’ll still taste good — I’ve done it.
- Use two spoons for the frosting swirl: When you’re customizing the frosting (if you’re making your own or using a tub), use two spoons instead of a knife to get that bakery-style swoop. It’s weirdly easier and looks way more professional. I’ve seen my sister do the one-spoon swirly thing and it ends up sticking to the spoon and then sweeping tiny crumbs into the frosting. Two spoons, my friend.
- Room temperature ingredients matter, but not as much as you think: The butter absolutely needs to be soft. The egg — if you’re in a hurry, take it out and run it under warm water for a minute. But honestly? If the butter is soft, the egg being cold isn’t the end of the world. Don’t let perfect be the enemy of doing this on a Tuesday.
- Let it cool completely before cutting if you want clean slices: I know it’s tempting to dig in while it’s warm (and honestly, that’s delicious too). But if you make this for a birthday and want that perfect photo-worthy slice, let it fully rest. Warm cookie cake slices are crumbly, soft, and messy. Cold cookie cake slices look like you bought it from a bakery. Your call.
- A pizza cutter works for cutting slices: Genuinely a game-changer. A knife can drag the frosting or squish the cookie. A pizza cutter glides straight through. My husband thought I was overthinking it until he saw how clean the edges came out.
Swaps That Actually Work (Without Ruining the Whole Thing)
- Dairy-Free: Use a plant-based butter like Country Crock’s olive oil sticks (they firm up better than some others) — it’s the version I make for my nephew who can’t do dairy, and he loves it. Just make sure it’s actually the stick kind, not the tub kind, which has too much water.
- Gluten-Free: I’ve had readers tell me they’ve used cup-for-cup gluten-free flour blends like King Arthur or Bob’s Red Mill 1-to-1 with great results. I’d add 2 tablespoons of extra flour to be safe. The texture might be slightly softer, but nobody at the table will know.
- Double Chocolate: Swap ¼ cup of the flour for ¼ cup of cocoa powder and add an extra splash of vanilla. It’s the version I make when we have a class party and I want to feel like a hero.
- M&M’s Cookie Cake: Use M&M’s instead of chocolate chips and press a few extra colorful ones on top before baking. My kids request this for, no exaggeration, every holiday. Or swap white chocolate chips + dried cranberries for a slightly more “grown-up” vibe — that one was for a book club meeting of mine and nobody said a word until the plate was empty.
- Frosting-free version: If you want it simpler (or less sweet), just bake it and dust the top with powdered sugar once it’s cool. The cookie itself is plenty sweet enough. That’s how I send it to school on days when I don’t want a sugar bomb frosting situation.
Questions I Get About This Recipe All the Time
Q: Why did my cookie cake come out cakey instead of chewy?
A: Ugh, I’ve been there. Usually it’s one of two things: you overmixed the dough (which develops the gluten too much), or you used extra egg. Use exactly one egg plus one yolk, and mix just until the flour streaks disappear. Also — make sure your baking soda is fresh. Old baking soda can make cookies puff up more and lose that dense, chewy texture. You’ve got this next time.
Q: Can I make this without eggs?
A: You can! I’ve tested it with a flax egg (1 tablespoon ground flaxseed mixed with 3 tablespoons water) plus skipping the extra yolk, and it comes out slightly more tender and a little less chewy, but still very good. If you’re baking for an allergy, that’s your best bet. I’ve also had readers report success with a commercial egg replacer like Bob’s Red Mill, but they said the texture was a bit more cake-like. It’ll still be delicious — just not identical.
Q: How long does cookie cake last? Can I freeze it?
A: At room temperature in an airtight container, it stays fresh about 4 days. In the fridge, up to a week — but honestly, it dries out a bit. For freezing, wrap the fully cooled cookie (frosting or not) tightly in plastic wrap and foil, and it’ll keep in the freezer for 3 months. Thaw it in the fridge overnight, then warm slices in the microwave for 10–15 seconds to bring back that fresh-baked magic.
Q: What do you serve with cookie cake?
A: Honestly, a glass of cold milk is the classic answer, and my kids would say that. For a “fancier” version, I serve it with lightly sweetened whipped cream and fresh strawberries on the side — the tartness of the berries balances out the chocolate and frosting. And for a seriously grown-up vibe, a scoop of vanilla bean ice cream on top while the cake is still slightly warm. The temperature contrast makes it feel like a fancy dessert from a restaurant that charges $14 a plate.
More Recipes My Family Makes on Repeat
If you liked this one, here are a few others that get the same reaction at our table:
- [INTERNAL LINK PLACEHOLDER: The Chewy Brownie Recipe That Started It All] — My kids genuinely wept when I told them I was writing this up.
- [INTERNAL LINK PLACEHOLDER: One-Bowl Banana Bread for the Freezer] — The recipe I make when I need a win before the school run.
- [INTERNAL LINK PLACEHOLDER: No-Churn Vanilla Ice Cream for Lazy Sundays] — Pair it with this cookie cake and you can skip the candles, honestly.
If this cookie cake ends up on your table and you make it yours — with M&M’s, or a drizzle of extra melted chocolate, or a slightly too thick layer of frosting that you hide from your kids until after dinner — come back and tell me how it went.
I read every comment (I’m one of those people, and I can’t stop), and there’s genuinely nothing that makes my day like hearing “my kid said this was the best thing I’ve ever made.”
📌 Homemade cookie cake recipe that stays chewy in the middle and golden-edged — save it for the next birthday celebration or the Tuesday that deserves a giant cookie.
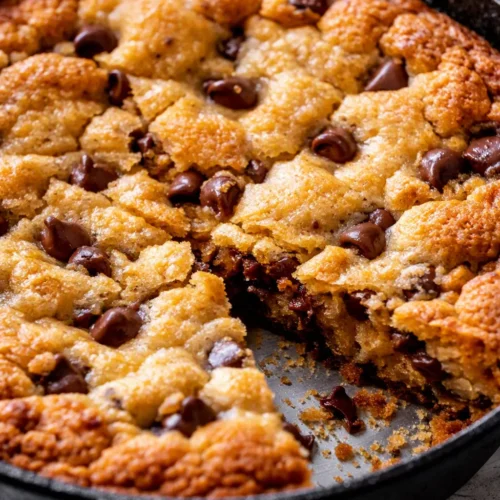
Homemade Cookie Cake (One Bowl, 30 Minutes)
Equipment
- 10-inch cast iron skillet or round cake pan
- Large Mixing Bowl
- Wooden spoon or rubber spatula
- Measuring cups and spoons
- Cooling rack
- Pizza cutter (for clean slices)
Ingredients
Cookie Cake
- 2 1/2 cups all-purpose flour
- 1 cup unsalted butter, softened
- 3/4 cup packed light brown sugar
- 1/4 cup granulated white sugar
- 1 large egg
- 1 egg yolk
- 1 teaspoon vanilla extract
- 1 cup semisweet chocolate chips, divided (3/4 cup in dough, remaining pressed on top)
- 1 teaspoon baking soda
- 3/4 teaspoon salt (fine sea salt; use 1/2 teaspoon if using table salt)
Instructions
- Preheat the oven to 350°F. Grease a 10-inch cast iron skillet or round cake pan with butter or nonstick spray.
- In a large bowl, mix the softened butter, brown sugar, and white sugar together with a wooden spoon or spatula until well combined and slightly fluffy, about 1 to 2 minutes.
- Add the egg, egg yolk, and vanilla. Mix until fully incorporated, scraping the bottom of the bowl so the butter doesn’t hide.
- Add the flour, baking soda, and salt to the same bowl. Mix until just combined and a few streaks of flour remain. Do not overmix.
- Fold in 3/4 cup of the chocolate chips until evenly distributed.
- Press the dough evenly into the prepared pan, pushing it toward the edges. Press the dough slightly higher at the rim to create a shallow crust for the frosting.
- Press the remaining chocolate chips gently into the top of the dough so they stay visible after baking.
- Bake at 350°F for 20 to 24 minutes, until the edges are deep golden brown and the center still looks slightly soft and underdone. The center will continue to set as it cools.
- Cool in the pan on a rack for at least 20 minutes before frosting. For clean slices, cool completely and cut with a pizza cutter.
Notes
Related Recipes:
 Cheesy Hamburger Casserole Bake That’s Ready in 40 Minutes (No Canned Soup Here)
 Texas Roadhouse Style Baked Salmon with Sweet and Savory Glaze — Ready in Under 30 Minutes
 Moist Lemon Zucchini Bread with a Crunchy Lemon Sugar Top
 Strawberry Shortcake Rice Krispie Treats That Actually Taste Like Shortcake — Ready in 15 Minutes
 Blueberry Oatmeal Cookies That Stay Soft for Days — in Under 30 Minutes
 Air Fryer Chicken and Vegetables That Don’t Taste Like a Regret (30 Minutes, One Pan)