
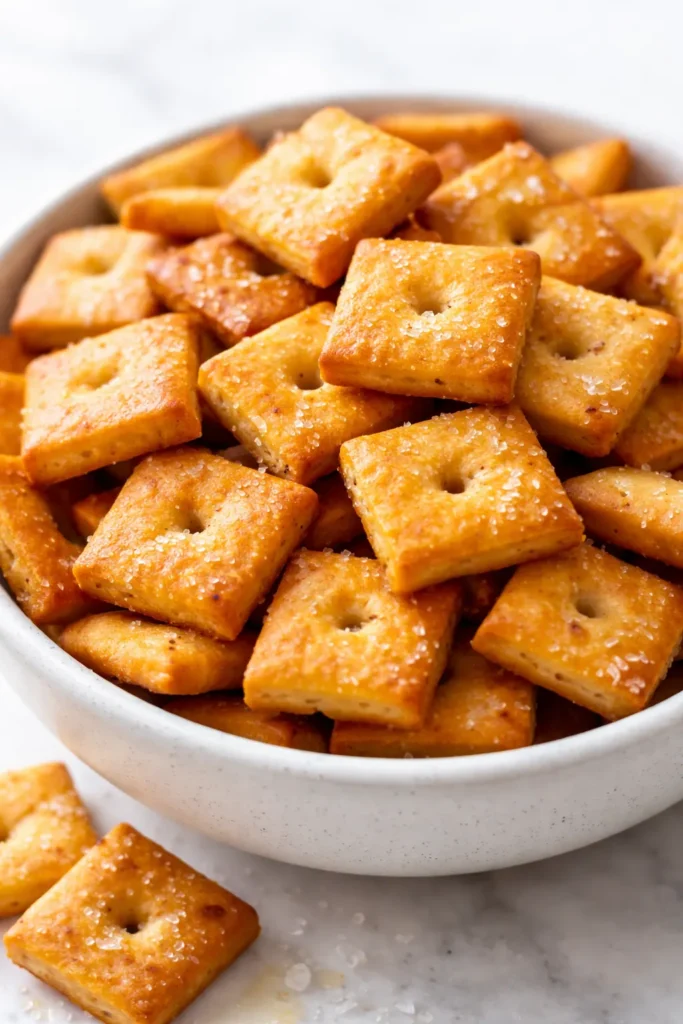
The first batch I made came out soft. Buttery, yes. Cheesy, absolutely. But soft. A sad imitation of the boxed cracker I was trying to outsmart. The problem was water — cheese releases moisture, and moisture is the enemy of the snap you’re looking for. So I did what I should have done from the start: treated the cheese like a dry ingredient, not a wet one.
The result is a cracker that looks like it came from a bakery counter — perfectly golden, blistered on top, dusted with flaky salt — and tastes like the best parts of childhood, except you know exactly what’s in it. Sharp cheddar, almond flour, butter, and a little salt. That is the whole list.
The short version: Fifteen minutes of active work, one food processor bowl, and a baking sheet. They shatter when you bite them. My kids have never once asked for the boxed kind since I started making these.
- Serves: 4 (as a snack)
- Hands-On Time: 15 min | Total Time: 30 min
- Difficulty: Easy — even on a busy weekday afternoon
- Cost per serving: ~$1.50
- Calories: ~180 per serving
- Dietary Notes: Naturally Gluten-Free, Low Carb
(Photo above: A pile of irregular square crackers spilling over a dark slate board. You can see the salt crystals catching natural light from a side window, and the edges are a deep golden brown, with tiny bubbles from the oven. The crackers sit in a heap — casual, unstacked, begging to be grabbed by the handful.)
The Trick That Keeps Them Crispy (Not Soggy)
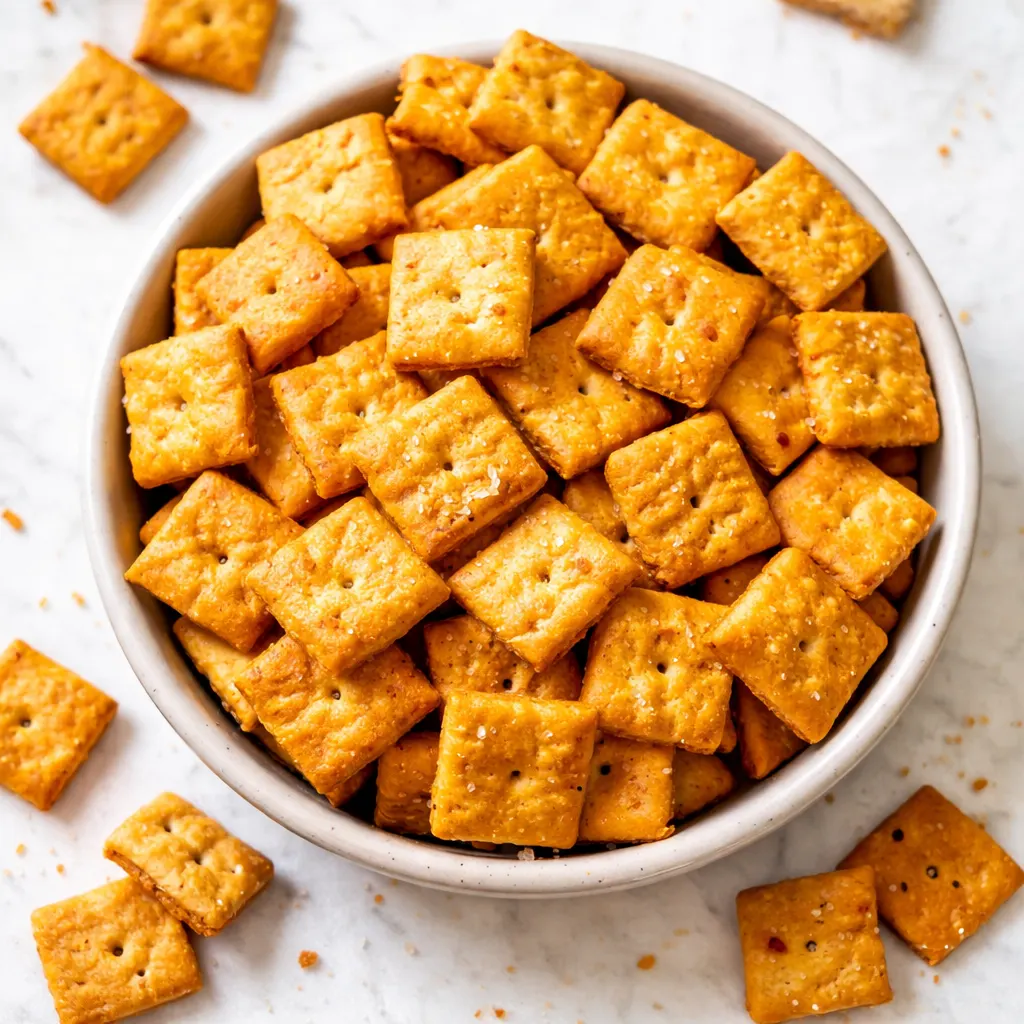
Pre-shredded cheese is the enemy of crispiness. It looks convenient — it is, I know — but the potato starch and cellulose they toss in to keep it from clumping turns into a pasty glue when it hits the butter. And glue does not make a cracker you want to eat.
Grating your own from a block takes exactly four minutes and guarantees the crackers puff instead of spread. The second trick is patience: letting the dough rest in the fridge for 15 minutes before rolling gives the flour time to absorb the fat, which means the crackers hold their shape in the oven.
The result is a cracker that tastes like cheddar that happens to be in cracker form, not like a cracker that happens to taste like cheddar. That distinction is everything.
Everything You Need (Plus My Honest Notes on Each)
- 8 oz sharp cheddar cheese (block): This is the star. The sharper it is, the more flavor you get without needing extra salt. I’ve tested this with mild cheddar and it tastes like cardboard. Don’t do it.
- 1 cup almond flour: Keeps them gluten-free and adds a subtle nutty note that pairs beautifully with the cheese. My kids can’t tell the difference, which is the highest praise I can give.
- 3 tbsp cold butter (unsalted): It has to be cold. If it gets warm, the dough turns greasy and the crackers turn tough. I’ve made this mistake exactly once.
- 1/2 tsp salt + flaky sea salt for topping: Salt in the dough builds the base. Flaky salt on top gives it texture and makes the cracker look like it came from a bakery. Do not skip the flaky salt. It is doing more work than any other ingredient in this recipe.
- Ice water (1-2 tbsp): Only if the dough feels dry when you pulse it. Add it a teaspoon at a time. You can always add more, but you cannot take it out.
What to Pull Out Before You Start
- Food processor (or a box grater and a bowl, if you want a workout)
- Baking sheet (rimmed — the butter will try to escape)
- Parchment paper (makes cleanup instant)
- Rolling pin (or a straight-sided water bottle in a pinch)
- Pizza cutter or a sharp knife (for clean cuts)
- Chopstick or toothpick (for the steam holes)
Here’s How I Do It (Start to Finish)
The whole thing goes fast once you start, so read through it once before you get your ingredients out.
Preheat: Set your oven to 350°F. Line a baking sheet with parchment paper.
- Grate the cheese: Grate the cheddar on the large holes of a box grater. (📸 Photo tip: You should see rough, fluffy shreds, not clumpy wet ones. If it looks oily, pop it in the freezer for 5 minutes before proceeding.)
- Pulse the dough: In a food processor, combine the almond flour, salt, and cold butter cubes. Pulse until it looks like coarse sand. Add the grated cheddar and pulse again until it comes together in a ball. If it feels dry, add ice water 1 tsp at a time and pulse once more.
- Chill the dough: Flatten the dough into a disk, wrap it in plastic, and refrigerate for 15 minutes. This step is the difference between a cracker and a puddle. I know it’s annoying to wait. Do it anyway.
- Roll and cut: Place the chilled dough between two sheets of parchment paper. Roll it out to an even 1/8-inch thickness. Peel off the top parchment, then use a pizza cutter to slice the dough into 1-inch squares. (📸 Photo tip: Clean, straight cuts mean even baking. A ruler helps if you are particular about uniformity — I am.)
- Transfer and top: Transfer the squares to the prepared baking sheet, leaving a half inch between each. Poke a hole in the center of every cracker with a chopstick or toothpick. Sprinkle generously with flaky sea salt.
- Bake and cool: Bake for 10-14 minutes, rotating the tray halfway through. Pull them when the edges are deeply golden and the centers are just set. Let them cool completely on the baking sheet — they will crisp up as they sit. This is the hardest part. Do not eat them yet.
How I Batch Make These for the Week
These are best the day they are made, but they survive a few days in a container if you treat them right. I make a double batch on Sunday afternoons and we pick at them all week long.
- Fridge: Airtight container, up to 5 days. If they lose their snap, pop them in a 300°F oven for 3 minutes.
- Freezer: Yes. Freeze the unbaked cut squares on a sheet tray, then transfer them to a freezer bag. Bake from frozen, adding 2 minutes to the time.
- Reheat: Oven or toaster oven at 300°F for 3 minutes. The microwave will make them sad.
Things I Wish I’d Known the First Time
- Grate your own cheese. I know I said this already, but I am saying it again because it is the single most common reason these turn out greasy instead of crisp. The pre-shredded stuff has anti-caking agents that ruin the texture. Just trust me on this.
- Do not skip the holes in the center. That little poke is not decorative — it lets steam escape so the crackers stay flat and shatteringly crisp instead of puffing into hollow pillows.
- Watch the oven like a hawk for the last two minutes. These go from perfectly golden to burnt very fast. The difference between the best batch you have ever made and a charcoal disaster is about 90 seconds. Set a timer and check early.
- Let them cool completely before you even think about storing them. If you put them in a container while they are still warm, the steam traps inside and they soften instantly. Be patient. Walk away.
Make It Yours: Easy Swaps and Variations
- Gluten-Free: This recipe is naturally gluten-free as written. Almond flour is the base and it works perfectly.
- Spicy Version: Add 1/4 tsp cayenne pepper and 1/2 tsp smoked paprika to the dry ingredients. This is my personal favorite — it tastes like a grown-up Cheez-It.
- Herb Version: Add 1 tsp dried rosemary or thyme to the dough. It makes them feel very intentional and pairs beautifully with a glass of wine.
- Kid-Friendly: My kids love the plain version, but I sometimes add a pinch of garlic powder. They have no idea, and they eat them faster.
- Nut-Free: Swap the almond flour for 3/4 cup all-purpose flour. The texture is slightly sturdier and less delicate, but still very good.
Questions I Get About These All the Time
Q: Why did my crackers turn out soft?
A: Two most likely culprits: you used pre-shredded cheese, or you didn’t bake them long enough. They need to be deeply golden around the edges — do not pull them at the first sign of color. Don’t be afraid of the darkness.
Q: Can I use regular flour instead of almond flour?
A: Yes, absolutely. Use 3/4 cup all-purpose flour instead of the almond flour. The texture will be more like a classic shortbread cracker — less delicate, but still very good.
Q: How long do these actually last?
A: In an airtight container at room temperature, about 3 days. In the fridge, about 5. But honestly, they have never lasted that long in my house. They disappear in about 24 hours.
Q: What do you serve with these?
A: They are excellent on a cheese board (redundant, I know), crumbled over a bowl of tomato soup, or just eaten by the handful standing over the kitchen counter. My kids like them with apple slices.
More Snacks My Family Makes on Repeat
If you liked these, here are a few others that get the same reaction at our table:
- Crispy Kale Chips with Nutritional Yeast — Salty, cheesy, and actually healthy. My kids inhale these faster than any bag of chips.
- Everything Bagel Almond Flour Crackers — The same crispy energy, but with sesame, poppy, and a serious crunch.
- 3-Ingredient Peanut Butter Cookies — The perfect sweet follow-up to a salty snack. Made in under 20 minutes.
This is the kind of snack that makes you feel like you hacked the system. A cracker that’s actually good for you, actually crispy, and actually tastes like real cheddar. That is a rare combination, and it is worth the 15 minutes it takes to pull together.
If you make these — and I really hope you do — drop a comment below and let me know how they turned out. I love hearing about the first batch.
📌 Save this healthy homemade Cheez-Its recipe for your next snack attack — crunchy, salty, and gluten-free crackers ready in 30 minutes that even picky kids will devour.
Healthy Homemade Cheez-Its
Equipment
- Food Processor
- Baking Sheet
- Parchment Paper
- Rolling Pin
- Pizza Cutter
- Chopstick or toothpick
Ingredients
Dough
- 8 oz sharp cheddar cheese (block)
- 1 cup almond flour
- 3 tbsp cold unsalted butter
- 1/2 tsp salt
- 1-2 tbsp ice water, if needed
For Topping
- flaky sea salt, for sprinkling
Instructions
- Preheat oven to 350°F. Line a baking sheet with parchment paper.
- Grate the cheddar on the large holes of a box grater.
- In a food processor, combine the almond flour, salt, and cold butter cubes. Pulse until coarse sand. Add grated cheddar and pulse until dough comes together in a ball. If dry, add ice water 1 tsp at a time and pulse once.
- Flatten dough into a disk, wrap in plastic, and refrigerate for 15 minutes.
- Place chilled dough between two sheets of parchment. Roll to 1/8-inch thickness. Remove top parchment and cut into 1-inch squares with a pizza cutter.
- Transfer squares to prepared baking sheet, leaving 1/2 inch space. Poke a hole in the center of each cracker with a chopstick or toothpick. Sprinkle generously with flaky sea salt.
- Bake for 10-14 minutes, rotating halfway. Cool completely on the baking sheet before serving or storing.
Notes
Related Recipes:
 Cheesy Hamburger Casserole Bake That’s Ready in 40 Minutes (No Canned Soup Here)
 Texas Roadhouse Style Baked Salmon with Sweet and Savory Glaze — Ready in Under 30 Minutes
 Moist Lemon Zucchini Bread with a Crunchy Lemon Sugar Top
 Strawberry Shortcake Rice Krispie Treats That Actually Taste Like Shortcake — Ready in 15 Minutes
 Blueberry Oatmeal Cookies That Stay Soft for Days — in Under 30 Minutes
 Air Fryer Chicken and Vegetables That Don’t Taste Like a Regret (30 Minutes, One Pan)