
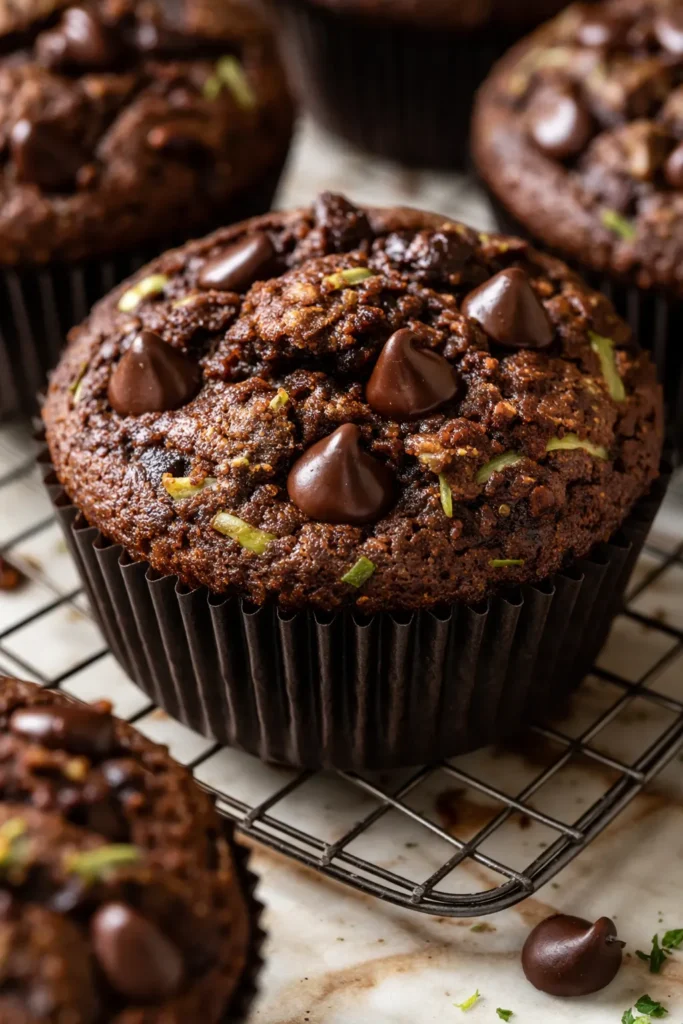
Let me tell you about the batch that made my neighbor text me at 7am on a Saturday. She saw the photo I posted the night before — those dark, glossy domes studded with chocolate, sitting on a wire rack with steam still rising — and asked if I was accepting orders. I was not. But I did drop a basket of six on her porch an hour later, and she texted back: “These are better than the ones from that coffee shop on Smith street. Don’t tell them I said that.”
That is the energy of these muffins. Tall, tender, deeply chocolate with a crinkly top that cracks when you bite into it. And yes — there is a full cup and a half of shredded zucchini hiding in every batch. You will not taste it. You will only notice that the crumb is somehow impossibly moist without being the least bit gummy.
The short version: One bowl, ten minutes of active work, and a high-heat trick that gives you a bakery dome every single time.
I’ve made roughly thirty batches of these over the last two summers. My kid, who claims to “not like vegetables,” ate four in one afternoon and only found out about the zucchini when I told her. She still asked for them again the next weekend. That’s the kind of recipe this is.
- Serves: 12 generous muffins
- Hands-On Time: 15 min | Total Time: 35 min
- Difficulty: Easier than you think — the batter comes together in one bowl, no mixer required
- Cost per serving: ~$0.85
- Calories: ~310 per muffin
- Dietary Notes: Nut-free. Adaptable for dairy-free with a simple swap.
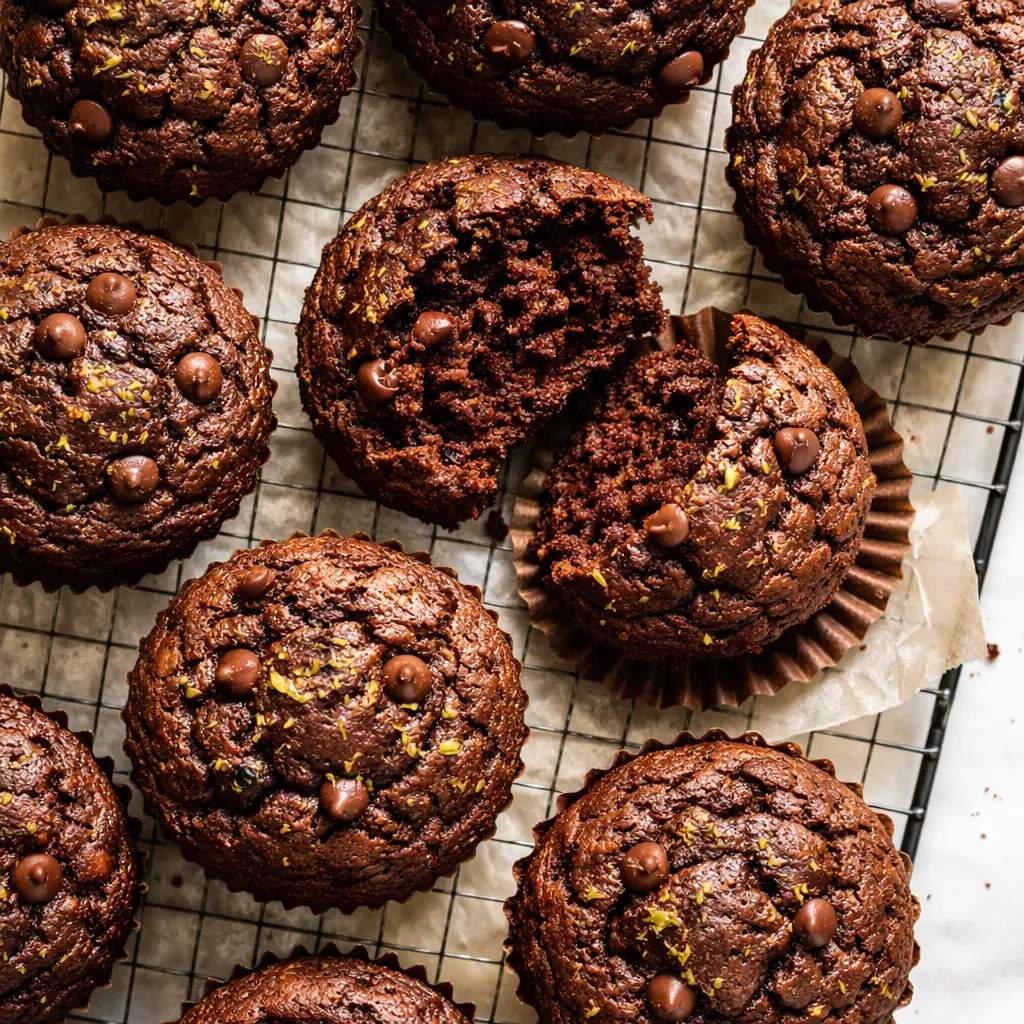
(Photo above: Overhead shot of a dozen chocolate muffins cooling on a dark gray wire rack, one broken in half to reveal a tender, fudgy crumb studded with melted chocolate chips, morning light coming in from a south-facing window, a rumpled linen napkin underneath.)
The Trick That Changed Everything for Me
I spent an embarrassing amount of time making dense, flat chocolate muffins that tasted like cocoa powder and regret before I figured out what was going wrong. The problem was the zucchini, which is about 95 percent water. If you shred it and dump it straight into the batter, that water releases during baking and turns the starches into glue. You get a muffin that looks like a hockey puck and tastes like one too.
The fix is one extra step: wring the grated zucchini out in a clean kitchen towel until no more liquid comes out. You will be shocked at how much water comes out of one medium zucchini. That single step is the difference between a muffin that bakes up tall and tender and one that bakes up flat and wet.
The other thing that changed everything was the heat. Starting the oven at 425°F for the first five minutes creates that dramatic dome and crackly top. The high heat sets the outer edges of the batter almost immediately, forcing the center to push upward as it bakes. Then you drop the temperature to 350°F to finish cooking the inside without burning the top. It sounds fussy but it is exactly two steps and the oven does all the work.
What Goes In (Plus My Honest Notes on Each One)
- 1 ½ cups shredded zucchini (about 1 medium): This is the moisture engine. Do not peel it. The green skin disappears completely into the dark batter. I weigh my zucchini after squeezing it — if you end up with less than a packed cup and a half, the muffins will be dry. Squeeze hard, then measure.
- 2 cups all-purpose flour (240g): Spoon and level it into your measuring cup. Scooping directly from the bag packs in extra flour and makes the muffins dense. I learned this the hard way after two separate batches that came out dry because I got lazy with the measuring.
- ½ cup Dutch-processed unsweetened cocoa powder (40g): This gives you that dark, almost black color and a smoother chocolate flavor. Natural cocoa works too, but the color will be lighter and the taste slightly more acidic. My kids cannot tell the difference, but I can see the difference. Dutch-process wins every time for visual drama.
- 1 cup granulated sugar + ½ cup packed brown sugar: The granulated sugar gives the top that shatteringly crisp crust. The brown sugar keeps the center tender and adds a hint of molasses that plays beautifully with the chocolate. Do not skip the brown sugar. I have and it was a mistake. The texture was fine but the flavor was one-note.
- ½ cup unsalted butter, melted and slightly cooled + ¼ cup neutral oil: Butter for flavor, oil for moisture guarantee. Oil keeps them soft on day three. Butter alone makes them dry by day two. This is the fat blend I use in all my quick breads now. It works.
- ¾ cup buttermilk, room temperature: The acid in the buttermilk activates the baking soda and keeps the crumb tender. If you do not have buttermilk, take ¾ cup of whole milk and add 2 teaspoons of lemon juice or white vinegar. Let it sit for five minutes. It works exactly the same.
- 2 large eggs, room temperature: Room temperature eggs mix in more smoothly and create a better emulsion with the butter. If you forget to take them out of the fridge, drop them in a bowl of warm water for five minutes. It fixes everything.
- 2 teaspoons vanilla extract: Do not skip this. It deepens the chocolate flavor in a way that is hard to detect but noticeable if it is missing.
- 1 ½ cups semi-sweet or dark chocolate chips: Save ¼ cup to sprinkle on top before baking. This is a visual thing — those exposed chips on the dome look intentional and bakery-like. I use semi-sweet because my kid prefers it, but dark chocolate chips make these feel more adult and less sweet.
- 1 teaspoon baking soda, ½ teaspoon baking powder, ½ teaspoon salt: The baking soda does the heavy lifting for the rise. The baking powder adds a little extra lift insurance. Salt keeps the chocolate from tasting flat.
The Setup (It’s Minimal, I Promise)
- One large mixing bowl and one medium mixing bowl
- A whisk and a rubber spatula
- A box grater
- A clean kitchen towel (for squeezing the zucchini)
- A 12-cup standard muffin tin
- Paper liners (I use unbleached brown ones — they make the dark muffin look even more dramatic against the pale paper)
That is genuinely everything. No stand mixer. No sifter. If you have two working arms and a countertop, you can make these.
Here’s How I Do It (Start to Finish)
This moves fast once you start, so read through the whole thing once before you touch a single ingredient. Most of these steps take under a minute each.
Preheat and prep: Position a rack in the center of the oven and preheat to 425°F. Line your muffin tin with paper liners. Do not grease the pan — the liners are doing that job.
- Shred and squeeze the zucchini: Grate the zucchini on the large holes of a box grater. Dump the shreds into the center of a clean kitchen towel, gather the corners, and twist tightly over the sink. Squeeze until almost no more liquid comes out. You should end up with about 1 packed cup of dry-ish shredded zucchini. (📸 Photo tip: You should see a visible stream of green-tinted water running into the sink. This is the moment that saves your muffins.)
- Whisk the dry ingredients: In your large mixing bowl, whisk together the flour, cocoa powder, baking soda, baking powder, and salt until everything is evenly combined and there are no cocoa lumps.
- Mix the wet ingredients: In the medium bowl, whisk together the melted butter, oil, granulated sugar, and brown sugar until smooth and slightly glossy. Whisk in the eggs one at a time, then the vanilla and the buttermilk. The mixture should look smooth and a little pale when you are done.
- Combine wet and dry: Pour the wet mixture into the dry mixture. Fold gently with a rubber spatula until just a few streaks of flour remain visible. Add the shredded zucchini and 1 ¼ cups of the chocolate chips. Fold just until combined. Do not keep mixing — overworking the batter will make the muffins tough. (📸 Photo tip: The batter should look thick and shaggy, not smooth and thin. A few flour streaks are fine at this stage.)
- Rest the batter: Cover the bowl with plastic wrap or a clean towel and let it sit at room temperature for 15 to 20 minutes. This resting period allows the starches to hydrate and the leavening to start working. You will see small bubbles forming on the surface. This step is optional but it genuinely produces a higher dome.
- Fill the liners: Divide the batter evenly among the 12 muffin cups. Fill each liner all the way to the top — this is non-negotiable for the bakery dome effect. Sprinkle the remaining ¼ cup of chocolate chips over the tops, pressing them in very lightly so they stick.
- Bake at high heat: Place the pan in the oven and bake at 425°F for exactly 5 minutes. Do not open the door. After 5 minutes, reduce the oven temperature to 350°F (without opening the door if you can manage it, but it is fine if you need to open it briefly). Bake for another 14 to 17 minutes. The tops should spring back when you gently press them, and a toothpick inserted in the center should come out with a few moist crumbs — not wet batter.
- Cool and release: Let the muffins cool in the pan for exactly 5 minutes. Transfer them to a wire rack to cool completely. If you leave them in the pan too long, the bottoms will steam and turn soggy.
How I Meal Prep These for the Week
I make a double batch on Sunday afternoons and we are set for breakfasts and lunchbox treats through Wednesday. They freeze beautifully, which means I also stash a few for the weeks when my kid has early morning rehearsals and needs something she can grab on the way out the door.
- Fridge: Store in an airtight container at room temperature for up to 3 days. The fridge tends to dry them out, so I only refrigerate if the weather is very warm or if I am holding them past day three.
- Freezer: Yes. Wrap each muffin individually in plastic wrap, then place them in a freezer bag. They stay good for up to 3 months.
- Reheat: Microwave for 15 to 20 seconds for a just-baked texture. If you are reheating from frozen, microwave for 30 to 40 seconds. The air fryer at 300°F for 3 to 4 minutes also works well and restores some of the crackly top texture. The microwave does not restore the crunch, but it keeps the center soft and warm.
Things I Wish I’d Known the First Time
- Do not skip the squeeze. I cannot say this enough. If your shredded zucchini still feels wet to the touch after squeezing, wrap it in a fresh dry part of the towel and squeeze harder. That water is the enemy of a good crumb structure. Every gummy muffin I have ever made was because I got lazy at this exact step.
- Fill the liners to the brim. Bakery muffins are tall because bakeries fill the batter all the way to the top of the liner. If you fill them three-quarters full, you will get flat tops. I fill mine right to the rim and a little over. Do not be timid here.
- Let the batter rest. I know it is an extra 15 minutes. I know you are busy. But that rest period allows the starches to absorb the liquid and the gluten to relax, which means the muffins dome higher and the crumb is more tender. I tested this side by side and the rested batch was clearly taller and lighter. It works.
- Use a cookie scoop for even portions. A large spring-loaded cookie scoop (about 3 tablespoons) makes dividing the batter mess-free and ensures every muffin is the same size. Even baking starts with even portions.
- If the top cracks too much, your oven runs hot. A beautiful bakery dome has one or two cracks, not a cratered surface. If you are getting multiple deep fissures, lower your initial temperature to 415°F and see if that helps. Every oven is a little different.
Make It Yours (Easy Variations)
- Dairy-Free: Use melted coconut oil or a neutral oil in place of the butter and use dairy-free milk mixed with lemon juice instead of buttermilk. I use oat milk or almond milk and it works perfectly. The high heat starting temperature remains the same — just watch the final bake time closely as dairy-free batters can brown a little faster.
- Gluten-Free: A good 1-to-1 gluten-free flour blend works beautifully here. I have tested this with King Arthur Measure for Measure and Cup4Cup and both produced muffins that were tender and domed. Do not rest the batter as long — 10 minutes max — because gluten-free batters can dry out if they sit too long.
- Peanut Butter Swirl: Drop a spoonful of creamy peanut butter on top of each muffin before baking and swirl it gently with a toothpick. My kid calls these the “reese’s muffins” and they disappear even faster than the original. For more peanut butter inspiration, check out these chocolate peanut butter banana bites.
- Spiced Chocolate: Add 1 teaspoon of cinnamon and ¼ teaspoon of cayenne pepper to the dry ingredients. The warmth of the spice plays beautifully against the dark chocolate and makes them feel more grown-up.
- Zucchini Bread Loaf: Pour the batter into a greased 9×5-inch loaf pan and bake at 350°F for 50 to 60 minutes. Check for doneness at 50 minutes with a toothpick. The crust will be slightly softer than the muffins but the inside will be just as tender.
The Questions My Readers Keep Asking
Q: Why did my muffins turn out gummy and flat?
A: Ugh, I have been there. The most common reason is not squeezing the zucchini dry enough. That extra water turns into steam during baking and collapses the structure. The second most common reason is overmixing the batter — mix until you cannot see dry flour and then stop. A few lumps are fine. The third reason is underbaking. Make sure a toothpick comes out with moist crumbs, not wet batter. You’ve got this next time.
Q: Can I make these with yellow squash instead of zucchini?
A: Yes, absolutely. Yellow summer squash is nearly identical in water content and behaves the same way in baking. Squeeze it just as hard and it will disappear into the chocolate batter the same way zucchini does. I have done it and the results were indistinguishable. My neighbor did not notice and she is the one who texts me at 7am about muffins.
Q: How long do these stay fresh? Can I freeze them?
A: They stay fresh at room temperature in an airtight container for up to 3 days. After that, the tops start to lose their crackly texture. Freeze them individually wrapped in plastic wrap inside a freezer bag for up to 3 months. Reheat from frozen in the microwave for 30 seconds or in a 300°F air fryer for 4 minutes. The air fryer method brings back more of the crunchy top.
Q: What do you serve with these? Are they breakfast or dessert?
A: Honestly, they are both. For breakfast, I set out a basket with strong black coffee and a glass of cold milk for my kid — the zucchini makes me feel slightly virtuous about calling chocolate cake a morning food. For dessert, I warm one up and put a scoop of vanilla ice cream next to it. My preferred serving move is to cut one in half, toast it cut-side down in a buttered skillet for about a minute, and eat it warm with a little flaky salt on top. That is the way I eat them when no one is watching.
More Recipes My Family Makes on Repeat
If you liked this one, here are a few others that get the same reaction at our table:
- Salted Brown Butter Chocolate Chip Cookies — The ones that made my mail carrier ask if I was selling them.
- Sour Cream Banana Bread — The only banana bread recipe I have used since 2020. Tender, tall, and stays moist for days.
- Glazed Lemon Blueberry Scones — For the mornings when you want something bright and not chocolate. Or both. I never judge.
I make these muffins on Sunday afternoons when the kitchen light is good and the week ahead feels manageable. They fill the apartment with that dark, roasted chocolate smell that makes everyone wander into the kitchen asking what is baking. By Tuesday morning, there are usually two left. Sometimes three, if I hid one.
If you try them, drop a comment below — I love hearing how they turn out for you. Tag me on Pinterest or Instagram so I can see your tall, crackly domes.
📌 Double chocolate zucchini muffins recipe that bakes up tall, moist, and studded with melty chocolate chips — save this for your next weekend baking project.
Bakery Style Double Chocolate Zucchini Muffins
Equipment
- Large Mixing Bowl
- Medium Mixing Bowl
- Whisk
- Rubber Spatula
- Box grater
- Clean Kitchen Towel
- 12-cup standard muffin tin
- Paper liners
Ingredients
Produce
- 1 ½ cups shredded zucchini (about 1 medium)
Dry Ingredients
- 2 cups all-purpose flour
- ½ cup Dutch-processed unsweetened cocoa powder
- 1 teaspoon baking soda
- ½ teaspoon baking powder
- ½ teaspoon salt
Wet Ingredients
- 1 cup granulated sugar
- ½ cup packed brown sugar
- ½ cup unsalted butter, melted and slightly cooled
- ¼ cup neutral oil
- ¾ cup buttermilk, room temperature
- 2 large eggs, room temperature
- 2 teaspoons vanilla extract
Mix-ins
- 1 ½ cups semi-sweet or dark chocolate chips
Instructions
- Shred and squeeze the zucchini: Grate the zucchini on the large holes of a box grater. Dump the shreds into the center of a clean kitchen towel, gather the corners, and twist tightly over the sink. Squeeze until almost no more liquid comes out. You should end up with about 1 packed cup of dry-ish shredded zucchini.
- Whisk the dry ingredients: In your large mixing bowl, whisk together the flour, cocoa powder, baking soda, baking powder, and salt until everything is evenly combined and there are no cocoa lumps.
- Mix the wet ingredients: In the medium bowl, whisk together the melted butter, oil, granulated sugar, and brown sugar until smooth and slightly glossy. Whisk in the eggs one at a time, then the vanilla and the buttermilk. The mixture should look smooth and a little pale when you are done.
- Combine wet and dry: Pour the wet mixture into the dry mixture. Fold gently with a rubber spatula until just a few streaks of flour remain visible. Add the shredded zucchini and 1 ¼ cups of the chocolate chips. Fold just until combined. Do not keep mixing – overworking the batter will make the muffins tough.
- Rest the batter: Cover the bowl with plastic wrap or a clean towel and let it sit at room temperature for 15 to 20 minutes. This resting period allows the starches to hydrate and the leavening to start working.
- Fill the liners: Divide the batter evenly among the 12 muffin cups. Fill each liner all the way to the top – this is non-negotiable for the bakery dome effect. Sprinkle the remaining ¼ cup of chocolate chips over the tops, pressing them in very lightly so they stick.
- Bake at high heat: Place the pan in the oven and bake at 425°F for exactly 5 minutes. Do not open the door. After 5 minutes, reduce the oven temperature to 350°F (without opening the door if you can manage it). Bake for another 14 to 17 minutes. The tops should spring back when you gently press them, and a toothpick inserted in the center should come out with a few moist crumbs – not wet batter.
- Cool and release: Let the muffins cool in the pan for exactly 5 minutes. Transfer them to a wire rack to cool completely. If you leave them in the pan too long, the bottoms will steam and turn soggy.
Notes
- Do not skip the squeeze. If your shredded zucchini still feels wet to the touch after squeezing, wrap it in a fresh dry part of the towel and squeeze harder. That water is the enemy of a good crumb structure.
- Fill the liners to the brim. Bakery muffins are tall because bakeries fill the batter all the way to the top of the liner. Fill right to the rim and a little over.
- Let the batter rest. That rest period allows the starches to absorb the liquid and the gluten to relax, which means the muffins dome higher and the crumb is more tender.
- Use a cookie scoop for even portions. A large spring-loaded cookie scoop (about 3 tablespoons) makes dividing the batter mess-free and ensures even baking.
- If the top cracks too much, your oven runs hot. Lower your initial temperature to 415°F and see if that helps.
Related Recipes:
 The Perfectly Pillowy Chocolate Chip Milk Buns (Tangzhong Method)
 Cheesy Hamburger Casserole Bake That’s Ready in 40 Minutes (No Canned Soup Here)
 Creamy Garlic Tagliatelle That Looks Like a Restaurant Dish in 20 Minutes
 Texas Roadhouse Style Baked Salmon with Sweet and Savory Glaze — Ready in Under 30 Minutes
 Easy Italian Meatloaf That’s Actually Juicy (Not Dry) — in 1 Hour
 Moist Lemon Zucchini Bread with a Crunchy Lemon Sugar Top