
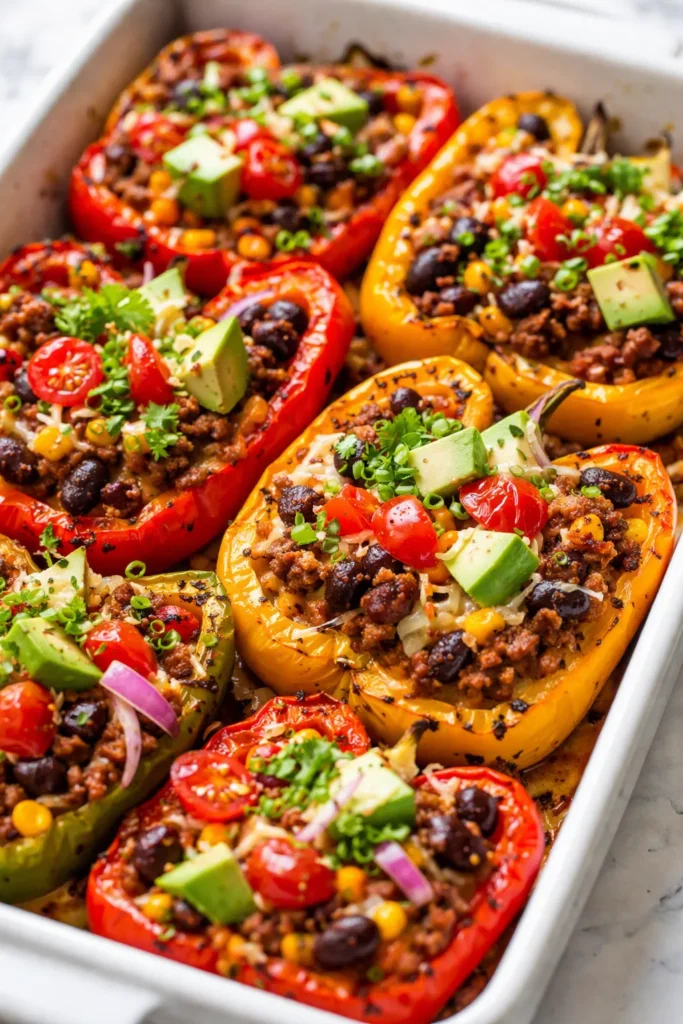
These taco stuffed peppers hold their shape, get all crispy-edged on top, and taste exactly like taco night — but they actually count as a vegetable serving. My kids ask for them every single week, and I’ve lost count of how many times I’ve texted this recipe to friends mid-bite.
The short version: Everything you love about taco night, stuffed into peppers that stay crisp — 45 minutes, one pan, done.
I’ve made this about forty times over the past year. It took me twelve soggy attempts to figure out the one step everybody skips — and now that I know it, I’ll never go back.
- Serves: 6 pepper halves as a main
- Hands-On Time: 20 min | Total Time: 45 min
- Difficulty: Easy — even on a Tuesday night
- Cost per serving: ~$2.50
- Calories: ~340 per serving
- Dietary Notes: Naturally gluten-free and low-carb; easily dairy-free
(Photo above: overhead shot of six taco stuffed pepper halves nestled in a white baking dish, cherry-red and golden-orange peppers with bubbly melted cheddar on top, scattered fresh cilantro and a small bowl of salsa beside them, warm afternoon light streaming in from the left.)
The One Step Everyone Skips (Don’t Skip It)
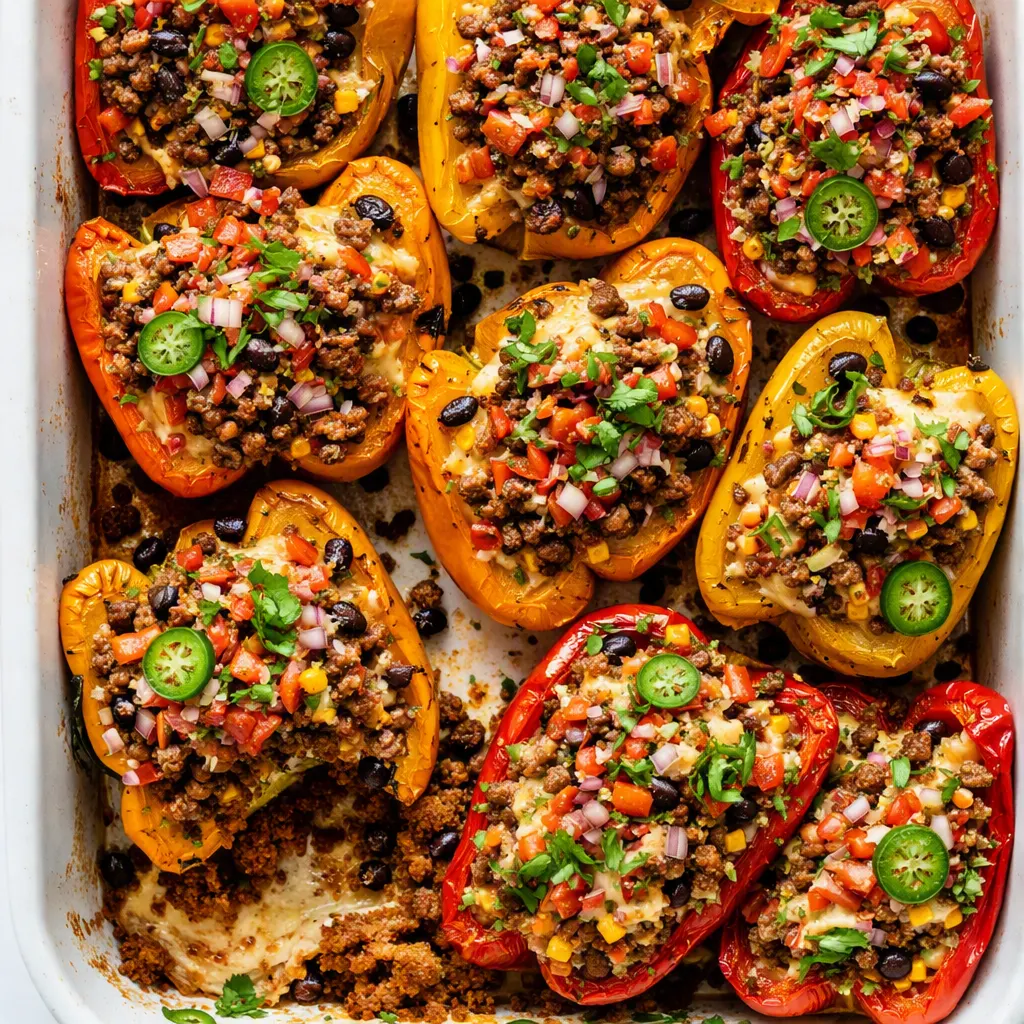
Here’s the thing nobody tells you about stuffed peppers: if you put raw peppers into the oven with the filling already inside, all that steam from the hot meat and beans softens them into limp vegetables before they ever get a chance to cook. The pepper ends up tasting like steamed sadness. You know the sad, collapsed pepper I’m talking about — the one that makes you wonder why you didn’t just make actual tacos.
The fix is almost stupidly simple. Roast the empty pepper halves for 10 minutes before you add the filling. Just ten minutes. That head start gives the peppers a chance to cook through and set their structure while they’re still empty, so when the filling goes in, they stay standing tall. The filling gets hot, the cheese melts into a golden crust, and the pepper underneath keeps a tiny bit of bite — the way a good cooked pepper should.
That little pre-roast turns these from “fine, I guess” into the thing my kids start asking about on Monday. My nine-year-old, who once declared peppers “the devil’s fruit,” now eats two halves without being reminded. That alone should tell you everything.
Everything You Need (And a Few Notes From Me)
- 3 large bell peppers (any color): I use a mix of red, orange, and yellow because they’re sweeter than green and my kids eat them faster — that’s also why the dish looks so pretty in photos. If you only have green, they work too; they just taste a little more savory and less sweet. Choose peppers with flat spots on the bottom so the halves don’t wobble in the dish.
- 1 lb ground beef (85/20): The fat gives the filling flavor and keeps it from drying out in the oven. Ground turkey works too — just don’t grab the 99% lean kind or the filling will taste dry and crumbly. My kids can tell when I skip the good beef, I’m not joking.
- 1/2 yellow onion, diced: Cook this with the beef until it’s soft and translucent — it adds all that sweet, savory depth you’d expect from a slow-cooked taco filling.
- 2 cloves garlic, minced: Add it in the last minute of browning so it turns fragrant but doesn’t burn. Burnt garlic is the fastest way to ruin any dinner, and I’ve done it one too many times.
- 1 packet taco seasoning (or 3 tbsp homemade): I make my own about half the time — chili powder, cumin, garlic powder, onion powder, smoked paprika, and salt. But when it’s 5:30 on a Tuesday and I forgot to plan dinner? Store-bought all the way. No guilt whatsoever.
- 1 can (15 oz) black beans, drained and rinsed: The beans stretch the meat so I can feed a hungry family on one pound of beef. Rinsing them well keeps the filling from turning a weird gray-brown color and cuts the sodium.
- 1 cup frozen corn, thawed: Adds a little pop of sweetness that balances the spicy taco seasoning. My picky nine-year-old picks the corn out but eats everything else — I’m counting that as a win.
- 1 cup shredded cheddar or Mexican blend: I grate my own cheddar when I have the energy because it melts so much creamier — pre-shredded cheese has a coating that keeps it from melting as smoothly. But honestly? Pre-shredded works just fine in a pinch, and I use it more often than I’d like to admit.
- 1/2 cup salsa (plus more for serving): Use your favorite jarred salsa. It adds moisture to the filling so you don’t need an egg or rice to hold everything together. I use whatever’s open in the fridge — chunky medium is my favorite.
- 1/2 tsp salt + 1/4 tsp black pepper: Go easy on the salt if your taco seasoning is already salty — some brands are aggressively seasoned, so taste before you add more.
- Optional toppings: sour cream, fresh cilantro, diced avocado, sliced jalapeños, hot sauce. In our house these are non-negotiable. The kids do sour cream and cilantro, my husband does jalapeños and hot sauce, and we all fight over the avocado.
What to Pull Out Before You Start
- A 9×13-inch baking dish — any oven-safe dish that fits six pepper halves snugly works. Snug is key; loose peppers tip over.
- A large skillet (12-inch works best) for the filling
- A cutting board and a sharp knife — a dull knife makes cutting peppers way harder than it should be
- A spoon for scooping out the pepper seeds and ribs
- A sturdy spatula for breaking up the ground beef
- A small bowl for your toppings once everything’s ready
Let’s Make It (Step by Step)
This goes fast once the peppers are in the oven, so read through the whole thing once before you start. I promise the only hard part is waiting for the timer.
Preheat and Prep: Preheat your oven to 400°F. Meanwhile, slice the bell peppers in half from top to bottom, straight through the stem. Scoop out the seeds and the white ribs with a spoon. You want the halves to look like little canoes — big enough to hold a generous scoop of filling but not so big that the filling gets lost.
- Roast the empty pepper halves: Place them cut-side down in the baking dish. Roast for 10 minutes. This is the step that prevents soggy peppers, and it’s worth every second of the “extra” time. (📸 Photo tip: You should see the pepper edges start to look slightly wrinkled and the color deepen just a touch.)
- Brown the beef: While the peppers roast, heat your skillet over medium-high heat. Add the ground beef and break it up with your spatula. Cook until it’s fully browned, about 5-7 minutes — you’ll hear it sizzle, then it’ll quiet down as the juices release, then sizzle again as the liquid evaporates and the browning happens. If there’s a lot of excess fat, drain most of it off, but leave a little for flavor.
- Add the onion and garlic: Push the beef to one side of the skillet and add the diced onion. Cook, stirring, for 3-4 minutes until it’s soft and translucent. Add the garlic and cook for 30 seconds more until it smells amazing — you’ll smell it before you see it. Then stir everything together.
- Build the taco filling: Sprinkle the taco seasoning over the beef mixture and stir to coat. Add the drained black beans, corn, and salsa. Stir everything together and let it bubble gently for 2-3 minutes until the beans are warmed through and the mixture looks like the best taco filling ever. Turn off the heat and taste it — add salt and pepper only if it needs it.
- Fill the peppers: Pull the peppers out of the oven and flip them cut-side up. Spoon the beef mixture generously into each half, mounding it just above the rim. They should look full and abundant, but not overflowing. (📸 Photo tip: Grab a photo here — the empty peppers look like colorful little boats waiting to be filled.)
- Top with cheese: Sprinkle the shredded cheese over each pepper. Don’t be shy — this creates the crispy cheese crust that everyone fights over. About 2-3 tablespoons per half, covering the filling completely.
- Bake until bubbly: Return the dish to the oven and bake for 20-25 minutes, until the cheese is melted, bubbly, and starting to brown at the edges. If you want an extra-golden top (I always do), switch the oven to broil for the last 1-2 minutes and watch it like a hawk — broilers move fast and you do not want burned cheese. (📸 Photo tip: You’ll know it’s ready when the cheese is bubbling around the edges and the filling is visibly steaming.)
- Rest and serve: Let the peppers sit for 5 minutes before serving. This rest is what keeps the filling from collapsing into a pile when you lift the pepper out. Serve with sour cream, cilantro, avocado, salsa, hot sauce, or whatever toppings make your family happy.
How I Meal Prep These for the Week
These are one of my favorite Sunday prep recipes because they store and reheat like a dream. I make a double batch on Sundays, and we’re set for Tuesday dinner, my Wednesday work lunches, and — if we’re being honest — my husband’s sneaky late-night snack that he pretends I don’t know about.
- Fridge: Store leftover stuffed peppers in an airtight container for up to 4 days. Reheat in the toaster oven at 350°F for 10-12 minutes to keep the peppers from getting mushy.
- Freezer: Yes — these freeze beautifully. Freeze each pepper half individually on a baking sheet, then transfer to a freezer bag once solid. They’ll keep for up to 3 months.
- Reheat: For frozen peppers, bake at 350°F for 25-30 minutes straight from the freezer. The microwave works in a pinch for a single pepper (about 2 minutes), but the oven keeps the cheese crust crispy and the pepper firm.
Things I Wish I’d Known the First Time
- Don’t over-stuff the peppers: I know it’s tempting to pile the filling sky-high — I’ve done it, and the result is filling that spills out, scorches onto the dish, and gets crusty in the wrong way. A generous scoop that sits just above the rim is perfect. If you have leftover filling, serve it with tortilla chips on the side. That’s never a problem.
- Cut the peppers evenly: If one half is way bigger than the other, they’ll cook unevenly. Try to slice straight down through the middle of the stem, and count the inner ribs so you’re cutting through the center. A slightly lopsided pepper will still taste good — but it won’t cook as evenly, so it’s worth a few extra seconds of attention.
- Use a dish that fits snugly: If the pepper halves are rattling around in a big dish, they’ll tip over and spill their filling. A 9×13-inch baking dish fits six halves perfectly. If I’m using smaller peppers, I use a smaller square dish so everything stays cozy and upright. Trust me on this one — I’ve had my share of tipped-over disasters, and no one wants to eat a stuffed pepper that looks like it’s had a rough night.
- Let them rest: I know everyone is hungry and the kitchen smells incredible, but those five minutes of resting are the difference between a pepper that holds together and a pepper that collapses into a pile. Even if you mess this up a little, it’ll still taste delicious — I’ve eaten many a collapsed pepper over the years, and they were all wonderful. But the rest makes it look pretty too.
Swaps That Actually Work
- Dairy-Free: Use dairy-free shredded cheese or skip the cheese altogether — the filling is so flavorful on its own that no one will miss it. This is the version I make for my sister-in-law, and she always takes seconds.
- Chicken or Turkey: Swap the ground beef for ground turkey (93/7) or chopped rotisserie chicken. The chicken version needs an extra splash of water or salsa since chicken doesn’t have the same fat content — otherwise it can turn out a little dry.
- Spicy Version: Add a diced jalapeño (seeds included if you’re brave) to the beef mixture and use a spicy salsa. My husband drizzles his with hot sauce after baking; my kids need the mild version, so I let everyone customize their own toppings.
- Rice or Quinoa: If you want a heartier version, stir 1 cup of cooked rice or quinoa into the filling. I do this when I want the dish to stretch for two nights — it makes the peppers extra filling and total comfort food.
- Keto / Low-Carb: These are naturally low-carb and gluten-free already. Just skip the beans and corn (or halve them) to drop the carbs further, and pile on extra meat and cheese.
- No Oven Version: If it’s summer and turning on the oven feels like a crime, you can make these in your air fryer at 360°F for 12-15 minutes. I’ve tested it — the cheese gets bubbly and the peppers stay crisp. You’re welcome.
The Questions My Readers Keep Asking Me
Q: Why did my peppers turn out mushy even though I followed the recipe?
A: Ugh, I’ve been there. The most common culprit is skipping the pre-roast — I know it feels like wasted time, but that 10 minutes is what keeps the peppers firm. The other culprit is baking too long. If your oven runs hot, start checking the peppers at the 18-minute mark. They should be tender when pierced with a fork, not collapsed and sad.
Q: Can I make these with ground turkey or chicken?
A: Yes! I do it all the time. Use ground turkey (93/7) or any ground chicken. You’ll want to add a couple of extra tablespoons of salsa or a splash of water because lean poultry doesn’t have as much fat to keep the filling moist. I’ve tested this and it works great — just don’t use 99% lean, or the filling will be a little dry.
Q: How long do these last in the fridge? Can I freeze them?
A: They’ll keep in the fridge for up to 4 days in an airtight container. For freezing, I freeze them individually on a baking sheet first, then transfer to a freezer bag — that way you can pull out just one or two at a time. They keep for up to 3 months. Reheat in the oven at 350°F so the pepper doesn’t turn mushy; the microwave works but it’ll be softer and the cheese won’t be crispy. Honestly, I do most of my freezing in the summer when peppers are everywhere and cheap.
Q: What do you serve with these?
A: My favorite sides are Mexican rice (I use the store-bought packet when I’m tired), a simple green salad with lime-cilantro vinaigrette, or roasted corn on the cob. On weekends, I serve them with a big bowl of tortilla chips and guacamole on the table — my kids love to scoop the leftover filling with chips. It’s technically a “serve yourself” night, which is my favorite kind of night.
More Recipes My Family Makes on Repeat
If you liked this one, here are a few others that get the same reaction at our table:
- [INTERNAL LINK PLACEHOLDER: Sheet Pan Chicken Fajitas] — One pan, fifteen minutes of prep, and the peppers and onions come out slightly charred and perfect every single time.
- [INTERNAL LINK PLACEHOLDER: Easy Ground Turkey Chili] — My go-to cold-weather dinner, and it somehow tastes even better the next day.
- [INTERNAL LINK PLACEHOLDER: One-Pot Taco Pasta with Black Beans] — All the flavors of taco night combined with pasta, and only one pot to wash afterward.
Alright, Go Make Your Peppers
These taco stuffed peppers have saved more Tuesday nights at our house than I can count — they’re the answer to the “what’s for dinner?” panic that hits at 5pm, and they make everyone happy without making me feel like a short-order cook. I really hope you and your family love them as much as we do.
If you try this recipe, drop a comment below and let me know how it goes — I genuinely love hearing what your family thought. And if you’re on Instagram or Pinterest, tag me so I can see your beautiful peppers!
📌 Save this taco stuffed peppers recipe for your next busy weeknight dinner — it’s the 45-minute meal that gets everyone to the table without a fight.
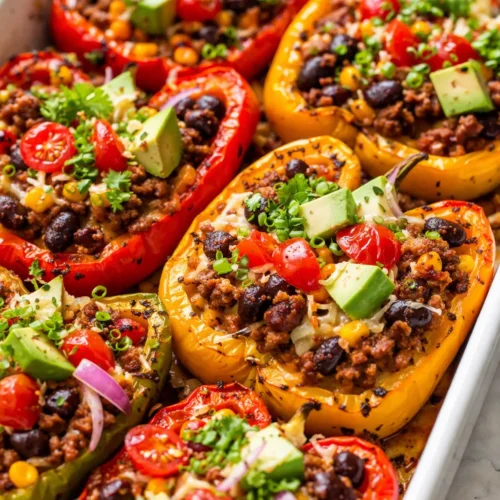
Taco Stuffed Peppers That Stay Crunchy Instead of Soggy
Equipment
- 9×13-inch baking dish
- Large Skillet
- Cutting board and sharp knife
- Spoon
- Sturdy spatula
- Small Bowl
Ingredients
Peppers
- 3 large bell peppers, any color
Filling
- 1 lb ground beef (85/20)
- 1/2 yellow onion, diced
- 2 cloves garlic, minced
- 1 packet taco seasoning (or 3 tbsp homemade)
- 1 can black beans (15 oz), drained and rinsed
- 1 cup frozen corn, thawed
- 1 cup shredded cheddar or Mexican blend
- 1/2 cup salsa, plus more for serving
- 1/2 tsp salt
- 1/4 tsp black pepper
Optional Toppings
- to taste sour cream, fresh cilantro, diced avocado, sliced jalapeños, hot sauce
Instructions
- Preheat the oven to 400°F. Slice the bell peppers in half from top to bottom, straight through the stem, and scoop out the seeds and white ribs so the halves look like little canoes.
- Place the empty pepper halves cut-side down in a 9×13-inch baking dish. Roast for 10 minutes — this pre-roast is the secret to keeping the peppers crunchy instead of soggy.
- Meanwhile, brown the ground beef in a large skillet over medium-high heat, breaking it up with a spatula, until fully browned, 5 to 7 minutes. Drain excess fat but leave a little for flavor.
- Push the beef to one side and cook the diced onion for 3 to 4 minutes until soft and translucent. Add the garlic and cook for 30 seconds until fragrant, then stir everything together.
- Stir in the taco seasoning, black beans, corn, and salsa. Let it bubble gently for 2 to 3 minutes, then taste and add salt and pepper only if needed.
- Flip the roasted peppers cut-side up. Spoon the beef mixture generously into each half, mounding it just above the rim.
- Sprinkle 2 to 3 tablespoons of shredded cheese over each pepper, covering the filling completely.
- Bake for 20 to 25 minutes until the cheese is melted, bubbly, and starting to brown at the edges. If you want an extra-golden top, broil for the last 1 to 2 minutes.
- Let the peppers rest for 5 minutes before serving. Serve with sour cream, cilantro, avocado, salsa, jalapeños, or hot sauce.
Notes
Related Recipes:
 Cheesy Hamburger Casserole Bake That’s Ready in 40 Minutes (No Canned Soup Here)
 Creamy Garlic Tagliatelle That Looks Like a Restaurant Dish in 20 Minutes
 Texas Roadhouse Style Baked Salmon with Sweet and Savory Glaze — Ready in Under 30 Minutes
 Easy Italian Meatloaf That’s Actually Juicy (Not Dry) — in 1 Hour
 The Biscuits and Gravy Casserole That’s Actually Crispy on Top (And Ready in 40 Minutes)
 Air Fryer Chicken and Vegetables That Don’t Taste Like a Regret (30 Minutes, One Pan)