
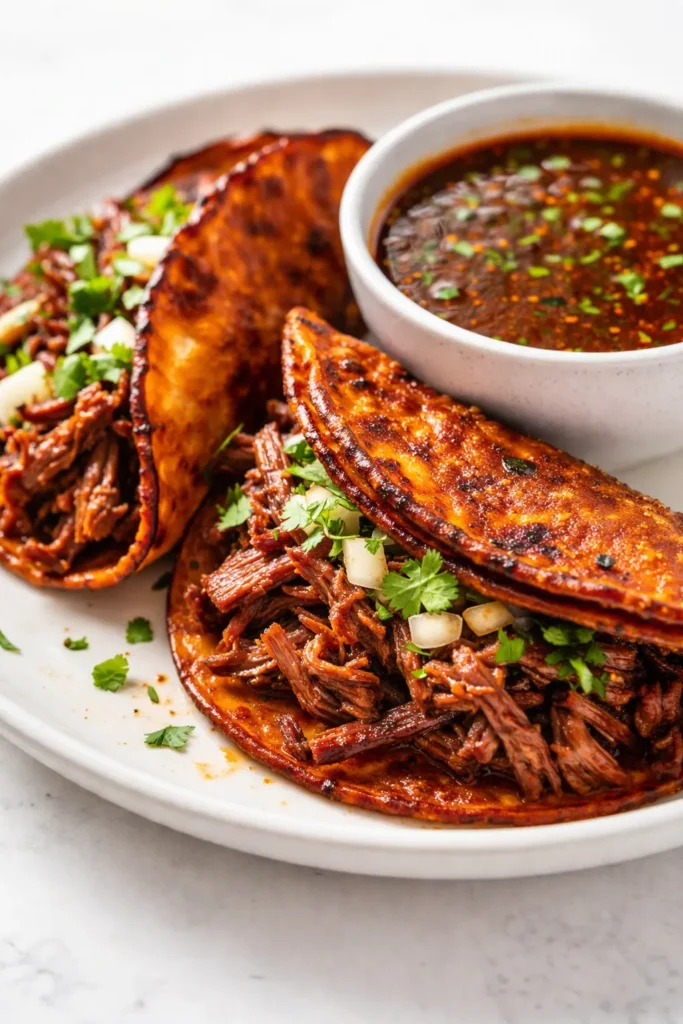
The first time I made birria tacos, my entire kitchen smelled like a weekend market in Jalisco — and we didn’t even leave Ohio. My husband took one bite, dipped it in the deep red consomé like he’d been doing it his whole life, and said we’d never need another taco recipe. We haven’t, and honestly, I don’t think I’ll ever stop making them for him.
The short version: Shredded chuck roast, slow-simmered in a smoky chile broth, then tucked into tortillas and fried until the edges shatter. It sounds fancy, but it’s really just patience plus one seriously good sauce.
I’ve made these birria tacos about thirty times now — for birthdays, for sick days, for the week my sister visited and refused to leave. Every single time, the consomé bowl empties before the taco plate does. You’ll see what I mean.
- Serves: 8–10 as tacos (makes about 20 tacos)
- Hands-On Time: 45 min | Total Time: 4 hours
- Difficulty: Totally doable — just needs time to simmer
- Cost per serving: About $4
- Calories: ~520 per 2 tacos with cheese
- Dietary Notes: Naturally dairy-free if you skip the cheese; gluten-free with corn tortillas
(Photo above: overhead shot of three birria tacos stacked on a blue ceramic plate, the top one cut in half so you can see the melted cheese stretching between the crispy tortilla layers, a small dark-red bowl of consomé for dipping beside it, and a sprinkle of white onion, cilantro, and a lime wedge catching the warm afternoon light from the left.)
Why These Are the Birria Tacos I Keep Coming Back To
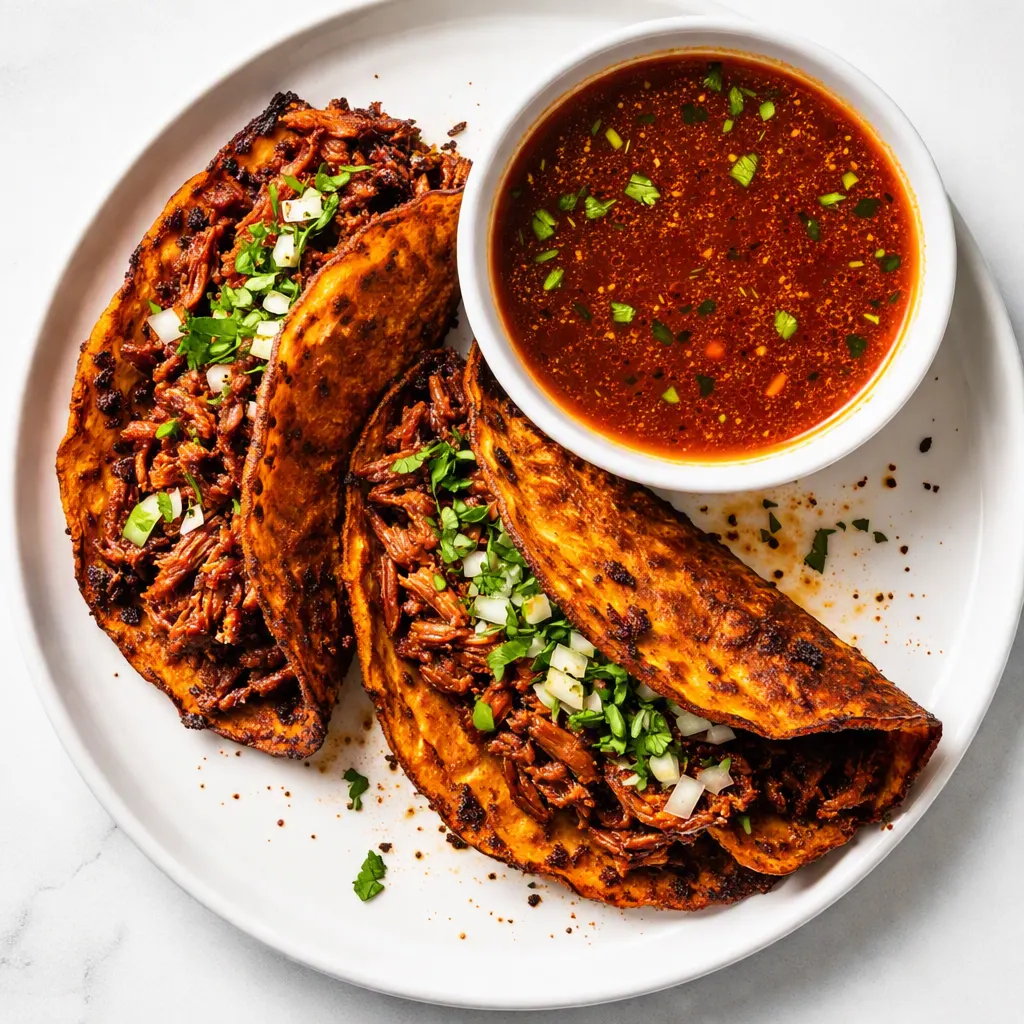
The secret isn’t one big trick — it’s a few small ones that stack. The dried chiles get toasted just long enough to wake them up, but not so long they turn bitter. The beef gets a good sear before it ever hits the broth. And the tortillas? They soak in that bright red consomé before they hit the hot pan, so every bite tastes like the stew itself, not just a shell holding it.
The biggest difference, though, is the fat that rises to the top of the pot. I skim it off and use it to fry the tortillas. That little extra step — honestly, it’s just a minute with a spoon — gives you the kind of golden, crispy edge that makes these tacos taste like they came from a street cart in Guadalajara.
I learned the hard way after a sad, soggy first attempt. Now the texture holds every single time, and the flavor gets deeper the longer the pot sits.
Everything You Need for the Consomé and the Tacos (With Real Talk)
- 3 lbs beef chuck roast (or short ribs): Chuck has the marbling that turns meltingly soft after a long simmer. Short ribs work beautifully too, but they cost more — I save those for holidays. If your butcher has beef shank, grab one and toss it in. The marrow makes the broth extra silky.
- 4 dried guajillo chiles: The backbone of the consomé. They’re mild and fruity, with that gorgeous brick-red color. You can find them in most grocery stores now, but I always keep a stash from my local Mexican market — they’re way fresher there.
- 2 dried ancho chiles: These add a raisiny sweetness that balances the heat. If you don’t have them, swap in two more guajillos and add a pinch of sugar.
- 2 chipotle peppers in adobo: Here’s the thing — I’m not sorry about the heat, but my kids are. So I start with just one chipotle and they don’t complain. My husband and I pass a second one around the table for extra smoke. My kids have never once left leftovers when these are on the table.
- 1 medium white onion, quartered: Half goes in the blender, half goes into the pot. Sweetness and depth, no tears required.
- 6 cloves garlic: Don’t skip the garlic. Just don’t. If you’re out, the recipe still works, but it’s not the same.
- 2 roma tomatoes: They give the broth body and a slight tang. No need to peel them — the blender handles it.
- 1 tbsp apple cider vinegar: This brightens everything at the end. It’s like the last chord of a song — you don’t notice it’s missing until you taste it with.
- 1 tsp dried oregano: Mexican oregano if you can find it. It’s earthier and less minty than the Mediterranean kind, and it makes a real difference.
- 1 tsp ground cumin + 1/2 tsp cinnamon: Cumin for warmth, cinnamon for the subtle sweetness you can’t quite name. Sounds weird in tacos — but it’s the thing your guests will ask about.
- 6 cups low-sodium beef broth: You’ll be salting the pot yourself later, and you need room to adjust.
- 2 bay leaves: Pop them in before the simmer, pull them out before you serve.
- 20–24 small corn tortillas: The kind for street tacos. Not flour — corn is non-negotiable here. If you grab them from a tortillería, you’re on your way to something special.
- 1/2 lb Oaxaca cheese (or Monterey Jack): Optional but truly glorious. Oaxaca melts like string cheese, which it basically is. If you keep it dairy-free, the tacos still shine. My kids insist on the cheese — they call it the “pinch of the taco.”
- 1 white onion + 1 bunch cilantro + 2 limes: The classic topping trio. Minced onion, torn cilantro, lime wedges for squeezing.
What to Pull Out Before You Start
- A heavy Dutch oven or stockpot — 7 quarts gives you room to sear without crowding
- A blender (a regular one is fine, but a powerful one makes the chile sauce silkier)
- A large skillet — cast iron works beautifully for the tacos
- Tongs and a ladle
- A fine-mesh strainer if you want extra silky broth (I skip it half the time and no one’s ever complained)
Let’s Make Birria Tacos (Step by Step)
This goes in phases, and most of the time the pot is doing the work while you go about your day. Read through once before you start, then let’s get to it.
Soften the chiles: Stem and seed the guajillos and anchos. In a dry skillet over medium-low heat, toast them for about 20 seconds per side. They should smell fragrant, not burned — if any wisps of smoke appear, pull them out immediately. Transfer them to a bowl and cover with boiling water. Let them sit until soft, about 15 minutes.
- Sear the beef: Pat the chuck roast dry and season generously with salt and pepper. Heat a splash of neutral oil in your Dutch oven over medium-high. Sear the meat in batches — about 4 minutes per side — until each side is deeply browned. Don’t crowd the pan. (📸 Photo tip: You want a deep chestnut-brown crust, not a pale tan. That color is flavor.)
- Blend the sauce: While the meat rests, add the soaked chiles (plus about 1 cup of the soaking water), tomatoes, half the quartered onion, garlic, chipotle, apple cider vinegar, oregano, cumin, and cinnamon. Blend until completely smooth. Taste it here — it should taste like a very intense, slightly sharp chili sauce.
- Combine and simmer: Pour the sauce over the seared beef, add the rest of the onion, bay leaves, and beef broth. Stir it all together, scraping up any browned bits from the bottom of the pot. Bring to a boil, then drop the heat to low, cover, and let it settle into a gentle simmer.
- Let it go low and slow: Let it simmer for 3 hours, checking occasionally. The liquid should be at a lazy bubble — not a rolling boil. You’ll know it’s ready when the beef shreds under light pressure from a fork. (📸 Photo tip: At the 3-hour mark, the consomé should look deep red and glossy, with a sheen of brick-red fat on the surface.)
- Shred the beef: Pull out the bay leaves and the big onion chunks. Use tongs to move the beef to a cutting board. Let it rest until cool enough to handle, then shred it with two forks. Discard any gristly bits. Season the shreds with a little salt.
- Skim and build the sauces: Skim the fat from the top of the consomé into a small bowl — this is liquid gold for the tortillas. Keep the consomé warm on the stove. Dip each tortilla briefly into the consomé, then into the skimmed fat, so it’s coated but not sagging.
- Fry the tacos: Heat a large skillet over medium. Lay the dipped tortillas flat in the pan, add a line of cheese and a pile of shredded beef, and fold. Fry each side until golden and crisp, about 2 minutes per side. Work in batches and keep them warm on a tray in a low oven.
- Serve them fast: Pile the tacos on a plate, sprinkle with minced onion and cilantro, and serve with a bowl of hot consomé for dipping. Lime wedges on the side. Everyone dips, everyone drips, nobody talks for the first ten minutes.
How I Meal Prep These for the Week
This is the meal-prep recipe that actually pays off. I typically make a double batch on Sunday afternoon — one batch for dinner that night, one batch to portion out for the week. The consomé gets better by day three, no joke. I’ve decided it’s because the chiles and spices finally stop competing and just become one thing.
- Fridge: Store the shredded beef and consomé in separate airtight containers — they stay great for 4–5 days. Reheat the consomé on the stove or in the microwave until it’s piping hot.
- Freezer: 100% yes, this freezes beautifully. Portion the shredded beef and consomé into individual containers and freeze for up to 3 months. I keep one in the freezer for those “I don’t want to cook anything” nights.
- Reheat: Warm the beef in the consomé, then dip and fry the tortillas fresh. The microwave makes the tortillas soggy, so please don’t — the extra five minutes in a skillet are worth it.
Things I Wish I’d Known the First Time I Made Birria Tacos
- Don’t toast the chiles too long: 20 seconds per side is plenty. Any longer and they get bitter, and that bitterness will haunt the whole pot. I learned this the hard way — my first batch tasted like a campfire in a bad way. Even if you mess this up a little, it’s still edible, just not the same.
- Sear the beef like you mean it: The browned crust is what gives the consomé its depth. If you skip this step, the broth turns out flat and one-note. I know it adds ten minutes, but trust me on this one.
- Save the skimmed fat: This is the classic birria trick. That red oil on top of the consomé is what makes the tortillas turn golden and shatteringly crisp. Use it for frying — the color and flavor are unreal.
- Let it simmer, not boil: A rolling boil makes the beef stringy and the broth cloudy. Keep it at a gentle bubble. My husband thought I was overthinking it until he tried both versions side by side.
Swaps That Actually Work
- Chicken Birria: Swap the beef for bone-in chicken thighs and reduce the simmer to 1 hour. The consomé will be lighter but still delicious. My sister does this on busy weeknights when she doesn’t have four hours — and honestly, it’s pretty great.
- Goat, if you’re up for it: Traditional birria is made with goat, and if you can find it, the flavor is unmatched. Simmer it the same way — 3 hours — and shred it the same. Your butcher can order it if they don’t stock it.
- Dairy-Free: Skip the cheese entirely. The tacos are still crispy, brothy, and deeply savory. My dairy-free nephew devoured them last Christmas — nobody believed him when he said they were fine without cheese.
- Spicy version: Add a third chipotle or throw in a dried chile de árbol when you soak the chiles. My husband does this for weekend versions — the kids get the mild pot, we get the one that wakes you up.
- Flour tortilla caveat: Please don’t. Corn is the way. Flour gets soggy and flops apart. If you’re cooking for a gluten-free eater, corn tortillas are naturally gluten-free anyway.
Questions I Get About Making Birria Tacos All the Time
Q: Why did my consomé turn out bitter?
A: Ugh, I’ve been there. Nine times out of ten, it’s the toasted chiles — either they burned for a second too long, or you left the seeds in when you toasted them. Start with stemmed, seeded chiles and toast them for just 20 seconds per side over medium-low heat. If you smoke them, toss them and restart. You’ve got this next time.
Q: Can I make this with chicken or turkey?
A: Yes! Chicken thighs work beautifully — just simmer for 60–75 minutes instead of 3 hours. The flavor is lighter but still plenty rich. A friend of mine makes a turkey version after Thanksgiving with the leftover carcass and honestly, it’s genius. I haven’t tested it myself, but readers swear by it.
Q: How long does this last? Can I freeze it?
A: The beef and consomé will stay delicious in the fridge for 4–5 days, and in the freezer for up to 3 months. I freeze them in separate quart containers so I can thaw just what I need for a quick weeknight dinner. Reheat the consomé on the stove, and always fry the tacos fresh — no soggy tortillas allowed.
Q: What do you serve with birria tacos?
A: The usual suspects: extra lime, a little bowl of pickled red onions, maybe some Mexican rice or a simple bean salad. We always do a big pot of consomé for dipping. My kids honestly love them with a side of avocado slices and a sprinkle of Tajín. Weekend version: I add a pitcher of agua de jamaica and call it a party.
More Recipes My Family Makes on Repeat
If you liked this one, here are a few others that get the same reaction at our table — half the time someone licks the plate, half the time we just don’t talk until the plates are empty.
- Chile Verde — that other slow-simmered pot of tomatillo magic that makes Mondays bearable.
- Carne Asada Tacos — the leaner, faster weeknight cousin of these birria beauties.
- Pozole Rojo — for when you want the same rich chile energy but you’re in the mood for soup.
I hope these birria tacos become your new weekend ritual the way they’ve become ours. The pot simmers, the house smells incredible, and by the time you’re dipping that first crispy tortilla into the consomé, the whole week just melts away. If you try them, drop a comment below — I love hearing how they turn out for your family.
📌 Birria tacos recipe that tastes like a weekend in Jalisco — save it for your next slow Sunday or rainy day dinner.
Birria Tacos for Rainy Weekend Nights: Rich, Brothy, and Worth Every Slow-Cooked Hour
Equipment
- Heavy Dutch Oven (7-Quart)
- Blender
- Large Cast Iron Skillet
- Tongs
- Ladle
- Fine-Mesh Strainer
Ingredients
For the Consomé and Beef
- 3 lbs beef chuck roast (or short ribs)
- 4 dried guajillo chiles
- 2 dried ancho chiles
- 2 chipotle peppers in adobo
- 1 medium white onion, quartered
- 6 cloves garlic
- 2 roma tomatoes
- 1 tbsp apple cider vinegar
- 1 tsp dried oregano (Mexican if possible)
- 1 tsp ground cumin
- 1/2 tsp ground cinnamon
- 6 cups low-sodium beef broth
- 2 bay leaves
- salt and freshly ground black pepper, for seasoning
- neutral oil, for searing
For the Tacos and Serving
- 20-24 small corn tortillas
- 1/2 lb Oaxaca cheese or Monterey Jack, shredded (optional)
- 1 small white onion, minced
- 1 bunch fresh cilantro, torn
- 2 limes, cut into wedges
Instructions
- Stem and seed the guajillos and anchos. Toast them in a dry skillet over medium-low heat for about 20 seconds per side until fragrant. Transfer to a bowl, cover with boiling water, and let sit until soft, about 15 minutes.
- Pat the chuck roast dry and season generously with salt and pepper. Heat a splash of neutral oil in a Dutch oven over medium-high. Sear the meat in batches until deeply browned on all sides, about 4 minutes per side. Don’t crowd the pan.
- Add the soaked chiles plus about 1 cup of soaking water, tomatoes, half the quartered onion, garlic, chipotle, apple cider vinegar, oregano, cumin, and cinnamon. Blend until completely smooth.
- Pour the sauce over the seared beef. Add the rest of the onion, bay leaves, and beef broth. Stir, scraping up any browned bits. Bring to a boil, then reduce to low, cover, and keep at a gentle simmer.
- Simmer for 3 hours, checking occasionally. The liquid should be at a lazy bubble, not a rolling boil. The beef is ready when it shreds easily under light pressure from a fork.
- Remove the bay leaves and onion chunks. Transfer the beef to a cutting board, let it rest until cool enough to handle, then shred with two forks. Discard any gristly bits and season with a little salt.
- Skim the red fat from the top of the consomé into a small bowl. Keep the consomé warm. Dip each tortilla briefly into the consomé, then into the skimmed fat, so it’s coated but not sagging.
- Heat a large skillet over medium. Lay the dipped tortillas flat in the pan, add a line of cheese and a pile of shredded beef, and fold. Fry each side until golden and crisp, about 2 minutes per side. Keep finished tacos warm in a low oven.
- Pile the tacos on a plate, sprinkle with minced onion and cilantro, and serve with hot consomé for dipping and lime wedges on the side.
Notes
Related Recipes:
 Cheesy Hamburger Casserole Bake That’s Ready in 40 Minutes (No Canned Soup Here)
 Creamy Garlic Tagliatelle That Looks Like a Restaurant Dish in 20 Minutes
 Texas Roadhouse Style Baked Salmon with Sweet and Savory Glaze — Ready in Under 30 Minutes
 Easy Italian Meatloaf That’s Actually Juicy (Not Dry) — in 1 Hour
 The Biscuits and Gravy Casserole That’s Actually Crispy on Top (And Ready in 40 Minutes)
 Air Fryer Chicken and Vegetables That Don’t Taste Like a Regret (30 Minutes, One Pan)