
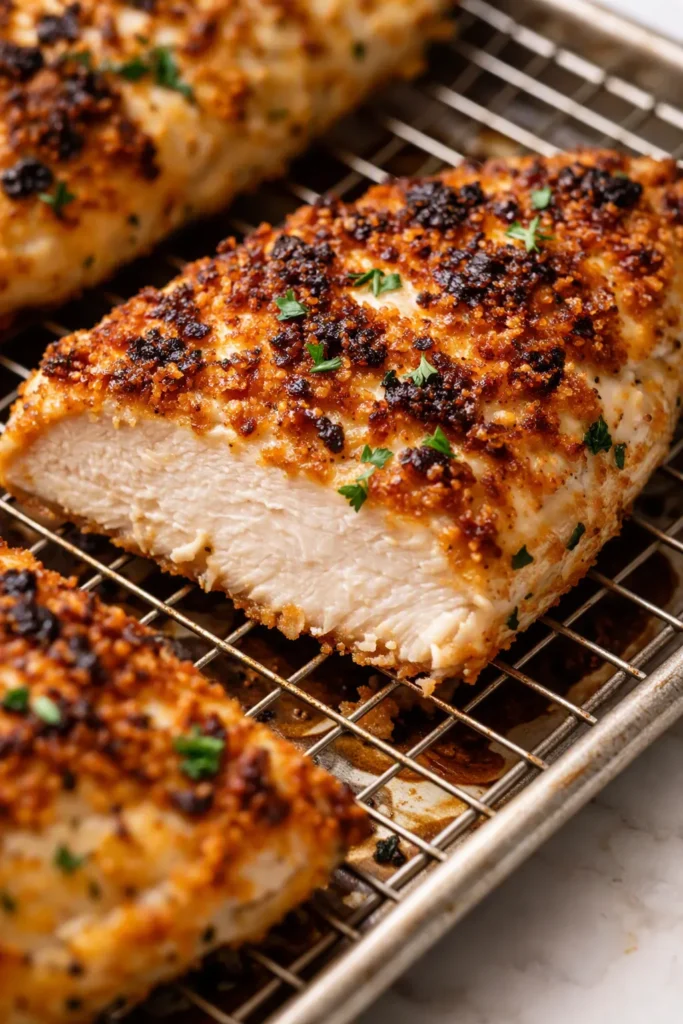
Every baked ranch chicken I tried before this one was either dry or soggy, and sometimes both in the same bite. Which, for a recipe that’s supposed to be the easiest weeknight dinner on planet earth, felt like a real betrayal. This version fixed it — one extra step and a wire rack did the whole job.
The short version: Ranch-mayo coated chicken under a crispy panko-parmesan crust, baked on a rack, done in 40 minutes.
I’ve made this about thirty times across three apartments. My sister in Austin texts me for the recipe every time she decides to cook again, which I’ve decided is the closest thing to verified proof.
- Serves: 4 as a main
- Hands-On Time: 15 min | Total Time: 40 min
- Difficulty: Easy, even on a Tuesday
- Cost per serving: About $2.75
- Calories: ~480 per serving
- Dietary Notes: Gluten-free swap works; dairy-free swap noted below
(Photo above: overhead shot of a white ceramic platter holding four golden-crusted chicken breasts finished with finely sliced chives, a small bowl of extra ranch at the side, one linen napkin, natural afternoon light from a kitchen window — styled just enough to look like you meant it.)
Why This Version Actually Stays Crispy (And Juicy)
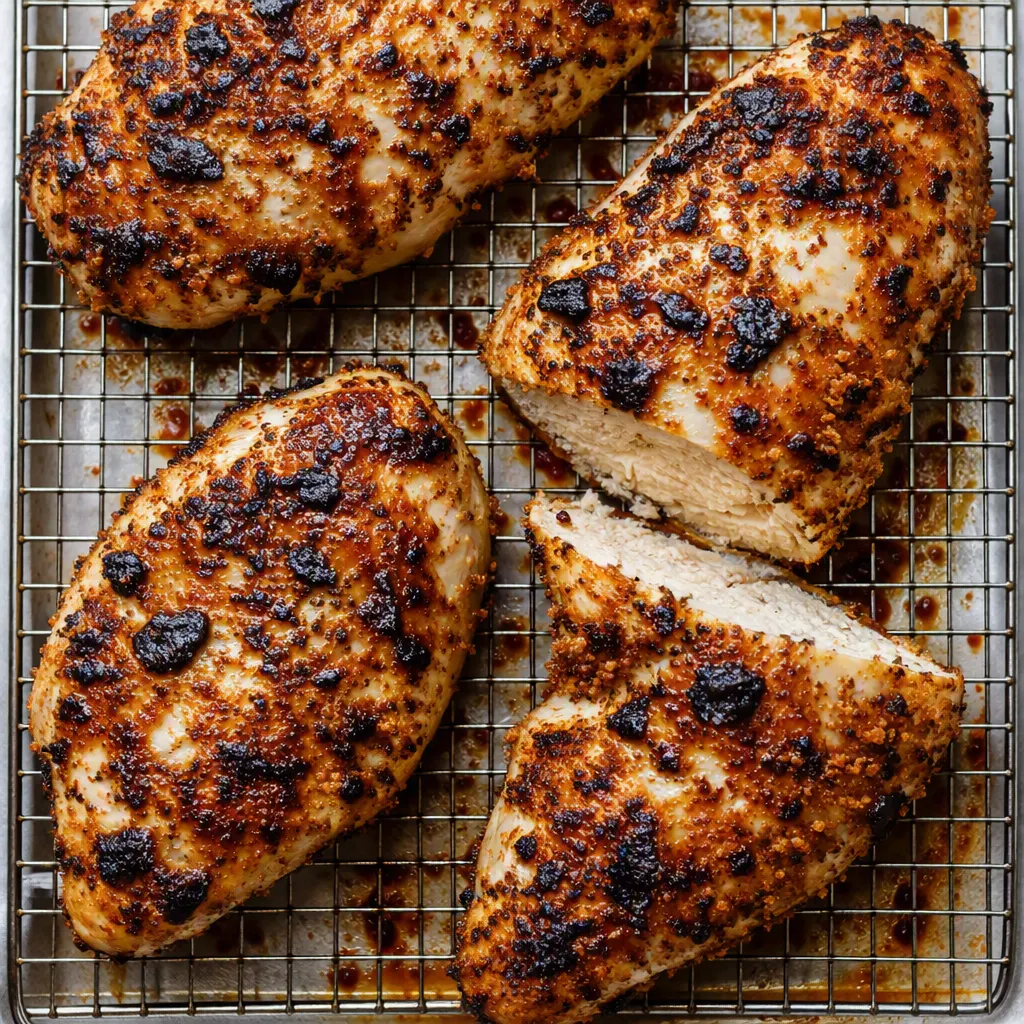
The first thing to know is that the rack isn’t a garnish — it’s the whole trick. Setting the chicken on a wire rack inside the baking sheet means hot air reaches the bottom of the crust. Skip it, and the underside sits in its own steam, which turns the crust from crisp to something closer to damp cardboard by minute twenty.
The second thing is a ninety-second broiler pass at the end. If you pull the chicken out when it hits temperature and call it a day, you’ll have perfectly juicy chicken wearing a pale, soft top. Ninety seconds under the broiler fixes the color and the texture at the same time. It’s the difference between something that looks baked and something that looks like you knew what you were doing.
The third thing, and the one I get the most questions about, is the mayo. It’s not there for flavor, though it’s not a bad one. It’s there to cling. Mayonnaise holds the ranch seasoning against the meat better than an egg wash and keeps the chicken from drying out while the crust does its job. That’s it. No science lecture. Just glue that works.
Ingredients Worth Talking About
- 4 boneless, skinless chicken breasts (about 1½ pounds): Pound them to an even ¾-inch thickness before anything else. This is the step everyone skips, and then they wonder why the thin end is rubbery while the thick end is still pink. A rolling pin works if you don’t have a mallet. My sister tried to skip this once, texted me “it’s dry,” and I texted back “pound it.” She’s been on board ever since.
- 1 packet (1 ounce) ranch dressing mix: The packet is fine. This is not the place to be precious. Hidden Valley is what I use; the store brand works too, but check the label — you want the kind that says it calls for mayo and buttermilk, not the one that’s mostly salt and regret.
- ½ cup mayonnaise: Full-fat only. Light mayo is watery, and watery shows up in the final texture. This is a hill I will stand on, and it’s not a tall hill — it’s just the one labeled “don’t use light mayo.”
- 2 tablespoons lemon juice: Fresh-squeezed. The bottled stuff has a flatness you can taste against the ranch. You’re already using a packet, so the least you can do is squeeze one lemon.
- 1 cup panko breadcrumbs: Panko stays shattery in the oven in a way that regular breadcrumbs don’t. This is the difference between a crust that crunches and a crust that kind of softly complies.
- 4 tablespoons butter, melted: Unsalted, because the ranch mix is already doing a lot of salt work.
- ⅓ cup grated parmesan: The stuff in the green can is fine here. Grate your own if you’re feeling ambitious, but this recipe doesn’t require a trip to the fancy cheese counter.
- Fresh chives, cut on a sharp bias: For the finish. They’re bright, they look intentional, and they make the whole plate read as “I did this on purpose” instead of “I made dinner in a hurry.” Both can be true.
What to Pull Out Before You Start
- A wire rack that fits inside a rimmed baking sheet — this is non-negotiable for the crisp bottom, so check before you start.
- A rimmed baking sheet (the standard half-sheet pan).
- A meat mallet or a rolling pin for pounding.
- One medium bowl and one small bowl.
- An instant-read thermometer. If you don’t own one, this is the recipe to buy it for. They’re about $12 and they end the guessing game forever.
Let’s Make It — It Goes Fast
Read through once before you start. The order matters more than you’d think, mostly because the crumb topping is a one-way door.
- Preheat: the oven to 400°F. Line a rimmed baking sheet with foil — the cleanup matters — and set the wire rack on top.
- Pound: the chicken to an even ¾-inch thickness. If the thin end is already close, just bully the thick end a little. Nobody wants a dry sliver of chicken and a raw middle in the same bite. (📸 Photo tip: two pounded breasts on a cutting board, visibly even thickness, your hand resting on top for scale — this is what “even” actually looks like.)
- Pat: the chicken dry with paper towels. Wet chicken doesn’t hold glue; it repels it. I skipped this once and watched the coating slide off in one sad sheet. Not again.
- Stir: the mayo, ranch packet, and lemon juice in the medium bowl until it’s one pale beige paste. It doesn’t need to be perfect, just uniform.
- Spread: the mixture over both sides of each breast. Use the back of a spoon and make sure there are no bare spots. This stuff is glue, and glue only works if it touches everything.
- Toss: the panko, melted butter, and parmesan together in the small bowl until every crumb looks damp. The butter is what gives you the golden crunch, so if you see dry pockets, keep tossing.
- Press: the crumb mixture onto the top of each breast. Use the flats of your fingers and press firmly — but don’t flatten it into a paste. You want some clumps in there. Leave the bottom of each breast bare. It feels wrong, but the bottom doesn’t need crumbs because the rack is doing the work.
- Bake: for 22 to 25 minutes, or until the thickest part of the largest breast reads 160°F. It’ll climb to 165 while it rests. Don’t skip the thermometer here — the last 5 degrees is the difference between juicy and sad.
- Broil: for 90 seconds to finish. Watch it the whole time. Broilers are liars and will burn your dinner while you’re looking at your phone!
- Rest: for 5 minutes, then slice against the grain. Finish with chives cut on a sharp bias and set the chicken on a warm plate. (📸 Photo tip: one breast sliced through the middle, the golden crust clearly visible on top, pale and juicy inside, a few chive pieces scattered on the cutting board — you want the cross-section to do the talking.)
How I Prep These Ahead When I’m Being Efficient
This is a dream for a Sunday batch. The chicken keeps beautifully, and the ranch flavor gets friendlier as it sits. The only thing that argues with the fridge is the crust, so I handle that separately and save the oven pass for when we’re ready to eat.
- Fridge: Cooked chicken in a sealed container for up to 3 days. Store any leftover crumb mixture in a separate small bag so you can refresh the topping after reheating.
- Freezer: Yes — freeze the coated chicken raw, before the crumb topping goes on. Freeze on the sheet pan until solid, then transfer to a freezer bag for up to 2 months. Thaw overnight in the fridge, add the crumbs, and bake as directed.
- Reheat: The microwave technically works, but it also makes the crust soggy, and the whole point of this recipe is the crunch. Oven at 375°F for about 10 minutes. Worth the extra time.
Things I Learned the Hard Way So You Don’t Have To
- Dry the chicken first: Pat it with paper towels before the mayo mixture goes anywhere near it. Wet chicken sheds the coating like a raincoat, and there is no recovering the crust once it slides. This is a one-way mistake.
- The rack is not optional: I know it’s another thing to wash. I also know the difference between a crisp bottom and a steamed one. Make peace with the rack, line the pan with foil, and the cleanup is just one piece of metal.
- Trust the thermometer, not the timer: Ovens lie, chicken breasts vary, and the difference between 160°F and 170°F is the difference between “this is great” and “this is why I don’t cook chicken.” An instant-read thermometer costs about $12 and it will fix more dinners than any expensive pan. Even if you mess everything else up a little, the thermometer will save you.
- Let it rest: Five minutes, no shortcuts. The juices need to settle back into the meat. Slice too early and you’ll see a white juice trail across the cutting board — that’s flavor leaving the building. Resting is free, and it’s the easiest way to look like you know what you’re doing.
Swaps That Actually Work
- Gluten-Free: Use GF panko — it exists and it works — or crushed pork rinds for a version that’s absurdly crunchy in a good way. The pork rind version is what my sister’s husband calls “the one that tastes like a party.”
- Dairy-Free: Swap the butter for olive oil and skip the parmesan. You’ll get a slightly lighter crumb color, but the crunch holds. A reader reported back that vegan butter works too, which I appreciated.
- Greek yogurt instead of mayo: Works in a pinch. Use full-fat and stir in a teaspoon of olive oil so the chicken doesn’t dry out. It’ll be tangier, but tangy is not a bad thing against ranch.
- Chicken thighs: Use boneless, skinless thighs and bake for 20-22 minutes. They’re harder to dry out, which makes them a gentler introduction to this recipe if you’re feeding someone who claims they “don’t like chicken.”
- The spicy adult version: Add ½ teaspoon cayenne to the crumb mixture and a few dashes of hot sauce into the mayo. Make it on a night when you want the ranch to have a little more to say. I’m not the boss of your dinner table.
Questions I Get in My DMs All the Time
Q: Why does my baked ranch chicken always turn out dry?
A: You’re almost certainly overcooking it, and I say that with love. Pull the chicken at 160°F, not “when it looks done.” The resting time carries it to 165. Also make sure the breasts are pounded to an even thickness — a thick end and a thin end can’t cook at the same speed, and the thin end will always win in the worst way.
Q: Can I use chicken thighs instead of breasts?
A: Yes, and they’re actually more forgiving. Use boneless, skinless thighs and bake for 20-22 minutes. Dark meat cooks to a higher internal temperature — about 175°F — but thighs don’t dry out the way breasts do. If you’ve never made this before, thighs are a low-risk way in.
Q: How long does this last in the fridge? Can I freeze it?
A: Three days in a sealed container in the fridge. For freezing, do it raw and coated but before the crumbs go on — freeze on the sheet pan, transfer to a freezer bag, thaw overnight, add the crumbs, and bake. For reheating, the oven at 375°F for 10 minutes keeps the crust crisp. The microwave works but the crust goes soft, and I’d rather you not experience that.
Q: What do you serve with baked ranch chicken?
A: A crisp green salad with a lemon vinaigrette, or roasted broccoli charred at the edges — the acid and the char both cut through the ranch richness. If you’re having a heavier night, mashed potatoes work, and the leftovers make an excellent sandwich the next day. That last part is a private opinion I stand behind completely.
More Recipes That Earn a Repeat at My Table
If this one lands in your regular rotation, here are the others that get the same treatment at my place:
- My Caesar Salad with the Dressing That Doesn’t Need Anchovies — Creamy, sharp, and it sits next to this chicken like they were made for each other.
- Roasted Broccoli with Lemon and Fried Capers — The broccoli gets the same golden edges as the chicken, and the capers do the crunchy work.
- The Buttermilk Dressing You’ll Put on Everything — Ten minutes on a Sunday and you’ll be drizzling it on lettuce, roasted vegetables, and probably a sandwich.
Set the chicken on the table with the chives on top and don’t explain anything. The crunch will do the introduction.
If you make it, drop a comment below and tell me how it went — I genuinely like hearing which variations people land on. It’s one of those recipes people either tweak immediately or keep exactly as is, and both are valid.
📌 This crispy baked ranch chicken recipe stays juicy with a golden panko crust — save it for your next busy weeknight dinner.
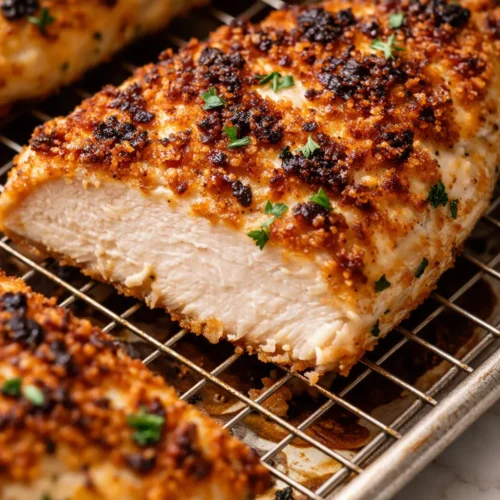
Baked Ranch Chicken That Stays Juicy and Golden — in 40 Minutes
Equipment
- Wire Rack
- Rimmed baking sheet
- Meat Mallet or Rolling Pin
- Medium Bowl
- Small Bowl
- Instant-Read Thermometer
Ingredients
- 4 boneless, skinless chicken breasts (about 1 1/2 pounds)
- 1 packet (1 ounce) ranch dressing mix
- 1/2 cup mayonnaise
- 2 tablespoons fresh lemon juice
- 1 cup panko breadcrumbs
- 4 tablespoons unsalted butter, melted
- 1/3 cup grated parmesan
- Fresh chives, cut on a sharp bias
Instructions
- Preheat: the oven to 400°F. Line a rimmed baking sheet with foil — the cleanup matters — and set the wire rack on top.
- Pound: the chicken to an even 3/4-inch thickness. If the thin end is already close, just bully the thick end a little. Nobody wants a dry sliver of chicken and a raw middle in the same bite.
- Pat: the chicken dry with paper towels. Wet chicken doesn’t hold glue; it repels it. I skipped this once and watched the coating slide off in one sad sheet.
- Stir: the mayo, ranch packet, and lemon juice in the medium bowl until it’s one pale beige paste. It doesn’t need to be perfect, just uniform.
- Spread: the mixture over both sides of each breast. Use the back of a spoon and make sure there are no bare spots. This stuff is glue, and glue only works if it touches everything.
- Toss: the panko, melted butter, and parmesan together in the small bowl until every crumb looks damp. The butter is what gives you the golden crunch, so if you see dry pockets, keep tossing.
- Press: the crumb mixture onto the top of each breast. Use the flats of your fingers and press firmly — but don’t flatten it into a paste. You want some clumps in there. Leave the bottom of each breast bare. It feels wrong, but the bottom doesn’t need crumbs because the rack is doing the work.
- Bake: for 22 to 25 minutes, or until the thickest part of the largest breast reads 160°F. It’ll climb to 165 while it rests. Don’t skip the thermometer here — the last 5 degrees is the difference between juicy and sad.
- Broil: for 90 seconds to finish. Watch it the whole time. Broilers are liars and will burn your dinner while you’re looking at your phone!
- Rest: for 5 minutes, then slice against the grain. Finish with chives cut on a sharp bias and set the chicken on a warm plate.
Notes
Related Recipes:
 Cheesy Hamburger Casserole Bake That’s Ready in 40 Minutes (No Canned Soup Here)
 Creamy Garlic Tagliatelle That Looks Like a Restaurant Dish in 20 Minutes
 Texas Roadhouse Style Baked Salmon with Sweet and Savory Glaze — Ready in Under 30 Minutes
 Easy Italian Meatloaf That’s Actually Juicy (Not Dry) — in 1 Hour
 The Biscuits and Gravy Casserole That’s Actually Crispy on Top (And Ready in 40 Minutes)
 Air Fryer Chicken and Vegetables That Don’t Taste Like a Regret (30 Minutes, One Pan)