
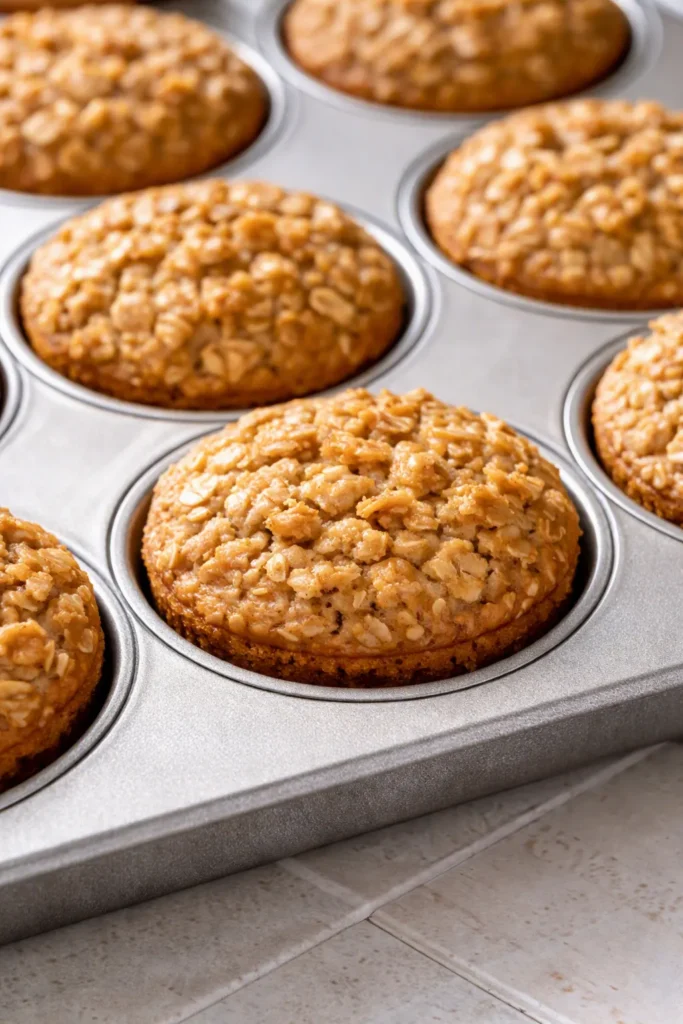
The first baked oatmeal cups I ever pulled out of the oven tasted exactly like what they were: oats, eggs, and good intentions left in the pan a few minutes too long. Dry, dense, defensively healthy. These are not those. These are soft in the middle, bronzed on top, and they reheat like they were baked an hour ago instead of four days ago.
Baked oatmeal cups that stay soft for five days in the fridge aren’t a miracle — they’re a ratio. Enough liquid, enough fat, and one ten-minute rest before they go in the oven. This recipe has all three. Your Tuesday morning is about to feel like someone else’s job.
The short version: One bowl, 25 minutes in the oven, and a week’s worth of breakfasts that reheat without turning into hockey pucks.
I’ve made this recipe twelve times since January. The twelfth batch is the one I’m giving you, because by batch nine I stopped having to think about it, and that’s when a breakfast recipe officially joins the rotation.
- Serves: 12 oatmeal cups (one per breakfast, two if you’re hungry)
- Hands-On Time: 15 min | Total Time: 50 min
- Difficulty: Easy enough to make half asleep — which is good, because that’s when you’ll need the recipe most
- Cost per serving: about $0.50, depending on your mix-ins
- Calories: ~230 per cup
- Dietary Notes: Vegetarian. Gluten-free with certified GF oats. Dairy-free if you swap the milk.
(Photo above: overhead shot of twelve oatmeal cups cooling on a wire rack, one cup pulled apart to show the tender golden center, a handful of blueberries and a small dish of maple syrup in the corner — early morning light from the left, real kitchen table.)
The Ten-Minute Rest That Makes or Breaks the Batch
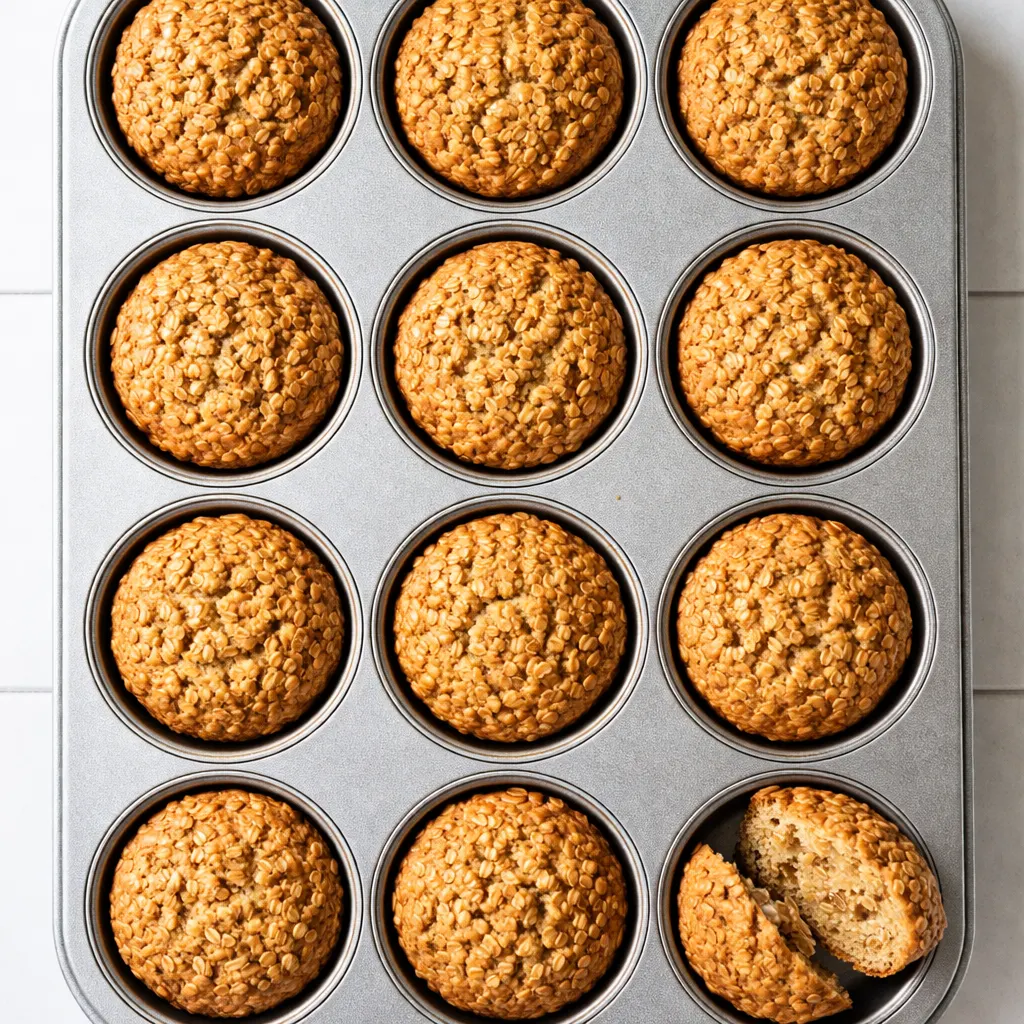
The rest is not a suggestion, and I say this as someone who skipped it exactly once because I was running late and paid for it in wet, collapsing cups that would not come out of their liners. When you stir the wet and dry together, the oats start drinking. Give them ten quiet minutes before the oven and they soak up what they need, which means the baking itself turns them soft and custardy instead of letting them fight the liquid for the entire bake.
The other insurance is the fat and the egg. Oats are greedy — they’ll pull moisture from whatever is nearby, including the fruit, the milk, and each other. Two eggs and a quarter-cup of fat aren’t accidents. They’re what keeps each cup tender at the center and light golden at the edge, five days after you made them.
The result is a cup that cuts cleanly with a fork, survives a commute in a plastic container, and does not require a glass of milk just to get it down. That’s the whole goal. This is breakfast that behaves.
Everything You Need (Plus Notes From a Repeat Offender)
- 3 cups old-fashioned rolled oats: The middle child is the right one here. Quick oats turn to paste; steel-cut oats stay stubbornly chewy. Rolled oats soak up the liquid and bake into something you can pick up with one hand. My nephew calls these “breakfast cookies,” and I have never corrected him because the child eats three and asks if there are more.
- 2 teaspoons baking powder: This is what keeps them from turning into dense little bricks. Not a lot, but enough to give each cup a bit of lift. Check the date before you start. Baking powder that’s been sitting in the back of the cabinet since fall is baking powder that does nothing.
- 1 teaspoon cinnamon: One teaspoon is polite. One and a half is a decision. I make the decision. Get a fresh tin — the one that’s been there two years has the flavor of floor dust.
- ½ teaspoon fine salt: Salt is what makes the maple taste like maple and the fruit taste like fruit. Skip it and everything goes flat.
- 2 cups whole or oat milk: Whole milk makes them richer. Oat milk makes them a little sweeter and keeps the recipe fully dairy-free. Both work; neither has ever disappointed me. If you go oat milk, use the unsweetened kind. The sweetened stuff makes the cups taste like dessert, which honestly might be fine depending on your week.
- 2 large eggs: The structural backbone. Not optional — I’ve tried it without, and the result is oat-flavored sand.
- ⅓ cup maple syrup: Maple is less sweet than honey and has a deeper flavor that gets along with cinnamon and fruit. Honey works too, but it makes the cups slightly more eager to brown, so watch them at the end. I use the real stuff. The pancake-syrup kind makes everything taste like diner regret.
- ¼ cup melted coconut oil: Melted and liquid, not a solid glop. If you measure it cold and dump it into cold milk, it seizes into tiny waxy chips that never quite disappear. Melt it first, measure it, keep it liquid until it goes in. Butter works the same way — melted and slightly cooled — and gives a toastier edge.
- 1 teaspoon vanilla extract: The quiet flavor that makes everything else read as intentional.
- 1 ripe banana, mashed: Not a speckled black one, just a ripe one with a few brown dots. This is doing two jobs: keeping the cups moist and replacing a chunk of the sugar. If you don’t have a banana, swap it for ½ cup applesauce and reduce the milk by 2 tablespoons.
- 1½ cups mix-ins: Blueberries, chocolate chips, chopped pecans, shredded coconut — pick your adventure. I do blueberries and white chocolate when I’m feeling optimistic, and chocolate chips with a handful of sunflower seeds when I’m not. Frozen berries work without thawing. Just fold them in gently; you don’t want a purple batter.
What to Pull Out Before You Start
- A 12-cup muffin tin — mine is the beat-up aluminum one that’s been through nine apartments
- Muffin liners, preferably parchment — the brown paper ones release way better than the white paper ones
- A large mixing bowl and a whisk — no stand mixer, no blender, nothing that needs washing
- A ¼-cup scoop or a ladle that approximates it — the uniformity keeps the bake times honest
- A wire rack for cooling — this is non-negotiable if you want the bottoms to stay crisp and not steam themselves soft
If you don’t have parchment liners, grease the tin well with butter or coconut oil and cut your losses on perfect edges. They’ll still taste right — they’ll just hold on to the pan like a toddler who doesn’t want to leave the playground. Let them cool ten minutes in the tin and they’ll let go.
Let’s Make Them (It’s One Bowl, I Promise!)
This goes fast. Read it through once, then enjoy how little there is to do.
Preheat and prep: Heat the oven to 375°F. Line your muffin tin with parchment liners, or grease it if that’s the route.
- Combine the dry: In a large bowl, stir the oats, baking powder, cinnamon, and salt until they’re evenly distributed. Thump the baking powder on the rim of the bowl first to break up any lumps. (📸 Photo tip: The dry mix should look like a pale, speckled landscape — you want the cinnamon fully worked in, not streaked.)
- Combine the wet: In a separate bowl or large measuring cup, whisk the milk, eggs, maple syrup, melted coconut oil, vanilla, and mashed banana until the banana is mostly integrated. A few tiny lumps are fine — they bake out; don’t chase them.
- Bring them together: Pour the wet into the dry and stir until no dry patches remain. Stop there. Overmixing is the fast route to gummy cups, and nobody in your kitchen needs that energy.
- Fold in your mix-ins: Add the blueberries, chocolate chips, or whatever you chose, and fold with four or five gentle strokes. If you’re using frozen berries, be extra gentle — they bleed if you manhandle them.
- Rest the batter for 10 minutes: This is the step I skipped once and will never skip again. Set a timer, walk away, wash the first bowl. When you come back, the batter will be thick and slightly glossy — that’s the oats doing their job. (📸 Photo tip: After the rest, the batter should look like wet sand, not soup. If it looks soupy, you used quick oats; bake them anyway, they’ll just be softer and need a few extra minutes.)
- Scoop and shape: Use the ¼-cup scoop to portion the batter into the liners, filling each to the top. These don’t dome like muffins — they bake flat, so what you see is what you get. Smooth the tops with the back of the scoop so they bake round instead of looking like little craters. (📸 Photo tip: Filled liners should look generous and even — a tidy row of twelve, all the same height.)
- Bake: Slide the tin into the oven and bake for 25 minutes, until the tops are golden and a toothpick inserted in the center comes out with just a few moist crumbs clinging. No wet batter. If you’re not sure, give them 3 more minutes — the difference between done and overdone is wider than you think.
- Cool: Let the cups rest in the tin for 5 minutes — this is what lets them set up enough to hold their shape — then transfer them to a wire rack to cool completely. If you try to move them too early, they’ll fall apart and you’ll eat the evidence. I’ve done it. It’s fine. The evidence was delicious.
How I Meal Prep These for the Week
This is a Sunday-afternoon recipe if there ever was one. I make a double batch, let them cool completely, and we’re set through Friday — two for me, two to share with the office, and one that mysteriously disappears while someone walks past the fridge.
- Fridge: Airtight container, up to 5 days. Layer a paper towel at the bottom to catch any condensation; it keeps the bottoms from getting soggy.
- Freezer: Yes. Flash-freeze them in a single layer on a sheet pan, then transfer to a zip-top bag. They’ll keep for 3 months, and you’ll be genuinely grateful to past-you when you pull one out on a chaotic morning.
- Reheat: Microwave 20–30 seconds for fridge-cold, 60–90 seconds from frozen. The microwave softens the top, which is fine for desk breakfasts. If you want the crust back, 4 minutes in a toaster oven at 350°F does the job — worth it on weekends, unnecessary on Tuesdays.
Things I Learned After Batch One (So You Don’t Have To)
- Don’t overmix, and don’t undermix: Stir until the dry bits disappear and then stop. I know it’s tempting to keep going to be “sure.” Ten extra stirs equals gummy cups, and gummy cups are a sad breakfast. Stop while it’s still a little shaggy.
- Trust the 10-minute rest: I said it above and I’ll say it once more because it’s the whole difference between a cup that cuts cleanly and a cup that collapses when you pull the liner off. Rest the batter. Go put on laundry. Come back. It’s not even annoying.
- Fill the liners all the way: These don’t rise much, so if you fill them halfway you get a squat little pancake in a paper skirt. Fill to the top. A full cup bakes into a proper muffin silhouette, and the presentation matters more than you’d think when the whole point is grabbing one and running.
- Pull them at 22 minutes if your oven runs hot: Ovens lie. Start checking at 22 minutes — if the toothpick comes out clean and the tops are golden, they’re done. Even if you slightly overbake them, they’ll still taste good; they’ll just be a little more honest about their texture. I’ve done it, and they were still better than anything from a drive-thru.
Swaps That Actually Work
- Gluten-free: Use certified GF old-fashioned oats and check that your baking powder is gluten-free (most are). Everything else in the recipe is already GF, so you’re two swaps away from a fully safe breakfast.
- Dairy-free: Use oat or almond milk and keep the coconut oil. That’s it. The cups taste slightly lighter but nobody at your table will know.
- Nut-free: Skip the pecans and use sunflower seeds or extra chocolate chips. I make the sunflower seed version for my friend’s daughter with a nut allergy, and she asks for seconds, which is the highest compliment a kid can give.
- The grown-up spice version: Add ½ teaspoon ground cardamom or ginger and a handful of chopped candied ginger. It reads like a fancy coffee shop breakfast and costs the same as the regular version. This is the one I make when I want to feel like I have my life together.
- Apple cinnamon: Swap the banana for ½ cup applesauce plus one small diced apple. The texture is a bit more tender and the apple bits soften pleasantly. My nephew says it tastes like “the fall one,” which is the best name for anything.
- Protein-friendly: Stir in one scoop of vanilla protein powder and reduce the oats by ¼ cup. The texture gets slightly more cakey — not a bad trade for a breakfast that keeps you full through a 10am meeting.
Questions I Get About These All the Time
Q: Why did my baked oatmeal cups turn out mushy in the middle?
A: Ugh, I’ve been there. The usual culprit is a skipped rest — the oats didn’t get time to absorb the liquid, so the center stayed wet while the edges baked. Give the batter the full 10 minutes, and check at 22 minutes with a toothpick. If it comes out with wet batter, add 3–5 minutes. Mushy means underbaked, not doomed.
Q: Can I make this with quick oats?
A: Technically yes, but you’ll get a softer, more pudding-like texture — quick oats absorb and break down faster. If that’s what you have, reduce the milk to 1½ cups and check them at 20 minutes. They’ll work, they just won’t have the same toothsome chew. I’ve tested this version so you don’t have to wonder.
Q: How long do these last? Can I freeze them?
A: Five days in an airtight container in the fridge, and three months in the freezer if you flash-freeze them first. Reheat fridge-cold cups in the microwave for 20–30 seconds, or use a toaster oven if you want the top crust revived. From frozen, give them 60–90 seconds. I prep a double batch almost every other Sunday and we’ve never once thrown one away.
Q: What do you serve with these?
A: Usually nothing — I eat two with a very large coffee and call it a meal. When I’m feeling civilized, a spoonful of Greek yogurt and a few raspberries on the side. My nephew eats his plain and calls them cookies. On weekends, I’ve done them with a fried egg and a handful of arugula, which sounds like a strange marriage but the peppery green against the sweet oat cup is genuinely good. Try it before you write it off.
More Recipes My Family Makes on Repeat
If this one lands in your weekly rotation, here are a few others that get the same reaction at our table:
- Banana Bread Muffins That Actually Stay Moist — My nephew’s request for every sleepover, and they freeze even better than these cups.
- The Sunday Sheet-Pan Egg Bites That Reheat Perfectly — The savory sibling to these cups, with the same make-ahead logic and zero babysitting.
- [INTERNAL LINK PLACEHOLDER: The Only Granola I’ve Made Since 2021] — One big batch, one jar, no regrets, and it turns any yogurt into a decision you feel good about.
Whether these are for your Tuesday desk breakfast, your kid’s after-school snack, or the version you make when you want to feel like you have your life together — they’ll hold up their end of the deal all week. That’s the whole promise, and it’s one they keep.
If you make a batch, drop a comment below or tag me on Pinterest — I love seeing which mix-ins win in your kitchen.
📌 Baked oatmeal cups that stay soft all week — save this make-ahead breakfast recipe for your next Sunday meal prep session.
Baked Oatmeal Cups That Don’t Dry Out in the Fridge — Finally
Equipment
- 12-cup muffin tin
- Parchment muffin liners
- Large Mixing Bowl
- Whisk
- 1/4-cup scoop
- Wire Rack
Ingredients
Dry Ingredients
- 3 cups old-fashioned rolled oats
- 2 teaspoons baking powder
- 1 teaspoon ground cinnamon
- 1/2 teaspoon fine salt
Wet Ingredients
- 2 cups whole or oat milk (unsweetened if using oat)
- 2 large eggs
- 1/3 cup maple syrup
- 1/4 cup coconut oil, melted and slightly cooled
- 1 teaspoon vanilla extract
- 1 ripe banana, mashed (or 1/2 cup applesauce)
Mix-Ins
- 1 1/2 cups mix-ins like blueberries, chocolate chips, pecans, or shredded coconut
Instructions
- Preheat the oven to 375°F. Line a 12-cup muffin tin with parchment liners, or grease the tin well with butter or coconut oil.
- In a large bowl, stir the oats, baking powder, cinnamon, and salt until evenly distributed. Thump the baking powder on the rim of the bowl first to break up any lumps.
- In a separate bowl or large measuring cup, whisk the milk, eggs, maple syrup, melted coconut oil, vanilla, and mashed banana until the banana is mostly integrated. A few tiny lumps are fine.
- Pour the wet ingredients into the dry ingredients and stir until no dry patches remain. Stop there. Overmixing leads to gummy cups.
- Fold in your mix-ins with four or five gentle strokes. If using frozen berries, be extra gentle so they don’t bleed into the batter.
- Rest the batter for 10 minutes. This is not optional — the oats need time to absorb the liquid. When you come back, the batter should be thick and slightly glossy.
- Scoop 1/4 cup of batter into each liner, filling to the top. Smooth the tops with the back of the scoop so they bake round instead of looking like craters.
- Bake for 25 minutes, until the tops are golden and a toothpick inserted in the center comes out with just a few moist crumbs. If your oven runs hot, start checking at 22 minutes.
- Let the cups rest in the tin for 5 minutes, then transfer them to a wire rack to cool completely.
Notes
Related Recipes:
 Cheesy Hamburger Casserole Bake That’s Ready in 40 Minutes (No Canned Soup Here)
 Texas Roadhouse Style Baked Salmon with Sweet and Savory Glaze — Ready in Under 30 Minutes
 Moist Lemon Zucchini Bread with a Crunchy Lemon Sugar Top
 Strawberry Shortcake Rice Krispie Treats That Actually Taste Like Shortcake — Ready in 15 Minutes
 Blueberry Oatmeal Cookies That Stay Soft for Days — in Under 30 Minutes
 Air Fryer Chicken and Vegetables That Don’t Taste Like a Regret (30 Minutes, One Pan)