
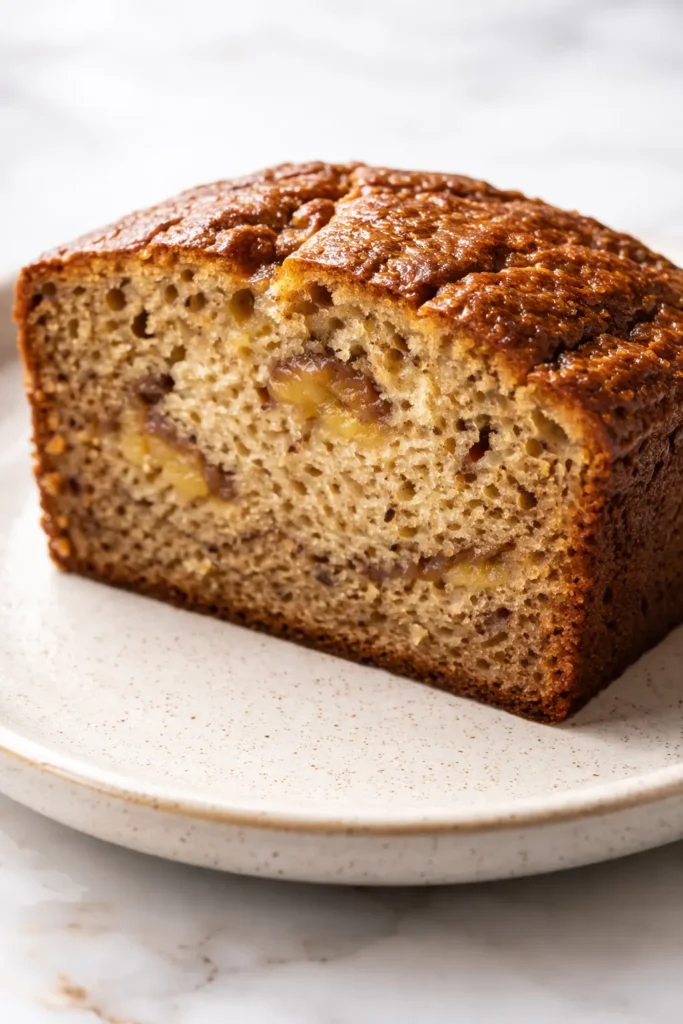
Every other banana bread I’d made before this one was fine. Edible. The kind you wrap up and bring to a thing, and people eat it politely, and you bring half the loaf back home. This one? I brought a loaf to a friend’s brunch and three people asked for the recipe before I’d even poured myself a coffee. The difference is in the crumb — fine, tender, almost cake-like. It’s the only banana bread I’ve made since.
The short version: This is the banana bread that actually lives up to the word “velvet” — fine-crumbed, moist through day four, and dark-golden on top without being dry on the edges.
I’ve tested this method about twelve times to make sure it wasn’t a fluke. It wasn’t. The trick is how you handle the butter.
- Serves: 1 loaf (10-12 slices)
- Hands-On Time: 20 min | Total Time: 1 hr 20 min
- Difficulty: Easy — the method is different, not harder
- Cost per serving: ~$0.85
- Calories: ~315 per slice
- Dietary Notes: Nut-free option. Can be made dairy-free.
(Photo above: overhead shot of a whole loaf on a wooden cutting board, sliced in half to show the fine, pale-gold interior crumb. A small pile of toasted walnuts on the side. Morning light, slightly warm tone.)
The One Step That Keeps This Bread Moist (Not Gummy)
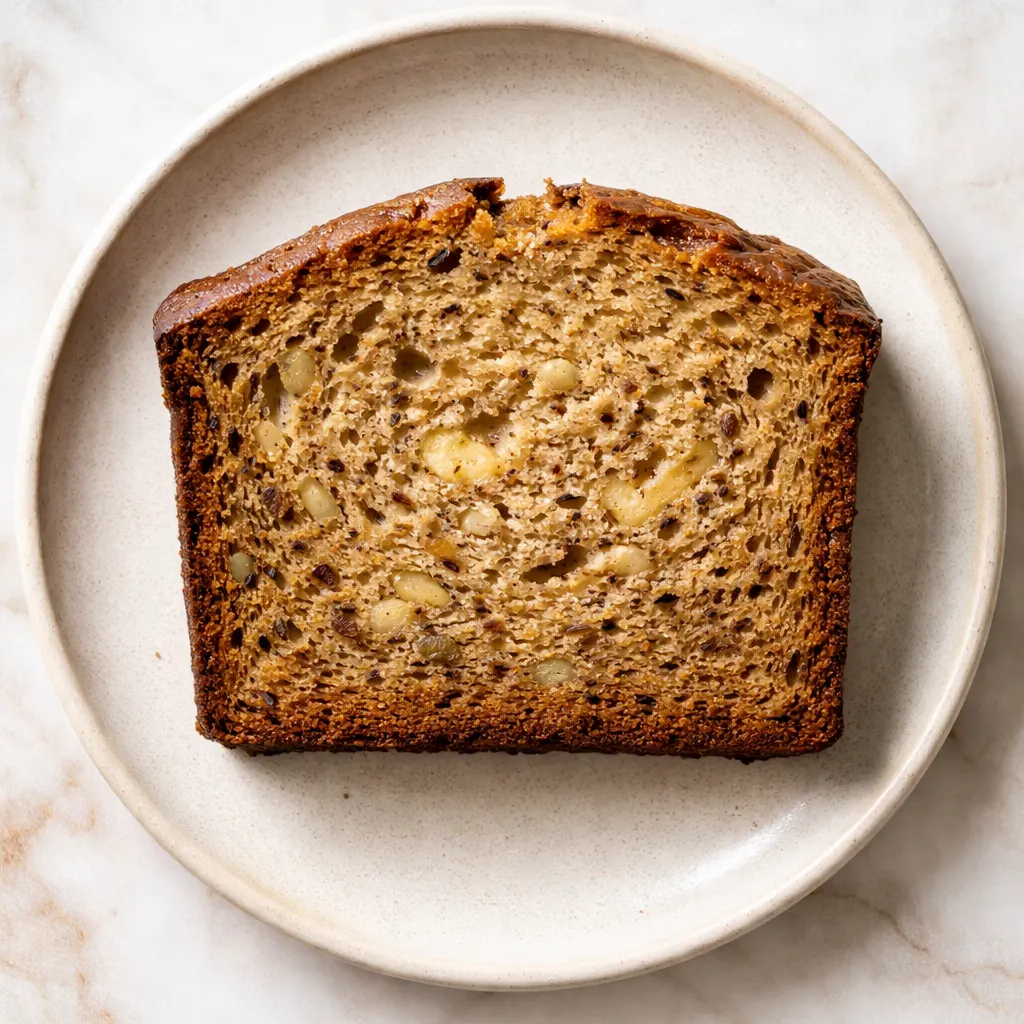
The trick is treating it more like a cake batter and less like a quick bread. You cream the butter and sugar first — even if the butter is slightly cold — which aerates it. Then you add the bananas last, mashed but still a little chunky, and fold them in gently. That keeps the gluten from overdeveloping. The result is a tight, tender crumb that doesn’t fall apart but also doesn’t feel wet in your mouth.
Most recipes have you mash the bananas into the wet ingredients right away. The liquid breaks down the flour structure and you get that dense, gummy band at the bottom. Not here.
The Ingredient Breakdown (With Real Talk)
- Bananas (3 large, very ripe): The darker the skin, the better. If yours aren’t spotty, roast them in a 350°F oven for 15 minutes. I do this constantly in the winter. My tip: mash them with a fork so there are still a few small lumps — they melt into the bread as it bakes and leave these little pockets of intense banana flavor.
- Unsalted butter (113g / 1 stick): Use it straight from the fridge. Cold butter aerates better in the creaming step than room-temp butter, which just melts into a puddle. I know this sounds backwards. It’s not.
- Sugar (200g / 1 cup granulated): All granulated. Brown sugar adds moisture but also makes the crumb heavier. For a fine, velvet crumb, granulated does the work. If you want a deeper flavor, swap 50g for brown sugar and accept a slightly denser result.
- Eggs (2 large, room temp): Room temp matters here — they emulsify into the creamed butter without shocking it.
- All-purpose flour (240g / 2 cups): Spoon and level. Do not scoop directly from the bag. Too much flour is the fastest way to a dry loaf.
- Yogurt (120g / 1/2 cup, full-fat): This is what makes the crumb tender. Full-fat is non-negotiable for the texture. I’ve tried it with Greek yogurt and it works, but the bread is slightly less tender. Still good, just not velvet.
- Baking soda (1 tsp) + Baking powder (1/2 tsp): The double lift gives height without a coarse crumb.
- Salt (1 tsp): Balances the sweetness and deepens the banana flavor.
What to Pull Out Before You Start
- 9×5-inch loaf pan — light metal, not glass. Glass insulates too much and the edges dry out.
- Stand mixer or hand mixer — creaming cold butter by hand is tough, but doable with a strong whisk.
- Rubber spatula — for folding. This is not a job for a wooden spoon.
- Parchment paper — make a sling. It’s the easiest way to lift the loaf out cleanly.
- Cooling rack — wire is best. No wire rack means a soggy bottom.
Here’s How I Do It (The Method)
This goes fast, so read through once before you start. The oven should be hot when the batter goes in.
Preheat: Set your oven to 350°F. Grease your 9×5 pan and line it with parchment paper, leaving a 2-inch overhang on the long sides.
- Cream the butter and sugar: Plop the cold butter and sugar into the bowl of your stand mixer fitted with the paddle attachment. Beat on medium-high for 5 minutes, scraping down the sides once. It’ll look pale, fluffy, and slightly granular — that’s the cold butter doing its job. (📸 Photo tip: After 5 minutes, the mixture should look like damp sand clumping together — pale yellow and airy.)
- Add the eggs: Crack them in one at a time, beating on medium for 30 seconds between each. Scrape down the bowl. It might look slightly curdled. That’s fine. Don’t panic.
- Add the yogurt and vanilla: Beat in the yogurt on low until just combined. The mixture will smooth right out.
- Whisk the dry ingredients: In a separate bowl, whisk the flour, baking soda, baking powder, and salt.
- Fold in the flour: Add the dry ingredients to the wet in three additions, folding gently with a rubber spatula. Stop as soon as you don’t see flour streaks. Overmixing is the enemy of a velvet crumb.
- Fold in the mashed bananas: Add the mashed bananas in two additions, folding just until they’re evenly distributed. A few small streaks of banana are fine — they’ll bake into these lovely concentrated spots of flavor. (📸 Photo tip: The final batter should be thick and scoopable, not runny. If it’s runny, your bananas were too big or too wet.)
- Bake: Pour the batter into the prepared pan and smooth the top. Bake for 55–65 minutes, rotating the pan halfway through. A wooden skewer inserted into the center should come out with a few moist crumbs — not clean, not wet. If it needs longer, tent the top with foil at the 45-minute mark.
- Cool: Let the loaf cool in the pan on a wire rack for 20 minutes. Then use the parchment sling to lift it out and cool completely before slicing. This step is brutal but non-negotiable. Slicing warm banana bread is how you get a crumbly, gummy mess.
How to Make This for the Week (Or the Freezer)
This bread hits peak texture on day two. I make it Sunday night, wrap it tightly in plastic wrap once cooled, and let it sit on the counter overnight. Monday morning breakfast is a perfect slice.
- Fridge: Wrap tightly in plastic. Keeps 5 days. Reheat slices in the toaster or a 300°F oven for 5 minutes.
- Freezer: Yes. Wrap the cooled loaf (or individual slices) tightly in plastic wrap, then foil. Freeze for up to 3 months. Thaw at room temp for 2 hours.
- Reheat: Toaster is best for individual slices. For a whole loaf, unwrap and reheat in a 300°F oven for 15 minutes.
Things I Learned the Hard Way
- The ripeness rule is real: Greenish bananas won’t give you enough flavor or moisture. If you have to bake today, roast them in a 350°F oven for 15 minutes. Let them cool. They’ll be soft and sweet. I’ve done this a dozen times. It works.
- If the top is getting too dark: Tent the loaf with foil at the 45-minute mark. This keeps the top from burning while the center finishes baking. My oven runs hot, so I do this every single time.
- Don’t over-bake: The skewer should come out with a few moist crumbs. If it comes out clean, the loaf will be dry tomorrow. You want that little bit of residual moisture.
- Add-ins: Fold in 1 cup of toasted walnuts or chocolate chips with the bananas. If you add chocolate chips, toss them in a tablespoon of flour first so they don’t sink to the bottom. Even if you mess this part up a little, it’ll still taste great. I’ve done it.
Swaps That Actually Work (I’ve Tested Them)
- Dairy-Free: Swap the butter for 1/2 cup of a good vegan butter (like Miyoko’s) and the yogurt for 1/2 cup of full-fat coconut yogurt. The texture will be slightly less tender but still excellent.
- Nut-Free: Omit the walnuts. Add toasted pumpkin seeds or leave it plain. It’s still velvet.
- Gluten-Free: Use a 1:1 GF flour blend (with xanthan gum). The crumb will be a little more delicate, but the texture is genuinely close. My friend who has celiac said it was the best banana bread she’d had in years.
- Chocolate Velvet: Swap 1/4 cup of the flour for 1/4 cup of unsweetened cocoa powder. Add 1/2 cup of chocolate chips. This is the version my kids beg for.
- Spiced Version: Add 1 tsp of cinnamon, 1/2 tsp of nutmeg, and 1/4 tsp of allspice to the dry ingredients. Perfect for fall.
Questions I Get About This Recipe All the Time
Q: Why did my banana bread sink in the middle?
A: Ugh, I’ve been there. This usually happens when the batter is too wet or the oven wasn’t hot enough. Make sure your bananas are measured (3 medium, not 3 huge ones) and use an oven thermometer. You’ve got this next time.
Q: Can I use frozen bananas?
A: Yes! Thaw them completely and drain off the excess liquid. The thawed bananas will be very soft — just mash them and proceed. I do this all the time when my bananas get past their prime.
Q: How long does this last?
A: Wrapped tightly at room temp, it stays moist for 4 days. After that, toast it. Day 5 is excellent toasted with a pat of butter.
Q: What do you serve with this?
A: A smear of salted butter and a cup of black coffee. For kids, a glass of milk. For brunch, a dollop of mascarpone and a drizzle of honey. My kids love it with a glass of cold milk after school.
More Recipes My Family Makes on Repeat
If you liked this one, here are a few others that get the same reaction at our table:
- Brown Butter Zucchini Bread — The same velvet method, but with zucchini. It’s how I trick my kids into eating vegetables.
- Salted Honey Chocolate Chip Cookies — The other recipe people ask me for constantly.
- Easy Lemon Olive Oil Cake — For when you want a velvet crumb without the bananas.
If you’re reading this on a Sunday morning with a cup of coffee and a spotty banana on your counter, this is your sign. Make the bread. Your kitchen is about to smell incredible.
Drop a comment below if you try it — I love hearing how it turns out in your kitchen. Tag me on Pinterest so I can see your loaf!
📌 Velvet banana bread that stays moist for days with a fine, tender crumb — save this recipe for your next banana bread Sunday.
Velvet Banana Bread That’s Actually Moist (Not Gummy) — The Cold Butter Method You’ll Use Forever
Equipment
- 9×5-inch loaf pan (light metal)
- Stand mixer or hand mixer
- Rubber Spatula
- Parchment Paper
- Cooling rack (wire)
- Whisk
- Mixing bowls
Ingredients
For the Batter
- 3 large very ripe bananas (mashed, slightly chunky)
- 113 g cold unsalted butter (1 stick)
- 200 g granulated sugar (1 cup)
- 2 large room temperature eggs
- 1 tsp vanilla extract
- 120 g full-fat plain yogurt (1/2 cup)
- 240 g all-purpose flour (2 cups, spooned and leveled)
- 1 tsp baking soda
- 1/2 tsp baking powder
- 1 tsp salt
Optional Add-Ins
- 1 cup toasted walnuts or chocolate chips (tossed in 1 tbsp flour to prevent sinking)
Instructions
- Preheat your oven to 350°F (175°C). Grease a 9×5-inch light metal loaf pan and line it with parchment paper, leaving a 2-inch overhang on the long sides.
- In the bowl of a stand mixer fitted with the paddle attachment (or using a hand mixer), beat the cold butter and granulated sugar on medium-high for 5 minutes, scraping down the sides once. The mixture should look pale, fluffy, and slightly granular — like damp sand clumping together.
- Add the eggs one at a time, beating on medium for 30 seconds after each. Scrape down the bowl. The mixture may look slightly curdled — that’s fine.
- Beat in the yogurt and vanilla on low until just combined. The mixture will smooth out.
- In a separate bowl, whisk together the flour, baking soda, baking powder, and salt.
- Add the dry ingredients to the wet in three additions, folding gently with a rubber spatula. Stop as soon as no flour streaks remain. Overmixing ruins the velvet crumb.
- Fold in the mashed bananas in two additions, just until evenly distributed. A few small streaks of banana are fine — they’ll create concentrated flavor pockets. If using add-ins (walnuts or chocolate chips), fold them in now. The batter should be thick and scoopable, not runny.
- Pour the batter into the prepared pan and smooth the top. Bake for 55–65 minutes, rotating the pan halfway through. At the 45-minute mark, tent the loaf with foil if the top is browning too quickly. A wooden skewer inserted into the center should come out with a few moist crumbs — not clean, not wet.
- Let the loaf cool in the pan on a wire rack for 20 minutes. Then use the parchment sling to lift it out and cool completely on the rack before slicing. Slicing warm results in a crumbly, gummy mess — resist the urge.
Notes
Related Recipes:
 Cheesy Hamburger Casserole Bake That’s Ready in 40 Minutes (No Canned Soup Here)
 Texas Roadhouse Style Baked Salmon with Sweet and Savory Glaze — Ready in Under 30 Minutes
 Moist Lemon Zucchini Bread with a Crunchy Lemon Sugar Top
 Strawberry Shortcake Rice Krispie Treats That Actually Taste Like Shortcake — Ready in 15 Minutes
 Blueberry Oatmeal Cookies That Stay Soft for Days — in Under 30 Minutes
 Air Fryer Chicken and Vegetables That Don’t Taste Like a Regret (30 Minutes, One Pan)