
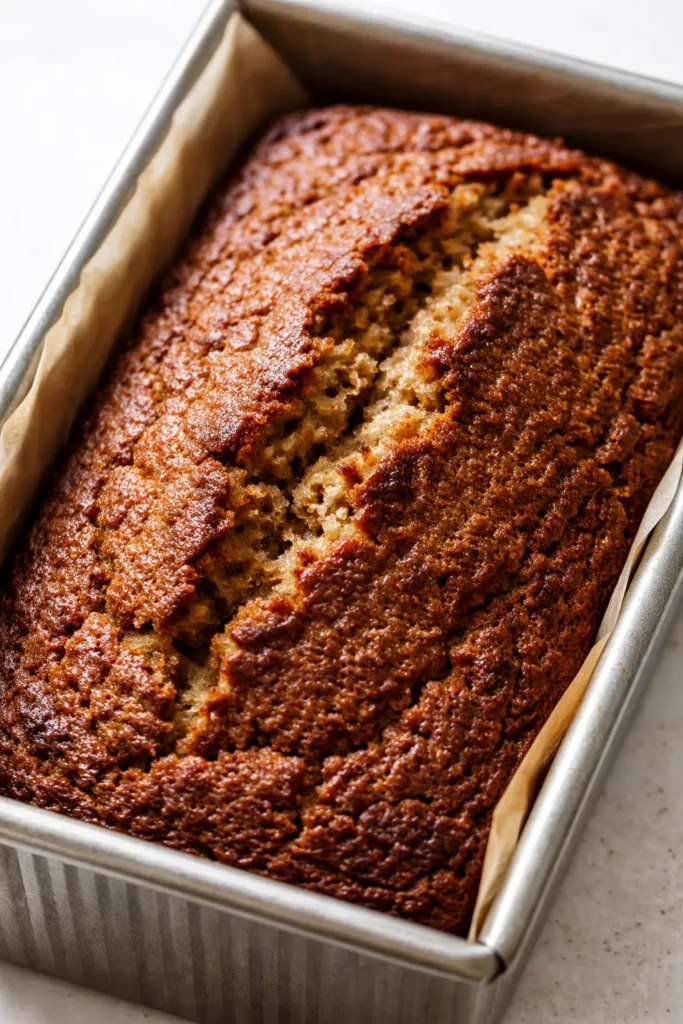
I have a very specific memory attached to this banana bread. It’s a gray Sunday afternoon about four years ago, and I had three overripe bananas on the counter that were basically begging for purpose. Not in a smoothie — in something they could anchor. I tried a version with melted butter and a version with brown butter, and the difference was so obvious I never went back. This is the brown butter version. It’s the one my neighbor texted me about at 9pm on a Tuesday asking for the recipe.
The short version: This banana bread is deeply, almost unfairly moist, with a crackly top that shatters when you slice it, and it comes together in about 10 minutes of active work.
I’ve tested this exact recipe 11 times over the last two years. Eleven. My kids have stopped asking if I’m making it for them because they know it’s for “research,” but they eat the test loaves anyway. Not a single complaint.
- Serves: 1 loaf (10 generous slices)
- Hands-On Time: 15 min | Total Time: 1 hour 15 min
- Difficulty: Easy enough for a Tuesday, impressive enough for a brunch
- Cost per serving: ~$0.85
- Calories: ~290 per slice
- Dietary Notes: Naturally vegetarian. Easily adaptable for dairy-free and gluten-free.
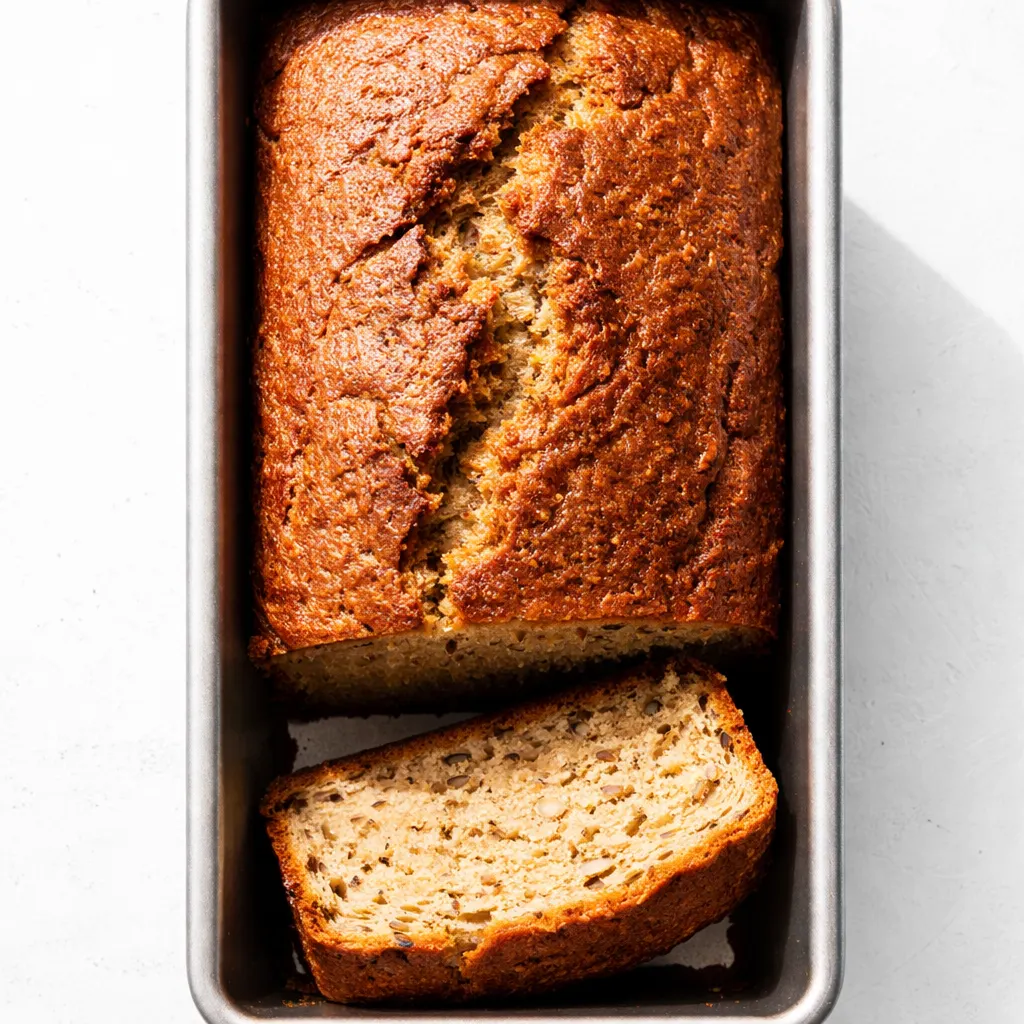
(Photo above: A single slice of banana bread set on a linen napkin, cut so you can see the dense, tender crumb and the tiny dark specks of vanilla bean. The loaf behind it shows the signature crackly, dark golden brown dome. Overhead, soft natural light from a north-facing window.)
The One Step That Makes This Banana Bread Unforgettable
Most banana bread recipes ask you to cream room-temperature butter with sugar. Fine, but it’s forgiving. The real game-changer is browning the butter first. It takes exactly 4 minutes and it does something that creaming never could: it transforms the butter from a simple fat into a nutty, toasty, slightly caramelized flavor base that makes the bread taste like it’s been baked twice.
The second non-negotiable? Don’t overmix the batter. I know everyone says it, but here’s what actually happens: overmixing develops the gluten, and gluten in a quick bread makes it tough. You want a muffin texture — tender, soft, almost delicate. The key is mixing until you see the last streak of flour disappear, then stopping.
The result is a loaf that’s deeply flavored, perfectly moist, and has that iconic crackly top that everyone asks about. It’s the kind of bread that doesn’t need butter but welcomes it anyway.
Ingredients That Actually Matter (With My Honest Notes)
- 1 ¾ cups all-purpose flour: The structure. Spoon and level it — don’t scoop from the bag, or you’ll end up with a dry loaf. (I tested this with bread flour once and it was just too tough. Stick with AP.)
- ½ cup unsalted butter: You’ll brown this first. It’s the heart of the recipe. (My kids have never noticed the nutty flavor difference, but they definitely notice when I skip it.)
- 3 overripe bananas (about 1 cup mashed): The darker the better. Black spots are ideal. They’re sweeter and more flavorful. (I stash them in the freezer when they hit that stage and thaw them when I’m ready.)
- ⅔ cup packed dark brown sugar: More molasses depth than light brown sugar. It’s what gives the bread that dark, warm color. (Light brown works in a pinch, but dark is worth the extra flavor.)
- 2 large eggs: Room temperature, so they emulsify into the brown butter smoothly. (Cold eggs will seize the browned butter — I’ve done it and it’s fixable, but better to just pull them out early.)
- ⅓ cup plain full-fat yogurt or sour cream: This is the moisture insurance. It adds tenderness and keeps the bread from drying out. (Greek yogurt works too, but whole-milk is best.)
- 1 tsp vanilla extract: Quality matters here. Use the real stuff. (I’m convinced the artificial stuff leaves a weird aftertaste in baked goods.)
- 1 tsp baking soda + ½ tsp salt + ½ tsp cinnamon: Leavening, salinity, and warmth. Cinnamon is optional but traditional for a reason. (Trust me on the salt — it balances the sweet.)
- Optional mix-ins: ½ cup chopped walnuts or ½ cup dark chocolate chips. Both are excellent. (I go back and forth. Walnuts for me, chocolate chips for the kids.)
What You’ll Need (The Minimal Setup)
- 9×5-inch loaf pan (anything larger will give you a flat top)
- Small saucepan for browning the butter
- Large mixing bowl
- Whisk and rubber spatula
- Parchment paper (for easy lifting)
That’s it. No mixer needed. This is a one-bowl situation (plus the saucepan).
Making the Banana Bread (My Exact Process)
Preheat your oven to 350°F and line a 9×5-inch loaf pan with parchment paper, leaving overhang on the long sides. This makes lifting the cooled loaf out so much easier.
- Brown the butter: Place the ½ cup butter in a small saucepan over medium heat. Cook, swirling occasionally, until it melts, foams, and then turns a deep amber color with little brown specks on the bottom. This takes about 4–5 minutes. Immediately pour it into a large heatproof bowl to stop the cooking. (📸 Photo tip: You’re looking for a golden brown color with dark specks — it should smell nutty and amazing. Don’t walk away from it; it can burn fast.)
- Mix the wet ingredients: To the warm brown butter, add the dark brown sugar and whisk until combined. The mixture will look like wet sand. Let it cool for 2 minutes, then whisk in the eggs, mashed bananas, yogurt, and vanilla. The batter will be smooth and fragrant.
- Add the dry ingredients: Sprinkle the flour, baking soda, salt, and cinnamon over the wet mixture. Use a rubber spatula to fold gently until just combined. Stop when you see the last streak of flour. Do not overmix. Fold in your mix-ins at this point if using any. (This is the hard rule — overmixing = tough banana bread. A few lumps are totally fine.) (📸 Photo tip: The batter should look thick and slightly shaggy, not perfectly smooth.)
- Bake: Pour the batter into the prepared loaf pan and spread it even. Bake for 50–60 minutes, or until a toothpick inserted into the center comes out clean or with a few moist crumbs. The top should be a deep golden brown and cracked beautifully. (If the top is browning too quickly around minute 35, tent it loosely with foil.)
- Cool: Let the loaf cool in the pan on a wire rack for 15 minutes, then use the parchment overhang to lift it out. Cool completely on the rack before slicing. (I know it’s tempting, but slicing it warm will make it crumble. Let it set.)
How I Make This Ahead (Because We’re All Busy)
This banana bread is actually better on day two, if you can believe it. The flavors settle and the texture relaxes into something even more tender. I often make a double batch on Sunday and we snack on it all week.
- Fridge: Wrap tightly in plastic wrap and store in an airtight container for up to 5 days. It stays incredibly moist.
- Freezer: Yes, absolutely. Wrap the whole loaf or individual slices tightly in plastic wrap, then foil. Freeze for up to 3 months. Thaw at room temperature or pop a frozen slice directly in the toaster.
- Reheat: Toaster is best for restoring a slightly crisp edge. The microwave works in 10-second bursts but makes it softer.
What I’ve Learned After 11 Loaves (So You Don’t Have to Experiment)
- Use a kitchen scale for the flour. 220 grams is the sweet spot. Scooping with a measuring cup can give you 260 grams, and that 40-gram difference is the line between tender and dry. Even if you don’t have a scale, spoon the flour into the cup and level it off.
- Don’t skip the parchment overhang. I know it’s one more step, but trying to flip a hot loaf out of a pan is stressful. The parchment handles it elegantly. Plus, it makes cleanup a breeze.
- Let it cool completely. I have personally ruined two loaves by cutting into them too early. The crumb needs time to set. 1 hour of cooling is non-negotiable if you want clean slices.
- Toast it. A slice of this banana bread, toasted until the edges are just crisp and slathered with salted butter, is one of the best things you can eat. Even my kids agree, and they usually refuse toasted bread of any kind.
How to Adapt This for Your Family (The Variations I Actually Trust)
- Dairy-Free: Swap the butter for vegan butter (I use the sticks, not the spread) and the yogurt for a dairy-free yogurt or applesauce. It works beautifully. (My dairy-sensitive friend tested this version for me — she gives it two thumbs up.)
- Gluten-Free: Use a 1:1 gluten-free baking flour blend that contains xanthan gum. Cup4Cup and King Arthur blends work best. Don’t overmix.
- Naturally Sweetened: Replace the brown sugar with ½ cup maple syrup or honey. Reduce the yogurt to ¼ cup since the syrup adds liquid. Bake at 325°F to prevent over-browning.
- Spiced Version: Add ½ tsp nutmeg and ¼ tsp cloves along with the cinnamon. It gives it a fall, almost chai-like warmth. (This is my favorite cold-weather version.)
The Questions I Get Asked About This Banana Bread (Like, Every Week)
Q: Why did my banana bread turn out dry?
A: Ugh, the worst! It’s usually one of three things: over-measured flour (use a scale or spoon-and-level!), over-baking (start checking at 50 minutes), or not enough banana (use 3 large ones, or mash them well to make sure you have a full cup).
Q: Can I make this with whole wheat flour?
A: You can, but I’d recommend swapping only half the all-purpose flour for whole wheat. 100% whole wheat makes it noticeably denser and heavier. My kids actually complained about the texture when I tried it all whole wheat. Half and half is the sweet spot.
Q: Can I freeze the batter or the baked bread?
A: The baked bread freezes like a dream (see my notes above!). The batter, surprisingly, doesn’t freeze well — the baking soda loses its oomph, and the bread won’t rise as high. Better to bake it first, then freeze the loaf or slices. Thawed slices are perfect for lunchboxes or a quick breakfast.
Q: What do you serve with this banana bread?
A: On its own, it’s perfect. But if I’m feeling fancy, I’ll spread a slice with salted butter and a drizzle of honey. My kids love it with a smear of peanut butter and a glass of cold milk. It’s also incredible alongside a cup of strong coffee for dipping.
More Recipes My Family Makes on Repeat
If this banana bread becomes a staple at your house (and I think it will), here are a few other recipes from the archives that get the same kind of love at our table:
- [INTERNAL LINK PLACEHOLDER: Perfectly Moist Blueberry Muffins] — The same brown butter trick, but with blueberries and a crunchy sugar top.
- [INTERNAL LINK PLACEHOLDER: No-Knead Dutch Oven Bread] — The crust is shatteringly crisp and the inside is chewy. Practically zero effort.
- [INTERNAL LINK PLACEHOLDER: The Only Chocolate Chip Cookie Recipe You’ll Ever Need] — Actually lives up to the name. My kids request these for every bake sale.
I make this banana bread more than any other quick bread in my rotation, and it’s not close. It’s the one I bring to school meetings, to neighbors, and to my own kitchen table on a slow Saturday morning. The brown butter makes it feel special, but the simplicity keeps it weeknight-accessible. That’s a hard balance to strike, and this loaf nails it.
If you make it, would you drop a comment and let me know how it turned out? I read every single one, and I love hearing about your kitchens.
📌 Moist banana bread recipe with a perfectly crackly top — save this for your next lazy Sunday baking session or when those bananas on the counter are begging for purpose.
The Best Banana Bread That’s Ridiculously Moist with a Perfectly Crackly Top
Equipment
- 9×5-inch loaf pan
- Small saucepan
- Large Mixing Bowl
- Whisk
- Rubber Spatula
- Parchment Paper
- Wire cooling rack
Ingredients
- 1 3/4 cups all-purpose flour (spooned and leveled)
- 1/2 cup unsalted butter
- 1 cup mashed overripe bananas (about 3 bananas)
- 2/3 cup packed dark brown sugar
- 2 large eggs, room temperature
- 1/3 cup plain full-fat yogurt or sour cream
- 1 tsp vanilla extract
- 1 tsp baking soda
- 1/2 tsp salt
- 1/2 tsp ground cinnamon
Optional Mix-ins
- 1/2 cup chopped walnuts
- 1/2 cup dark chocolate chips
Instructions
- Preheat your oven to 350°F and line a 9×5-inch loaf pan with parchment paper, leaving overhang on the long sides.
- Brown the butter: Place the ½ cup butter in a small saucepan over medium heat. Cook, swirling occasionally, until it melts, foams, and then turns a deep amber color with little brown specks on the bottom. This takes about 4–5 minutes. Immediately pour it into a large heatproof bowl to stop the cooking.
- Mix the wet ingredients: To the warm brown butter, add the dark brown sugar and whisk until combined. Let it cool for 2 minutes, then whisk in the eggs, mashed bananas, yogurt, and vanilla.
- Add the dry ingredients: Sprinkle the flour, baking soda, salt, and cinnamon over the wet mixture. Use a rubber spatula to fold gently until just combined. Stop when you see the last streak of flour. Do not overmix. Fold in your mix-ins at this point if using any.
- Bake: Pour the batter into the prepared loaf pan and spread it even. Bake for 50–60 minutes, or until a toothpick inserted into the center comes out clean or with a few moist crumbs. If the top is browning too quickly around minute 35, tent it loosely with foil.
- Cool: Let the loaf cool in the pan on a wire rack for 15 minutes, then use the parchment overhang to lift it out. Cool completely on the rack before slicing.
Notes
Related Recipes:
 Cheesy Hamburger Casserole Bake That’s Ready in 40 Minutes (No Canned Soup Here)
 Texas Roadhouse Style Baked Salmon with Sweet and Savory Glaze — Ready in Under 30 Minutes
 Moist Lemon Zucchini Bread with a Crunchy Lemon Sugar Top
 Strawberry Shortcake Rice Krispie Treats That Actually Taste Like Shortcake — Ready in 15 Minutes
 Blueberry Oatmeal Cookies That Stay Soft for Days — in Under 30 Minutes
 Air Fryer Chicken and Vegetables That Don’t Taste Like a Regret (30 Minutes, One Pan)