
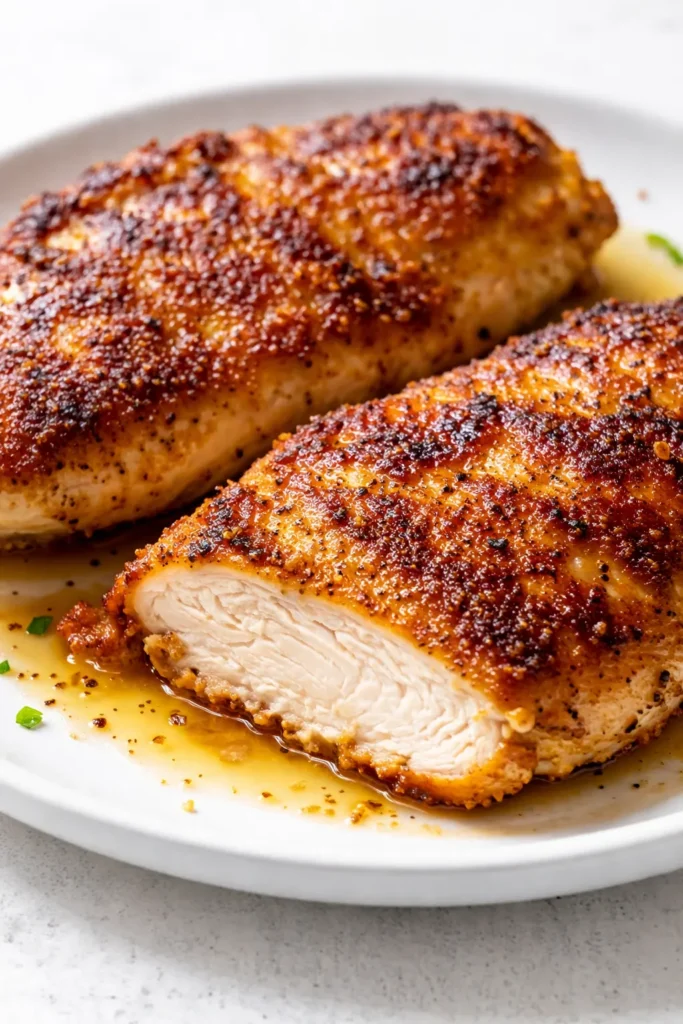
Golden, shatteringly crisp on the outside, tender and herb-flecked on the inside. That’s the cutlet that has ruined takeout chicken for my family. And the best part? Twenty-five minutes is all you need — no long marinades, no complicated techniques, just one skillet and a handful of ingredients you probably already have. This is weeknight cooking that actually delivers.
The short version: These come together in 25 minutes and my kids have never once left leftovers. Actually, that’s a lie — sometimes I hide one in the back of the fridge for lunch the next day.
I’ve made these cutlets roughly forty times since I figured out the buttermilk trick, and they’ve become my go-to for the kind of dinner that feels like a treat without requiring a trip to a specialty store. If you’ve ever scooped a pale, sad chicken cutlet off a plate and wondered where you went wrong, this is the fix.
- Serves: 4 as a main
- Hands-On Time: 15 min | Total Time: 25 min
- Difficulty: Easy enough for a Tuesday
- Cost per serving: ~$2.50
- Calories: ~380 per serving
- Dietary Notes: Naturally nut-free. Can be made gluten-free with GF panko.
(Photo above: An overhead shot of the finished cutlets arranged on a large wooden cutting board. A halved lemon sits at the edge, and a small bowl of creamy tzatziki is tucked in the corner for dipping. The crust is visibly craggy and golden brown. Natural window light from the left.)
The Trick That Keeps the Crust Crisp and the Meat Juicy
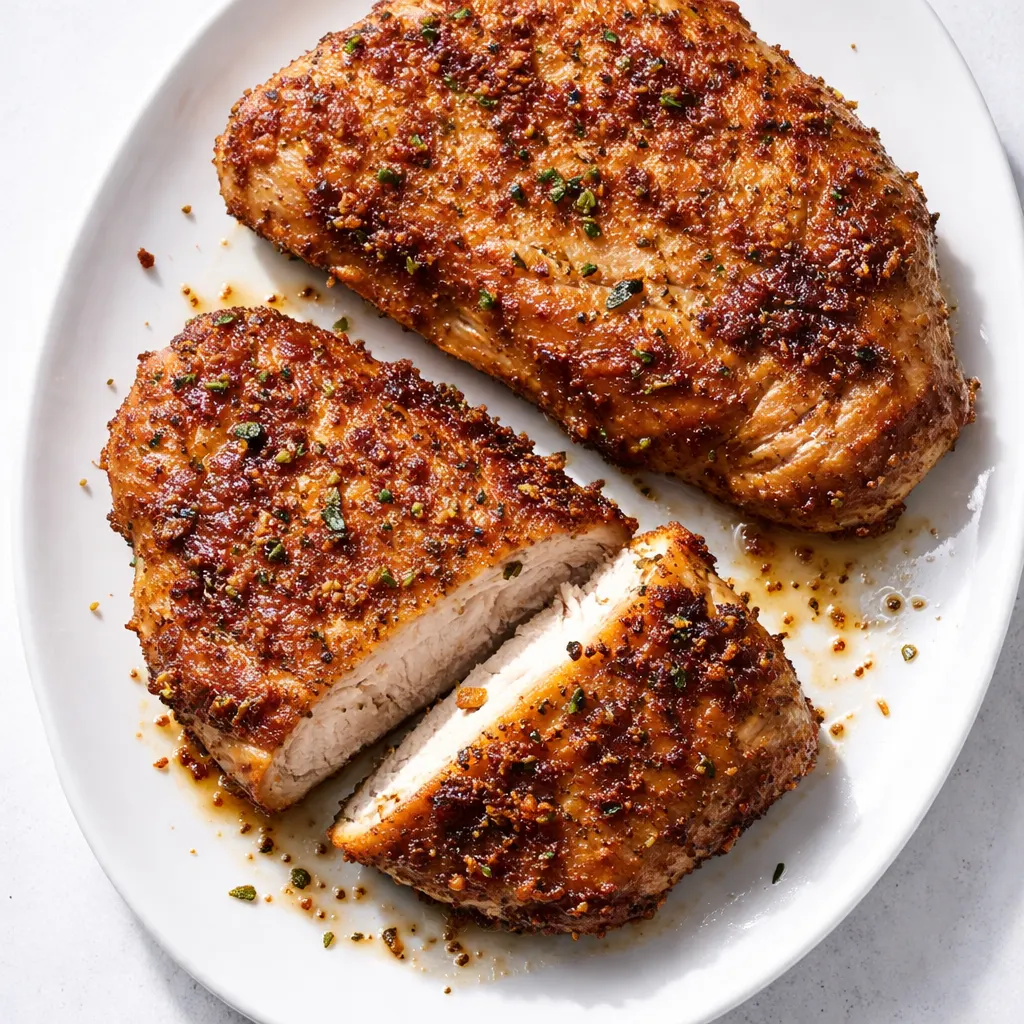
Most chicken cutlets suffer from one of two problems: a pale, soggy crust or dry, stringy meat. These solve both. The buttermilk brine — even a quick 10-minute soak — tenderizes the chicken so it stays moist through the heat. And the breading situation? A mix of panko and finely grated Parmesan creates a crust that’s shatteringly crisp and actually sticks to the chicken instead of falling off in the pan. No fancy equipment. No weird ingredients. Just technique that works.
The other thing people get wrong is the oil temperature. Too low and the cutlets absorb fat like sponges. Too high and the outside burns before the inside cooks. Medium-high heat with a generous shallow layer of olive oil is the sweet spot — and I’ll walk you through exactly how to tell when it’s ready.
Everything You Need (And a Few Notes From Me)
- 2 large boneless, skinless chicken breasts: Look for breasts that are roughly the same size so they cook evenly. If they’re massive, butterfly them into two thin cutlets each — you want about 1/2-inch thickness.
- 1/2 cup buttermilk (or plain yogurt): This is the tenderizer. The tangy flavor is subtle, but it makes a real difference in texture. No buttermilk? 1/2 cup milk + 1/2 tablespoon lemon juice works perfectly.
- 1 cup panko breadcrumbs: Regular breadcrumbs are too fine. Panko gives you that craggy, extra-crispy texture that actually stays crisp. This is non-negotiable.
- 1/2 cup finely grated Parmesan: Adds savory depth and helps the browning. My kids have no idea it’s in there, and I am totally fine with that.
- 1 tsp dried oregano + 1 tsp garlic powder + zest of 1 lemon: This is the Mediterranean flavor bomb. Don’t skip the zest — it adds a freshness that bottled lemon juice just can’t replicate. Dried oregano works better here than fresh because it doesn’t burn in the pan.
- Olive oil, for frying: A shallow layer (about 1/4 inch) in the skillet. It’s not deep-frying, but it’s also not a drizzle. Be generous here — the crust needs the fat to get golden.
What to Pull Out Before You Start
- A 12-inch cast iron skillet or heavy stainless steel pan: Cast iron holds heat best for even browning. If you don’t have one, a heavy-bottomed stainless pan works — just don’t use nonstick if you can avoid it; you want that deep golden crust.
- A wire rack set over a baking sheet: This is for resting the cooked cutlets. Paper towels trap steam and ruin the crust. A wire rack keeps everything crisp and airy.
- Tongs: For flipping the cutlets without splashing hot oil everywhere.
Let’s Make It (Step by Step)
This comes together fast, so read through once before you start. The actual cooking takes about 8 minutes total — the rest is just waiting for the pan to get hot and the chicken to hang out in the buttermilk.
- Pound or slice the chicken: Place the chicken breasts between two sheets of plastic wrap and pound to 1/2-inch thickness. Or, if you’re me and you don’t own a meat mallet, just butterfly them open and press them flat with your palm. (📸 Photo tip: You’re aiming for even thickness across the whole piece — think a uniform golden disc, not a drumstick shape.)
- Quick brine: Whisk the buttermilk, lemon zest, half the oregano, and a big pinch of salt in a bowl. Add the chicken and let it sit for 10 minutes. This is the step that ensures the meat stays juicy — don’t skip it.
- Set up the breading station: Mix the panko, Parmesan, remaining oregano, garlic powder, and some black pepper on a plate. Take a chicken piece from the buttermilk, let the excess drip off, and press it firmly into the crumb mixture. Flip and press again. Really press it in — this is what keeps the crust on the chicken, not in the pan. (📸 Photo tip: The crumbs should completely cover the surface with no wet spots showing through.)
- Shallow fry: Heat a deep layer of olive oil in the skillet over medium-high heat. The oil is ready when a breadcrumb sizzles immediately. Lay the cutlets in the pan — don’t crowd them. Cook for 3-4 minutes per side, until deep golden brown and cooked through (165°F internal temp).
- Rest and serve: Transfer to a wire rack set over a baking sheet (not paper towels — you want that crust to stay crisp). Let rest 2 minutes. Serve with lemon wedges and, if you’re smart, a side of tzatziki or a simple Greek salad.
How I Meal Prep These for the Week
I make a double batch on Sundays and we’re set for easy lunches and quick dinners through Wednesday. The trick is undercooking them just slightly — pull them at 160°F, and the carryover heat will bring them to 165°F during reheating.
- Fridge: Store in an airtight container in the fridge for up to 4 days. I line the container with paper towels to absorb any excess moisture so the crust doesn’t get steamed.
- Freezer: Yes! Freeze the cooked cutlets in a single layer on a baking sheet, then transfer to a freezer bag. They’ll keep for 3 months.
- Reheat: The microwave works in a pinch, but the oven or air fryer keeps them crispy. 350°F for 8-10 minutes (or 5 minutes in the air fryer at 375°F). My kids eat these cold in their lunchboxes — and honestly, cold is also delicious.
Things I Wish I’d Known the First Time
- Don’t skip the wire rack resting step. Paper towels trap steam and turn that perfect golden crust into a sad, soggy mess. A wire rack keeps air circulating around the whole cutlet. I learned this the hard way after one too many lunches where the cutlet steamed itself sad in the container.
- Pressing the breading is not optional. I know it feels aggressive, but you need the crumbs to really embed into the buttermilk coating. If you just sprinkle them on, half will fall off in the pan. Really press them in — this is the difference between a crust that stays and a crust that leaves.
- The oil temperature matters. If the oil isn’t hot enough, the crust absorbs it and turns greasy. If it’s too hot, the outside burns before the inside cooks. Test it with a breadcrumb: it should sizzle immediately, not float silently or burn on contact.
- Season in layers. Salt the buttermilk brine, and make sure the breading has salt too (the Parmesan helps, but a pinch of salt in the panko mix makes a difference). If your cutlets taste flat, it’s usually a salt issue. Even if you mess this part up a little, a squeeze of lemon at the end will fix most seasoning sins.
Swaps That Actually Work
- Gluten-Free: Use GF panko breadcrumbs — they work beautifully here. I’ve tested this for my friend who’s GF, and honestly, you can’t tell the difference.
- Dairy-Free: Use a dairy-free yogurt (plain, unsweetened) in place of the buttermilk, and skip the Parmesan. Add an extra pinch of salt and a tablespoon of nutritional yeast to the panko for that savory depth.
- Spicy Version: Add 1/2 teaspoon of red pepper flakes to the buttermilk brine and a pinch of cayenne to the breading. This is the version I make for adults after the kids go to bed — served with a cold glass of something crisp.
- Chicken Thigh Cutlets: Swap the breasts for boneless, skinless thighs. They’re more forgiving and stay extra juicy. The cooking time stays the same — about 3-4 minutes per side — but they’re practically impossible to overcook. This is my secret weapon for nights when I’m not paying close attention.
Questions I Get About This Recipe All the Time
Q: Why did my breading fall off in the pan?
A: Ugh, that’s the most frustrating thing, and it’s almost always one of two things: either the oil wasn’t hot enough when you started frying, or you didn’t press the breading firmly enough into the chicken. Make sure the oil shimmers before you add the cutlets, and really press those crumbs in. You’ve got this next time!
Q: Can I bake these instead of frying?
A: Yes, but honestly, they won’t be as crispy. If you want to bake them, place them on a wire rack over a baking sheet, spray generously with oil, and bake at 425°F for 12-15 minutes, flipping halfway through. They’ll be good — just not the same shatteringly crisp experience. I’ve tested this and it works for a lighter version, but the skillet version is the one I make on repeat.
Q: How long do these last? Can I freeze them?
A: They’ll keep in the fridge for up to 4 days in an airtight container. Yes, they freeze beautifully! Freeze in a single layer on a baking sheet, then transfer to a freezer bag for up to 3 months. To reheat, pop them in a 350°F oven for 8-10 minutes or an air fryer at 375°F for 5 minutes — the microwave will work but the crust won’t stay crispy. I always make a double batch for exactly this reason.
Q: What do you serve with these cutlets?
A: I have a few go-to sides. A simple Greek salad (tomatoes, cucumber, feta, red onion, oregano vinaigrette) is the classic for good reason. For busy nights, I toss a bag of arugula with lemon juice and olive oil and call it a day. And if we’re feeling indulgent? Warm pita bread with tzatziki and roasted red peppers. My kids love the “make your own pita” version.
More Recipes My Family Makes on Repeat
If you liked this one, here are a few others that get the same reaction at our table:
- Creamy Lemon Orzo with Spinach — The perfect side dish for these cutlets. One pot, 20 minutes, zero fuss.
- One-Pan Greek Chicken Meatballs — Same Mediterranean vibe, even easier. Great for meal prep.
- The Simplest Tzatziki Sauce — You’re going to want this dip. Garlicky, cool, and comes together in 5 minutes.
These cutlets have saved more weeknights than I can count — they look and taste like something special, but they’re genuinely easier than ordering takeout. That golden, craggy crust with the bright pop of lemon? It’s the kind of dinner that makes everyone at the table go quiet for a few minutes.
If you make these, drop a comment below and let me know how they turned out — I read every single one and I love hearing about your wins (and even the learning moments). Tag me on Pinterest so I can see yours!
📌 Crispy Mediterranean Chicken Cutlets recipe that stays juicy with a perfectly golden panko crust — save it for your next busy weeknight dinner!
Crispy Mediterranean Chicken Cutlets That Actually Stay Juicy — in 25 Minutes
Equipment
- 12-inch cast iron skillet
- Wire Rack
- Baking Sheet
- Mixing bowl
Ingredients
Chicken and Brine
- 2 large boneless skinless chicken breasts, pounded to 1/2-inch thickness
- 1/2 cup buttermilk
Breading
- 1 cup panko breadcrumbs
- 1/2 cup finely grated Parmesan cheese
- 1 tsp dried oregano
- 1 tsp garlic powder
- 1 lemon, zested
- Salt and black pepper to taste
- Olive oil, for frying
- Lemon wedges, for serving
Instructions
- Pound the chicken breasts between two sheets of plastic wrap to 1/2-inch thickness. Alternatively, butterfly them open and press flat with your palm. Aim for even thickness across the piece.
- Whisk buttermilk, lemon zest, half the oregano, and a big pinch of salt in a bowl. Add the chicken and let it sit for 10 minutes. This tenderizes the meat and keeps it juicy.
- Mix panko, Parmesan, remaining oregano, garlic powder, and black pepper on a plate. Take a chicken piece from the buttermilk, let excess drip off, and press firmly into the crumb mixture. Flip and press again until completely coated.
- Heat a shallow layer of olive oil (about 1/4 inch) in a large skillet over medium-high heat. When the oil shimmers and a breadcrumb sizzles instantly, add the cutlets without crowding. Cook 3-4 minutes per side until deep golden brown and internal temperature reaches 165°F.
- Transfer to a wire rack set over a baking sheet. Let rest 2 minutes. Serve with lemon wedges and tzatziki if desired.
Notes
Related Recipes:
 Cheesy Hamburger Casserole Bake That’s Ready in 40 Minutes (No Canned Soup Here)
 Creamy Garlic Tagliatelle That Looks Like a Restaurant Dish in 20 Minutes
 Texas Roadhouse Style Baked Salmon with Sweet and Savory Glaze — Ready in Under 30 Minutes
 Easy Italian Meatloaf That’s Actually Juicy (Not Dry) — in 1 Hour
 The Biscuits and Gravy Casserole That’s Actually Crispy on Top (And Ready in 40 Minutes)
 Air Fryer Chicken and Vegetables That Don’t Taste Like a Regret (30 Minutes, One Pan)