
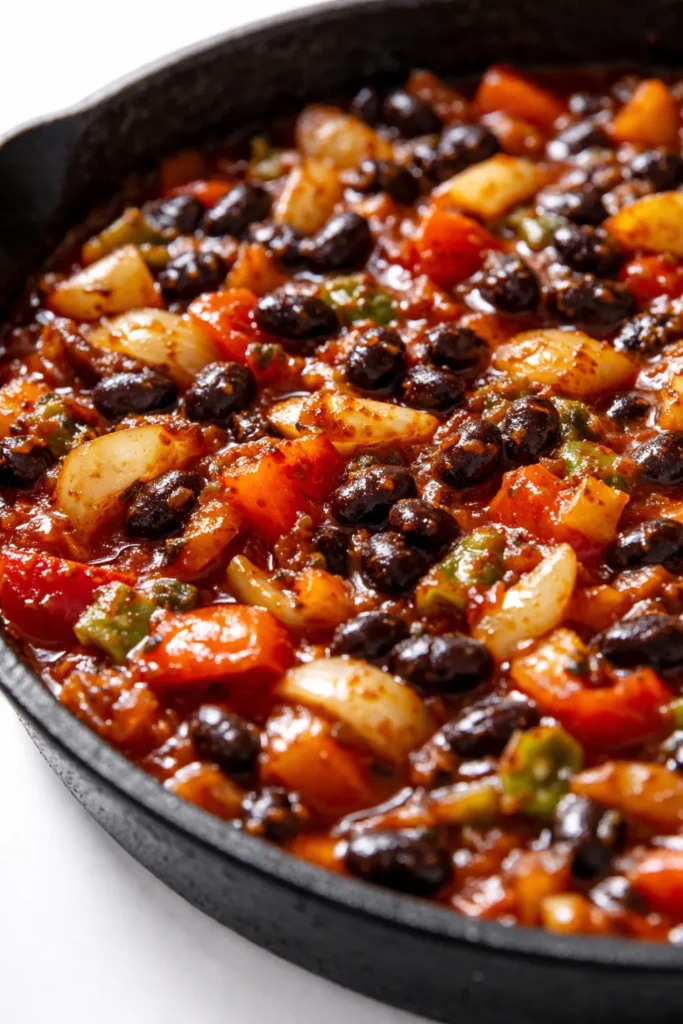
I have made a lot of “healthy” enchilada skillets over the years. Most of them were fine. That word — “fine” — is the one I use when I don’t want to say “bland” or “watery.” This one hits the deep, slightly tangy, slightly spicy note you are actually craving when the enchilada mood strikes. It tastes like the kind of thing you would order at a casual spot where they make their own tortillas, not like a recipe you found on a blog that promised a lot and delivered a mushy compromise.
The short version: One pan, 30 minutes, no mushy texture, and my picky nine-year-old nephew asked for a second bowl before I finished taking photos.
I tested this version about fifteen times before landing here. The ones before it taught me exactly what happens when you skip the char on the peppers or dump in too much sauce. You learn more from the failures — and there were plenty. This version is everything I wanted those earlier skillets to be.
- Serves: 4 as a main
- Hands-On Time: 15 min | Total Time: 30 min
- Difficulty: Easy enough for a Tuesday when you forgot to thaw anything
- Cost per serving: ~$4.50
- Calories: ~425 per serving
- Dietary Notes: Naturally gluten-free if you use corn tortillas. Easily dairy-free.
(Photo above: Wide shot from a 45-degree angle, natural light coming from the left. The skillet sits on a wooden board, still sizzling. You can see the melted cheese on top with a few golden-brown spots, charred edges on the peppers peeking through. A generous dollop of Greek yogurt sits in the center, with fresh cilantro scattered and a few pickled jalapeño slices. The serving spoon is resting in the pan, ready to go.)
The Thing That Makes This Taste Like You Simmered It for an Hour
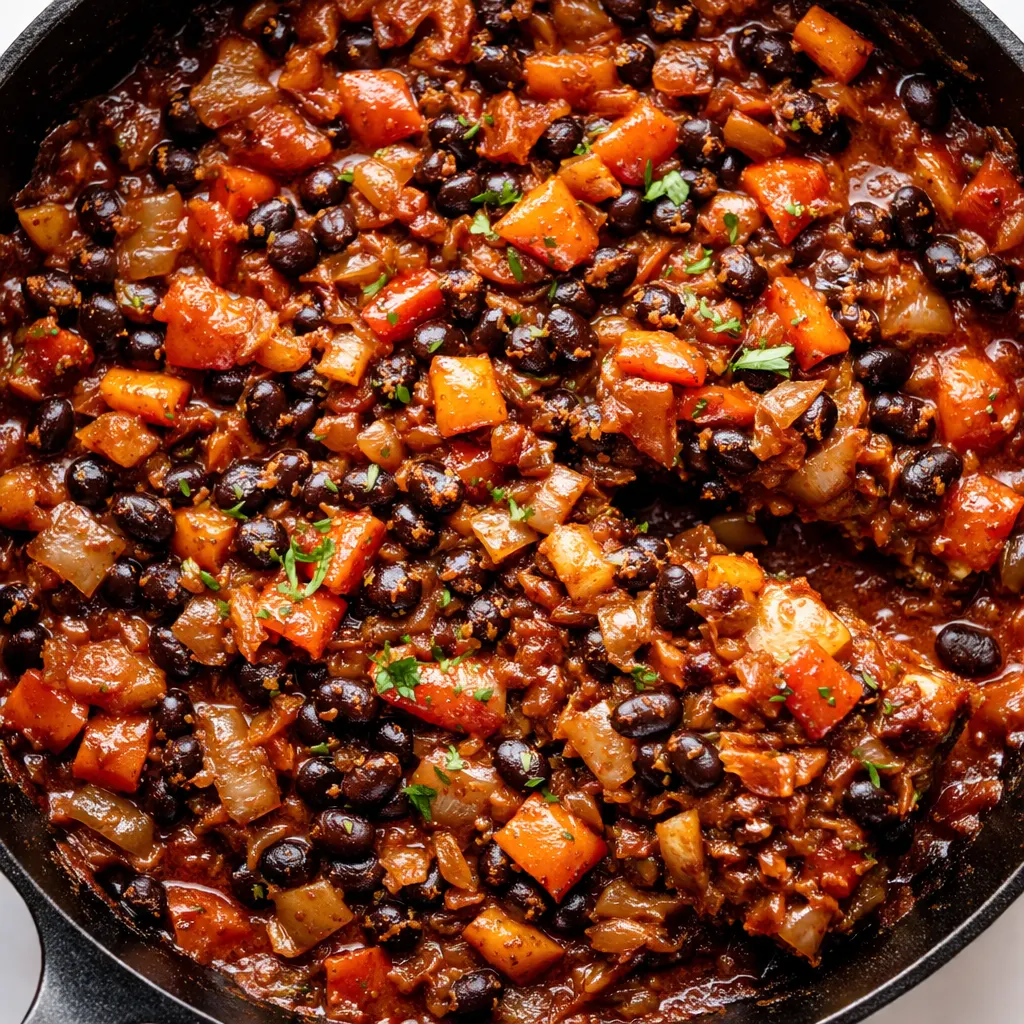
The secret here is not the spice blend — it is how you treat the vegetables. Most people dump everything into the pan at once and wonder why the final dish tastes flat and watery. I char the peppers and onions first over relatively high heat until they develop real color. That browning is not just aesthetic. It creates a smoky depth that tricks your brain into thinking this skillet has been cooking all afternoon. It is the single highest-leverage step in the entire recipe.
The second trick is a splash of pickled jalapeño brine. I know how that sounds. I was skeptical too the first time someone suggested it. But that splash does more for the overall flavor than any individual spice in the cabinet. It adds acid, salt, and a subtle brightness that cuts through the richness of the cheese and beans. You do not taste pickles. You just taste a more interesting, more complete version of an enchilada skillet. It is one of those moves that makes people ask what you did differently.
Ingredients Worth Talking About
- 1 tbsp olive oil: For charring the vegetables. Do not use less — you need enough for proper heat transfer. I use avocado oil sometimes, but olive is perfectly fine.
- 1 large onion, diced: The aromatic foundation. Let it get some real color. A red onion also works, though it is a touch sweeter.
- 2 bell peppers (any color), diced: The main vegetable presence. My family prefers red and orange for the natural sweetness they bring.
- 3 cloves garlic, minced: Non-negotiable. I use the jarred stuff when I am genuinely tired and there is no judgment from anyone in this kitchen.
- 1 tbsp chili powder, 1 tsp cumin, 1/2 tsp smoked paprika: The spice backbone. Fresh spices matter here. If yours have been in the cabinet for more than a year, they will not deliver the punch this dish needs.
- 1 can (15 oz) black beans, rinsed and drained: The protein anchor. Pinto beans also work, but black beans hold their shape better through the cooking process.
- 1 can (4 oz) diced green chiles: Mild heat, concentrated flavor. Do not skip these — they are not spicy, they are flavorful, and they add a brightness that canned sauce alone cannot provide.
- 1/2 cup enchilada sauce (red or green): The saucy binder. I use the Frontera brand or a quick homemade red sauce. Store-bought is absolutely fine — just choose a quality one without added sugar or corn syrup.
- 1/4 cup pickled jalapeño brine (from a jar of pickled jalapeños): The secret weapon. This is the ingredient that makes people ask what is in this. They will not guess pickles.
- 6-8 corn or flour tortillas, cut into strips: The panada-like element that softens and thickens the skillet. Day-old tortillas are ideal. Corn keeps the dish gluten-free.
- 1 cup shredded cheese (cheddar, Monterey Jack, or a blend): The finishing layer. Sharp cheddar gives you more flavor per ounce, so you can use less and still get that gooey pull.
- Toppings: Fresh cilantro, Greek yogurt or sour cream, extra pickled jalapeños. These are non-negotiable for texture and acid balance.
What to Pull Out Before You Start
- A 12-inch oven-safe skillet: Cast iron is ideal, but a stainless steel or non-stick oven-safe pan works well. If you do not have an oven-safe skillet, you can melt the cheese under the broiler on a baking sheet and transfer it to a serving dish — though the skillet presentation is part of the appeal.
- A sharp knife and cutting board: For dicing the vegetables. A dull knife will make this step feel like a chore.
- A spatula or wooden spoon: For stirring and folding the tortillas.
Let’s Make It (Step by Step)
This moves quickly once the chopping starts, so I recommend having everything ready before you turn on the heat. It is called mise en place, but I think of it as not burning my garlic.
- Char the vegetables: Heat the olive oil in your skillet over medium-high heat. Add the onion and bell peppers. Cook, stirring occasionally, until they develop nice charred spots — about 5 to 7 minutes. This is the most important step in the whole recipe. Do not rush it. You want visible browning on the edges of the peppers, not just soft, steamed-looking vegetables. (📸 Photo tip: Look for dark brown spots on the pepper edges and translucent, slightly caramelized onion pieces. This is where the flavor lives.)
- Bloom the spices: Reduce the heat to medium. Add the garlic, chili powder, cumin, and smoked paprika. Stir constantly for about 30 seconds until the mixture becomes fragrant. This wakes up the dried spices and integrates them into the oil base.
- Add the saucy components: Add the rinsed black beans, diced green chiles, enchilada sauce, and the pickled jalapeño brine. Stir to combine thoroughly. Let the mixture simmer uncovered for 2 to 3 minutes, allowing it to thicken slightly. If the pan looks too dry, add a splash of water or vegetable broth.
- Fold in the tortillas: Add the tortilla strips and gently fold them into the mixture. They will soften quickly and absorb the sauce. This step is what gives the dish that cohesive, casserole-like texture without requiring any time in the oven. (📸 Photo tip: The tortillas should be just barely submerged in the sauce. They will continue to absorb liquid as the dish finishes cooking.)
- Top with cheese: Sprinkle the shredded cheese evenly over the top of the mixture. Remove the skillet from the stovetop if it is oven-safe.
- Melt the cheese: Transfer the skillet to a preheated broiler set to high. Broil for 2 to 3 minutes, until the cheese is bubbly and browned in spots. If you do not have a broiler, cover the skillet with a tight-fitting lid for one minute — the trapped steam will melt the cheese sufficiently.
- Finish and serve: Remove the skillet from the oven. Let it rest for 2 minutes before serving. This short rest allows the mixture to set up slightly so you get a clean scoop rather than a soupy mess. Top with fresh cilantro, a generous dollop of Greek yogurt, and extra pickled jalapeño slices. Serve directly from the skillet.
How I Meal Prep This for the Week
This is one of those rare weeknight skillets that reheats with dignity. I make a double batch on Sundays and we are set for Wednesday.
- Fridge: Store in an airtight container for up to 4 days. The tortillas will continue to absorb liquid over time, so the texture shifts toward something more like a casserole. That is not a bad thing.
- Freezer: Yes, this freezes well. Cool completely, then transfer to a freezer-safe container. Freeze for up to 3 months. Thaw in the refrigerator overnight before reheating.
- Reheat: The microwave works in a pinch, but the oven or a skillet is better. Reheat in a 350°F oven for 10 minutes, or in a skillet over medium heat with a splash of water to re-steam the tortillas.
Things I Wish I’d Known the First Time
- Do not skip the char. This is the hill I will die on with this recipe. If you do not get color on the onions and peppers, the entire dish tastes flat. It is the difference between a good weeknight dinner and one you text your sister about.
- Use the brine. I know it sounds like an odd move. I was skeptical too. But that splash of acidity is exactly what a one-pan meal needs to taste like it is more than the sum of its parts. It brightens everything without making the dish taste sour.
- Cut the tortillas into strips, not triangles. If you cut them into triangles, they do not integrate as evenly into the skillet. Strips soften uniformly and create that cohesive, fork-friendly texture you want in a skillet meal.
- Let it rest before serving. Those two minutes off the heat matter more than you think. They allow the mixture to set so you get a clean scoop rather than a pool of sauce on the plate.
Make It Yours: Easy Variations
- Dairy-Free: Use a vegan shredded cheese (I like Violife or Miyoko’s) and skip the yogurt topping. A sliced avocado provides the creamy element beautifully. My sister makes it this way and says it is her preferred version.
- Gluten-Free: Use corn tortillas and double-check that your enchilada sauce is certified gluten-free. The rest of the ingredients are naturally GF-friendly.
- Spicy: Add a diced fresh jalapeño along with the onions and peppers. Use hot enchilada sauce. I make this version after the kids have gone to bed — it becomes a completely different, much more aggressive dish.
- Protein Boost: Add a cup of shredded cooked chicken or ground beef right after the beans. This is the version I make for a genuinely hungry crowd.
- Kid-Friendly: Use mild enchilada sauce, skip the pickled jalapeño brine (substitute a squeeze of lime), and use flour tortillas. My nephew cleaned his bowl with the flour tortilla version.
Questions I Get About This Recipe All the Time
Q: Why did my skillet turn out watery?
A: Ugh, I have been there. It usually means the vegetables did not cook down enough before you added the liquid, or you used too much enchilada sauce. Stick to the half-cup measurement and let the mixture simmer uncovered for a few minutes to thicken before adding the cheese. You have got this next time.
Q: Can I make this with flour tortillas instead of corn?
A: Absolutely. Flour tortillas will soften more and take on a dumpling-like quality. It is a different texture but equally satisfying. Corn tortillas hold up better for leftovers, so keep that in mind if you are meal prepping.
Q: How long does this last? Can I freeze it?
A: It keeps in the refrigerator in an airtight container for up to 4 days. Yes, it freezes well for up to 3 months. Thaw in the fridge overnight and reheat in a skillet with a splash of water to restore the moisture the tortillas absorbed.
Q: What do you serve with this?
A: A simple side salad with lime vinaigrette and tortilla chips for scooping up any bits left in the pan. My kids also love it with a side of black beans and rice on nights when they need a little more fuel.
More Recipes My Family Makes on Repeat
If you liked this one, here are a few others that get the same reaction at our table:
- One-Pan Black Bean Soup — The one I make when I want something deeply cozy and I don’t want to face a pile of dishes afterward.
- Sheet Pan Chicken Fajitas — Same flavor energy, even less cleanup, and the leftovers travel well.
- Quick Turkey Chili — The weeknight chili that actually tastes like it has been bubbling on the stove all afternoon.
This is the skillet I make when I want the comfort of enchiladas without the work of rolling them. It hits every single note — the tangy sauce, the gooey cheese, the tender tortillas — and it does it in one pan in 30 minutes. That is the kind of recipe worth holding onto.
If you try it, drop a comment below — I love hearing how it goes for your family.
📌 This one-skillet healthy enchilada recipe is perfect for busy weeknights and meal prep — save it for the next time you need a quick, satisfying dinner that everyone at the table will actually eat.
Healthy Enchilada Skillet
Equipment
- 12-inch oven-safe skillet
- Sharp Knife
- Cutting board
- Spatula or Wooden Spoon
Ingredients
For the Skillet Base
- 1 tbsp olive oil
- 1 large onion, diced
- 2 whole bell peppers (any color), diced
- 3 cloves garlic, minced
- 1 tbsp chili powder
- 1 tsp cumin
- 1/2 tsp smoked paprika
- 1 can (15 oz) black beans, rinsed and drained
- 1 can (4 oz) diced green chiles
- 1/2 cup enchilada sauce (red or green)
- 1/4 cup pickled jalapeño brine
- 6-8 whole corn or flour tortillas, cut into strips
- 1 cup shredded cheese (cheddar, Monterey Jack, or blend)
For Topping
- to taste fresh cilantro
- to taste Greek yogurt or sour cream
- to taste extra pickled jalapeños
Instructions
- Char the vegetables: Heat the olive oil in your skillet over medium-high heat. Add the onion and bell peppers. Cook, stirring occasionally, until they develop nice charred spots — about 5 to 7 minutes. Do not rush this step; it creates the smoky depth.
- Bloom the spices: Reduce the heat to medium. Add the garlic, chili powder, cumin, and smoked paprika. Stir constantly for about 30 seconds until fragrant.
- Add the saucy components: Add the black beans, diced green chiles, enchilada sauce, and pickled jalapeño brine. Stir to combine. Let the mixture simmer uncovered for 2 to 3 minutes, allowing it to thicken slightly. If too dry, add a splash of water or vegetable broth.
- Fold in the tortillas: Add the tortilla strips and gently fold them into the mixture. They will soften quickly and absorb the sauce.
- Top with cheese: Sprinkle the shredded cheese evenly over the top. Remove the skillet from the stovetop if it is oven-safe.
- Melt the cheese: Transfer the skillet to a preheated broiler set to high. Broil for 2 to 3 minutes, until the cheese is bubbly and browned in spots. Alternatively, cover the skillet with a tight-fitting lid for one minute to melt the cheese via steam.
- Finish and serve: Remove the skillet from the oven. Let it rest for 2 minutes before serving. This short rest allows the mixture to set up slightly. Top with fresh cilantro, a generous dollop of Greek yogurt, and extra pickled jalapeño slices. Serve directly from the skillet.
Notes
- Do not skip the char on the peppers — it is the highest-leverage step for flavor.
- The pickled jalapeño brine is the secret weapon; it adds acid and brightness without tasting pickled.
- Cut tortillas into strips, not triangles, for even softening.
- Let the skillet rest 2 minutes before serving for a clean scoop.
- For dairy-free, use vegan cheese and sliced avocado instead of yogurt.
- For gluten-free, use corn tortillas and double-check enchilada sauce is certified GF.
Related Recipes:
 Cheesy Hamburger Casserole Bake That’s Ready in 40 Minutes (No Canned Soup Here)
 Creamy Garlic Tagliatelle That Looks Like a Restaurant Dish in 20 Minutes
 Texas Roadhouse Style Baked Salmon with Sweet and Savory Glaze — Ready in Under 30 Minutes
 Easy Italian Meatloaf That’s Actually Juicy (Not Dry) — in 1 Hour
 The Biscuits and Gravy Casserole That’s Actually Crispy on Top (And Ready in 40 Minutes)
 Air Fryer Chicken and Vegetables That Don’t Taste Like a Regret (30 Minutes, One Pan)