
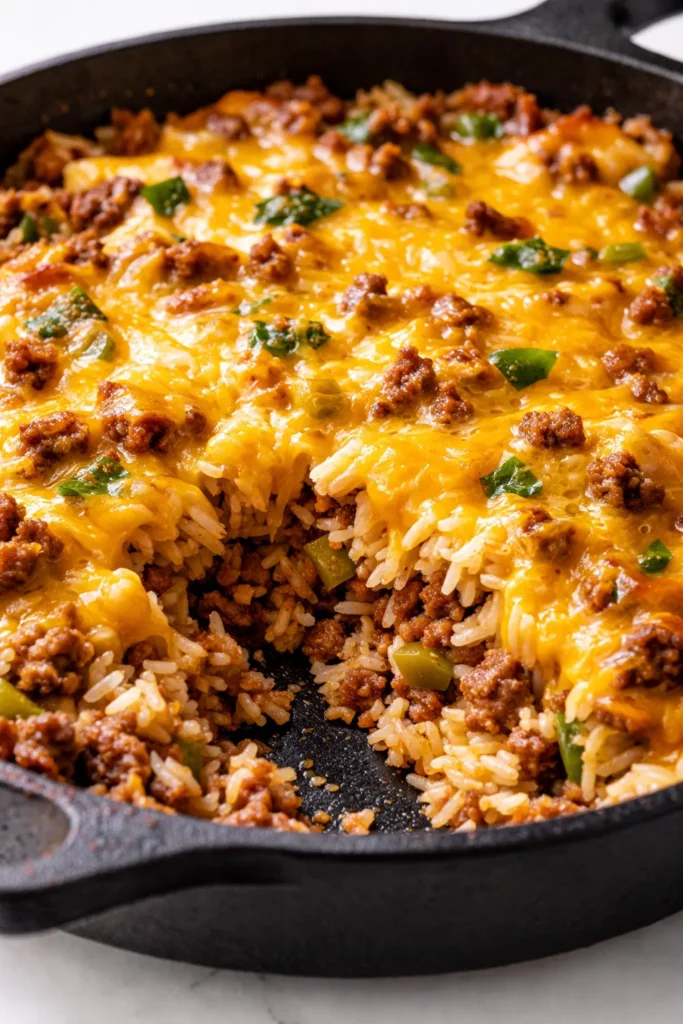
Every single version of taco rice I made before this one ended up the same way: a sad, vaguely seasoned pile of mush. Flavorful mush, sure, but textureless. The problem is always the same — too much liquid, not enough browning, and rice that goes from al dente to baby food in about ninety seconds. This version fixes all of that. The rice stays distinct, the edges get crispy, and the whole thing comes together in one skillet in under half an hour. It is the weeknight winner I didn’t know I needed.
The short version: Cheesy, slightly crispy, deeply savory, and done in 30 minutes flat with just one pan to wash.
I’ve tested this roughly 14 times over the past two months, and my neighbors have started timing their dog walks to when they know I’m testing it. That’s how you know a recipe works.
- Serves: 4 as a main
- Hands-On Time: 15 min | Total Time: 30 min
- Difficulty: Easy enough for a Tuesday, even with interruptions
- Cost per serving: ~$3.50
- Calories: ~485 per serving
- Dietary Notes: Naturally gluten-free
(Photo above: overhead shot of the cast iron skillet on a trivet, a single scoop pulled to the side to show the stretchy cheese and distinct rice grains, a dollop of sour cream and a scattering of pickled jalapeños on top, late afternoon light from the window.)
The Trick That Keeps This Taco Rice From Getting Soggy
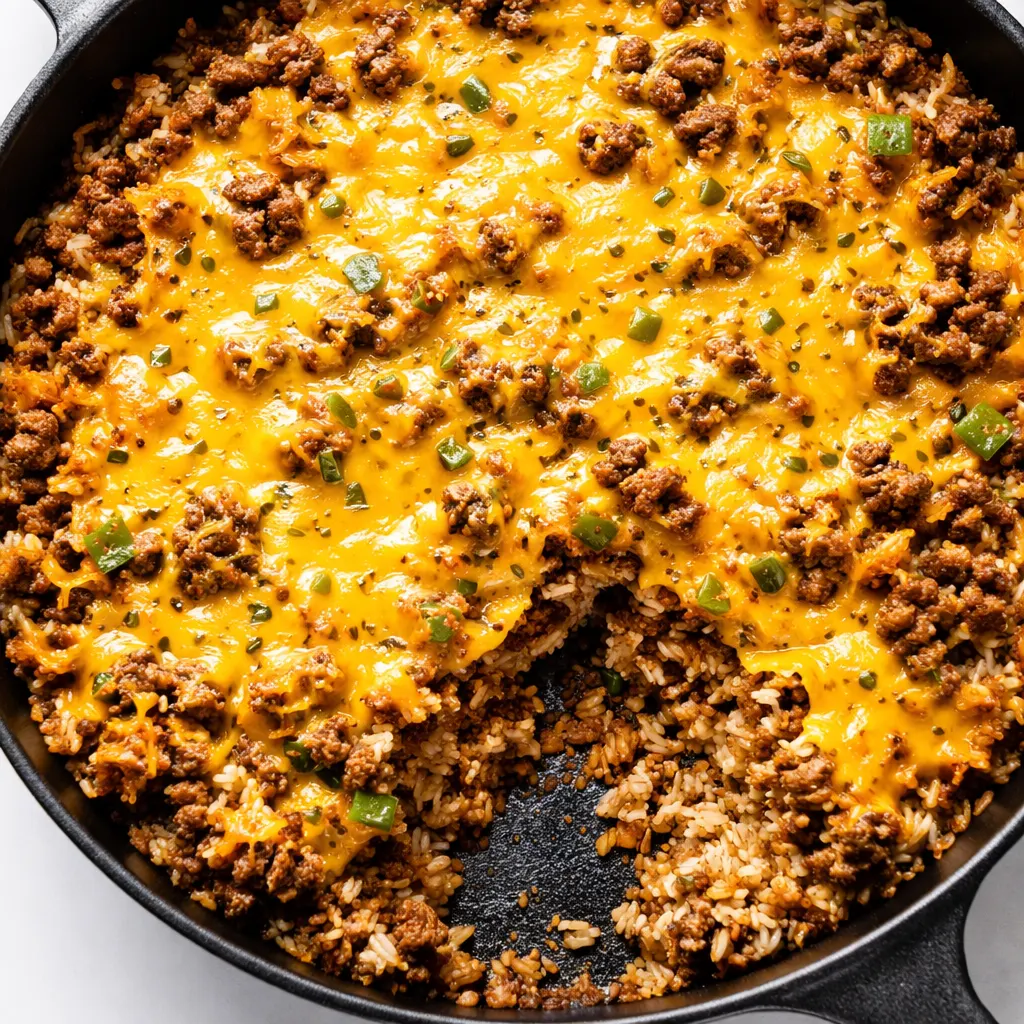
The enemy of a good taco rice skillet is soggy rice. The culprit is usually too much liquid or adding the rice too early. Here’s the fix: you cook the aromatics, brown the meat, drain off the fat — this is key — and then toast the rice in the residual fat before adding the liquid. That toasting step changes everything. It firms up the grain so it holds its shape no matter what you throw at it.
The second trick is using the right liquid-to-rice ratio. Most recipes add too much water or broth. I use exactly 1 ½ cups of low-sodium chicken broth for every cup of rice. It’s a tighter ratio, which means the rice absorbs exactly what it needs and the rest of the moisture cooks off, leaving you with perfectly distinct grains.
The cheese on top isn’t just for show — it melts into a barrier that traps steam, so the top stays hot and melty while the bottom gets a little crispy from the residual heat of the skillet. That contrast is the whole point of this dish.
Ingredients That Actually Matter Here
- 1 lb ground beef (80/20): The fat content matters here. Too lean and the rice won’t have enough fat to toast in. Too fatty and you’ll need to drain more. 80/20 is the sweet spot. I’ve tried 90/10 and the rice just doesn’t toast as nicely — a little fat is doing the work here.
- 1 cup long-grain white rice: Not short-grain, not medium. Long-grain holds its shape best in this application. Basmati or jasmine work perfectly. Short-grain will turn into risotto, which is delicious but not what we’re after today.
- 1 ½ cups low-sodium chicken broth: The exact ratio that works. Low-sodium is non-negotiable here — the taco seasoning brings plenty of salt. Full-sodium broth makes this inedibly salty, ask me how I know.
- 1 packet taco seasoning (or 3 Tbsp homemade): The store-bought stuff is fine here — it’s a weeknight skillet, not a culinary exam. If you’re making your own, make sure it has cumin, smoked paprika, garlic powder, and onion powder. Sprinkle it in with the tomato paste so it blooms in the fat.
- 1 can (4 oz) diced green chiles: Not spicy. Bright. They add a little acidity and texture without any heat. My kids don’t even notice them, which is my favorite kind of move.
- 1 cup shredded Mexican blend or sharp cheddar: Pre-shredded works in a pinch but freshly shredded melts so much better. The anti-caking coating on pre-shredded keeps it from getting that stretchy, gooey thing we all want.
- Toppings (sour cream, pickled jalapeños, cilantro, lime): Not optional. They are the finish. A squeeze of lime right before serving is what makes the whole dish sing — acid cuts through the fat and makes it feel bright.
What to Pull Out Before You Start
- A 12-inch cast iron skillet or heavy-bottomed stainless steel skillet. Cast iron gives you the best crispy edges, but any heavy pan works.
- Wooden spoon or spatula for breaking up the meat.
- Cutting board and knife for the toppings.
That’s genuinely it. One pan, one spoon, one board.
Let’s Make It (Start to Finish in 30 Minutes)
This goes fast, so read through once before you start. The actual cooking is about 15 minutes of active work, then 15 minutes of letting the skillet do its thing.
- Brown the meat: Heat your skillet over medium-high heat. Add the ground beef and cook, breaking it apart, until it’s deeply browned — about 5-7 minutes. Don’t stir it constantly; let it sit so it gets a crust. (📸 Photo tip: You should see deep brown bits on the bottom of the pan — that’s flavor.)
- Drain the fat: Carefully tilt the skillet and spoon off all but about 1 tablespoon of the rendered fat. Leave that tablespoon in there — it’s going to toast the rice. This is the step everyone skips and it’s why theirs turns out greasy and heavy.
- Bloom the aromatics: Add the diced onion and cook until translucent, about 3 minutes. Add the garlic, taco seasoning, and tomato paste. Stir constantly for 1 minute until it’s fragrant and deepened in color.
- Toast the rice: Add the dry rice to the skillet. Stir it around in the fat and spices for 2 minutes. It should start to smell slightly nutty. This is the non-negotiable step — it’s what keeps the rice from turning to mush later. (📸 Photo tip: The rice will look slightly translucent at the edges — that’s how you know it’s toasted enough.)
- Add liquids and chiles: Pour in the chicken broth and diced green chiles (with their liquid). Stir to combine, scraping up any brown bits from the bottom of the pan. Bring it to a simmer.
- Simmer: Reduce the heat to low, cover the skillet, and let it simmer for 15 minutes. Do not lift the lid. I know it’s tempting, but every time you lift the lid you release steam and the rice needs that steam to cook evenly.
- Cheese it: After 15 minutes, remove the lid. The rice should be tender and most of the liquid absorbed. Sprinkle the shredded cheese evenly over the top. Cover again for 2-3 minutes until the cheese is melted and gooey.
- Finish and serve: Remove from heat. Hit it with a squeeze of lime, then add your toppings — sour cream, pickled jalapeños, a handful of cilantro, whatever you like. Serve directly from the skillet. That’s the whole point — one pan, no plates to wash, everyone digs in.
How I Make This for the Week (If There’s Any Left)
I make a double batch of this on Sundays and we’re set for two quick dinners during the week. The trick is undercooking the rice by just a minute or two if you know you’re going to reheat it — it finishes in the microwave or oven without getting mushy.
- Fridge: Store in an airtight container for up to 4 days. Reheat in a skillet with a splash of water to re-steam the rice.
- Freezer: Yes, this freezes beautifully. Portion it into containers and freeze for up to 3 months. Thaw overnight in the fridge.
- Reheat: Skillet is best (crisps the edges back up), but the microwave works in a pinch. Add a wet paper towel over the bowl to keep the rice from drying out.
Things I Learned After Making This 12 Times
- Don’t skip the drain step. I know it’s an extra step and an extra dish (a small bowl for the fat), but it’s the difference between a skillet that feels heavy and greasy and one that feels satisfying and light. My husband thought I was being precious about it until I made him a version without draining. He admitted I was right. I let him admit it graciously.
- Toast the rice the full 2 minutes. It should look slightly translucent at the edges and smell nutty. If you skip this, the rice will absorb too much liquid and turn into porridge. Even if you forget to toast it, it’ll still be edible — just slightly mushier. We’ve all been there.
- Use a heavy-bottomed skillet. This isn’t a snob thing — it’s a heat distribution thing. A thin pan will scorch the rice on the bottom before it’s done cooking through. Cast iron or stainless steel is your friend here.
- Let it sit for 5 minutes after cooking. The rice needs that time to redistribute moisture. If you dig in immediately, the top layer will be perfect but the bottom will be slightly wet. Five minutes of rest fixes that. Use those five minutes to set the table or pour a glass of wine.
Swaps That Actually Work For This Skillet
- Vegetarian: Swap the ground beef for two cans of black beans or a pound of your favorite plant-based crumble. Toast the rice in 2 tablespoons of oil instead of the beef fat. I make this version for my vegetarian sister and she says it’s the only taco rice she doesn’t feel like she’s compromising on.
- Spicy: Add a diced jalapeño with the onions, or use hot Rotel instead of the mild green chiles. A smoked paprika-heavy taco seasoning also adds warmth without just being hot for the sake of it.
- Kid-Friendly: My kids prefer this with a dollop of plain Greek yogurt instead of sour cream, and a pile of crushed tortilla chips on top for crunch. It’s a good texture contrast that the grown-ups steal, too.
- Dairy-Free: Omit the cheese or use a good plant-based shred that melts. I’ve used the Miyoko’s brand and it works surprisingly well here. It won’t stretch the same way, but it does get gooey.
Questions I Get About This All the Time
Q: Why did my rice turn out mushy?
A: Ugh, I’ve been there. Two possible culprits: either you didn’t toast the rice long enough (it needs a full 2 minutes in the fat), or you lifted the lid during the 15-minute simmer. Every time the lid comes off, steam escapes, and the rice needs that steam to cook evenly. Try again with those two fixes — you’ve got this next time.
Q: Can I make this with ground turkey or chicken?
A: Yes, but add a tablespoon of oil to the pan before browning, because poultry is leaner than beef. The rice needs that fat to toast properly. I’ve tested this with ground turkey and it works fine — just make sure you’re not using 99% lean, or it’ll be too dry.
Q: How long does this last in the fridge? Can I freeze it?
A: It lasts up to 4 days in the fridge in an airtight container. To freeze, portion it out individually and freeze for up to 3 months. The best way to reheat is in a skillet with a tiny splash of water — it brings the texture back better than the microwave. The microwave works in a pinch, but it won’t be as crispy.
Q: What do I serve with this?
A: Honestly, nothing — it’s a one-skillet meal that’s pretty complete on its own. If I’m feeling ambitious, I’ll do a quick side salad with a lime vinaigrette (the acidity cuts the richness perfectly) or some roasted street corn-style frozen corn that I char in a separate pan. My kids eat it with a side of sliced avocado and that’s it.
More Recipes My Family Makes on Repeat
If you liked this one, here are a few others that get the same reaction at our table:
- One-Pan Enchilada Pasta — All the flavor of enchiladas without rolling a single tortilla.
- Smoky Black Bean Soup — My 30-minute answer to “what’s for dinner” at least twice a month.
- Crispy Cheddar Chicken and Rice Bake — The one that got my picky eater to ask for seconds.
This skillet has genuinely become my most-used weeknight trick. It’s the one I make when I have zero energy but still want something that feels like a real meal — and doesn’t leave me with a sink full of dishes.
If you try it, drop a comment below and let me know how it went for you — I love hearing about the little variations people come up with. And if you share it on Pinterest, tag me so I can see your beautiful skillet!
📌 Save this Cheesy Taco Rice Skillet recipe for your next busy weeknight — it’s the 30-minute dinner that finally solves the soggy rice problem.
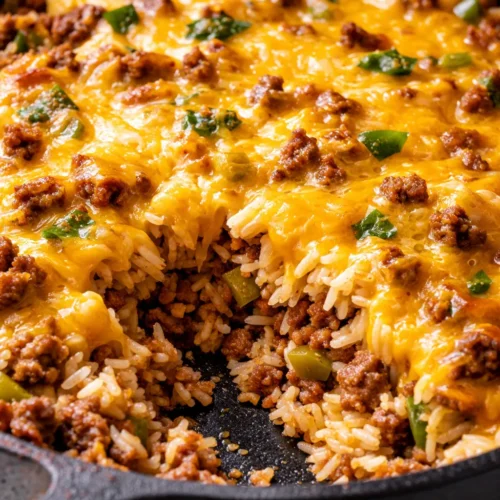
Cheesy Taco Rice Skillet
Equipment
- 12-inch cast iron skillet
- Wooden Spoon
- Cutting board
- Chef’s knife
Ingredients
Meat & Aromatics
- 1 lb ground beef (80/20)
- 1 medium onion, diced
- 3 cloves garlic, minced
- 2 tablespoons tomato paste
- 1 packet taco seasoning (or 3 tbsp homemade)
Rice & Liquid
- 1 cup long-grain white rice (basmati or jasmine)
- 1.5 cups low-sodium chicken broth
- 1 can (4 oz) diced green chiles
Cheese & Toppings
- 1 cup shredded Mexican blend or sharp cheddar
- to taste sour cream, for serving
- to taste pickled jalapeños, for serving
- to taste fresh cilantro, for serving
- 1 lime, cut into wedges
Instructions
- Brown the meat: Heat your skillet over medium-high heat. Add the ground beef and cook, breaking it apart, until it’s deeply browned — about 5-7 minutes. Don’t stir it constantly; let it sit so it gets a crust.
- Drain the fat: Carefully tilt the skillet and spoon off all but about 1 tablespoon of the rendered fat. Leave that tablespoon in there — it’s going to toast the rice.
- Bloom the aromatics: Add the diced onion and cook until translucent, about 3 minutes. Add the garlic, taco seasoning, and tomato paste. Stir constantly for 1 minute until it’s fragrant and deepened in color.
- Toast the rice: Add the dry rice to the skillet. Stir it around in the fat and spices for 2 minutes. It should start to smell slightly nutty and look slightly translucent at the edges.
- Add liquids and chiles: Pour in the chicken broth and diced green chiles (with their liquid). Stir to combine, scraping up any brown bits from the bottom of the pan. Bring it to a simmer.
- Simmer: Reduce the heat to low, cover the skillet, and let it simmer for 15 minutes. Do not lift the lid.
- Cheese it: After 15 minutes, remove the lid. The rice should be tender and most of the liquid absorbed. Sprinkle the shredded cheese evenly over the top. Cover again for 2-3 minutes until the cheese is melted and gooey.
- Finish and serve: Remove from heat. Hit it with a squeeze of lime, then add your toppings — sour cream, pickled jalapeños, a handful of cilantro, whatever you like. Serve directly from the skillet.
Notes
Related Recipes:
 Peach Arugula Salad with Brown Butter Pecans: The 15-Minute Summer Dinner I Make on Repeat
 Cheesy Hamburger Casserole Bake That’s Ready in 40 Minutes (No Canned Soup Here)
 Lemon Capellini Salad for Late Summer Evenings: Bright, Tangy, Ready in 20 Minutes
 Creamed Cabbage and Ground Beef Casserole That’s Rich, Tender, and Done in 45 Minutes
 Grilled Peach Burrata Salad That Tastes Like a Fancy Restaurant — at Home in 20 Minutes
 Dolly Parton’s Easy 5-Ingredient Casserole That Feeds a Crowd in 45 Minutes