
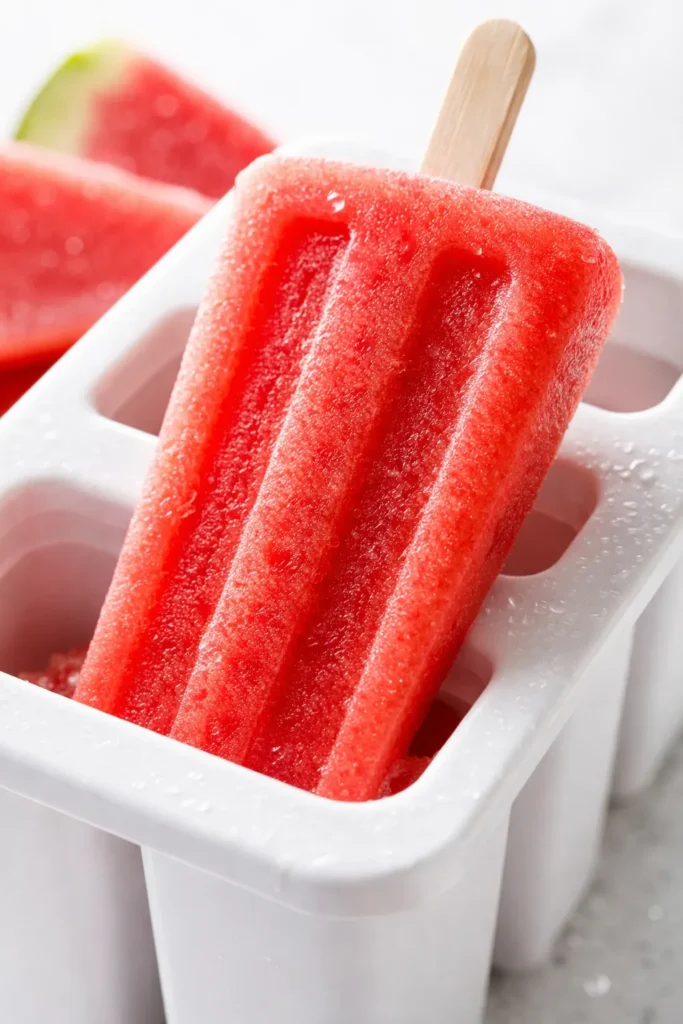
You know that moment when you bite into a homemade popsicle and it’s just… crunchy ice with a vague memory of fruit? These are the opposite of that. My kids have been going through a box of popsicle molds a week since June, and this version is the only one that disappears before it’s even fully frozen. I’m not exaggerating — the first time I made them, my neighbor’s kid sat on our porch step and ate three in a row without saying a word. That’s when I knew I had something.
The short version: Three ingredients, five minutes of hands-on time, and a texture that’s creamy-icy in the best way — like a frozen watermelon wedge but better, and way less messy.
I’ve made these roughly 20 times in the last month. My neighbor texted me for the recipe after I handed one over the fence. My kids now ask for them instead of ice cream, which feels like a parenting win I’ll take however I can get it.
- Serves: 8-10 popsicles (depending on your mold size)
- Hands-On Time: 10 minutes | Total Time: 6 hours (mostly hands-off freezing)
- Difficulty: Easy enough for a Tuesday with a toddler helping
- Cost per serving: ~$0.50
- Calories: ~45-60 per pop
- Dietary Notes: Naturally vegan, gluten-free, dairy-free, no added sugar (if your melon is sweet enough)
(Photo above: A set of four bright red watermelon popsicles arranged on a wooden cutting board in late afternoon sunlight. One is slightly pulled out of its silicone mold to show the glossy, smooth texture. A few sprigs of mint and a half-lime are scattered nearby for color contrast. The popsicles have a clean, bright appearance — no ice crystals visible on the surface.)
The Trick That Keeps Them Creamy (Not Icy)
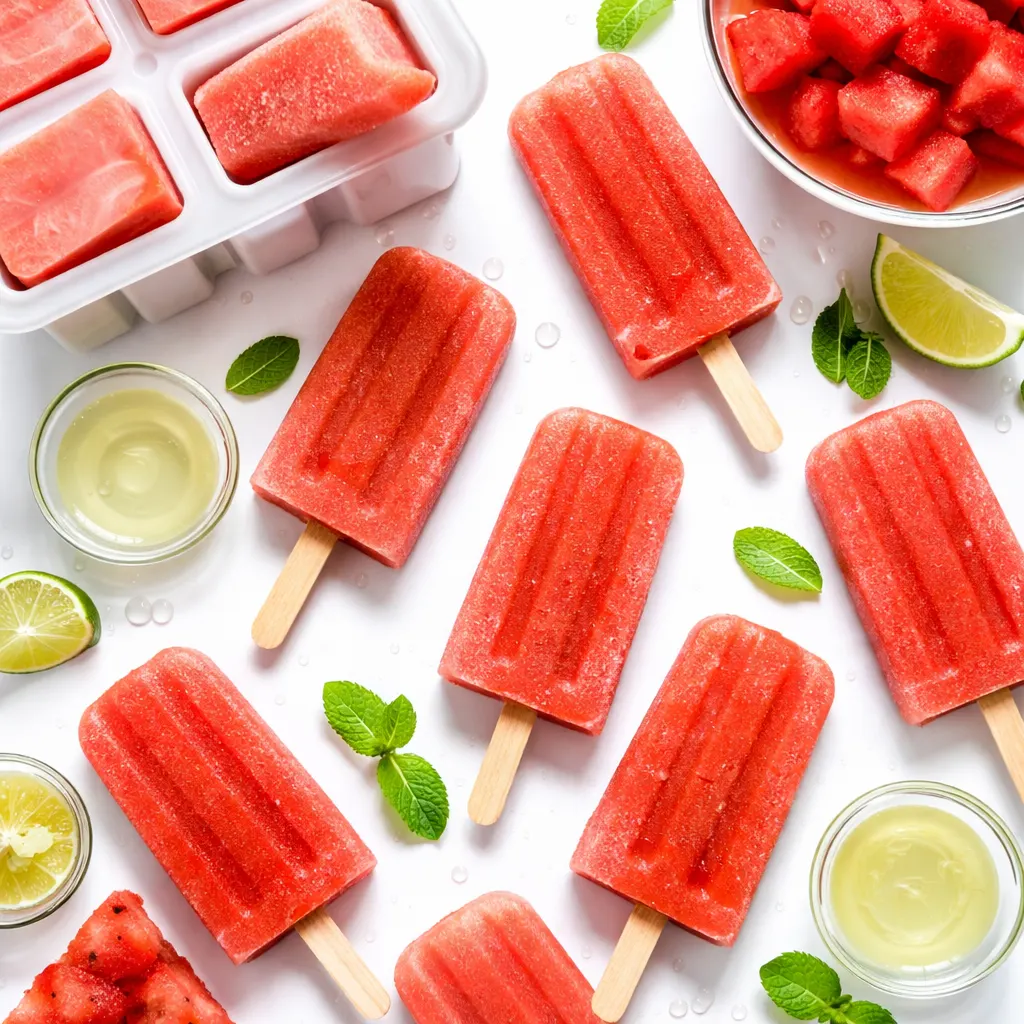
Here’s the thing about pure fruit popsicles: they freeze hard because water freezes harder than sugar or fat. The solution isn’t adding corn syrup or a bunch of processed sugar — it’s adding a small amount of something that lowers the freezing point and adds richness. Specifically: a little lime juice (for acid and structure) and a pinch of salt (for flavor depth and a smoother melt).
Salt is doing three things here: it suppresses bitterness, it enhances the natural sweetness of the melon, and it lowers the freezing point of the mixture just enough so that the popsicle isn’t a rock-hard ice cube. I know putting salt in a popsicle sounds like a mistake. It’s not. It’s the difference between a popsicle that’s just okay and one you text your sister about.
The other non-negotiable step? Straining the puree. Watermelon has those stringy white bits that don’t fully break down in a blender, and they turn into unpleasant little chewy crystals in the finished popsicle. A fine-mesh strainer fixes this in exactly 60 seconds. Skip it once and you’ll never skip it again.
The result is a popsicle that tastes intensely of watermelon — not watered-down watermelon water — and has a smooth, scoopable texture straight out of the freezer. No chipping a tooth on a rock of ice. No sad, pale, separated layers. Just pure, concentrated summer.
What You Need (The Short List)
- 4 cups cubed seedless watermelon (about 1/2 of a medium melon): This is the whole base. Make sure it’s ripe and sweet — the flavor concentrates when frozen, so if it’s bland now, it’ll be bland later. A good watermelon is heavy for its size, has a creamy yellow spot on one side (that’s where it sat on the ground ripening), and sounds hollow when you tap it. My kids love helping pick out the watermelon at the store — I tap it, they listen, and we make a whole production out of it. They’re wrong about the ripeness maybe 30% of the time, but it makes grocery shopping more fun.
- 2 tablespoons fresh lime juice (from about 1 lime): Don’t skip this. Lime does for watermelon what salt does for caramel — it makes everything taste more like itself. It brightens, it lifts, and it stops the sweetness from being cloying. Bottled juice works in a pinch but the fresh stuff really does make a noticeable difference here.
- 1-2 tablespoons maple syrup or agave (optional): If your watermelon is perfectly ripe, you genuinely don’t need this. But if it’s early June and you’re taking a chance on a melon that looked better than it turned out, a little sweetener guarantees a popsicle that tastes like candy. I only use this for the first batch or two of the season. By August, the melons do all the work and I leave it out entirely.
- Pinch of salt (about 1/8 teaspoon): The unsung hero. It deepens the flavor and helps the popsicle thaw slightly faster on your tongue, releasing more flavor. Don’t worry — you won’t taste the salt. You’ll just taste a better watermelon popsicle and wonder why yours are better than every other version you’ve tried.
The Setup (Bare Minimum, I Promise)
- Blender: Any blender works. A high-speed one will get it slightly smoother, but a regular one plus a good strainer is totally fine. I use a $40 Oster from Target and it’s never let me down.
- Fine-mesh strainer: This is non-negotiable for me. It catches the fibrous white bits that the blender just can’t break down. A regular colander has holes that are too big — you need a fine-mesh one.
- Popsicle molds: I’ve tried the expensive silicone molds from Sur La Table and the $6 plastic ones from Target. The cheap ones work just as well. The key is running them under warm water for a full 15 seconds before you try to unstick them. I use a 10-mold silicone set from Amazon that cost $12 and has lasted three summers so far.
- Popsicle sticks: If your molds don’t come with sticks, get the wooden ones. They’re about a dollar at any grocery store.
One note: if you don’t have molds at all, you can use small paper cups (5-ounce size works perfectly). Pour the puree in, cover the top with foil, and poke the stick through the foil. The foil holds the stick in place while it freezes. It’s not as pretty in photos, but it works exactly the same way.
Let’s Make Them (10 Minutes of Work, Then Patience)
This is the easiest method I’ve found after way too many batches of icy disappointment. Read through once, then let your kids help you pour — it’s that simple.
Prep the watermelon: Cut the watermelon into rough 1-inch cubes. Try to leave behind as many of the white seeds as you can. You don’t need to be perfect about it — the strainer in step 2 will catch anything you miss.
- Blend: Add the watermelon cubes, lime juice, maple syrup (if using), and salt to the blender. Blend on high for 30-45 seconds until completely smooth. The puree should look bright pink and almost frothy — that air incorporation helps with the final texture. If your blender is weak, blend for an extra 30 seconds. You shouldn’t see any chunks of watermelon flesh. (📸 Photo tip: The puree should be vivid neon pink with a light foam on top. It should look drinkable — which it is, honestly. I always save a little for the kids to taste before it goes into the molds. They call it “watermelon smoothie” and it’s gone before the popsicles are even frozen.)
- Strain: Set your fine-mesh strainer over a large liquid measuring cup or a bowl with a spout. Pour the puree through the strainer, using a spatula to gently stir and push it through. You’ll be left with a pale, fibrous pulp in the strainer — discard it. This step takes about 1 minute and is hands-down the difference between a perfect popsicle and one with weird stringy bits that make you question your life choices. I skipped it my first three times. Every single time, I regretted it when I bit into a little chewy piece. Learn from my mistakes. (📸 Photo tip: The strained puree should be completely smooth and uniform in color. No flecks of white, no separation.)
- Pour: Carefully pour the strained puree into your popsicle molds, leaving about 1/4 inch of headroom at the top. The liquid expands as it freezes, so if you fill them to the brim, the lids will pop off and you’ll have a sticky mess in your freezer. I learned this one the hard way. If your mold has a lid, attach it and insert the sticks. If not, set the molds in the freezer for about 1 hour, then insert the sticks when the puree has thickened to a slushie consistency.
- Freeze: Place the molds on a flat, level surface in the coldest part of your freezer. Freeze for at least 6 hours, ideally overnight. The longer they freeze, the harder they’ll be, so 6 hours is the minimum for a solid pop. If you’re impatient (I get it), 4 hours will give you a soft, slushy popsicle — which is also delicious, just not as sturdy. My kids check the freezer approximately 47 times in the first hour. I don’t blame them. I do the same thing.
- Unmold and serve: Run the outside of the mold under warm tap water for about 15 seconds. Gently wiggle the stick — the popsicle should slide right out. If it doesn’t, give it another 5 seconds under the water. Don’t yank it — you’ll end up with a stick in your hand and a popsicle still stuck in the mold. Serve immediately, or wrap individually in plastic wrap and store in a freezer bag for later. I prep a few in little bags so the kids can grab one from the freezer without having to ask me for help. It’s a small independence that makes them feel very grown up.
How I Meal Prep These for a Week of Summer
I make a double batch on Sunday afternoons and we’re set for the week. The puree itself can be made a day ahead and stored in the fridge — just give it a quick stir before pouring into the molds. This is one of those rare recipes where the prep is genuinely minimal and the payoff is enormous.
- Fridge: Prepared, un-poured puree keeps for 2 days in a sealed container. Give it a good stir before using, as the solid bits will settle at the bottom.
- Freezer: Frozen popsicles keep beautifully for up to 3 months. After they’re fully frozen (at least 6-8 hours), pop them out of the molds and transfer them to a freezer-safe zip-top bag. They won’t stick together if they’re fully frozen. Label the bag with the date so you remember what’s in there come September.
- Reheat: Not applicable here, but if they feel too hard straight out of the freezer, let them sit on the counter for 2-3 minutes before serving. They soften just enough to be perfect.
Things I Learned After Making These About 20 Times
- Taste the puree before freezing: This is your only chance to adjust the sweetness or acid. If the puree tastes flat, add another squeeze of lime. If it’s not sweet enough, add a little maple syrup. Freezing dulls sweetness, so aim for slightly sweeter than you think you want. If it tastes perfect now, it will taste just barely sweet enough frozen. Trust me on this one.
- Don’t overfill the molds: I know it’s tempting to fill them to the very top, but liquid expands when it freezes. If you ignore this advice (like I did the first three times), you’ll be cleaning watermelon puree out of your freezer at 10 PM. Leave that 1/4 inch. It matters.
- Use a small funnel for easy pouring: If your blender pitcher doesn’t have a spout, use a small funnel to get the puree into the molds without spilling it everywhere. I resisted buying a funnel for years and just made a mess every single time. A 2-pack of funnels is $5 on Amazon. I finally bought one and my countertops have never been cleaner.
- If you want a creamier texture, add a little coconut milk: Replace 1/4 cup of the watermelon puree with full-fat coconut milk. It adds a subtle tropical flavor and makes the texture even richer — almost like a creamy ice pop. It’s not strictly a watermelon popsicle at that point, but it’s a delicious variation I make when I want something a little more decadent. My kids call these the “beach popsicles” and they’re gone even faster than the regular ones.
- Patience on the stick placement: If you’re using sticks that don’t come attached to a lid, wait about 1 hour before inserting them. At that point, the puree has thickened to a slushie consistency and the stick will stand straight up. Insert them too early and they’ll lean, giving you popsicles that are thicker on one side. It still tastes the same, but it looks a little wonky.
Ways to Make Them Your Own (For Every Mood and Audience)
- Spicy Watermelon: Muddle a thin slice of jalapeño in the lime juice before adding it to the blender. The heat is subtle and works surprisingly well with the sweet melon. I do this for the adult batch after the kids go to bed. It’s the perfect end-of-summer dinner party move.
- Watermelon Mint: Add 5-6 fresh mint leaves to the blender with the watermelon. Strain as usual. The mint gives it a cool, garden-fresh finish that’s incredibly refreshing on a 95-degree day. This is my personal favorite version — I grow mint on my fire escape and it’s the whole reason I started making these in the first place.
- Watermelon Basil: Same technique as the mint, but use 4-5 fresh basil leaves. It sounds like it shouldn’t work. It’s not weird — it’s sophisticated in a way that surprises everyone who tries it. Serve these at a dinner party and people will think you did something very complicated.
- Boozey Adult Popsicles: Replace 2 tablespoons of the watermelon puree with white rum, vodka, or even tequila. The alcohol lowers the freezing point significantly, so they’ll be soft and slushy rather than hard. Great for a summer party, but label these very clearly so you don’t hand one to a kid by accident. Ask me how I know that’s an important step.
- Strawberry Watermelon: Replace 1 cup of the fresh watermelon with 1 cup of frozen strawberries (no need to thaw). It makes the color even deeper — almost electric red — and adds a tartness that’s really lovely alongside the sweet melon. This is the version my youngest asks for every time. She’s convinced it’s pinker and therefore better.
Questions I Get Every Time I Post These
Q: Why did my popsicles turn out icy and hard instead of creamy?
A: Ugh, I’ve been there and it’s so frustrating. The most common reason is using a very watery watermelon or skipping the sweetener. A little sugar, maple syrup, or even agave lowers the freezing point and keeps the texture smooth. If your watermelon was on the bland or watery side, add an extra tablespoon of maple syrup next time. You can also sub in 1/4 cup of full-fat coconut milk for some of the puree — the fat helps a lot. Even with those adjustments, these will never be as creamy as a dairy-Based popsicle, but they should be scoopable, not crunchy.
Q: Can I use a different sweetener?
A: Yes, absolutely. Honey works great — it has a slightly floral note that pairs well with melon. Agave is perfect because it’s liquid and dissolves instantly without needing heat. I’d avoid granulated white sugar unless you dissolve it in a little warm water first to make a simple syrup, because it won’t dissolve properly in cold watermelon puree and you’ll end up with a grainy texture. Stevia and monk fruit work in theory, but I haven’t tested them, so I can’t vouch for the result.
Q: How long do they last in the freezer? Can I make a big batch?
A: They last about 3 months in a tightly sealed freezer bag. After that, they start to develop freezer burn and the flavor dulls. I always make a double batch in July when watermelon is at its absolute peak, and we’re usually still finding a stray pop in the back of the freezer in October. It’s a happy surprise every time. Just make sure the bag is sealed tightly — watermelon picks up freezer odors easily, and nobody wants a popsicle that tastes faintly of frozen pizza.
Q: What do you serve with these?
A: Honestly, they’re a standalone dessert or snack 90% of the time in my house. But if I’m doing a summer party, I serve them alongside grilled chicken or burgers and a big tomato and cucumber salad. They’re the perfect palate cleanser between bites of savory food. My kids just eat them on the back steps with pool water dripping all over their hands — bare feet, wet hair, the whole scene. That’s the energy these are made for. Pure, uncomplicated summer.
Q: Can I use frozen watermelon?
A: Yes, but it changes the texture slightly and you need to adjust a little. Frozen watermelon releases more water when it thaws, which can make the puree watery. If you’re starting with frozen cubes, add 2 tablespoons less watermelon and an extra tablespoon of maple syrup to compensate for the dilution. You’ll also want to blend it a little longer to make sure it’s completely smooth, since frozen chunks are harder to break down.
More Recipes My Family Makes on Repeat
If you’re in a summer recipe groove like we are, here are a few others that get the same reaction at our table — the kind where someone asks “can you make this again tomorrow?”
- Creamy Coconut Lime Popsicles — The tropical cousin to these watermelon pops. Just as easy, just as good, and the texture is even creamier thanks to the coconut milk.
- Grilled Chicken with Watermelon Salsa — The perfect way to use up the other half of that watermelon. It’s on the table in 25 minutes and tastes like summer on a plate.
- No-Churn Mango Ice Cream — Another no-fuss frozen treat that doesn’t require an ice cream maker. My kids fight over the last scoop every single time.
These are the popsicles that make summer feel like summer. The ones you make once and then get asked for at every barbecue, every pool day, every “mom, I’m hot” plea from a sticky kid in July. I hope they become a staple in your freezer the way they have in mine. They’re the simplest recipe I’ve ever developed, and honestly, they might be the one I’m most proud of — because they made my kids’ eyes light up in a way that store-bought popsicles never have.
If you try them, drop a comment below and let me know how they turned out. I love hearing about your kitchen victories, big and small. And if you’re on Pinterest, tag me so I can see your popsicles — there’s something deeply satisfying about seeing a freezer full of bright red popsicles that you made with your own hands.
📌 Save this 3-ingredient watermelon popsicle recipe for your next summer party, pool day, or hot weeknight when the kids need a cool treat that’s actually good for them — no artificial colors, no corn syrup, just real fruit and a little lime.
The Watermelon Popsicles You’ll Make All Summer: 3 Ingredients, Zero Icy Disappointment
Equipment
- Blender
- Fine-Mesh Strainer
- Popsicle molds
- Popsicle sticks
- Funnel (optional)
Ingredients
- 4 cups seedless watermelon, cubed (about 1/2 medium melon)
- 2 tablespoons fresh lime juice (from about 1 lime)
- 1-2 tablespoons maple syrup or agave (optional, for sweetness)
- 1/8 teaspoon salt
Instructions
- Prep the watermelon: Cut the watermelon into rough 1-inch cubes. Try to leave behind as many of the white seeds as you can. The strainer later will catch any you miss.
- Blend: Add the watermelon cubes, lime juice, maple syrup (if using), and salt to the blender. Blend on high for 30-45 seconds until completely smooth. The puree should look bright pink and almost frothy.
- Strain: Set a fine-mesh strainer over a large liquid measuring cup or bowl. Pour the puree through the strainer, using a spatula to gently stir and push it through. Discard the fibrous pulp left in the strainer.
- Pour: Carefully pour the strained puree into popsicle molds, leaving about 1/4 inch of headroom at the top. If your mold has a lid, attach it and insert the sticks. If not, freeze for about 1 hour until slushy, then insert the sticks.
- Freeze: Place the molds on a flat, level surface in the coldest part of your freezer. Freeze for at least 6 hours, ideally overnight.
- Unmold and serve: Run the outside of the mold under warm water for about 15 seconds. Gently wiggle the stick to release. Serve immediately or wrap individually and store in a freezer bag for up to 3 months.
Notes
Related Recipes:
 The Perfectly Pillowy Chocolate Chip Milk Buns (Tangzhong Method)
 Bagel Breakfast Sliders That Taste Like a Diner Breakfast — in 25 Minutes
 Cheesy Hamburger Casserole Bake That’s Ready in 40 Minutes (No Canned Soup Here)
 Creamy Garlic Tagliatelle That Looks Like a Restaurant Dish in 20 Minutes
 Texas Roadhouse Style Baked Salmon with Sweet and Savory Glaze — Ready in Under 30 Minutes
 Easy Italian Meatloaf That’s Actually Juicy (Not Dry) — in 1 Hour