

This Starbucks iced coffee copycat costs about 80 cents a glass and tastes close enough to the real thing that I’ve stopped feeling guilty about my drive-thru habit. Actually, I’ve stopped the drive-thru habit entirely. That’s what this recipe does to people.
The short version: Cold brew concentrate you make overnight, vanilla sweet cream you whisk in thirty seconds, and ice that doesn’t water everything down.
I’ve made this roughly forty times since May. My sister visits twice a year and the first thing she does when she lands is open my fridge — not for the food. For this. My neighbor texts me when she’s out of cold brew, which I’ve decided is flattering and not a demand for shared custody of my jar.
- Serves: 2 tall glasses (easily doubled)
- Hands-On Time: 10 min | Total Time: 10 min + 12–18 hrs hands-off steep
- Difficulty: Easy — the waiting is the hardest part
- Cost per serving: ~$0.80
- Calories: ~130 per tall glass, depending on how generous you are with the cream
- Dietary Notes: Vegetarian, gluten-free. Dairy-free version in the swaps below.
(Photo above: two tall clear glasses of cold brew with a thick ribbon of vanilla sweet cream still floating on top, shot at eye level in morning light on a white countertop — you can see the amber coffee, the pale cream band, and big cubes of ice stacked beneath.)
The Two Decisions That Make This Taste Like Starbucks
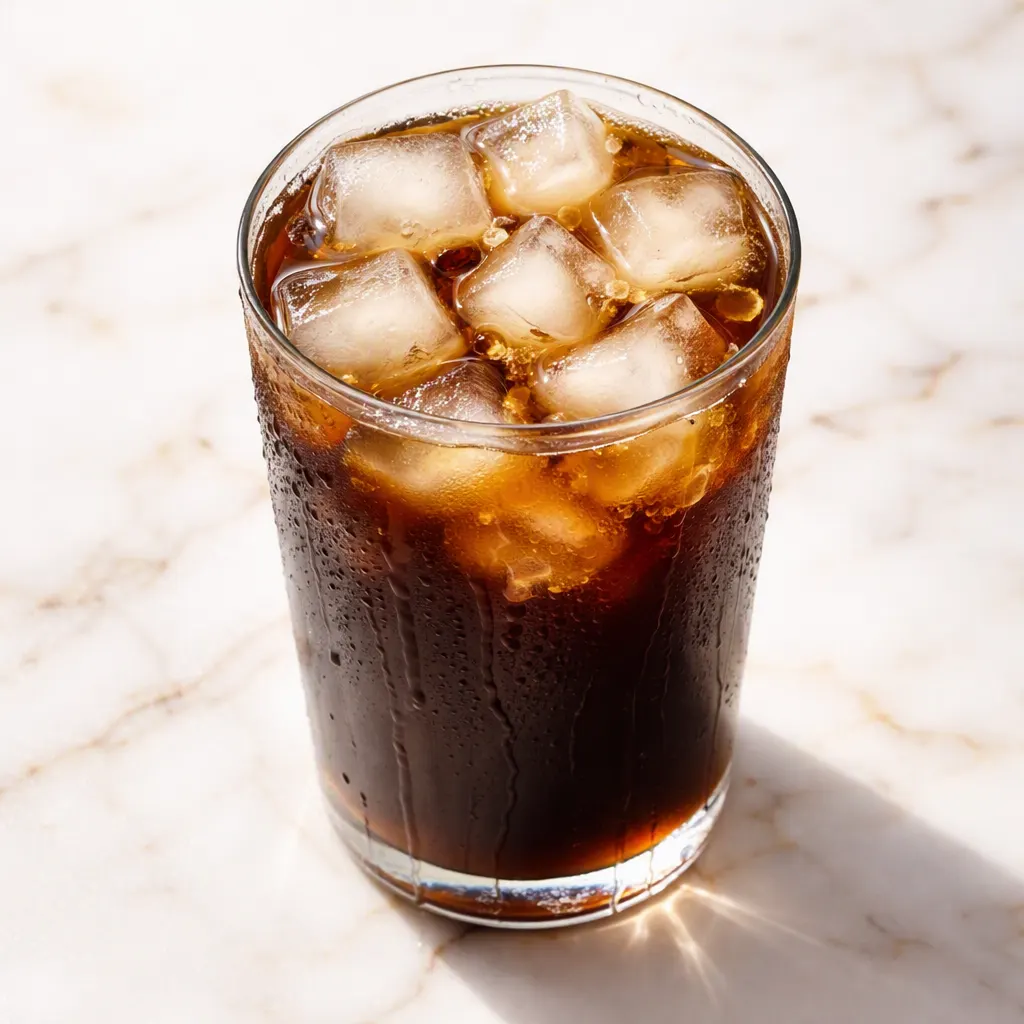
There’s no espresso machine required, no barista magic, no fifteen-step ritual. The Starbucks iced coffee copycat formula is basically two moves: a strong cold brew base and a cream layer that knows how to behave. Get those right and the rest is just assembly.
The first decision is cold brewing instead of hot-brewing and pouring over ice. Iced coffee — the kind that goes watery after two sips — is hot coffee that has been diluted by melting ice. Cold brew sits in cold water for twelve hours, so it comes out smooth, strong, and already cold. The ice in your glass becomes a garnish instead of a culprit. I learned this the way everyone learns it: by making five weak, sad glasses of iced coffee, and then finally trying the overnight version.
The second decision is the sweet cream. It’s not flavored cream mixed into the coffee. It’s cream, milk, and vanilla syrup lightly whisked so it floats on top in a separate layer. You get coffee first, then sweet vanilla cream as the drink moves down the glass. The whole experience — the way it tastes, the way it looks sitting on a counter — comes from that band of cream. Skip it and you’ve made cold coffee. Make it and you’ve made the drink.
What Goes In (Plus My Honest Notes)
- 1 cup (90 g) coarsely ground coffee: This is the whole game. Use a medium-dark roast and grind it like you would for a French press — coarse, with visible pieces. Finely ground coffee turns cold brew cloudy and bitter. I use a standard drip roast and it works beautifully; no need to buy anything fancy.
- 4 cups (960 ml) cold water: Filtered if your tap has personality. I keep a pitcher of filtered water in the fridge for exactly this and nothing else.
- 1/2 cup (120 ml) heavy cream: The base of the sweet cream. Keep it cold; it whisks up faster and pours silkier. My nephew calls the finished cream “fancy milk” and has asked me to bottle it. I have considered it.
- 1/4 cup (60 ml) 2% or whole milk: This softens the heavy cream so it pours instead of scoops. No need to be precise — a splash in the right direction is the whole assignment.
- 2 tablespoons (30 ml) vanilla syrup: Store-bought works. Homemade is embarrassingly easy: simmer 1 cup water with 1 cup sugar until dissolved, stir in 2 teaspoons vanilla extract, and cool. Do not use granulated sugar in the drink itself — it sinks to the bottom and you get a bitter coffee with a weirdly sweet last sip. That’s the opposite of the experience we’re building.
- Ice: Large cubes if you have them. The less surface area, the slower the melt, the stronger the drink stays. I freeze a tray of big cubes just for this — it’s the least dramatic thing I do all week.
Tools You Need (Nothing Fancy)
- A large jar or pitcher with a lid: Quart-size is fine for this batch; I use a half-gallon jar with a clamp lid.
- A fine-mesh strainer lined with a paper coffee filter, or a nut milk bag: The nut milk bag is the upgrade that changed my cold brew life. Zero sediment, zero patience required.
- A small bowl or 2-cup measuring cup: For the sweet cream, so you can pour it in a thin, controlled ribbon.
- A whisk: Or a jar with a lid and a few aggressive shakes. I’ve done both. The jar shake works.
- Tall clear glasses: The layers are the point. I’m a grown woman and I still take a photo every single time I make one of these.
Let’s Make It (Five Minutes Tonight, Five in the Morning)
The active time is ten minutes total, split across two moments. Tonight you set the cold brew. Tomorrow you finish the drink. Read through once so you know what’s coming — it’s not complicated, but it does require patience for the overnight part.
- Combine the coffee and water: Add the ground coffee to your jar, pour in the cold water, and stir once. Everything should be wet. Put the lid on and leave it on the counter at room temperature. (📸 Photo tip: within an hour the water turns deep amber and the grounds settle toward the bottom — that’s the color you’re looking for.)
- Wait 12 to 18 hours: That’s the entire step. Don’t stir it again, don’t peek too much, and don’t go past 20 hours — the flavor starts getting harsh and dusty. I start mine before bed and strain it after breakfast. Overnight timing is the whole trick.
- Strain it: Line your strainer with the paper filter or set the nut milk bag over a bowl or clean jar. Slowly pour the cold brew through. You should end up with a deep, clear concentrate — if it looks milky or cloudy, your grind was too fine. It’ll still taste fine; it just won’t be as smooth. (📸 Photo tip: the strained concentrate should look like iced tea with a pulse — dark, clear, and rich.)
- Make the syrup if you’re going the homemade route: Simmer 1 cup water and 1 cup sugar until the sugar dissolves, stir in 2 teaspoons vanilla extract, and let it cool. Store it in the fridge and it’ll keep for weeks. Or skip this entirely and use a good store-bought vanilla syrup.
- Make the sweet cream: In your measuring cup, combine the heavy cream, milk, and 2 tablespoons of the vanilla syrup. Whisk for 15 to 20 seconds — just until it thickens slightly and pours like silk. You’re not making whipped cream; you’re making a drink element that knows how to behave. (📸 Photo tip: the cream should fall from the whisk in a smooth ribbon, not in stiff peaks — that’s the sweet spot.)
- Assemble the glasses: Fill each tall glass with ice. Pour 1/2 cup (120 ml) of cold brew concentrate over the ice, then add 3/4 cup (180 ml) cold water. If you want it sweeter, add a teaspoon or two of vanilla syrup to the coffee before the cream — this is the moment to do it, while you can still stir it.
- Pour the cream over the back of a spoon: Hold a spoon just above the surface of the drink and pour the sweet cream over its back. The cream spreads and settles in a layer on top. Pour it straight from the cup and it falls through, mixing everything into a brown latte. Delicious, but not the look. (📸 Photo tip: don’t stir yet. The layered glass is the photo. Take it before the first sip.)
- Stir, then drink: Give it a proper stir until the drink turns a caramel color. The cream ribbons down through the coffee and the whole thing becomes the drink you’ve been trying to justify paying five dollars for. Sit down. Do not rush this one.
How I Batch This for the Week
Sundays, I make a double batch of cold brew and a jar of sweet cream. That’s my entire Sunday contribution to the week’s kindness. Come Thursday, I’m still drinking a glass that tastes like I thought ahead — because I did.
- Fridge: Cold brew concentrate keeps 5 to 7 days in a sealed jar. The sweet cream keeps about 4 days — it settles, so whisk it or shake it hard before each pour.
- Freezer: Yes, the concentrate freezes beautifully. Pour extra into an ice cube tray and pop those cubes into future glasses. Coffee ice that doesn’t dilute — that’s the move.
- Reheat: It’s iced coffee, so reheating isn’t the point — but the concentrate is also excellent with hot water and a splash of milk in the winter. I save a little every batch for the cold-weather version. Same drink, different season.
Things I Learned the Hard Way (So You Don’t Have To)
- Grind coarse. Coarser than you think: The most common cold brew failure is cloudy, bitter coffee, and it’s almost always a fine grind. French press grind is the texture you’re after. Even if you mess this part up, the coffee will still taste good — it’ll just look dusty. I’ve done it. It’s fine. It’s still better than the drive-thru.
- Ice is a structural ingredient, not a garnish: Small ice melts fast. Big cubes last. The ratio of ice to glass is what keeps the last quarter of the drink as strong as the first. This is a small detail that does an outsized amount of work, which is my favorite kind of detail.
- The spoon is the secret to the layer: Pour the sweet cream against the back of a spoon, half an inch above the surface of the drink. Let the cream spread on its own. Trust the process — it takes about four seconds and the result is the difference between a drink that looks like a drink and a drink that looks like the picture!
- Do not stir before the photo: The layered glass is the whole impression. Take the photo first. Then stir. If you’re making this for guests, pour the cream at the table so they see the band before it gets folded in. That moment is worth more than any garnish I’ve ever placed.
Swaps That Actually Work
- Dairy-free: Use coconut cream in place of the heavy cream and oat milk in place of the milk. It won’t hold quite the same thick ribbon, but it layers beautifully and tastes like a vacation. This is the version I make for my friend Dana, who asks for it by name.
- Caramel: Add 1 to 2 tablespoons of caramel syrup to the coffee before the cream, then drizzle caramel over the cream layer. It tastes like a dessert you can drink in the morning, which I refuse to apologize for.
- Mocha: Stir 1 to 2 tablespoons of chocolate syrup into the concentrate before assembling. A tiny pinch of salt in the sweet cream makes it taste like dark chocolate instead of hot cocoa.
- Less sweet: Use half the vanilla syrup in the sweet cream and skip the syrup in the coffee entirely. This is my everyday version — I like the coffee to have room to be coffee.
- Cold weather: Skip the ice, add hot water to the concentrate, and pour the sweet cream on top. Same proportions, warm, and suddenly it’s a completely different drink. I do this from November until March and it has never once disappointed me.
Questions People Keep Asking Me About This
Q: Why does my iced coffee always taste watered down?
A: Ugh, been there. It’s almost always because you’re pouring hot-brewed coffee straight over ice. The ice melts, and then you’re drinking coffee-flavored water with nowhere to run. The cold brew concentrate is already cold and strong, so the ice simply keeps it cold instead of watering it into regret. One overnight batch and this problem is gone. You’ve got this.
Q: Can I make this dairy-free?
A: Yes, and I’ve tested it so I can hand it to you with a clear conscience. Coconut cream for the heavy cream, oat milk for the milk. It won’t sit in quite the same precise layer, but it’s still a beautiful glass and it tastes great. If you want a thicker dairy-free layer, use coconut cream straight from the can without whisking it too much.
Q: How long does the cold brew last? Can I freeze it?
A: The concentrate stays good in a sealed jar in the fridge for up to a week. The sweet cream keeps about 4 days. And yes, freeze the concentrate — pour it into an ice cube tray and use those cubes in your next glass. Coffee ice that doesn’t dilute. It’s the best trick in this whole recipe.
Q: What do you actually serve with this?
A: A toasted everything bagel with scallion cream cheese is my non-negotiable pairing. On weekends, I pour a glass and pull a slice of lemon olive oil cake from the freezer. It’s less a pairing and more a mood, but I stand by it completely.
More Recipes We Make on Repeat
If this one lands in your regular rotation, here are a few others that get the same treatment in my kitchen:
- [INTERNAL LINK PLACEHOLDER: Brown Butter Banana Bread] — the slice that turns this iced coffee into a full morning ritual.
- [INTERNAL LINK PLACEHOLDER: Sheet Pan Egg Bites] — the protein you want before a second glass.
- [INTERNAL LINK PLACEHOLDER: Lemon Olive Oil Cake] — weekend afternoon, glass of cold brew, one slice. That’s the whole plan.
The first time you pour the cream in and watch it settle into its own band between the glass and the coffee, you’ll get it. The reason to make this at home isn’t just the 80 cents — it’s the quiet minute with the glass in your hand before the day starts asking things of you.
If you try it, drop a comment below and tell me how your layers held up. Or tag me on Pinterest with your glass — I’m collecting receipts.
📌 This Starbucks iced coffee copycat recipe costs 80 cents a glass and tastes like the real thing — save it for your next Sunday batch brewing.

Starbucks Iced Coffee Copycat (80 Cents a Glass)
Equipment
- Large jar or pitcher with lid
- Fine-Mesh Strainer
- Paper coffee filter or nut milk bag
- Small bowl or 2-cup measuring cup
- Whisk or jar with lid
- Tall clear glasses
- Spoon
Ingredients
For the Cold Brew
- 1 cup coarsely ground coffee (90 g), medium-dark roast
- 4 cup cold water, filtered if possible
For the Sweet Cream
- 1/2 cup heavy cream, cold
- 1/4 cup 2% or whole milk
- 2 tablespoons vanilla syrup, store-bought or homemade
For the Homemade Vanilla Syrup (optional)
- 1 cup water
- 1 cup granulated sugar
- 2 teaspoons vanilla extract
For Serving
- as needed ice (large cubes preferred)
Instructions
- Add the ground coffee to your jar, pour in the cold water, and stir once so everything is wet. Cover and leave it on the counter at room temperature.
- Let it steep for 12 to 18 hours. Don’t stir again and don’t go past 20 hours or the flavor turns harsh and dusty.
- Line a fine-mesh strainer with a paper coffee filter or set a nut milk bag over a bowl or clean jar. Slowly pour the cold brew through. The concentrate should look dark, clear, and rich — not cloudy.
- If making homemade vanilla syrup, simmer 1 cup water with 1 cup sugar until the sugar dissolves, stir in 2 teaspoons vanilla extract, and let it cool. Store-bought vanilla syrup also works.
- In a measuring cup, combine the heavy cream, milk, and 2 tablespoons vanilla syrup. Whisk for 15 to 20 seconds until it thickens slightly and pours like silk. You are not making whipped cream; you are making a drink element that knows how to behave.
- Fill each tall glass with ice. Pour 1/2 cup (120 ml) cold brew concentrate over the ice, then add 3/4 cup (180 ml) cold water. Add extra vanilla syrup to the coffee now if you want it sweeter.
- Hold a spoon just above the surface of the drink and pour the sweet cream over its back so it spreads and settles in a layer on top. Don’t stir yet — the layered glass is the photo.
- Stir until the drink turns a caramel color and the cream ribbons down through the coffee. Sit down. Do not rush this one.
Notes
Related Recipes:
 Cheesy Hamburger Casserole Bake That’s Ready in 40 Minutes (No Canned Soup Here)
 Texas Roadhouse Style Baked Salmon with Sweet and Savory Glaze — Ready in Under 30 Minutes
 Moist Lemon Zucchini Bread with a Crunchy Lemon Sugar Top
 Strawberry Shortcake Rice Krispie Treats That Actually Taste Like Shortcake — Ready in 15 Minutes
 Blueberry Oatmeal Cookies That Stay Soft for Days — in Under 30 Minutes
 Air Fryer Chicken and Vegetables That Don’t Taste Like a Regret (30 Minutes, One Pan)