
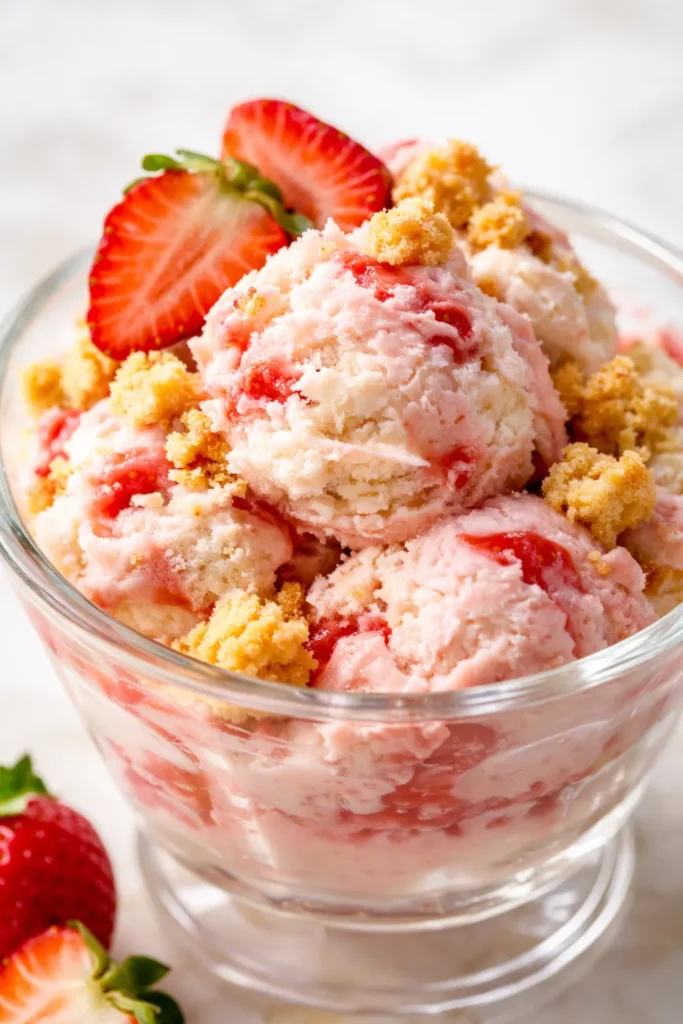
The first time I made this, I ate it for breakfast. Not because I planned to—but because I opened the container to “test” the texture and suddenly it was noon. This is that kind of recipe. A no-churn strawberry shortcake ice cream that skips the ice bath and the salt-and-bag tricks in favor of something simpler: sweetened condensed milk and properly whipped cream.
The strawberries get macerated with a pinch of salt and a whisper of balsamic (you won’t taste it, you’ll just wonder why yours tastes more “strawberry” than anyone else’s), and the shortcake pieces are toasted so they stay chewy-firm instead of dissolving into soggy mush. It looks like a pint you paid twelve dollars for. It costs about half that to make.
The short version: Twenty minutes of hands-on work, six hours in the freezer, and you have a pint of strawberry shortcake ice cream that stays soft and scoopable straight from the container.
I’ve made this version forty times across two apartments and three different freezers. It works every time.
- Serves: 8 as dessert
- Hands-On Time: 25 min | Total Time: 6 hours 25 min (includes freezing)
- Difficulty: Easy — if you can whip cream, you can make this
- Cost per serving: ~$1.05
- Calories: ~420 per serving
- Dietary Notes: Naturally gluten-free adaptable with GF shortbread
(Photo above: A single scoop of strawberry shortcake ice cream in a matte white bowl, loose macerated berries and toasted shortbread pieces scattered on the linen beneath it. Natural light from a west-facing window, mid-afternoon. The ice cream has a pale pink hue and visible dark red berry ribbons throughout.)
The Trick That Changes the Texture
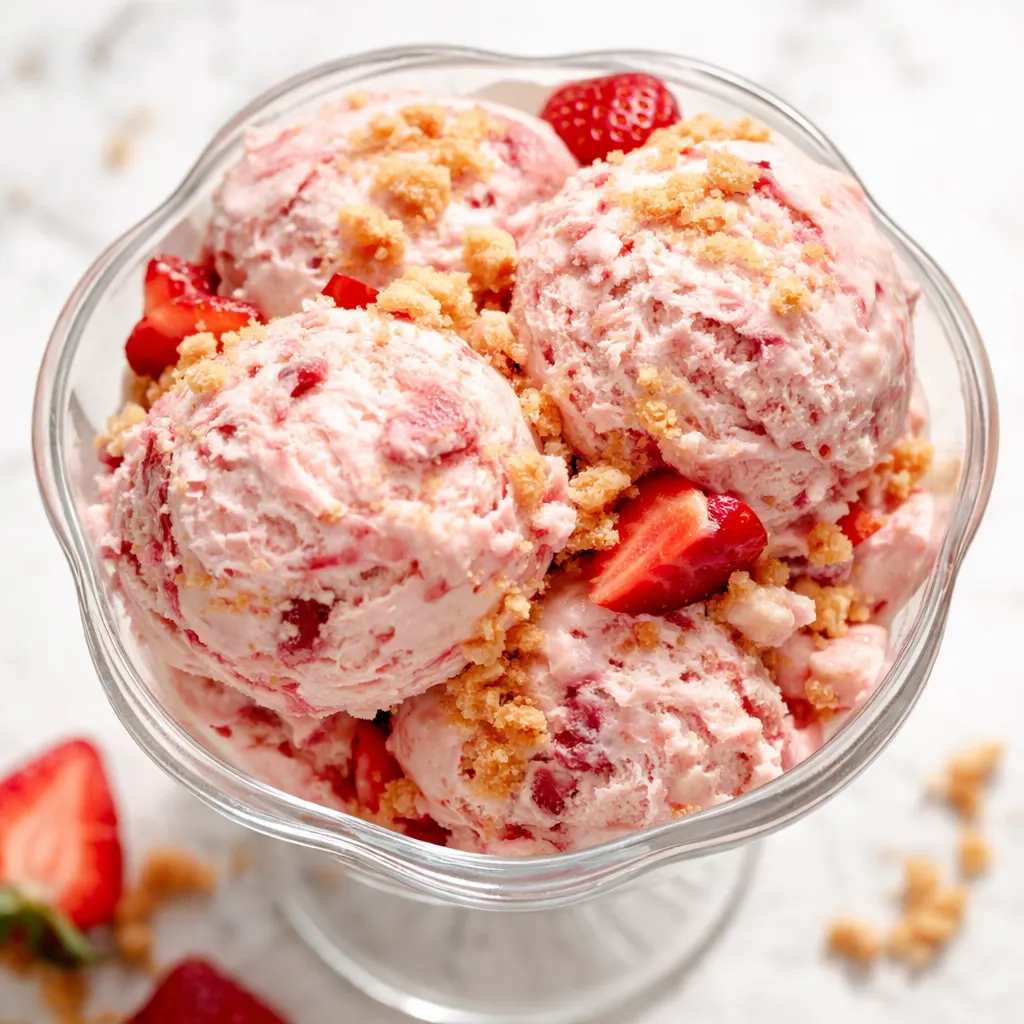
Most no-churn recipes give you a solid block of ice cream that needs to sit out for fifteen minutes before you can dent it. This one doesn’t. The macerated strawberries do double duty—they flavor the cream and their natural pectin helps keep the scoopability loose and silky straight from the freezer.
The other non-negotiable move is toasting the shortbread. I learned this the hard way after a batch of soggy, sad cake crumb ice cream. A few minutes in the oven draws out the butter and creates a crisp edge that doesn’t turn to mush when it hits the cream. It stays distinct. Every bite has a cold creamy part and a chewy-crisp part. That contrast is the whole point.
The balsamic in the berry syrup isn’t a gimmick. It rounds the sugar so the ice cream doesn’t taste like candy. No one will guess it’s there. They’ll just ask what makes yours different.
Everything You Need (And a Few Notes From Me)
- 1 lb fresh strawberries (about 3 cups), hulled and quartered: Fresh berries macerate better than frozen because they hold their shape. Toss them with sugar and let them sit. They will release a shocking amount of juice. That juice is the flavor base for the entire ice cream. Don’t skip the maceration step—if you do, you’ll have bland ice cream with frozen chunks of berry.
- 1/2 cup granulated sugar: Just enough to draw the moisture out without making it cloying.
- 1 tbsp balsamic vinegar: I know it sounds weird. It’s the thing that makes people ask “what is that?” They won’t guess it, but they’ll notice the depth. My husband thought I was overcomplicating it until he tried a batch without it and asked why it tasted flat.
- 1 can (14 oz) sweetened condensed milk: The base of almost every good no-churn recipe. It stabilizes the cream so you don’t need an ice cream maker.
- 2 cups heavy cream: Whip it to soft peaks. Stiff peaks sound better but they make the ice cream dense. We want airy. Cold cream whips faster—keep it in the fridge until the last minute.
- 1 tsp vanilla extract: The good stuff, not the imitation. It brightens the strawberry.
- 1 cup shortbread cookies (or pound cake), crumbled into 1/2-inch pieces: Toasted in the oven until they’re just barely golden. This is the texture anchor. Store-bought shortbread is fine—I do it all the time.
- Zest of 1 lemon (optional but encouraged): Adds a brightness that cuts through the cream. My kids don’t notice it, but it’s there.
What to Pull Out Before You Start
- Stand mixer or large bowl + hand mixer (whisk attachment works best)
- Loaf pan (9×5) or a freezer-safe container with a lid
- Baking sheet for toasting the shortbread
- Fine mesh sieve (for straining the strawberry syrup—optional but gives a smoother texture)
- Spatula for folding
Let’s Make It (You Can Do This)
Read through once. The hands-on time is about twenty minutes. The waiting time is the hard part.
Setup: Clear a shelf in your freezer so the loaf pan sits flat. Make sure the bowl and whisk for the cream are cold.
- Macerate the berries: In a medium bowl, combine the quartered strawberries, sugar, balsamic vinegar, and a tiny pinch of salt. Stir gently, then let sit at room temperature for 30 minutes. Stir once halfway through. (📸 Photo tip: After 30 minutes, you should see a deep red syrup pooling at the bottom of the bowl. The berries should look glossy and slightly shriveled. If it looks dry, let it sit another 10 minutes.)
- Toast the shortbread: While the berries macerate, preheat your oven to 350°F. Spread the crumbled shortbread pieces on a baking sheet in a single layer. Toast for 5-7 minutes, until they are just barely golden at the edges. They will darken slightly out of the oven. Let them cool completely on the sheet. (Do not skip this. It’s the difference between crunchy bits and soggy crumbs.)
- Strain the berries (optional but smart): Pour the macerated strawberries into a fine mesh sieve set over a medium bowl. Press gently with a spatula to release most of the syrup. Set the syrup aside. You will use the syrup in the ice cream base and the solids as a layer. If you prefer large berry chunks, skip the strain and use everything. I do it both ways depending on my mood.
- Whip the cream: In the bowl of a stand mixer (or using a hand mixer), beat the heavy cream on medium-high speed until soft peaks form. You’re looking for peaks that flop over when you lift the whisk, not stiff peaks that stand straight up. This takes about 3-4 minutes. (Overwhipping is the most common mistake. Stop when it looks like soft, billowy clouds.)
- Make the base: In a large separate bowl, whisk together the sweetened condensed milk, vanilla extract, lemon zest (if using), and the reserved strawberry syrup. Whisk until smooth and evenly pink.
- Fold: Add about a third of the whipped cream to the condensed milk mixture and fold gently with a spatula until mostly combined. Add the remaining whipped cream and fold until no white streaks remain. The mixture should look like a uniform, pale pink mousse. (📸 Photo tip: The texture at this stage should be thick and airy with no pockets of white. If you see streaks, fold two more times gently.)
- Layer it up: Spoon about a third of the ice cream base into your loaf pan. Scatter half of the reserved macerated strawberry solids and half of the toasted shortbread pieces over the top. Drizzle with a bit of extra syrup if you have it. Repeat with another third of the base, the remaining strawberries and shortbread, then finish with the final third of the base.
- Swirl (optional but pretty): Take a butter knife and gently swirl it through the layers once or twice. You want ribbons of berry and pockets of shortbread, not a uniform mix.
- Freeze: Cover the loaf pan with plastic wrap pressed directly onto the surface of the ice cream (this prevents ice crystals), then seal with foil or a lid. Freeze for at least 6 hours, preferably overnight. The wait is worth it.
Sunday Prep = Ice Cream All Week
This recipe is practically built for make-ahead logic. Make the full batch on Sunday afternoon and you have dessert all week long. The texture actually improves after day two—the flavors settle and the shortbread softens just enough to be chewy without losing its character.
- Fridge: The base doesn’t store well before freezing—freeze it immediately after assembling.
- Freezer: Wrap tightly and freeze for up to 2 weeks. After that, it’s still safe but the texture starts to get icy.
- Reheat/Softening: Let it sit at room temperature for 5-7 minutes before scooping. The silicone spatula trick works here—run it under hot water first for the perfect scoop.
Things I Learned the Hard Way So You Don’t Have To
- Soft peaks mean soft ice cream. I know it’s tempting to whip the cream until it’s stiff. Don’t. Dense ice cream is a direct result of overwhipped cream. Stop when it looks like soft, floppy clouds. It will look underdone—it’s not.
- Maceration is not optional. If you skip the sugar and the resting time, your strawberries will freeze into hard, icy chunks. The sugar draws the water out and replaces it with concentrated flavor. Trust the process.
- Toast the shortbread even if you’re short on time. It takes five minutes and it’s the single thing that keeps this from tasting like a melted milkshake. Toasted shortbread stays crisp against the cold cream. Untoasted shortbread turns into a paste. I have made this mistake twice. You don’t need to.
- Press plastic wrap onto the surface. Air exposure causes ice crystals. If you press the wrap directly onto the ice cream before freezing, you get a creamy texture with zero freezer burn. This makes a real difference after day three.
Ways to Make It Yours
- Gluten-Free: Use gluten-free shortbread cookies or crumbled vanilla wafers. Toasting them is still essential. My sister makes this for her daughter and swears by GF vanilla wafers—they stay crunchy longer.
- Extra Creamy: Add 2 tablespoons of mascarpone to the condensed milk mixture. It adds a subtle tang and a velvety texture. I do this when I want it to feel really indulgent.
- Balsamic Black Pepper: Add a generous pinch of cracked black pepper to the macerating strawberries. It sounds wild, but it makes the berry flavor sing. The kids won’t eat that version. That’s fine—more for you.
- Mixed Berry: Swap half the strawberries for raspberries or blackberries. Macerate them the same way. The color turns a deeper purple and the flavor gets more complex.
- Kid-Friendly Version: Skip the balsamic and lemon zest. Add an extra teaspoon of vanilla and toss some freeze-dried strawberries into the base. My kids call this the “pink stuff” and ask for it every weekend.
- Make-Ahead for a Party: Assemble the entire thing in a disposable foil loaf pan, wrap it tightly, and freeze it for up to a week. Bring it to the gathering, let it sit for 10 minutes, and scoop straight from the pan. No cleanup, no serving dish to track down later.
Questions People Always Ask About This Recipe
Q: Why did my ice cream turn out icy?
A: This usually happens when the condensed milk and cream aren’t fully integrated, or if the berries released too much water. Make sure your strawberries are macerated fully and you fold the two mixtures together until there are no white streaks. Also—and this matters—press the plastic wrap directly onto the surface before freezing. Air exposure is the enemy of creamy ice cream.
Q: Can I use frozen strawberries?
A: Yes, but thaw them completely in the fridge and save all the juice. Frozen berries actually macerate faster because they’re already broken down. I’ve done this mid-winter when fresh berries were pale and sad. Just drain off the excess liquid so the ice cream doesn’t get watered down.
Q: How long does this last in the freezer?
A: About two weeks in an airtight container with plastic wrap pressed onto the surface. It never lasts that long in my house, but theoretically. After two weeks, the texture starts to get a little icy. It’s still good—just not as scoopable.
Q: What do you serve this with?
A: It’s perfect on its own, but if you want to make it a full dessert: a shortbready slice of pound cake underneath, thin fresh strawberries on the side, and a drizzle of the leftover maceration syrup. My kids just want it in a bowl with extra berries on top. We’re both right.
More Sweet Things We Make on Repeat
If you liked this one, here are a few others that get the same reaction at our table:
- No-Bake Key Lime Pies — Tangy, creamy, and tastes like a summer afternoon.
- Sheet Pan Chocolate Chip Cookie Cake — The butterscotch notes from the brown butter make these disappear at every gathering.
- Brown Butter Peach Crisp — The jammy topping and crunchy oat crust is my go-to for the week peaches are perfect.
The best part of this recipe is that it looks and tastes like something you’d queue for at a specialty shop, but it’s just a bowl, a whisk, and a little patience. That’s my favorite kind of thing to make.
If you try it, drop a comment below—I love hearing how it goes for your family.
📌 No-churn strawberry shortcake ice cream that stays scoopable straight from the freezer — save this recipe for your next backyard get-together or lazy Sunday afternoon treat.
No-Churn Strawberry Shortcake Ice Cream
Equipment
- Stand mixer or hand mixer
- Loaf Pan (9×5 inch)
- Baking Sheet
- Fine-Mesh Sieve
- Silicone spatula
Ingredients
- 1 lb fresh strawberries, hulled and quartered
- 1/2 cup granulated sugar
- 1 tbsp balsamic vinegar
- 1 pinch salt
- 1 can (14 oz) sweetened condensed milk
- 2 cups heavy cream
- 1 tsp vanilla extract
- 1 cup shortbread cookies, crumbled into 1/2-inch pieces
- 1 lemon zest (optional)
Instructions
- Macerate the berries: In a medium bowl, combine the quartered strawberries, sugar, balsamic vinegar, and a tiny pinch of salt. Stir gently, then let sit at room temperature for 30 minutes. Stir once halfway through.
- Toast the shortbread: While the berries macerate, preheat your oven to 350°F. Spread the crumbled shortbread pieces on a baking sheet in a single layer. Toast for 5-7 minutes, until they are just barely golden at the edges. Let them cool completely on the sheet.
- Strain the berries (optional but smart): Pour the macerated strawberries into a fine mesh sieve set over a medium bowl. Press gently with a spatula to release most of the syrup. Set the syrup aside. You will use the syrup in the ice cream base and the solids as a layer.
- Whip the cream: In the bowl of a stand mixer (or using a hand mixer), beat the heavy cream on medium-high speed until soft peaks form. This takes about 3-4 minutes. Stop when it looks like soft, billowy clouds.
- Make the base: In a large separate bowl, whisk together the sweetened condensed milk, vanilla extract, lemon zest (if using), and the reserved strawberry syrup. Whisk until smooth and evenly pink.
- Fold: Add about a third of the whipped cream to the condensed milk mixture and fold gently with a spatula until mostly combined. Add the remaining whipped cream and fold until no white streaks remain. The mixture should look like a uniform, pale pink mousse.
- Layer it up: Spoon about a third of the ice cream base into your loaf pan. Scatter half of the reserved macerated strawberry solids and half of the toasted shortbread pieces over the top. Drizzle with a bit of extra syrup if you have it. Repeat with another third of the base, the remaining strawberries and shortbread, then finish with the final third of the base.
- Swirl (optional but pretty): Take a butter knife and gently swirl it through the layers once or twice. You want ribbons of berry and pockets of shortbread, not a uniform mix.
- Freeze: Cover the loaf pan with plastic wrap pressed directly onto the surface of the ice cream, then seal with foil or a lid. Freeze for at least 6 hours, preferably overnight. The wait is worth it.
Notes
- Soft peaks mean soft ice cream. Don’t overwhip the cream. Stop when it looks like soft, floppy clouds.
- Maceration is not optional. If you skip the sugar and resting time, your strawberries will freeze into hard, icy chunks.
- Toast the shortbread even if you’re short on time. It takes five minutes and keeps the shortbread from turning into a paste.
- Press plastic wrap onto the surface. Air exposure causes ice crystals. Press wrap directly onto the ice cream before freezing.
Related Recipes:
 The Perfectly Pillowy Chocolate Chip Milk Buns (Tangzhong Method)
 Cheesy Hamburger Casserole Bake That’s Ready in 40 Minutes (No Canned Soup Here)
 Creamy Garlic Tagliatelle That Looks Like a Restaurant Dish in 20 Minutes
 Texas Roadhouse Style Baked Salmon with Sweet and Savory Glaze — Ready in Under 30 Minutes
 Easy Italian Meatloaf That’s Actually Juicy (Not Dry) — in 1 Hour
 Moist Lemon Zucchini Bread with a Crunchy Lemon Sugar Top