
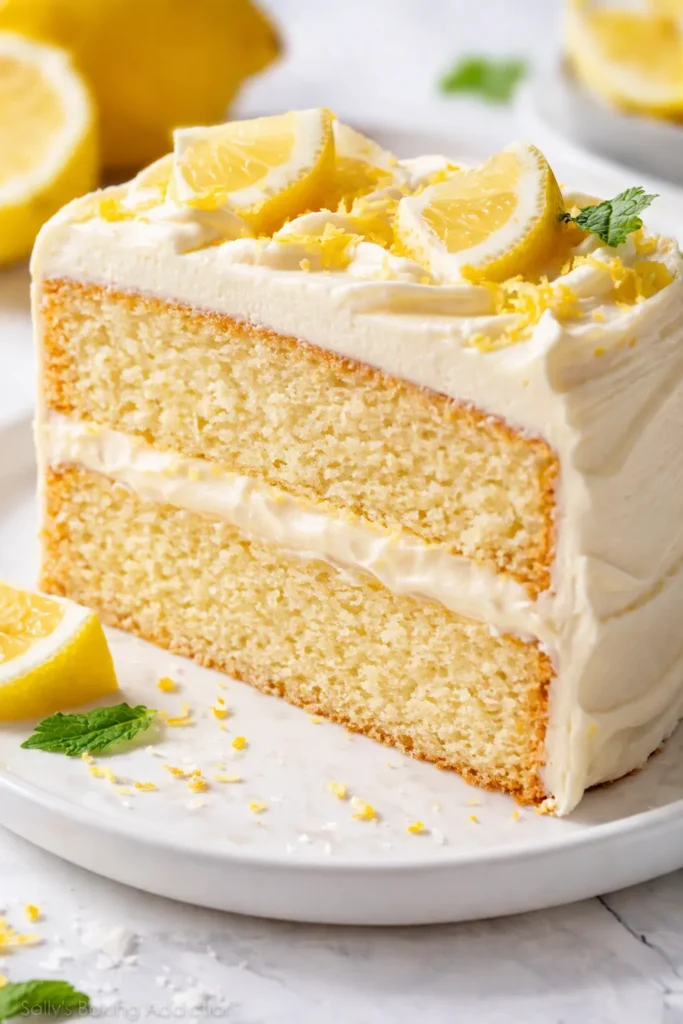
I pulled the first clean slice out of this cake and said “okay” out loud to an empty kitchen. That is the specific, underrated pleasure of a lemon velvet cake — it’s not loud or showy. It’s just exactly right. Tender buttermilk crumb, sharp lemon running through every bite, cream cheese frosting thick enough to hold its shape and tangy enough to cut the sweetness. This is the cake I bring when I need something that always works.
The short version: A buttermilk layer cake with lemon in the crumb and a lemon cream cheese frosting — about 30 minutes of real work, and it looks like you fussed all day.
I’ve made this exact lemon velvet cake seven times in the last two months. The first three were fine. The fourth is the version I keep making — I stopped tweaking it because there was nothing left to fix.
- Serves: 12 as dessert
- Hands-On Time: 30 min | Total Time: 1 hr 45 min
- Difficulty: Straightforward — even if you don’t make layer cakes often
- Cost per serving: ~$1.75
- Calories: ~490 per slice
- Dietary Notes: Vegetarian. Can be made dairy-free or gluten-free — see the swaps below.
(Photo above: a two-layer lemon velvet cake on a white cake stand, one clean slice cut and lifted slightly so the pale yellow crumb is visible against the white cream cheese frosting, fine lemon zest dusted across the top, soft morning light from a kitchen window on the left.)
The Buttermilk Is the Whole Point
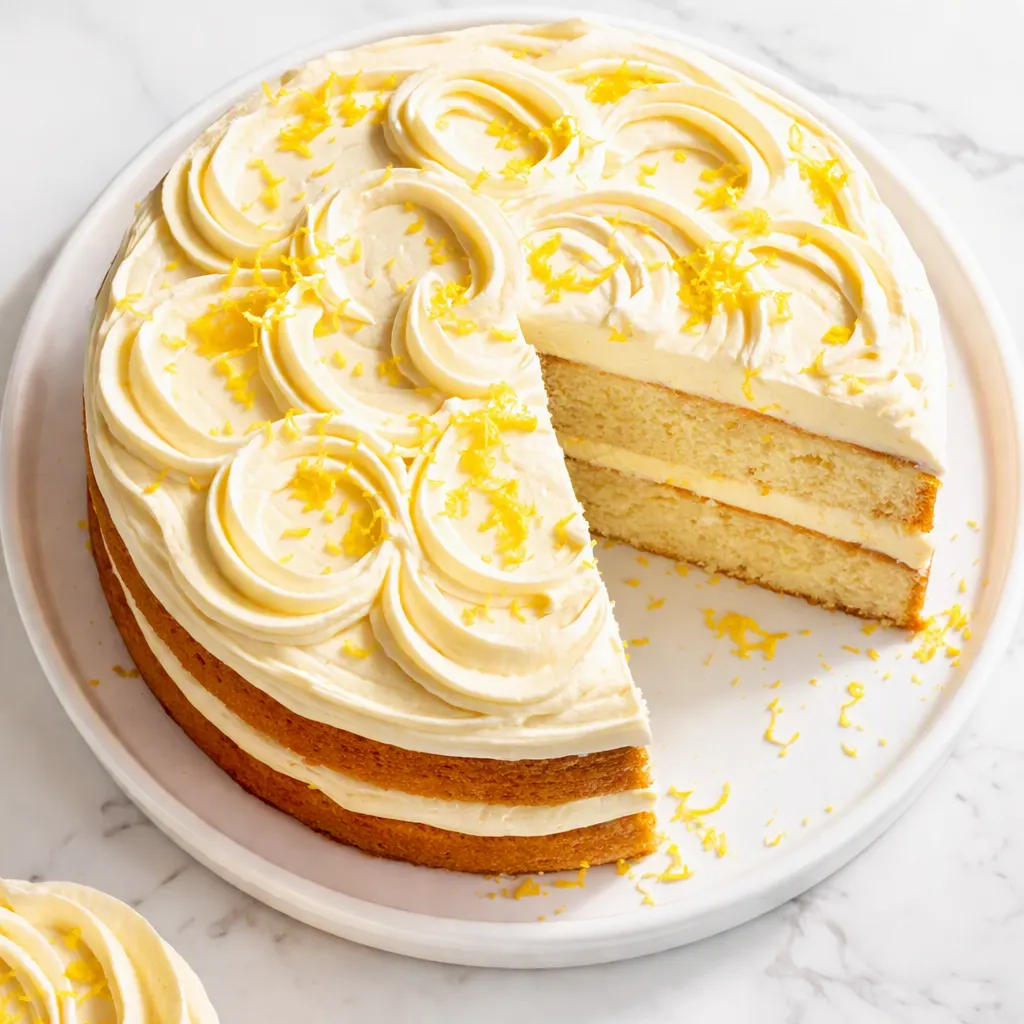
Here’s what “velvet” actually means in a cake: a crumb so fine and close that it practically dissolves when you bite into it. No coarse tunnels, no crumbling, nothing that needs a fork to wrangle. The buttermilk is doing most of that work. It’s the same trick that makes red velvet what it is — the acid in the buttermilk reacts with the baking soda to give the cake lift, and it keeps the gluten from developing too much, which is what keeps the texture delicate. You don’t need to remember the chemistry. You just need to use real buttermilk, not the powdered kind.
The second trick is the half-and-half fat: butter for flavor, a neutral oil for tenderness. Oil keeps the crumb moist a few days later, which means this cake still tastes like the day you made it by day four in the fridge. Skipping the oil makes the cake lean a little drier. I know it sounds like an extra step — it’s literally just pouring both into the mixer.
And then there’s the lemon. Two whole lemons — zest and juice — and this is the part that makes it taste genuinely lemony instead of like lemon extract and good intentions.
The Ingredients Worth Talking About (and the Notes I’d Give You in Person)
- 2 1/2 cups (300 g) cake flour: This is the velvet. Cake flour has less protein than all-purpose, so the crumb comes out tender instead of sturdy. If you swap in all-purpose, the cake will still be good — it just won’t be velvet. I keep my box of cake flour on the top shelf and I will never go back.
- 1 1/2 cups (300 g) granulated sugar: Structure, not just sweet. Don’t reduce it — sugar does more than sweeten here.
- 1 tsp baking soda + 1/2 tsp fine salt: The lift and the balance.
- 1/2 cup (113 g) unsalted butter, room temperature: Flavor. Room temperature means it gives when you press it, not melted. I’ve made this with cold butter and the batter breaks — the cake still comes out okay, but the texture isn’t as fine.
- 1/2 cup (120 ml) neutral oil: Canola or grapeseed — anything without a strong flavor. This is the step that makes people ask which bakery you used, so don’t skip it.
- 3 large eggs, room temperature: Structure and richness.
- 1 cup (240 ml) buttermilk, room temperature: The tang and the tender crumb. If you don’t keep buttermilk around, here’s the trick: 1 cup of milk plus 1 tablespoon of lemon juice, left to sit for 5 minutes. It’s not the exact same, but it works in a pinch.
- 2 lemons: Zest of both, juice of both. The zest goes in the batter and the frosting; the juice goes in the batter only. Zest before you juice. Every time.
- 1 tsp vanilla extract: Rounds out the lemon so it doesn’t taste like a cleaning spray. It sounds odd, but the vanilla actually makes the lemon taste more like lemon.
- 8 oz (226 g) full-fat cream cheese, room temperature: The tang that makes this cake work. Do not use low-fat — it turns grainy when you beat it. I’ve tried. Not worth it.
- 2 cups (240 g) powdered sugar, sifted: Sweetness and stability for the frosting. Sift it. Cream cheese frosting is the one place where lumpy powdered sugar will absolutely betray you.
What to Pull Out Before You Start
- Two 9-inch round cake pans — light metal, not dark nonstick. Dark pans cook faster and will burn the edges before the middle is done.
- Stand mixer or hand mixer
- Fine-mesh sieve for sifting the powdered sugar
- Microplane for the zest
- Serrated knife for leveling the layers
- Parchment paper, butter, and a cake plate or stand
Here’s How I Do It (Start to Finish)
Read through once before you start. The actual work is about 30 minutes; the rest is oven time and patience, which is honestly the harder part.
- Heat the oven and prep the pans: Preheat to 350°F. Butter two 9-inch round pans, line the bottoms with parchment circles, and dust with a little flour. The parchment is non-negotiable — this is a tender cake, and tender cakes stick.
- Whisk the dry ingredients: In a medium bowl, whisk the cake flour, baking soda, and salt until combined. Sift if the flour has been sitting around clumping.
- Cream the butter: In the mixer, beat the butter, oil, and sugar on medium-high for 3 full minutes, until the mixture looks lighter and a little fluffy. (📸 Photo tip: You’re looking for a pale, thickened mixture that holds its shape when you stop the mixer — this is what the batter looks like before the eggs go in.) This is the step everyone rushes. Don’t rush it.
- Add the eggs: One at a time, beating well after each one and scraping down the bowl. Then add the lemon zest, lemon juice, and vanilla. Beat until just combined.
- Add the buttermilk and dry alternately: With the mixer on low, add a third of the flour, then half the buttermilk, another third of the flour, the rest of the buttermilk, and the remaining flour. Mix until you don’t see streaks of flour — then stop. Overmixing is the fastest way to turn velvet into something heavy. A few small streaks are fine; you’ll finish them by hand with a spatula.
- Divide and smooth: Pour the batter evenly into the two pans and smooth the tops with an offset spatula. (📸 Photo tip: The batter should fill each pan just over halfway — even and level before it goes in the oven.)
- Bake: 28 to 33 minutes, until the top springs back when you press it gently and a toothpick comes out clean or with a moist crumb. Your kitchen will smell like lemon before the timer goes off. The toothpick is the law.
- Cool completely: Leave the cakes in the pans for 10 minutes, then turn them out onto a wire rack and let them cool completely. Not mostly cool. Completely. A warm cake will turn the frosting into a puddle, and we are not doing that.
- Make the frosting: Beat the cream cheese and butter together until smooth, about 2 minutes. Add the sifted powdered sugar, lemon zest, lemon juice, and a pinch of salt. Beat on low until combined, then on high for 2 minutes, until it’s light and holds its shape. If it looks like soup, the cream cheese was too warm or too cold. Room temperature cream cheese is non-negotiable.
- Level, stack, and frost: Level the dome off each layer with a serrated knife. Place one layer on the plate, add a thick layer of frosting, spread it to the very edge, and stack the second layer on top. Do a thin crumb coat all over, chill for 20 to 30 minutes, then finish with the rest of the frosting. That chill is what gives you a sharp, clean finish instead of crumbs dragging through the frosting.
- Finish with lemon zest: Grate fresh zest over the top in one deliberate, even pass — not a pile. The white frosting against the yellow zest is the whole visual reason this cake reads as intentional. (📸 Photo tip: The final cake frosted smooth, fine lemon zest dusted across the top, one clean slice cut so the pale crumb is visible against the white frosting.)
Make-Ahead Notes (Because a Layer Cake Shouldn’t Stress You Out)
I bake the layers the night before more often than not. Wrap them tightly in plastic and they stay moist overnight — the cake actually slices cleaner cold, and a lemon velvet cake is at its best when you’re not waiting on the crumb to cool. It turns the whole process into about 30 minutes of work the next day.
- Fridge: Frosted cake keeps 3 to 4 days in an airtight cake carrier. It’s genuinely still good on day four — the oil in the batter does real work.
- Freezer: Yes, but freeze unfrosted. Wrap the cooled layers individually in plastic wrap, then foil, for up to 3 months. Thaw overnight in the fridge before frosting.
- Reheat: Don’t. Set the cake out at room temperature for 30 minutes before serving. The fridge firms the crumb, but it relaxes right back — that’s the correct way to eat it.
Things I Wish I’d Known the First Time
- Room temperature is not a suggestion here: Cold butter and cold buttermilk won’t emulsify into a smooth batter. Pull everything out 45 minutes before you start. If you forgot, warm the buttermilk gently in the microwave for 15 seconds and soften the butter in 10-second bursts at low power. It works. I’ve done it.
- Don’t overmix, even though it’s tempting: The second the flour is incorporated, stop. I’ve ruined two batches by leaving the mixer running while I dug out a spatula. A light hand is the difference between velvet and crumbly.
- The crumb coat is worth the 20 minutes: A thin layer of frosting, a chill, then the real coat. It’s the difference between a cake that looks sharp and one that looks like it lost a fight with a spatula. Nobody needs to know it’s two steps instead of one.
- Even if a layer domes or cracks, you’re fine: Level it off with a serrated knife and the frosting covers everything. I’ve served a cake that cracked down the middle — the person eating it thought it was a design choice. It tasted like the cake it was.
- Hot knife for clean slices: Run the knife under hot water, dry it, then cut. Wipe it between slices. You get edges so clean the crumb doesn’t drag. This is the kind of detail that reads as “bakery” even though it costs nothing.
Swaps That Actually Work
- Dairy-free: Use plant-based cream cheese and butter, and a quick buttermilk substitute: 1 cup of plant milk plus 1 tablespoon of lemon juice, left for 5 minutes. I’ve tested the cake this way — it works. It’s slightly less tender, but the lemon carries it.
- Gluten-free: A cup-for-cup gluten-free flour blend with xanthan gum works, though the crumb is a little more open. Read the package — the blends with xanthan gum behave closest to cake flour.
- Lemon glaze version: Skip the frosting entirely and make a simple glaze — 1 cup of powdered sugar plus 2 tablespoons of lemon juice, whisked and poured over the cooled top. It’s lighter and more breakfast-appropriate. Same cake, completely different vibe.
- Blueberry-lemon: Toss 1 cup of fresh blueberries in a spoonful of flour, then fold them into the batter after the buttermilk. Make this in July when blueberries are actually worth it. My friend’s daughter requested this over a chocolate sheet cake at her birthday, and I’m not sure the birthday girl’s mother has fully forgiven me.
- Extra-tangy dinner-party version: Spread a thin layer of lemon curd between each cake layer before the frosting. It’s rich, but the acid cuts it, and it looks like you did something very complicated when you actually just bought a jar of lemon curd.
The Questions I Get About This Cake All the Time
Q: Why did my cake sink in the middle?
A: Two usual suspects. The oven wasn’t actually at 350°F (an eight-dollar oven thermometer ends this problem), or the batter was overmixed and built up too much air, which rises dramatically and then collapses. Bake at 350, mix just until the flour disappears, and you’re there. I’ve had both happen. The cake still tasted good — it just needed a hat.
Q: Can I make this gluten-free or dairy-free without ruining it?
A: Yes, see the swaps above. For dairy-free, plant-based cream cheese and butter with the quick buttermilk substitute works — I’ve tested it. For gluten-free, use a cup-for-cup blend with xanthan gum. The texture is slightly different, but the lemon and the tang carry the whole thing.
Q: How long does this cake last? Can I freeze it?
A: 3 to 4 days in the fridge in an airtight carrier, and it’s genuinely still good on day four. Freeze the unfrosted layers for up to 3 months, wrapped in plastic then foil. Don’t freeze a frosted cake — cream cheese frosting gets weepy when it thaws.
Q: What do you serve with this cake?
A: A strong black coffee, honestly. The bitterness is the right partner for the tangy frosting. On weekends, I serve it with a pot of Earl Grey and practically no conversation about the cake itself — people just eat it. For a bigger dessert moment, a little macerated strawberry on the plate does something unexpected and good.
More Recipes My People Ask Me For
If this one lands at your table, here are a few others that get the same reaction at mine.
- [INTERNAL LINK PLACEHOLDER: Classic Red Velvet Cake] — the original that inspired this one, and still my most-requested layer cake.
- [INTERNAL LINK PLACEHOLDER: Lemon Olive Oil Cake] — the one I make when I don’t want to frost anything, just glaze and go.
- [INTERNAL LINK PLACEHOLDER: Buttermilk Pound Cake] — the other reason I keep buttermilk on the grocery list.
This is the cake for a Sunday afternoon when you want the kitchen to smell like lemon and the table to look like you planned ahead. You did plan ahead — that’s the whole trick. It works for a birthday, a dinner party, or absolutely no reason at all, and it always, always slices clean.
If you make it, leave a comment and let me know how it came out — I read every single one, and I genuinely love hearing which version people end up with, especially everyone who dumps a jar of lemon curd in the middle!
📌 Lemon velvet cake with cream cheese frosting that slices clean and stays tender for days — save this for your next birthday or a Sunday that deserves a proper dessert.
Lemon Velvet Cake That Slices Like a Dream
Equipment
- Two 9-inch round cake pans
- Stand mixer or hand mixer
- Fine-Mesh Sieve
- Microplane
- Serrated Knife
- Parchment Paper
- Offset spatula
Ingredients
For the Cake
- 2 1/2 cups cake flour (300 g)
- 1 1/2 cups granulated sugar (300 g)
- 1 tsp baking soda
- 1/2 tsp fine salt
- 1/2 cup unsalted butter, room temperature (113 g)
- 1/2 cup neutral oil, like canola or grapeseed (120 ml)
- 3 large eggs, room temperature
- 1 cup buttermilk, room temperature (240 ml)
- 2 lemons, zested and juiced
- 1 tsp vanilla extract
For the Lemon Cream Cheese Frosting
- 1/2 cup unsalted butter, room temperature (113 g)
- 8 oz full-fat cream cheese, room temperature (226 g)
- 2 cups powdered sugar, sifted (240 g)
- 1 pinch fine salt
- lemon zest and lemon juice from the 2 lemons, for the frosting
Instructions
- Preheat the oven to 350°F. Butter two 9-inch round pans, line the bottoms with parchment paper, and dust lightly with flour.
- Whisk the cake flour, baking soda, and fine salt together in a medium bowl.
- Beat the butter, oil, and sugar on medium-high for 3 full minutes, until pale and fluffy.
- Add the eggs one at a time, beating well after each and scraping down the bowl. Mix in the lemon zest, lemon juice, and vanilla.
- Add the flour mixture and buttermilk alternately, starting and ending with flour, mixing on low until just combined. Finish by hand with a spatula.
- Divide the batter evenly between the prepared pans and smooth the tops.
- Bake for 28 to 33 minutes, until the top springs back and a toothpick comes out clean or with moist crumbs.
- Cool in the pans for 10 minutes, then turn out onto a wire rack and cool completely.
- Beat the cream cheese and butter until smooth. Add the sifted powdered sugar, lemon zest, lemon juice, and a pinch of salt. Beat until light and holds its shape.
- Level the cake layers with a serrated knife. Stack with a thick layer of frosting between, do a thin crumb coat over the whole cake, chill for 20 to 30 minutes, then finish with the remaining frosting.
- Grate fresh lemon zest over the top in one deliberate pass before slicing.
Notes
Related Recipes:
 Cheesy Hamburger Casserole Bake That’s Ready in 40 Minutes (No Canned Soup Here)
 Texas Roadhouse Style Baked Salmon with Sweet and Savory Glaze — Ready in Under 30 Minutes
 Moist Lemon Zucchini Bread with a Crunchy Lemon Sugar Top
 Strawberry Shortcake Rice Krispie Treats That Actually Taste Like Shortcake — Ready in 15 Minutes
 Blueberry Oatmeal Cookies That Stay Soft for Days — in Under 30 Minutes
 Air Fryer Chicken and Vegetables That Don’t Taste Like a Regret (30 Minutes, One Pan)