
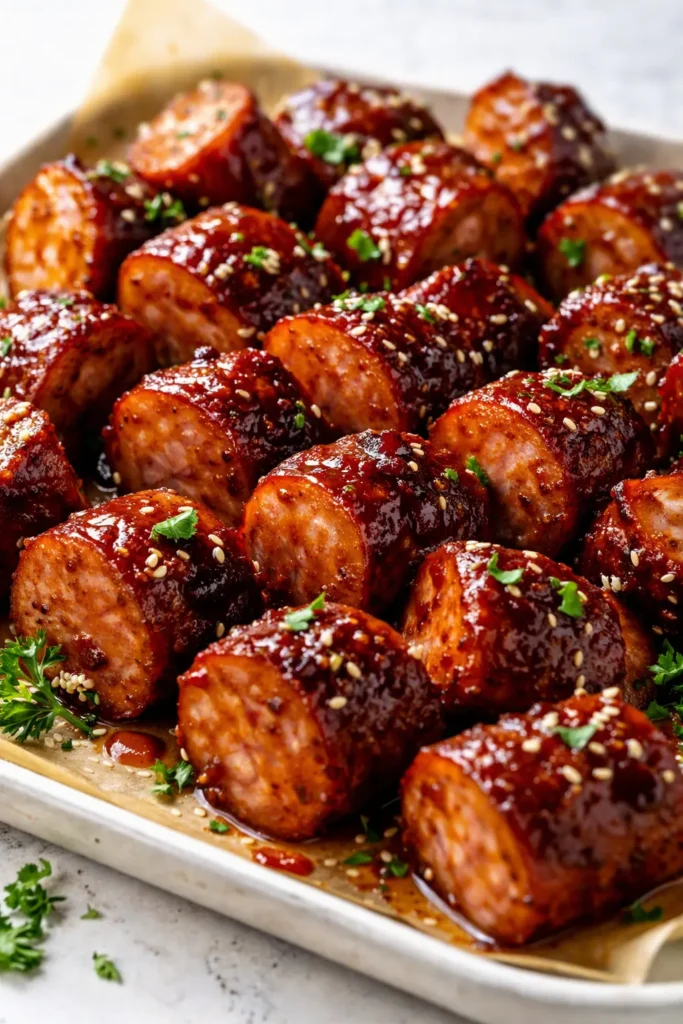
The first time I made these BBQ sausage bites, my husband walked into the kitchen, grabbed a toothpick, and ate four before saying a single word. Then he asked if we could just have them for dinner straight off the baking sheet. That’s the energy we’re working with — sticky, caramelized, sweet-and-smoky little coins of sausage that disappear faster than anything else on the snack table. They’re glossy, they’re messy in the best way, and they’re done before you’ve even finished setting out the rest of your appetizers.
The short version: These come together in 30 minutes with pantry staples, and I’ve genuinely never once seen leftovers.
I’ve made these at least forty times over the past few years — for Super Bowl parties, for my daughter’s birthday sleepover, for the “it’s 5 p.m. and I forgot I volunteered to bring an appetizer” emergency. My kids fight over the caramelized bits that stick to the pan, so I always make extra just so I can have a few myself. This is one of those recipes that feels like a cheat code: it tastes like you stood over a grill all afternoon when really you just tossed everything on a sheet pan and let the oven do the work.
- Serves: 8 as an appetizer (about 40 bites)
- Hands-On Time: 20 min | Total Time: 30 min
- Difficulty: Easy enough for a game day crowd, even if you’ve never made them before
- Cost per serving: ~$1.75
- Calories: ~280 per serving
- Dietary Notes: Naturally low-carb, easily gluten-free — see the swaps section below
(Photo above: overhead shot of glossy BBQ sausage bites piled on a wooden serving board with toothpicks stuck in and sliced green onions scattered on top — the caramelized edges catching the afternoon light, with a small ramekin of extra glaze off to the side.)
The One Step Everyone Skips That Makes These Actually Sticky
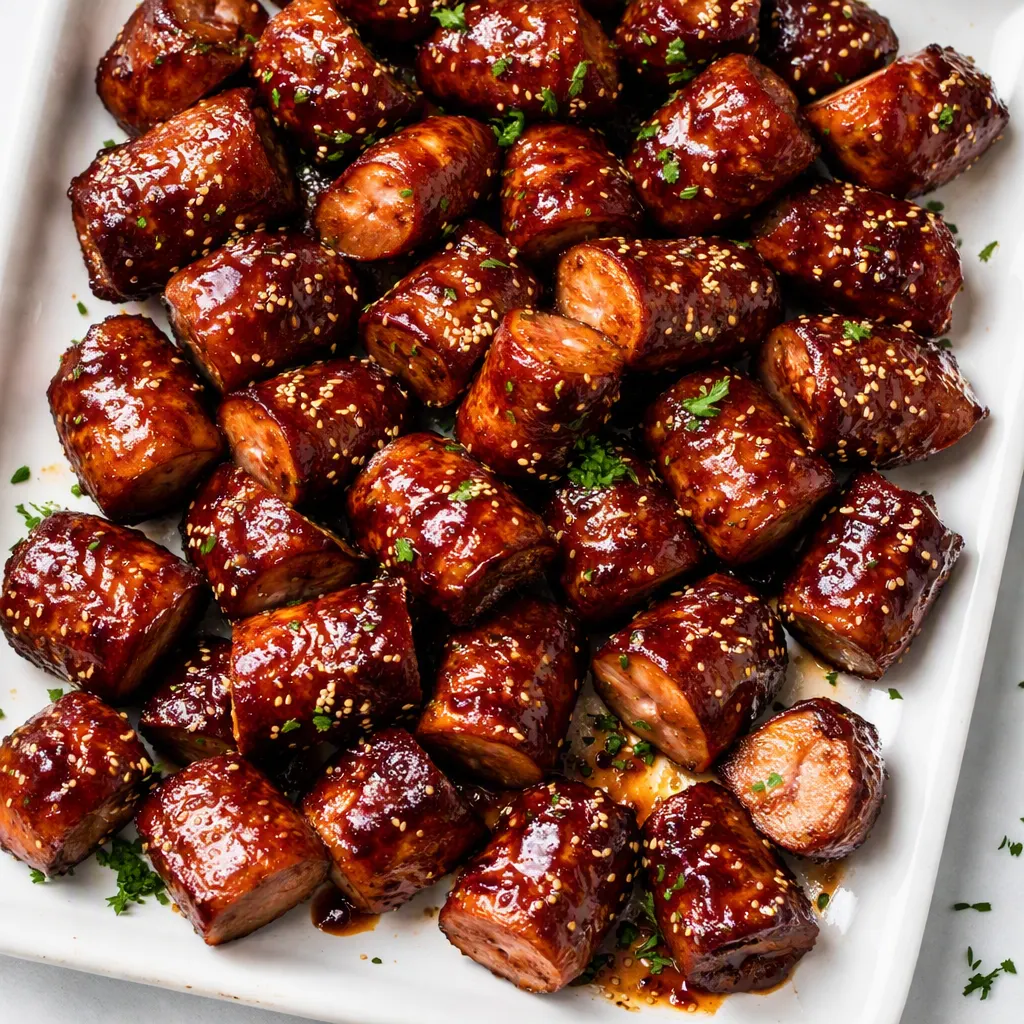
Here’s what took me way too long to figure out: you can’t just toss sausage in barbecue sauce and call it done. Sauces are mostly liquid. They run off the sausage, pool at the bottom of the pan, and you end up with bites that taste fine but look sad and slide around in a puddle of juice. The fix has two parts — simmer the glaze first until it thickens and coats the back of a spoon, then give the glazed bites one final hot blast in the oven so that glaze caramelizes and sets into that lacquered, glossy finish you see in the photos.
When I skip that simmer step — and I’ve definitely done it on rushed weeknights — the difference is obvious right away. The glaze slides off, the sausage steams instead of roasting, and everyone eats them politely but nobody’s texting me for the recipe. That extra five minutes on the stove is the entire game. It gives the brown sugar time to melt, the vinegar time to mellow, and the ketchup time to deepen into something that actually tastes like barbecue.
This version gets you that pulls-apart-sticky finish with zero fancy techniques. No skewers to assemble, no basting every two minutes. Just one sheet pan, one small saucepan, and 30 minutes.
Everything You Need (Plus My Honest Notes)
- 1 (14-oz) package smoked sausage or kielbasa: The backbone of the whole thing. I like a beef or beef-and-pork blend — richer fat means juicier bites. My kids can tell when I buy the cheap version, the texture gets rubbery. Hillshire Farms works great, and so does anything from a local butcher counter.
- 1/2 cup ketchup: The sweet-tangy base that holds everything together. I used to look down on ketchup in real recipes, which is ridiculous because this is basically ketchup with a glow-up.
- 1/3 cup packed brown sugar: The caramelization engine. Dark brown sugar gives a deeper molasses flavor; light brown works fine if that’s what you have. Don’t overthink it.
- 2 tablespoons apple cider vinegar: The acid that keeps things from going one-note sweet. I forgot it once and the glaze was flat — like candy without the fun. This is the ingredient that makes you want another bite.
- 1 tablespoon Worcestershire sauce: Your secretly savory layer. In a pinch, I’ve swapped in soy sauce or even a splash of steak sauce and they all worked. Don’t run to the store just for this.
- 1 teaspoon smoked paprika: A little hit of campfire flavor that makes the whole thing taste like it came off a grill. Regular paprika works but loses about half the depth. If you love that smoky barbecue taste, this is the one that matters most.
- 1/2 teaspoon garlic powder: Background flavor that rounds everything out. Use a pressed garlic clove if you want it more punchy.
- 1/4 teaspoon cayenne pepper (optional): A whisper of warmth that adults notice and kids don’t. My nine-year-old genuinely thinks this version is “not spicy at all,” which is exactly the bar I’m going for.
- Sliced green onions or chopped parsley, for garnish (optional but pretty): That pop of green makes the whole platter look intentional. I skip it when I’m just feeding my family, but never when this is going to a party.
The Setup (It’s Minimal, I Promise)
- A large rimmed baking sheet: A half-sheet pan is ideal. Line it with foil — the glaze gets very sticky and very happy to weld itself to your pan, so foil saves you a 20-minute soak.
- A medium saucepan: For simmering the glaze. Any small pot works.
- A spatula or wooden spoon: For tossing the sausage in the glaze and spreading it back out.
- Toothpicks for serving: Optional but traditional — and honestly, half the fun is the toothpick grab.
Let’s Make It (Step by Step)
This goes fast, so read it through once before you start. The timing on the final roast is the only place where you really need to pay attention.
- Preheat: Preheat your oven to 425°F and line a large baking sheet with foil. (📸 Photo tip: You’ll see a shiny foil-lined sheet, empty and waiting — no need to grease it, since the sausage has plenty of its own fat.)
- Slice the sausage: Cut it into 1/2-inch coins on a slight diagonal. The angle isn’t just for looks — it gives you more surface area for the caramelized glaze to grab onto. My daughter loves being the “official sausage slicer” if you’ve got small helpers around. (📸 Photo tip: A cutting board full of uniform oval-shaped coins, cut on the bias.)
- Simmer the glaze: In a medium saucepan over medium heat, whisk together the ketchup, brown sugar, apple cider vinegar, Worcestershire, smoked paprika, garlic powder, and cayenne if using. Bring it to a gentle simmer and cook for 5-7 minutes, stirring occasionally, until it thickens and coats the back of a spoon. This step is the whole game — the difference between sticky lacquered bites and soggy sausage in a sauce puddle.
- Roast the sausage first: Arrange the coins in a single layer on the prepared sheet. Roast for 10 minutes until they’re sizzling and just starting to brown around the edges. If the pan looks like there’s a lot of rendered fat, that’s normal — the sausage is doing its thing.
- Coat: Pull the sheet out of the oven, pour the glaze over the hot sausage, and stir with a spatula until every single coin is coated. Don’t be shy — you want this fully mixed. (📸 Photo tip: Each bite should look dressed in a glossy reddish-brown coat, with no bare spots or pale patches.)
- Roast again: Spread the coated sausage back into an even single layer with a little breathing room between pieces, and roast for 8-10 more minutes. You’re looking for the glaze to start bubbling and turning dark and sticky along the pan edges. Watch it near the end — caramelization can tip over into bitter if you let it go too long.
- Rest and serve: Let the bites sit on the pan for 3 minutes so the glaze sets slightly. Scatter the green onions or parsley over the top, then serve warm with toothpicks. Don’t let them sit much longer than that — they’ll weld themselves to the foil, and you’ll want to eat them hot anyway.
How I Meal Prep These for Game Day
I usually make a double batch on Saturday mornings so we’re set for the weekend game — or for all the “I’m hungry” moments that follow. The glaze alone keeps in the fridge for up to five days, which means the day-of work is literally just slicing sausage and roasting. I’ve also made the full batch ahead, cooled it, and served it the next day — it reheats beautifully and you’d never know.
- Fridge: Store cooled bites in an airtight container for up to 4 days. Reheat in a 350°F oven for 8-10 minutes so the caramelized edges crisp back up.
- Freezer: Yes — freeze fully cooked, cooled bites in a single layer on a baking sheet, then transfer to a freezer bag. They keep for 2 months. Reheat straight from frozen at 375°F for 10-12 minutes.
- Reheat: The microwave works in a pinch, but it makes the glaze soft and steamy instead of sticky-crisp. If you have 10 minutes, the oven is absolutely worth it.
Things I Wish I’d Known the First Time
- Simmer the glaze until it’s actually thick: I know it’s tempting to skip ahead — you’re busy and dinner’s at 6. But those 5-7 minutes of bubbling concentrate the flavors and give the glaze the body that makes it cling. When it’s ready, it should look like thick barbecue sauce. If you skip this, you’ll end up with watery bites, and I don’t want you to learn the hard way like I did.
- Don’t crowd the pan on the final roast: The glazed coins need a little space so the heat can hit them directly. If they’re packed tight, the glaze steams and turns soft instead of caramelizing. Even if you do crowd them a little, they’ll still taste amazing — I’ve made this mistake more times than I’d like to admit, and the bites still disappeared.
- Resist the urge to stir mid-roast: I know, it’s hard to leave good food alone. But the final 8-10 minutes are where the magic happens, and constant stirring breaks up the caramelization forming on the edges. Peek through the oven door if you’re curious, and trust that it’s working.
- Don’t throw away the sticky pan bits: When you’re serving, scrape up the caramelized drippings from the foil and spoon them over the sausage. That’s concentrated flavor — sweet, smoky, slightly crusty — and it’s the part my kids ask for by name.
Swaps That Actually Work
- Gluten-free: Most smoked sausages are naturally gluten-free, but double-check the label — some brands add fillers. Swap the Worcestershire for gluten-free soy sauce or tamari and you’re set. I made this for my nephew with celiac and he went back for three rounds.
- Spicy version: Double the cayenne, or add a minced jalapeño to the glaze while it simmers. I keep the main batch mild for my kids and stir extra heat into mine at the end — best of both worlds.
- Grape jelly version: Swap the ketchup and brown sugar for 1 cup of grape jelly and 1/2 cup of your favorite BBQ sauce. The jelly melts into the glaze and adds a sweet-tangy fruitiness that’s dangerously good.
- Honey garlic version: Swap the brown sugar for 1/3 cup of honey and add a crushed garlic clove to the simmering glaze. The flavor is brighter and less heavy — I like this one for summer cookouts.
- Air fryer method: Got a smaller crowd? Air fry at 375°F for 8 minutes, toss with the glaze, then cook 4-5 more minutes. Same caramelized result, less oven heat in the kitchen.
Questions My Readers Keep Asking Me About These
Q: Why did my bites turn out soggy and watery instead of sticky and glazed?
A: Ugh, I’ve been there, and it’s the most common miss. The culprit is usually one of two things: either you didn’t simmer the glaze long enough (it needs those 5-7 minutes), or the sausage coins were crowded together on the final roast so the glaze steamed instead of caramelized. Spread them out, make sure your oven is fully at 425°F, and you’ll nail it next time. You’ve got this.
Q: Can I make these with chicken sausage or turkey sausage?
A: Yes! I’ve tested this with both and it works. Just know that leaner sausages cook faster and can dry out — check them at the 8-minute mark on the first roast instead of 10. A light spray of cooking oil on the foil also helps them release cleanly. They won’t be quite as juicy as the full-fat version, but they’re still a crowd-pleaser.
Q: How long do these last, and can I freeze them?
A: Fully cooked bites stay good in the fridge for up to 4 days in an airtight container, or in the freezer for up to 2 months. Reheat in a 350°F oven for 8-10 minutes (375°F straight from frozen for 12). The microwave will get them hot, but it makes the glaze soft and steamy, so the oven is worth the extra few minutes. Also, cold leftovers straight from the fridge are weirdly delicious. I won’t say more.
Q: What do you serve with BBQ sausage bites?
A: On game day, I put out a platter of these next to a veggie tray with ranch dip and some pickles or pickled jalapeños — the vinegar cuts all that sweet, smoky richness. When we do them as a quick weeknight dinner, we eat them over rice or mashed potatoes with a bagged salad on the side. My kids’ favorite move? Dunking them in extra ranch. I’m not proud of it, but I can confirm it’s good.
More Appetizers My Family Makes on Repeat
If these made it onto your game day menu, here are a few others that get the same response at our table:
- [INTERNAL LINK PLACEHOLDER: Crockpot Little Smokies] — The zero-effort version of this craving, and they always disappear first at our house.
- [INTERNAL LINK PLACEHOLDER: Bang Bang Chicken Bites] — Crispy, creamy, and the sauce actually clings to the chicken. We make these at least once a month.
- [INTERNAL LINK PLACEHOLDER: Air Fryer Meatballs] — My emergency appetizer when I have 15 minutes and nothing planned. Impossible to mess up.
Whether you’re feeding a Super Bowl crowd, putting out a New Year’s Eve snack board, or trying to convince your family that Tuesday night deserves an appetizer tray (it does), these BBQ sausage bites have never once let me down. They’re the recipe I reach for when I need something fast, reliable, and gone before anyone thinks to ask what’s in them.
If you try them, drop a comment below — I love hearing how these turn out for y’all. And tag me on Pinterest when you make them, because I want to see that caramelized glory in action.
📌 Save this BBQ sausage bites recipe for game day — sticky, caramelized, and on the table in 30 minutes.
Sticky Caramelized BBQ Sausage Bites
Equipment
- Large Rimmed Baking Sheet
- Medium saucepan
- Spatula or Wooden Spoon
- Aluminum Foil
- Toothpicks for Serving
Ingredients
For the Sausage Bites
- 1 package smoked sausage or kielbasa (14 oz), sliced into 1/2-inch coins
For the Sticky BBQ Glaze
- 1/2 cup ketchup
- 1/3 cup packed brown sugar
- 2 tablespoons apple cider vinegar
- 1 tablespoon Worcestershire sauce
- 1 teaspoon smoked paprika
- 1/2 teaspoon garlic powder
- 1/4 teaspoon cayenne pepper (optional)
For Serving (Optional)
- 1/4 cup sliced green onions or chopped parsley, for garnish
Instructions
- Preheat: Preheat your oven to 425°F and line a large baking sheet with foil.
- Slice the sausage: Cut it into 1/2-inch coins on a slight diagonal so there is more surface area for the caramelized glaze to grab onto.
- Simmer the glaze: In a medium saucepan over medium heat, whisk together the ketchup, brown sugar, apple cider vinegar, Worcestershire, smoked paprika, garlic powder, and cayenne if using. Bring to a gentle simmer and cook for 5-7 minutes until it thickens and coats the back of a spoon.
- Roast the sausage first: Arrange the coins in a single layer on the prepared sheet. Roast for 10 minutes until sizzling and just starting to brown around the edges.
- Coat: Pull the sheet out of the oven, pour the glaze over the hot sausage, and stir with a spatula until every single coin is coated.
- Roast again: Spread the coated sausage back into a single layer with a little breathing room. Roast for 8-10 minutes until the glaze is bubbling and turning dark and sticky along the pan edges.
- Rest and serve: Let the bites sit on the pan for 3 minutes so the glaze sets slightly. Scatter green onions or parsley over the top, then serve warm with toothpicks.
Notes
Related Recipes:
 Cheesy Hamburger Casserole Bake That’s Ready in 40 Minutes (No Canned Soup Here)
 Creamy Garlic Tagliatelle That Looks Like a Restaurant Dish in 20 Minutes
 Texas Roadhouse Style Baked Salmon with Sweet and Savory Glaze — Ready in Under 30 Minutes
 Easy Italian Meatloaf That’s Actually Juicy (Not Dry) — in 1 Hour
 The Biscuits and Gravy Casserole That’s Actually Crispy on Top (And Ready in 40 Minutes)
 Air Fryer Chicken and Vegetables That Don’t Taste Like a Regret (30 Minutes, One Pan)