
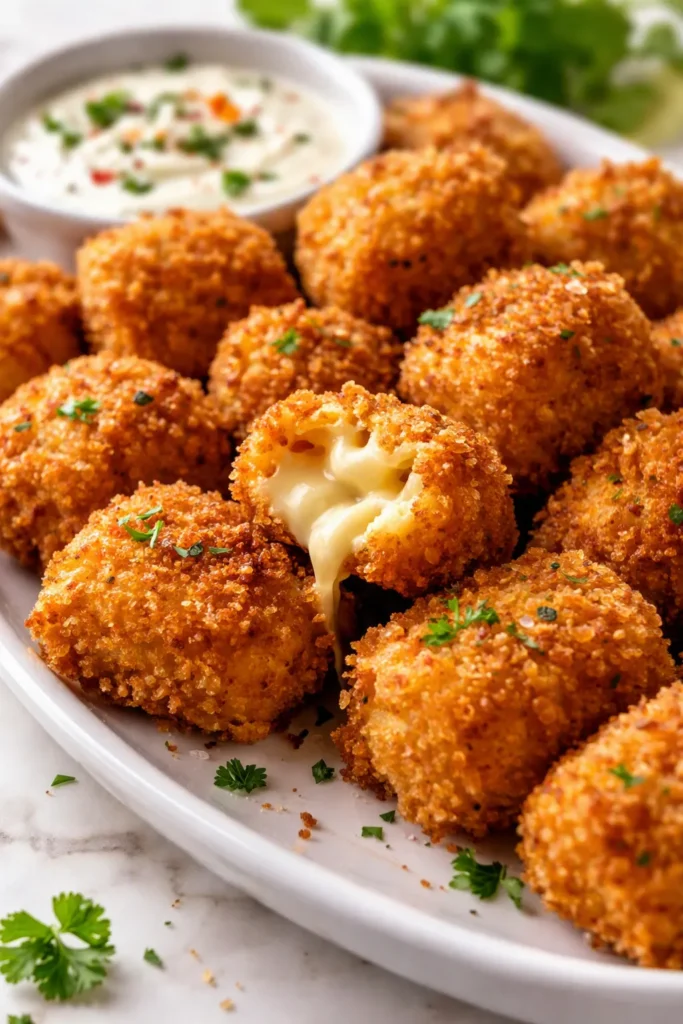
The sound of a golden, craggy crust cracking under a fork, giving way to a lava flow of melted cheese and tender pasta — that’s what these fried mac and cheese bites deliver, and they come together in about 20 minutes using last night’s leftovers. For two years I threw away leftover mac and cheese. Not kidding. I’d scrape it into the trash, feeling guilty, until my six-year-old piped up at the dinner table and asked if we could “fry those like chicken nuggets.” Best leftover redemption idea ever. Now we make extra macaroni and cheese on purpose just so I can whip up a batch of these bite-sized wonders later in the week.
The short version: These crunchy, cheesy fried mac and cheese bites turn yesterday’s side dish into the ultimate snack — and my kids beg for them every single time.
I’ve made this recipe more times than I can count, and my picky nine-year-old even helps me roll the balls now. It’s our little Sunday afternoon win.
- Serves: 4 as a hearty snack or appetizer
- Hands-On Time: 15 min | Total Time: 20 min
- Difficulty: Easy, even with a toddler hanging off your leg
- Cost per serving: ~$4.50, depending on your mac and cheese stash
- Calories: ~250 per serving (about 4–5 bites)
- Dietary Notes: Naturally vegetarian; easily adaptable for dairy-free and gluten-free
(Photo above: a cast-iron skillet filled with golden-brown fried mac and cheese bites, one split in half to reveal the gooey cheddar center, dusted with flaky salt on a rustic wooden board, afternoon sunlight streaming in from the left — the kind of shot that’ll make you want to grab one right off the screen.)
The Thing That Makes These Actually Crispy (Not Soggy)
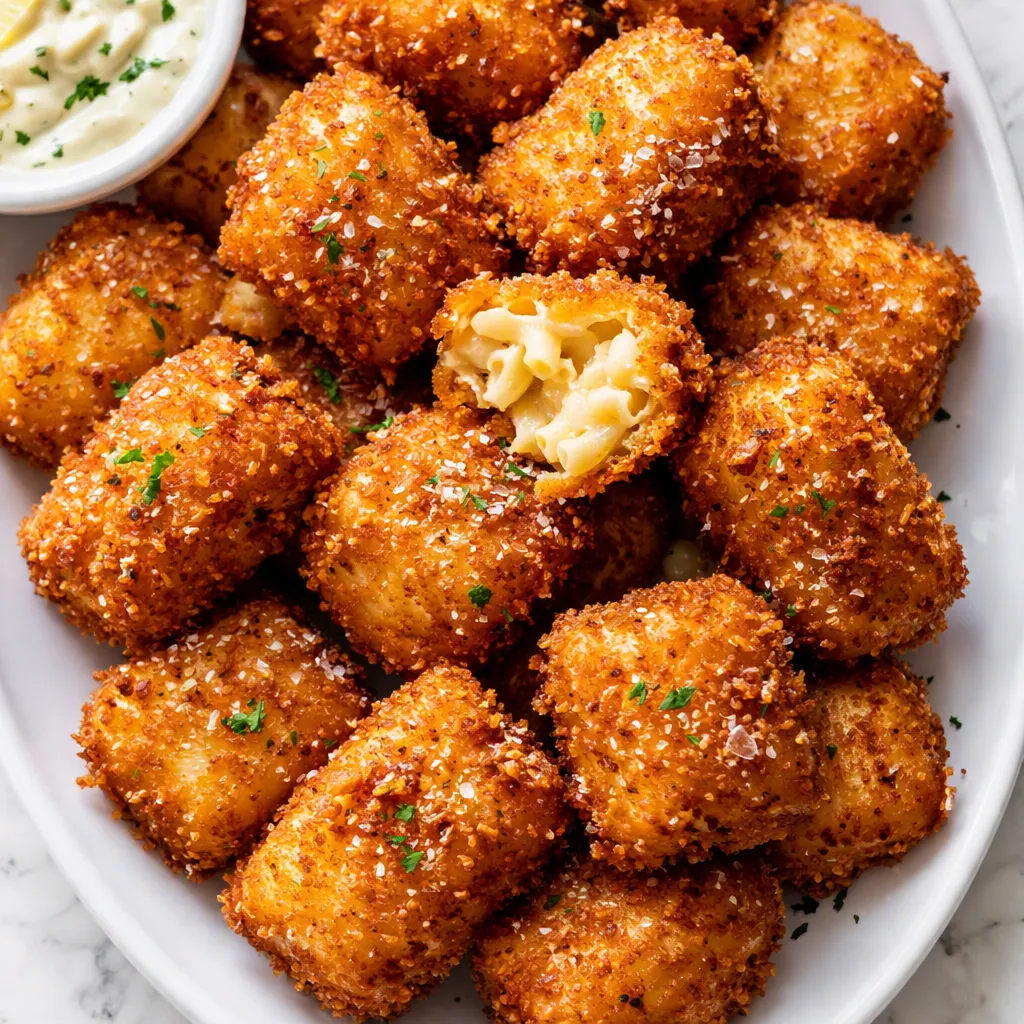
You know that moment when you bite into a fried mac and cheese ball and it’s all mush? That used to be every single batch I made until I locked in two non-negotiables. First, your leftover mac and cheese has to be cold — like, fully chilled so the cheese solidifies and the mixture can hold its shape. I stash mine in the fridge for at least a couple hours, or even overnight. If you try to roll warm, loose mac nudges, they’ll fall apart the second they hit hot oil. Second, double-dredge the panko coating. Flour, egg, panko, then back into the egg and panko again. That extra layer creates an armor of crispiness that stays loud even after they cool down a bit.
I also let the breaded bites sit on a baking sheet for about five minutes before frying — that little rest helps the coating stick. I learned this the hard way after too many batches that shed their crust like a snake molting. Now? Perfect every time. The result is a shatteringly crispy shell that traps all that molten mac and cheese inside, so when you pop one in your mouth, you get that hot, stretchy cheese pull and the salty crunch all at once.
Everything You Need (And a Few Notes From Me)
- 2 cups cold leftover mac and cheese (homemade or store-bought, any style): This is the star, so use one you actually love. My kids can smell the difference when I use the boxed kind with the powder packet, but they still demolish them — no judgment here.
- ½ cup all-purpose flour: Season it with a pinch of salt and pepper. This dry coat is the glue that holds the egg on, so don’t skip it.
- 2 large eggs, beaten with 1 tablespoon of milk: The milk thins the egg just enough to get an even coat. My four-year-old’s official job is “egg whacker,” and she takes it very seriously.
- 1½ cups panko breadcrumbs: I’ve tried regular breadcrumbs, and they turn out okay but a little dense. Panko gives you that airy, crispy crunch that makes these feel like restaurant apps. If you’re out, crush some potato chips or cornflakes — I’ve done both in desperation and they work.
- Vegetable or canola oil, for frying: You’ll need about 2 inches in a heavy pot. Peanut oil works beautifully too if you have it.
- Optional: ½ teaspoon garlic powder, ¼ teaspoon smoked paprika, or a pinch of cayenne stirred into the flour for a little extra something. My husband loves the spicy version after the kids go to bed.
What to Pull Out Before You Start
- A heavy-bottomed pot or Dutch oven (a 5- to 6-quart one gives the bites room to float without crowding)
- A deep-fry or candy thermometer (you want that oil at 350°F — eyeballing it leads to either raw centers or burnt outsides, trust me)
- A slotted spoon or spider strainer
- A rimmed baking sheet lined with paper towels (for draining) and a wire rack if you have one
- Three shallow bowls for the breading station
- A small cookie scoop or spoon for portioning
Let’s Make It (Step by Step)
This moves pretty fast once you start, so read through and set up your station first. I usually pop my phone on a stand because my hands are going to be covered in flour and egg goo.
Chill the mac and cheese if needed: If your leftovers aren’t already fridge-cold, spread them in a shallow dish and freeze for 15 minutes, or refrigerate for at least 2 hours. You want the mixture firm enough to scoop and roll without sticking to your hands.
- Portion and roll the balls: Use a small cookie scoop (about 1½ tablespoons) to portion the cold mac and cheese, then roll each scoop between your palms into a smooth ball. You should get around 16–18 bites. If the mixture is still a little sticky, lightly dampen your hands with water. (📸 Photo tip: an overhead shot of all the rolled mac and cheese balls lined up on a parchment-lined tray, showing the uniform size.)
- Set up your breading station: Grab three shallow bowls. Bowl one: flour seasoned with a pinch of salt, pepper, and any extra spices. Bowl two: beaten eggs with milk. Bowl three: panko breadcrumbs.
- First coat — flour: Roll a ball in the flour until it’s lightly dusted all over, then gently shake off the excess. This dry layer is the secret to a coating that clings. (📸 Photo tip: a ball halfway through the flour, showing the thin dusty layer before it hits the egg.)
- Egg dip: Drop the floured ball into the egg mixture and turn it with a fork to coat completely. Let any excess drip off.
- First panko layer: Roll it in the panko, pressing gently so the crumbs adhere. Now — here’s the game-changer — dip it back into the egg and then into the panko a second time. This double-dredge makes the crust thick and insanely crunchy. Set the finished bite on a clean plate and repeat with all the balls. Let them rest for about 5 minutes while you heat the oil.
- Heat the oil: Pour about 2 inches of oil into your heavy pot and clip on the thermometer. Heat over medium-high until it reaches a steady 350°F. This is the step where I make my kids stand back — hot oil and little fingers are not a good combo.
- Fry in batches: Carefully lower 4–5 bites into the hot oil with your slotted spoon. They’ll sink for a few seconds then pop up and start sizzling. Fry for 2½ to 3 minutes, turning them a couple of times, until they’re deep golden brown all over. If the oil temperature drops too much, let it come back up between batches. I usually find the first batch is the tester — we eat those standing right at the stove.
- Drain and salt immediately: Transfer the fried bites to the paper-towel-lined sheet or wire rack and sprinkle with flaky sea salt while they’re still hot. That salt hitting the hot oil residue is chef’s-kiss magic.
Sunday Prep = Stress-Free Weeknight Snacks
I make a double batch on Sundays and we’re set for after-school hunger strikes and impromptu game nights until Wednesday. The uncooked, breaded bites freeze beautifully — just lay them on a parchment-lined tray in a single layer and freeze until solid, then transfer to a zip-top bag. You can fry them straight from frozen; just add 1 minute to the frying time. My kids call them “freezer nuggets” and they’re honestly a lifesaver.
- Fridge: Store any leftover bites in an airtight container for up to 2 days. They’ll lose some crunch but are still tasty.
- Freezer: Yes! Uncooked breaded bites keep for up to 2 months. Don’t freeze them after frying — they turn rubbery.
- Reheat: The oven or air fryer is your friend. Pop them at 375°F for 6–8 minutes (from fridge) or 10–12 minutes (from frozen). The microwave will make them sad and soggy — I don’t recommend it unless you’re in a true crisis.
My Honest Advice After Making This More Times Than I Can Count
- Use the coldest mac and cheese you can get. I’ve tried it with room-temp leftovers, and the balls turn into puddles before they hit the oil. Chilled, though, they hold together like little soldiers. Even if you’re in a rush, a 15-minute freezer pop helps a ton.
- Don’t crowd the pot. Adding too many bites at once drops the oil temperature fast, and you’ll get greasy, soggy spots instead of that all-over golden crust. I fry 4 or 5 at a time in my 6-quart pot. If the oil dips below 325°F, just be patient and let it climb back up.
- If a ball breaks in the oil, scoop it out quickly. It happens to the best of us. Don’t panic — just fish out the escapees so they don’t burn and ruin the oil. The rest will still be delicious. (I’ve served plates where two out of ten looked a little wonky, and nobody complained.)
- Season every layer. A pinch of salt in the flour, a little garlic powder in the panko, and that flaky salt at the end make all the difference. My husband thought I was overcomplicating things until I made him try one without the seasoned flour — now he’s the one reminding me.
Make It Yours: Easy Variations
- Air fryer version: Spritz the breaded bites with cooking spray and air fry at 380°F for 8–10 minutes, flipping halfway, until golden and crunchy. They won’t be quite as decadent, but they’re a weekday compromise. This is the version I let my daughter make “all by herself” because there’s no hot oil danger.
- Dairy-free: Use a high-quality dairy-free mac and cheese (like one with cashew cream) and swap the eggs for a flax egg (1 tablespoon ground flax + 2.5 tablespoons water per egg) if needed. The bites will still be creamy; my nephew who can’t do dairy asks for these whenever he visits.
- Gluten-free: Use gluten-free macaroni, a gluten-free flour blend, and crushed gluten-free rice Chex or gluten-free panko. The coating stays incredibly crunchy.
- Spicy jalapeño-cheddar: Stir finely diced pickled jalapeños and a handful of shredded pepper jack into your leftover mac before chilling. My husband and I make this version after the kids are asleep and eat them with ranch.
- Kid-friendly pizza style: Mix in a couple tablespoons of mini pepperoni and a spoonful of marinara into the cold mac and cheese. Serve with warm pizza sauce for dipping — my nine-year-old named them “macca-roni pizzettes.”
- Pulled pork stuffed: For game day, press a little cube of cold pulled pork into the center of each ball before breading. The result is like a mac-and-cheese-barbecue bomb.
The Fried Mac and Cheese Questions My Readers Keep Asking
Q: Why did my mac and cheese bites fall apart in the oil?
A: Ugh, I’ve been there, and it’s almost always because the mac and cheese wasn’t cold enough or the oil wasn’t hot enough. Chilled mac acts like a glue, and a steady 350°F sears the outside instantly so they hold their shape. If your mixture still seems crumbly, you can mix an extra tablespoon of cream cheese into it before chilling — it adds a little binder without changing the flavor much.
Q: Can I use boxed mac and cheese for this?
A: You absolutely can! My kids actually prefer the neon orange stuff from the blue box for these. Just make it according to the package, add an extra handful of shredded cheddar while it’s hot to bump up the cheese pull, then chill it really well before shaping. The bites will be a little softer than ones made with a baked mac, but they fry up deliciously.
Q: How long do leftovers last? Can I freeze them after frying?
A: Fried leftovers stay good in the fridge for up to 2 days in an airtight container, but they’ll lose that shatter-crisp exterior — the oven or air fryer revives them nicely. I don’t recommend freezing already-fried bites because they get oddly chewy. The magic is in freezing the uncooked, breaded balls, then frying them straight from the freezer whenever the craving hits. That way you get fresh-from-the-fryer crunch every time.
Q: What’s the best dipping sauce for fried mac and cheese bites?
A: My kids are a ranch-or-bust crew, but honestly, warm marinara, buffalo ranch, or a smoky chipotle mayo all work. For a grown-up gathering, I set out little ramekins of truffle aioli and everyone loses their minds. My personal favorite is a drizzle of sriracha and a squeeze of lime — it cuts through the richness perfectly.
More Recipes My Family Makes on Repeat
If you liked these crispy little gems, here are a few other snacks that get the same “can we have these again?” reaction at our table:
- [INTERNAL LINK PLACEHOLDER: Extra Crispy Chicken Tenders] — The buttermilk marinade is the secret, and they freeze beautifully just like the bites.
- [INTERNAL LINK PLACEHOLDER: Air Fryer Broccoli Cheddar Tots] — A veggie-packed hack that even my green-averse kid devours.
- [INTERNAL LINK PLACEHOLDER: Homemade Mozzarella Sticks] — No weird breading, just string cheese and a double-panko coat that stays melty forever.
I hope these fried mac and cheese bites become your family’s favorite leftover trick the same way they’ve become ours. There’s something so satisfying about turning a sad container of fridge mac into a snack everyone fights over. If you give them a try, tag me or drop a comment — I’d love to hear what dipping sauce won at your house.
📌 Fried mac and cheese bites recipe that uses up leftovers in the crispiest, cheesiest way possible — save it for your next game day spread or busy weeknight snack attack.
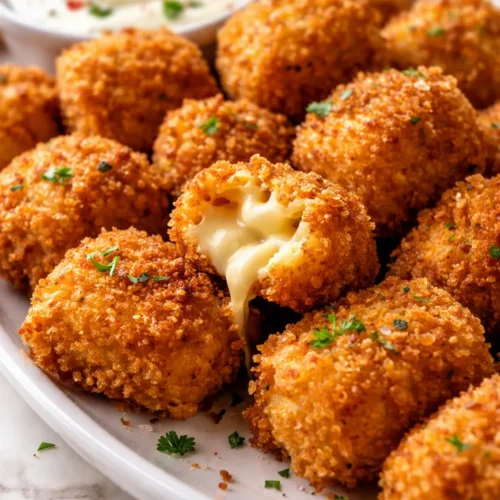
Fried Mac and Cheese Bites
Equipment
- Heavy-bottomed pot or Dutch oven
- Deep-fry thermometer
- Slotted spoon or spider strainer
- Rimmed baking sheet
- Paper towels
- Three Shallow Bowls
- Small cookie scoop or spoon
Ingredients
- 2 cups cold leftover mac and cheese
- ½ cup all-purpose flour
- Salt and pepper to taste
- 2 large eggs
- 1 tablespoon milk
- 1½ cups panko breadcrumbs
- as needed Vegetable or canola oil
Optional Spice Mix
- ½ teaspoon garlic powder
- ¼ teaspoon smoked paprika
- pinch cayenne pepper
Instructions
- Portion and roll the balls: Use a small cookie scoop (about 1½ tablespoons) to portion the cold mac and cheese, then roll each scoop between your palms into a smooth ball. You should get around 16–18 bites. If the mixture is still a little sticky, lightly dampen your hands with water.
- Set up your breading station: Grab three shallow bowls. Bowl one: flour seasoned with salt, pepper, and any extra spices. Bowl two: beaten eggs with milk. Bowl three: panko breadcrumbs.
- First coat — flour: Roll a ball in the flour until lightly dusted all over, then gently shake off the excess.
- Egg dip: Drop the floured ball into the egg mixture and turn with a fork to coat completely. Let excess drip off.
- First panko layer: Roll it in the panko, pressing gently so the crumbs adhere. Dip back into the egg, then into the panko a second time for a double-dredge. Set the finished bite on a clean plate and repeat with all balls. Let them rest for about 5 minutes while you heat the oil.
- Heat the oil: Pour about 2 inches of oil into your heavy pot and attach the thermometer. Heat over medium-high until it reaches a steady 350°F.
- Fry in batches: Carefully lower 4–5 bites into the hot oil. Fry for 2½ to 3 minutes, turning occasionally, until deep golden brown all over. Let oil return to temperature between batches.
- Drain and salt immediately: Transfer the fried bites to a paper-towel-lined sheet or wire rack and sprinkle with flaky sea salt while still hot.
Notes
Related Recipes:
 Cheesy Hamburger Casserole Bake That’s Ready in 40 Minutes (No Canned Soup Here)
 Creamy Garlic Tagliatelle That Looks Like a Restaurant Dish in 20 Minutes
 Texas Roadhouse Style Baked Salmon with Sweet and Savory Glaze — Ready in Under 30 Minutes
 Easy Italian Meatloaf That’s Actually Juicy (Not Dry) — in 1 Hour
 The Biscuits and Gravy Casserole That’s Actually Crispy on Top (And Ready in 40 Minutes)
 Air Fryer Chicken and Vegetables That Don’t Taste Like a Regret (30 Minutes, One Pan)