
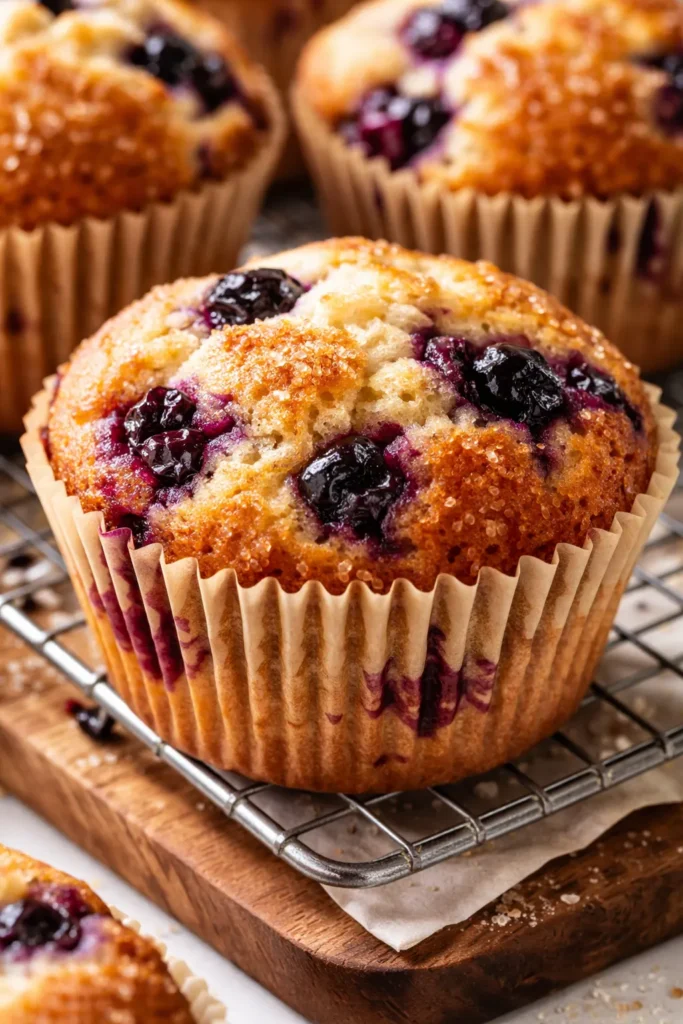
The first time I made these, my neighbor knocked on my door to ask what I was baking. Not kidding. The whole hallway smelled like vanilla and warm berries — that specific kind of cozy that makes people pause. That was four batches ago, and I haven’t bought a bakery muffin since.
The short version: Tall, domed tops, tender crumb, and huckleberries that stay suspended instead of sinking to the bottom. Fifteen minutes of hands-on work.
I’ve tested this at least six times to make sure the frozen berry version works as well as fresh. It does. My kids eat these for breakfast on school mornings without a single complaint — which in my house qualifies as a five-star review.
- Serves: 12 standard muffins
- Hands-On Time: 15 min | Total Time: 35 min
- Difficulty: Easy — even on a Tuesday morning before school
- Cost per serving: ~$0.80
- Calories: ~280 per muffin
- Dietary Notes: Vegetarian, easily adaptable for gluten-free
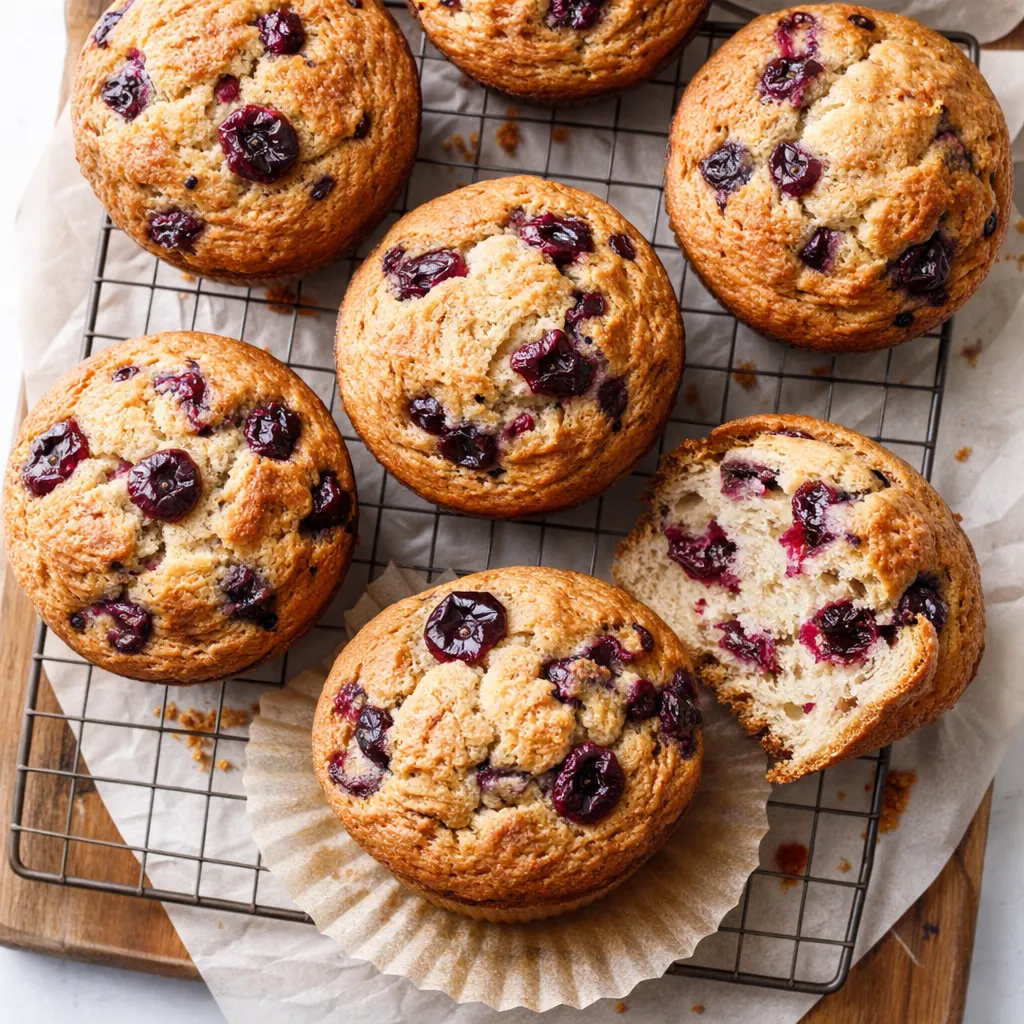
(Photo above: Overhead shot of a batch cooling on a wooden board, natural morning light coming from the left, one muffin broken open to show the purple berry swirl and tall golden dome. Blue countertop. Simple, intentional mess.)
The One Step That Makes These Taste Like Pastry School
Most muffin recipes skip the brown butter. Don’t skip it. Browning the butter adds a nutty, toasty depth that makes the huckleberries taste darker and more complex. It takes exactly four minutes and zero skill. You just swirl the pan and watch the solids turn golden.
Here’s what happens: the milk solids toast and release a flavor compound that plain butter can’t touch. It sneaks into the background of every bite. Your brain registers it as richness, not a specific ingredient. That’s the gap between a good muffin and a memorable one.
I learned this the hard way after way too many batches that tasted fine but didn’t make anyone ask for the recipe. Brown butter is the difference.
Everything You Need (And a Few Notes From Me)
- 1/2 cup (1 stick) unsalted butter: The star of the show. Don’t use salted — you want to control the salt level yourself. Pro tip: Use a light-colored pan to brown the butter so you can see the color change clearly.
- 2 cups all-purpose flour: Spoon and level it. Scooping straight from the bag packs in too much flour and makes the muffins dense. Tragic. I’ve done it.
- 1/2 cup granulated sugar + 1/2 cup packed brown sugar: The brown sugar adds moisture and a hint of molasses that plays nicely with the huckleberries. My kids can smell the difference when I skip the brown sugar — I’m not joking.
- 2 tsp baking powder + 1/2 tsp baking soda: Fresh baking powder matters. If yours has been sitting in the cabinet for a year, it’s time to replace it. Domes won’t happen without it.
- 1/2 tsp salt: Fine salt for the batter. Flaky salt for the top later.
- 1 cup buttermilk: Makes the crumb tender and reacts with the baking soda for lift. No buttermilk? Use regular milk + 1 tablespoon of lemon juice. Let it sit 5 minutes.
- 2 large eggs: Room temperature if you remember. Cold is fine in a pinch — I’ve done it many times.
- 1 tsp vanilla extract: Pure, not imitation. It’s subtle but noticeable.
- 1 1/2 cups huckleberries (fresh or frozen): The whole point. Frozen work great — just don’t thaw them first. Toss them in 1 tablespoon of flour before folding in. This keeps them from sinking to the bottom.
- Turbinado sugar for topping: Optional but not really. That crunchy top is half the appeal.
What to Pull Out Before You Start
- A 12-cup standard muffin pan
- Paper liners (I prefer unbleached parchment liners — they peel off cleanly)
- A light-colored skillet or saucepan for browning the butter
- Two mixing bowls (one large, one medium)
- A whisk, spatula, and cookie scoop (the scoop makes filling the cups so much cleaner)
That’s it. No stand mixer required. This is a whisk-and-fork situation.
Let’s Make These (Step by Step)
This moves fast once the wet ingredients are combined, so read through once before you start. Trust me.
Preheat and Prep: Preheat your oven to 400°F. Line your muffin pan with 12 paper liners. If you don’t have liners, grease the cups well with butter or nonstick spray.
- Brown the butter: Melt the butter in your light-colored skillet over medium heat. Swirl occasionally. It’ll foam up, then the foam will subside and you’ll see golden brown specks forming at the bottom. When it smells nutty and toasty — about 3 to 4 minutes — pull it off the heat immediately. Pour it into a small bowl to stop the cooking. Let it cool while you do the next steps. (📸 Photo tip: You’re looking for amber specks at the bottom of the pan, not black specks. Amber is perfect. Black means it’s burnt.)
- Mix the dry ingredients: In a large bowl, whisk together the flour, granulated sugar, brown sugar, baking powder, baking soda, and salt. Set aside.
- Mix the wet ingredients: In a medium bowl, whisk together the cooled brown butter (it should be warm but not hot), buttermilk, eggs, and vanilla until smooth and well combined.
- Combine wet and dry: Pour the wet mixture into the dry mixture. Use a spatula to fold it together gently. Stop when you can still see a few streaks of flour. Do not overmix — overmixed batter is the #1 reason muffins turn out tough. Fold it like you’re being gentle with a very expensive sweater.
- Fold in the huckleberries: Sprinkle the flour-dusted huckleberries over the top of the batter. Fold them in with a few gentle strokes. The batter will be thick — that’s good. (📸 Photo tip: If you’re using frozen berries, the batter might seize slightly and turn a little purple in streaks. That’s fine. It means the berries are staying put instead of sinking.)
- Rest the batter (the big secret!): Cover the bowl with plastic wrap or a clean towel and let it sit at room temperature for 20 minutes. This rest lets the starches hydrate and the leavening activate. This single step gives you taller, domed muffin tops instead of flat ones. I know 20 minutes feels long. It’s worth it.
- Fill the muffin cups: Use your cookie scoop or a spoon to divide the batter evenly among the 12 cups. They should be full — nearly to the top. Sprinkle the tops generously with turbinado sugar.
- Bake: Bake at 400°F for 18 to 22 minutes. Start checking at 18 minutes — a toothpick inserted into the center should come out clean or with a few moist crumbs. The tops should be deep golden brown and spring back when you gently press them.
- Cool in the pan 5 minutes: Let the muffins rest in the pan on a wire rack for 5 minutes. Then lift them out of the pan and let them cool completely on the rack. Or don’t — I am not here to stop you from eating one warm.
How I Stock My Freezer With These
I make a double batch on Sunday mornings and we’re set for the week. Here’s how I store them so they stay fresh:
- Fridge: Store in an airtight container at room temperature for up to 3 days. No refrigerator — it dries them out.
- Freezer: Absolutely yes. Let them cool completely, then wrap each muffin individually in plastic wrap and place in a freezer-safe bag. They keep for 3 months.
- Reheat: Microwave for 15 to 20 seconds if you want it warm. For that just-baked texture, pop them in a 350°F oven for 5 minutes. The top gets crispy again. My secret: I wrap them individually so the kids can grab one from the freezer on school mornings and it’s ready by the time they walk out the door.
Things I Wish I’d Known the First Time
- Don’t skip the flour coating: Tossing the berries in a tablespoon of flour before folding them into the batter changes everything. It creates a light barrier so the berries stay suspended throughout the muffin instead of sinking into a sad purple layer at the bottom. I skipped it once. The whole batch looked like a science experiment gone wrong.
- The batter rest is non-negotiable for tall tops: I know waiting 20 minutes feels ridiculous when you’re hungry. But that rest is what gives you the bakery-style dome. The gluten relaxes, the baking powder activates, and the batter thickens enough to mound up as it bakes instead of spreading flat. I’ve tested it side by side. The rested batch wins every single time.
- Fresh vs. frozen berries: Both work. Fresh huckleberries are a treat if you can find them. Frozen are more consistent and often more affordable. Just don’t thaw them before adding — frozen berries bleed less into the batter and keep their shape better.
- Even if the tops aren’t perfectly domed, they’ll taste incredible: The first time I tried this, I overmixed the batter slightly and the tops came out flat. They were still the best muffins I’d ever made. Don’t stress about perfection on the first try.
Make It Yours: Easy Swaps
- Blueberry version: Swap huckleberries for 1 1/2 cups of fresh or frozen wild blueberries. The smaller berries distribute more evenly than grocery store blueberries. It’s my go-to when huckleberries are out of season.
- Lemon-Huckleberry: Add the zest of one lemon to the wet ingredients and swap 1 tablespoon of buttermilk for 1 tablespoon of lemon juice. The bright citrus cuts through the richness of the brown butter beautifully.
- Gluten-Free: Swap the all-purpose flour for a 1:1 gluten-free baking flour (like King Arthur Measure for Measure). Everything else stays the same. I tested this for a friend’s brunch and no one could tell the difference.
- Streusel topping (my kids’ favorite): Combine 1/4 cup flour, 3 tablespoons brown sugar, 2 tablespoons cold butter (cubed), and pinch of salt. Use your fingers to work it into coarse crumbs. Sprinkle on top before baking instead of the turbinado sugar. It adds a buttery, crumbly crust that feels very indulgent.
Questions I Get About This Recipe All the Time
Q: Why did my huckleberries sink to the bottom?
A: Ugh, I’ve been there. The fix is simple: toss the fresh or frozen berries in 1 tablespoon of flour before folding them into the batter. That little coating creates friction that holds them in place. Also, make sure your batter isn’t too thin — the rest step helps thicken it up.
Q: Can I use frozen huckleberries?
A: Yes, absolutely. I actually prefer frozen for baking because they’re picked at peak ripeness and don’t break down as much. Just add them straight from the freezer — no thawing. Toss them in flour first, same as fresh.
Q: How long do these last? Can I freeze them?
A: Airtight container at room temperature for 3 days, max. For longer storage, wrap each muffin individually in plastic wrap and freeze in a zip-top bag for up to 3 months. To reheat, pop one in the microwave for 15 seconds or in a 350°F oven for 5 minutes to crisp the top back up.
Q: What do you serve with these?
A: Black coffee, full stop. But if we’re doing brunch, I pair them with a simple sausage and egg bake (my kids love that combo) or a bowl of fresh fruit on the side. They also make an amazing snack at 3pm with a glass of cold milk — trust me on that one.
More Recipes My Family Makes on Repeat
If you liked these huckleberry muffins, here are a few other favorites that get my family just as excited:
- Wild Blueberry Scones with Lemon Glaze — Tender, buttery, and ready in 30 minutes. My Saturday morning go-to.
- Savory Cheddar & Chive Muffins — The perfect savory companion to a bowl of soup. Also amazing split, toasted, and buttered.
- Weeknight Dutch Baby with Berries — Impressive enough for guests, easy enough for a Tuesday. A family favorite.
Make these once, and you’ll never go back to the boxed mix. I promise. The brown butter does that to a person.
If you try them, drop a comment below — I love hearing how they turn out in your kitchen. And tag me on Instagram so I can cheer you on from here.
📌 Tall, buttery huckleberry muffins with a secret bakery trick that takes 5 minutes — save this recipe for your next weekend breakfast!
Huckleberry Muffins
Equipment
- 12-cup standard muffin pan
- Paper liners (unbleached parchment preferred)
- Light-colored skillet or saucepan for browning butter
- Two mixing bowls (one large, one medium)
- Whisk
- Spatula
- Cookie Scoop
Ingredients
Batter
- 1/2 cup unsalted butter (1 stick)
- 2 cups all-purpose flour, spooned and leveled
- 1/2 cup granulated sugar
- 1/2 cup packed brown sugar
- 2 tsp baking powder
- 1/2 tsp baking soda
- 1/2 tsp fine salt
- 1 cup buttermilk
- 2 large eggs, room temperature preferred
- 1 tsp pure vanilla extract
- 1 1/2 cups huckleberries (fresh or frozen, not thawed)
- 1 tbsp all-purpose flour (for tossing berries)
For Topping
- 2 tbsp turbinado sugar
Instructions
- Preheat your oven to 400°F. Line a 12-cup muffin pan with paper liners (or grease the cups well).
- Brown the butter: Melt the butter in a light-colored skillet over medium heat. Swirl occasionally. It will foam up, then subside. When amber specks form at the bottom and it smells nutty (3–4 minutes), remove from heat immediately. Pour into a small bowl and let cool slightly.
- Mix dry ingredients: In a large bowl, whisk together flour, granulated sugar, brown sugar, baking powder, baking soda, and salt.
- Mix wet ingredients: In a medium bowl, whisk together the cooled brown butter, buttermilk, eggs, and vanilla until smooth.
- Combine: Pour wet mixture into dry mixture. Fold gently with a spatula until just combined — a few streaks of flour should remain. Do not overmix.
- Fold in huckleberries: Sprinkle the flour-dusted huckleberries over the batter and fold with a few gentle strokes until evenly distributed. Batter will be thick.
- Rest the batter: Cover the bowl and let it sit at room temperature for 20 minutes. This activates the leavening and gives taller, domed tops.
- Fill the cups: Divide the batter evenly among the 12 cups, filling nearly to the top. Sprinkle generously with turbinado sugar.
- Bake at 400°F for 18–22 minutes, until tops are deep golden and a toothpick inserted in the center comes out clean or with a few moist crumbs.
- Cool in the pan for 5 minutes, then transfer to a wire rack to cool completely. Or enjoy one warm — no judgment.
Notes
Related Recipes:
 Cheesy Hamburger Casserole Bake That’s Ready in 40 Minutes (No Canned Soup Here)
 Texas Roadhouse Style Baked Salmon with Sweet and Savory Glaze — Ready in Under 30 Minutes
 Moist Lemon Zucchini Bread with a Crunchy Lemon Sugar Top
 Strawberry Shortcake Rice Krispie Treats That Actually Taste Like Shortcake — Ready in 15 Minutes
 Blueberry Oatmeal Cookies That Stay Soft for Days — in Under 30 Minutes
 Air Fryer Chicken and Vegetables That Don’t Taste Like a Regret (30 Minutes, One Pan)