
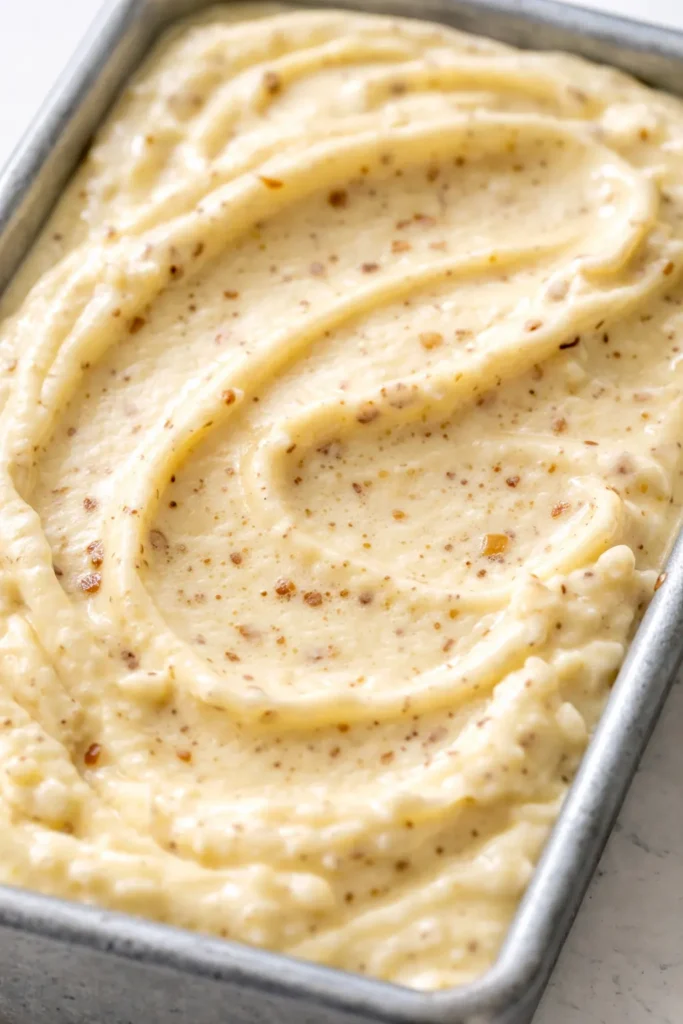
The first time I made this, I stood over the container with a spoon at 10 PM, telling myself “just one more bite” until the spoon hit the bottom. My husband, who claims he “doesn’t do banana flavored things,” ate half the batch before I could stop him. This is not the icy, crystallized banana ice cream you’ve suffered through before. This is the real deal — creamy, densely flavored, with soft vanilla wafer bits that taste exactly like the center of a good banana pudding.
The short version: Creamy, banana-packed, with soft vanilla wafer bits in every scoop — and zero special equipment.
I’ve made this about nine times in the last month. It is the easiest “I brought dessert” move in my entire repertoire. Everyone assumes it takes hours, and I let them.
- Serves: 8 as dessert
- Hands-On Time: 10 min | Total Time: 4 hrs 10 min
- Difficulty: Almost embarrassingly easy
- Cost per serving: ~$1.50
- Calories: ~380 per serving
- Dietary Notes: Vegetarian. Adaptable for gluten-free (use GF vanilla wafers).
(Photo above: overhead shot of a scoop of ice cream in a simple white bowl, showing the vanilla wafer pieces and the creamy, speckled texture of the banana ice cream, natural light from a side window.)
Why This Tastes Like the Real Pudding (Not Just Banana Ice Cream)
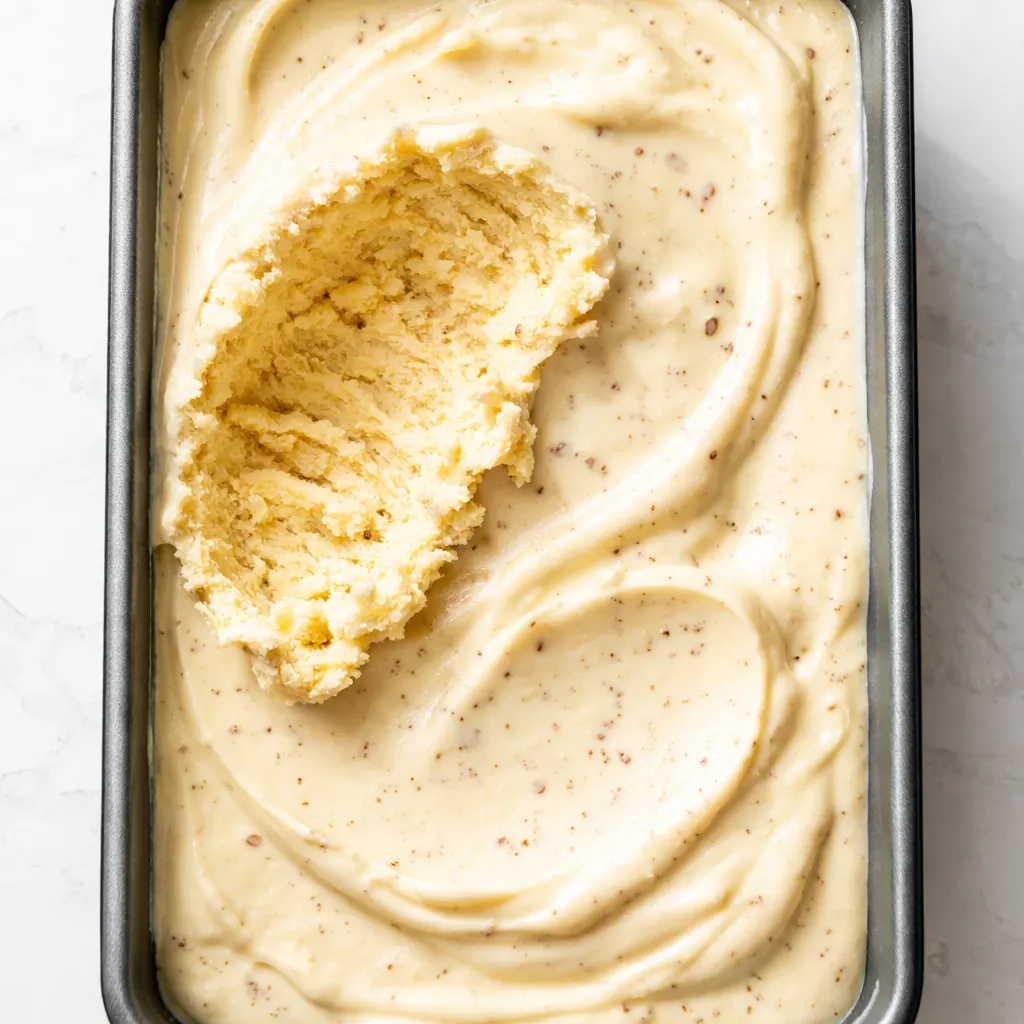
The secret is macerating the bananas. Most no-churn recipes just mash the bananas and throw them in, which leaves you with a muted, slightly icy result. If you let the bananas sit with sugar and a squeeze of lemon for five minutes, it draws out their natural oils and concentrates the flavor in a way that makes the whole thing taste like the inside of a banana pudding cup.
The lemon isn’t there to be tasted. It’s there to keep the bananas from turning a sad shade of grey and to give the sweetness something to push against.
What you get is a base that stays scoopable straight from the freezer, absorbs the vanilla wafers into soft pockets of cookie, and genuinely tastes like you spent way more time on it than you did.
Everything You Need (And Why It Works)
- 2 cups heavy cream: This is the air that makes it scoopable. Do not substitute half-and-half. I have tried, and you will cry.
Make sure it’s cold before you whip it — warm cream won’t hold peaks. - 1 can (14 oz) sweetened condensed milk: The no-churn non-negotiable. It adds sweetness, body, and prevents ice crystals.
Get the full-fat version. The low-fat one has too much water and gets icy. - 3 very ripe bananas: The browner, the better. If they have no spots, they have no flavor.
My trick: if your bananas aren’t ripe enough, bake them at 300°F for 15 minutes. They’ll soften and sweeten right up. - 1 tsp vanilla extract: Standard, but don’t skip it.
- 1 tbsp fresh lemon juice: Non-negotiable if you want it to taste bright and stay pretty.
- 2 tbsp granulated sugar: Helps the maceration process.
- 2 cups vanilla wafers (like Nilla): Crushed into big and small pieces. The big ones stay crunchy, the small ones melt into the base.
Generic works. Nilla works best. Do not use chocolate wafers unless you want a different dessert entirely.
What to Pull Out Before You Start
- 9×5 loaf pan: The perfect size so it freezes evenly and fast.
- Hand mixer or stand mixer: You can whisk by hand if you have impressive biceps. I do not.
- Spatula: For folding, not stirring.
- Mixing bowls: One large, one medium.
Let’s Make It (Seriously, It’s This Easy)
Read this once before you start. The actual active time is under ten minutes, but the order matters.
- Macerate the bananas: In a medium bowl, mash the bananas with a fork or potato masher until mostly smooth with some small chunks. Stir in the sugar and lemon juice. Let it sit for 5 minutes while you do the next step.
(📸 Photo tip: The banana should look like a thick, slightly syrupy puree — not watery, not chunky.) - Whip the cream: In a large bowl, whip the heavy cream and vanilla extract to soft peaks. You will know it’s ready when it holds a gentle curl when you lift the beater, not stiff peaks.
(📸 Photo tip: The cream should be billowy and hold a soft shape — if it looks like butter, you went too far.) - Fold the base together: Pour the sweetened condensed milk over the whipped cream. Fold gently until combined. Then add the banana mixture and fold until just combined. A few streaks are fine.
- Layer it: Spoon a third of the cream mixture into your loaf pan. Sprinkle with a third of the crushed wafers. Repeat twice. End with a layer of cream on top so the top doesn’t get freezer-burned.
(📸 Photo tip: Run a knife through the layers to swirl them slightly, then press a few larger wafer pieces on top for a visual finish.) - Freeze: Cover tightly with plastic wrap or a lid. Freeze for at least 4 hours, preferably 6. It will keep for up to 2 weeks.
How to Make This Ahead (Because We’re All Busy)
I make a double batch on Fridays when the bananas on the counter are about to turn. It disappears by Monday, but technically it keeps well. My secret: pressing a piece of plastic wrap directly onto the surface of the ice cream before sealing the lid. It prevents ice crystals from forming on top.
- Fridge: Not applicable — it melts. Store in the freezer.
- Freezer: Yes, up to 2 weeks in a tightly sealed container. After that, the wafers get too soft and the flavor starts to fade.
- Reheat: Let it sit on the counter for 5 minutes before scooping. It comes out too hard straight from the freezer. Patience matters here.
Things I Learned After the First Few Batches
- Don’t over-whip the cream. Soft peaks only. If you whip it to stiff peaks, the mixture gets dense and the final texture is heavy, not creamy. I made this mistake exactly once. The texture was fine, but not great.
- The ripeness of the banana is everything. If you use yellow bananas with no spots, the ice cream will taste like sweet dairy with a whisper of banana. If you use spotty brown bananas, it tastes like the inside of a banana cream pie. There is no shortcut here — wait for the spots.
- Crush the wafers by hand. If you put them in a food processor, you get dust. You want a mix of big pieces (1/2 inch) and small crumbs. The big ones stay crunchy, the small ones dissolve into the base and give it a subtle cookie flavor throughout.
- A splash of rum makes it scoopable. If you’re making this for adults, add 2 tablespoons of dark rum to the cream mixture before folding. The alcohol lowers the freezing point, making the ice cream soft and scoopable straight from the freezer. It also adds a warm vanilla undertone. My husband loves this version.
Swaps That Actually Work
- Gluten-Free: Use gluten-free vanilla wafers. They work exactly the same. No one will notice the difference.
- Dairy-Free: Swap the heavy cream for full-fat coconut cream (chilled, solid part only) and use a dairy-free sweetened condensed milk. It works, but it will taste faintly of coconut. I actually love this version because the coconut pairs beautifully with banana.
- Boozey Banana: As mentioned above, 2 tbsp dark rum or bourbon. It changes the texture slightly — makes it softer and richer.
- Kid-Friendly Smoothie Pops: Pour the mixture (before adding wafers) into popsicle molds. Freeze for 6 hours. My nephew calls them “banana cream pops” and they are the only dessert he eats without complaint.
Questions I Get About This Recipe All the Time
Q: Why did my ice cream turn out icy?
A: Ugh, I’ve been there. Two reasons most likely: your heavy cream was over-whipped and lost its structure, or the finished ice cream wasn’t sealed tight enough. Press plastic wrap directly onto the surface of the ice cream before freezing. It blocks the air that causes crystal formation. You’ve got this next time!
Q: Can I make this with non-dairy whipped topping?
A: I haven’t tested it with store-bought whipped topping (like Cool Whip), so I can’t recommend it with confidence. The heavy cream provides a richness and stability that imitation whipped creams just can’t match. If you try it, please let me know — I’m genuinely curious!
Q: How long does this last in the freezer?
A: About 2 weeks before the wafers get completely soft and the banana flavor starts to mellow. I promise it won’t last that long in your house. My house it’s gone in three days, tops. Store it in a tightly sealed container with plastic wrap pressed onto the surface.
Q: What do you serve with this?
A: Honestly, just a spoon and a bowl. But if I’m feeling fancy, a warm vanilla wafer crumble on top and a drizzle of salted caramel. My kids love it with fresh sliced strawberries on top. We always do the caramel version on weekends.
More Recipes My Family Makes on Repeat
If you liked this one, here are a few others that get the same reaction at our table:
- [INTERNAL LINK PLACEHOLDER: Three-Ingredient Chocolate Sorbet] — Rich, dark, and somehow even easier than this one. Two ingredients, five minutes of work.
- [INTERNAL LINK PLACEHOLDER: Salted Caramel No-Churn Ice Cream] — The salty-sweet version of this recipe. Use the same base, swap the bananas for caramel.
- [INTERNAL LINK PLACEHOLDER: Old-Fashioned Banana Pudding (Baked)] — For when you want the real thing, complete with meringue. My grandmother’s recipe.
This is the kind of dessert that makes you look like a hero with almost zero effort. Keep it in your back pocket for hot afternoons, unexpected guests, or a Tuesday when the only thing that will fix the mood is something cold and creamy and nostalgic.
If you make it, drop a comment below — I love hearing how it goes for you! And tag me on Pinterest so I can see your beautiful scoop.
📌 The only no-churn banana pudding ice cream recipe you’ll ever need — save it for your next hot afternoon when you need something cold, creamy, and effortless.
No-Churn Banana Pudding Ice Cream That’s Creamier Than the Boxed Stuff — in 10 Minutes of Work
Equipment
- 9×5 Loaf Pan
- Hand mixer or stand mixer
- Spatula
- Mixing bowls
- Plastic wrap
Ingredients
- 2 cups heavy cream
- 1 can (14 oz) sweetened condensed milk
- 1 tsp vanilla extract
- 1 tbsp fresh lemon juice
- 2 tbsp granulated sugar
- 2 cups vanilla wafers (like Nilla), crushed
Instructions
- Macerate the bananas: In a medium bowl, mash the bananas with a fork or potato masher until mostly smooth with some small chunks. Stir in the sugar and lemon juice. Let it sit for 5 minutes while you do the next step.
- Whip the cream: In a large bowl, whip the heavy cream and vanilla extract to soft peaks. You’ll know it’s ready when it holds a gentle curl when you lift the beater.
- Fold the base together: Pour the sweetened condensed milk over the whipped cream. Fold gently until combined. Then add the banana mixture and fold until just combined.
- Layer it: Spoon a third of the cream mixture into your loaf pan. Sprinkle with a third of the crushed wafers. Repeat twice, ending with a layer of cream on top. Run a knife through to swirl slightly.
- Freeze: Cover tightly with plastic wrap. Freeze for at least 4 hours, preferably 6. It will keep for up to 2 weeks.
Notes
– Don’t overwhip the cream — soft peaks only.
– Use very ripe (spotty brown) bananas for the best flavor.
– Crush wafers by hand for a mix of sizes.
– For a boozy version, add 2 tbsp dark rum to the cream mixture. Swaps:
– Gluten-free: use GF vanilla wafers.
– Dairy-free: use chilled full-fat coconut cream and dairy-free condensed milk (will taste faintly of coconut).
– Kids: pour mixture into popsicle molds for banana cream pops.
Related Recipes:
 Cheesy Hamburger Casserole Bake That’s Ready in 40 Minutes (No Canned Soup Here)
 Texas Roadhouse Style Baked Salmon with Sweet and Savory Glaze — Ready in Under 30 Minutes
 Moist Lemon Zucchini Bread with a Crunchy Lemon Sugar Top
 Strawberry Shortcake Rice Krispie Treats That Actually Taste Like Shortcake — Ready in 15 Minutes
 Blueberry Oatmeal Cookies That Stay Soft for Days — in Under 30 Minutes
 Air Fryer Chicken and Vegetables That Don’t Taste Like a Regret (30 Minutes, One Pan)