
I’ve made a lot of pickles in my time. Some tart, some sweet, some that sat in the pantry for months before tasting right. But these? These are the ones I come back to every single summer. They’re ready in a day — actually ready, not “technically edible” — and they stay crisp for weeks. No canning equipment, no boiling water bath, no pressure to eat them all at once. Just a brine, a jar, and the kind of crunch that lets everyone in the kitchen know you’re about to have a really good burger.
The short version: Ten minutes of active time, one jar, and you’ll have dill pickles that beat anything from the store.
I’ve been making these for three summers now — ever since my farmers’ market started selling Kirbys in bulk. My husband used to buy the big jar from Costco. Now he hoards these like they’re gold. The kids eat them straight from the jar, standing in front of the open fridge. That’s real love.
- Yield: 1 quart jar (about 6–8 pickle spears)
- Hands-On Time: 10 min | Total Time: 24 hours (mostly waiting)
- Difficulty: Easy enough for a Tuesday night when you’re craving crunch
- Cost per serving: Less than $2 for the whole jar
- Calories: ~5 per spear (brine isn’t a meal)
- Dietary Notes: Naturally vegan, gluten-free, dairy-free — everyone’s invited
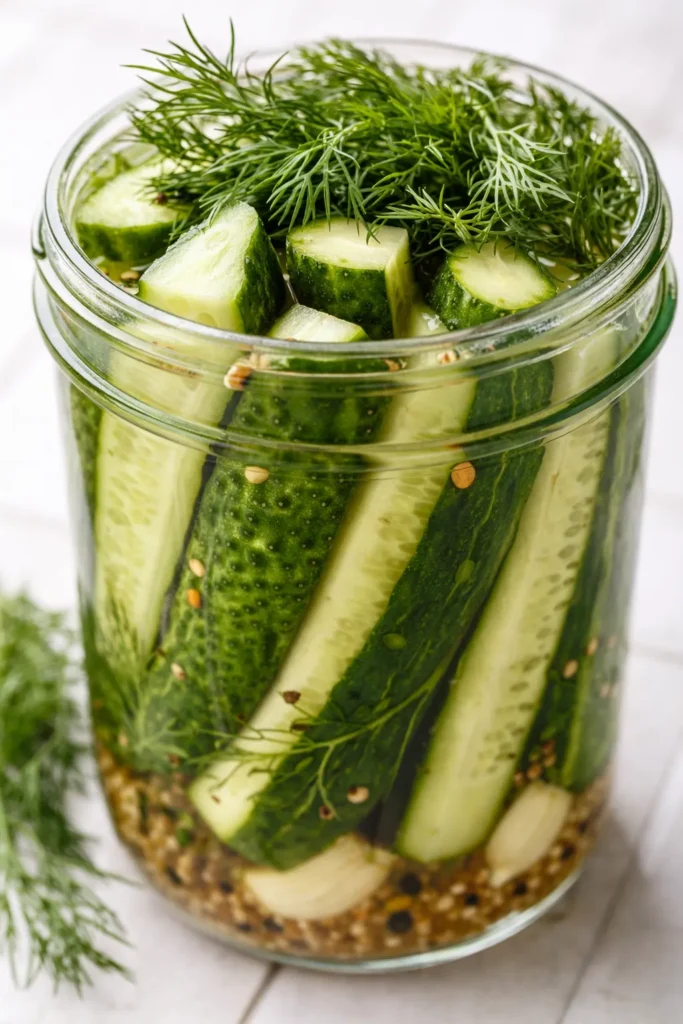
(Photo above: overhead shot of a wide-mouth mason jar filled with cucumber spears, fresh dill sprigs tumbling over the edge, garlic cloves nestled in the brine, and a halo of golden turmeric from the coriander seeds. Natural morning light from the left, shot on a wooden countertop with a linen napkin underneath.)
Why These Are the Crunchiest Pickles I’ve Ever Made
Most quick pickle recipes give you limp, sad spears by day three. Not these. The trick isn’t some secret ingredient — it’s a 60-second step you could easily skip. I learned it the hard way after a batch that went from crunchy to floppy in four days. Now I do it every time and they hold up for two full weeks in the fridge.
It’s about the ends. You trim off a thin slice from both ends of each cucumber — the blossom end and the stem end. That tiny slice removes the enzymes that soften pickles over time. Sounds fussy, I know, but it takes seconds and makes a ridiculous difference. The first time I tried it, my husband asked what I’d done differently. Nothing special, I told him. Just a little knife work.
The other non-negotiable? Use pickling cucumbers. Kirbys, or any thin-skinned variety. English cucumbers water down the brine and go soft. Persian cucumbers work in a pinch but aren’t as sturdy. If you use standard waxed slicers, you’re fighting an uphill battle. Trust me on this one.
The Ingredient Breakdown — With Real Talk
- 1 lb pickling cucumbers (Kirby or similar): The crunch starts here. Look for firm, unwaxed, no soft spots. My farmers’ market knows me as “the pickle lady.”
- 1 cup white vinegar: Distilled white is classic. You can swap in white wine vinegar for a slightly fruitier brine, but don’t use apple cider unless you want a softer finish. My kids don’t love the stronger tang of ACV, so I stick with white.
- 1 cup water: Tap is fine. Filtered if yours has a strong chlorine taste — it’ll be more noticeable in the brine than you think.
- 1½ tbsp kosher salt: This isn’t the time for fine table salt. Kosher dissolves evenly and gives a clean brine. I use Diamond Crystal. If you only have Morton’s, use 1 tablespoon — it’s denser and saltier by volume. Yes, I’ve tested both. Yes, it matters.
- 1 tbsp sugar: Just enough to balance the acid. Not sweet pickles, just rounded. You could skip it, but they’ll taste sharper. My kids don’t notice it’s there.
- 4–6 cloves garlic, smashed: Smash them — don’t mince — so they release flavor slowly. Whole cloves are too subtle in a 24-hour pickle.
- 1 large bunch fresh dill: At least 10 sprigs. Use the fronds and some stems. The stems have tons of flavor. I buy two bunches — one for the pickles, one for snacking with labneh.
- 1 tsp black peppercorns
- 1 tsp coriander seeds
- Pinch of red pepper flakes (optional): My addition. Kids skip it, but I love the warm heat. One summer I accidentally used crushed ghost pepper — that was a brutal batch. Stick with standard flakes.
- 2 fresh grape leaves (optional but amazing):** An old-school trick. The natural tannins help keep pickles crisp. I add one to the top and bottom of the jar. If you have a grapevine neighbor, ask nicely.
What to Pull Out Before You Start
- 1-quart wide-mouth mason jar: Wide-mouth makes packing easier. You can split into two pint jars if that’s what you have. I use a Weck jar because it looks prettier on the table, but standard Ball jars work perfectly.
- Small saucepan
- Sharp knife and cutting board
- Measuring cups and spoons
- Cheesecloth or fine-mesh strainer (optional): If you don’t like seeds floating in your brine, strain after heating. I don’t bother — the spices add visual interest.
Let’s Make Them — It’s Almost Embarrassingly Simple
This goes fast. Read through once so you know the order. The only real active work is slicing and simmering the brine.
Prep the cucumbers: Wash them well. Trim a thin slice off both ends — that’s the enzyme trick. Cut into spears (quarter lengthwise for medium cucumbers, sixths for fat ones). You can also do rounds if you want pickle chips, but spears hold up better in the jar.
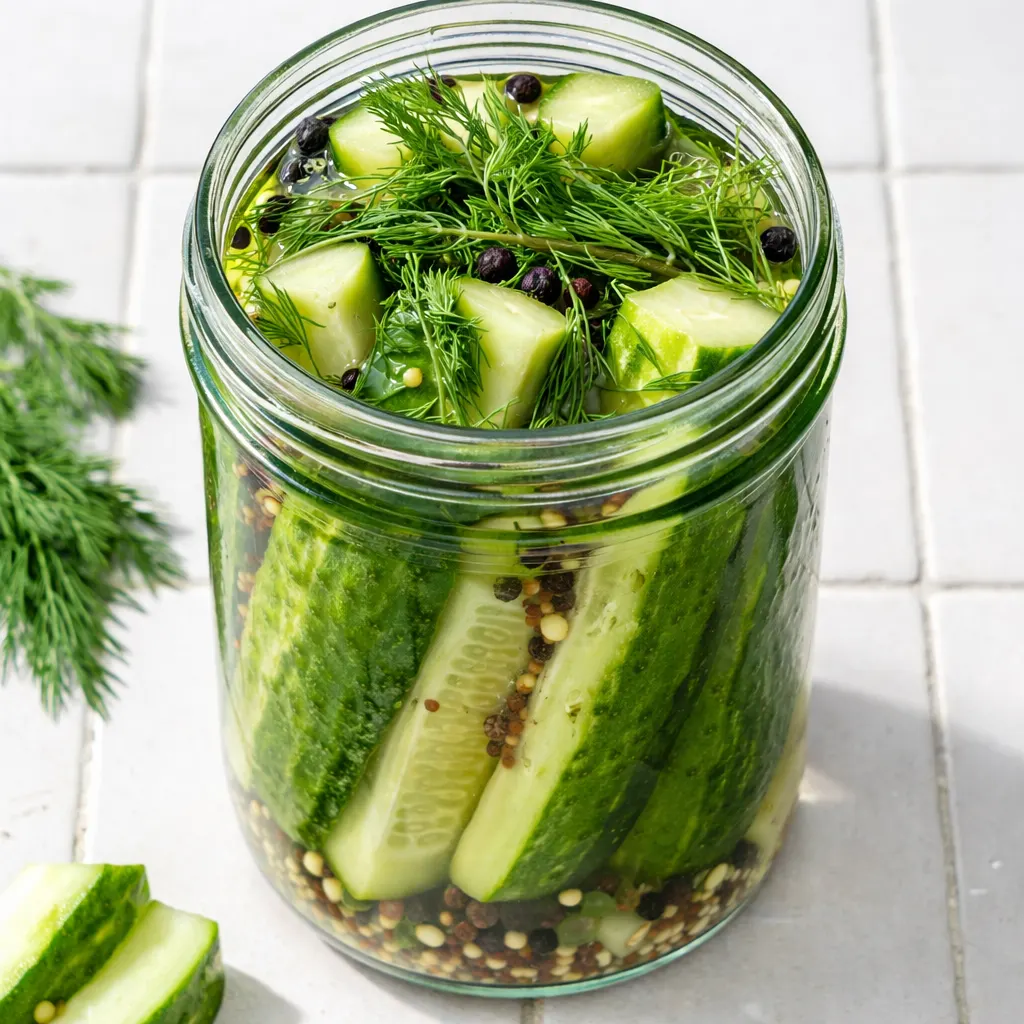
- Pack the jar: Layer dill, garlic, spices, and cucumber spears in the jar. Cram them in — they’ll settle as the brine works. (📸 Photo tip: This is where the visual magic happens. Pack so dill fronds are visible against the glass. You’re making art you can eat.)
- Make the brine: Combine vinegar, water, salt, and sugar in the small saucepan. Bring to a boil, stirring until salt and sugar dissolve. Remove from heat. (📸 Photo tip: If you’re shooting a process shot, this steamy moment with the peppercorns swirling is gorgeous.)
- Pour the brine: Pour the hot brine over the cucumbers in the jar. Leave about ½ inch headspace. Tap the jar gently on the counter to release air bubbles. Add a few more dill sprigs on top if you want them to show in the photo.
- Weight and seal: If you have a glass fermentation weight, pop it in to keep everything submerged. If not, you can use a small ziplock filled with some brine as a makeshift weight. Otherwise, just press the lid on tight. The top pickles might float above the brine — flip the jar every few hours for the first day to redistribute.
- Wait, but not for long: Leave at room temperature for a few hours (or overnight if your kitchen is cool), then refrigerate. The flavor develops best after 24 hours, but I’ve snuck a spear at hour 12 and it was already good. My patience runs thin. Yours might too.
How I Meal Prep These for the Week
Pickles are basically the ultimate make-ahead. I make a double batch on Sunday and we’re set for burger nights, sandwich lunches, and those afternoons when my kids need a salty crunch. I’ve found they actually get better after a week in the fridge — the garlic and dill mellow out and the brine becomes something you want to sip (don’t, but you’ll want to).
- Fridge: Sealed jar, up to 3 weeks. Best within first two. After that, the garlic gets a little funky — I strain and re-use the brine for a second batch of fresh cucumbers.
- Freezer: No. Cucumbers turn to mush on thaw. These are fridge-only. Make a smaller batch if you won’t eat them fast.
- Reheat: You don’t. Serve straight from the fridge. If they’re for a burger, let them sit out 10 minutes to take the chill off. That’s as close to “reheating” as you’ll get.
Things I Wish I’d Known the First Time
- Kirbys are non-negotiable for crunch: I once used regular slicing cucumbers because that’s what I had in the fridge. By day two, they were sad. By day four, they were compost. Don’t do it. Even if you mess up everything else, the cucumber variety makes or breaks this recipe.
- The brine must be hot: Pouring hot brine heats the garlic and dill just enough to wake them up. Cold brine leads to bland, crunchy-but-boring pickles. The heat isn’t necessary for safety — these are refrigerator pickles — but it’s essential for flavor.
- You can double or triple this easily: I make a gallon jar when the farmers’ market has a deal. Scale the brine proportionally, but the spice ratio stays the same. Just leave headspace and let the brine cool a bit if you’re filling a huge jar — thermal shock can crack glass.
- Flavor improves over time: Day 1 is good. Day 3 is better. Day 7 is the sweet spot. After that, it plateaus. If you like bold dill flavor, add extra sprigs when you pack — they’ll fade after a week.
Swaps That Actually Work
- Spicy: Add 2–3 sliced jalapeños or a habanero (left whole) to the jar. I do a spicy batch for nachos. My kids borrow from my jar and regret nothing.
- Sweet: Increase sugar to 2 tablespoons and add a cinnamon stick and star anise. These taste more like bread-and-butter pickles but without the long process. My neighbor loves these on her pulled pork sandwich.
- Low-sodium: Reduce salt to 1 tablespoon. They’ll keep fine but won’t be as firm. They’ll also taste more like vinegar. I’d rather skip the sugar than the salt for stability.
- Garlic-free: Replace garlic with a few slices of fresh ginger. Sounds weird, tastes amazing on a sushi-style bowl. My friend who’s allergic to garlic swears by this version.
- No grape leaves: Add a pinch of alum (1/8 tsp) or a black tea bag (tannins). If you have neither, just skip it — the ends-trimming trick does most of the work alone.
Questions I Get About This Recipe All the Time
Q: Why did my pickles turn out soft?
A: Ugh, I’ve been there. Usually it’s one of three things: you didn’t trim the ends, you used the wrong cucumber (slicing cucumbers are water balloons), or you didn’t add enough salt. Next time, use Kirbys, trim those ends, and measure your salt exactly — don’t skimp. You’ve got this.
Q: Can I make these with apple cider vinegar?
A: Yes, but the flavor is noticeably different — more tart, with a fruitier edge. I’d pair it with a bit more dill and maybe a teaspoon of whole mustard seeds. I’ve tested it and the color is a little cloudier, but the taste is great on a BLT. Just don’t expect the same clear brine.
Q: How long do these last in the fridge?
A: Up to 3 weeks in a sealed jar. I always finish mine by week two because they’re at peak crunch. After 3 weeks, the garlic can get sharp and the cucumbers lose their snap. If you see any cloudiness or mold on the surface, toss it — but that’s rare with a proper salt level.
Q: What do you serve with these pickles?
A: Everything. Burgers (obviously), tuna salad sandwiches, cheese boards (they cut through a rich triple-cream brie beautifully), or alongside a simple grilled chicken with that same dill-you-used-for-the-brine. My kids love them with crispy roasted potatoes — the cold crunch next to the hot starch is a perfect pair. (For the potatoes, try these crispy roasted potatoes.)
More Recipes My Family Makes on Repeat
If you liked this one, here are a few others that get the same reaction at our table:
- Quick Pickled Red Onions — [INTERNAL LINK PLACEHOLDER: Quick Pickled Red Onions] — bright, tangy, ready in 30 minutes. I put them on everything.
- Refrigerator Bread & Butter Pickles — [INTERNAL LINK PLACEHOLDER: Refrigerator Bread & Butter Pickles] — sweeter, softer, perfect for sandwiches.
- Fermented Dill Pickles (Slow Version) — [INTERNAL LINK PLACEHOLDER: Fermented Dill Pickles Slow Version] — if you want the probiotic payoff and can wait a week.
I hope you make these and find yourself reaching for the jar more often than you expect. There’s something so satisfying about opening the fridge and seeing those green spears, knowing you made them with your own hands. If you try them, drop a comment below — I love hearing how your version turned out, especially if you tried a weird twist I haven’t thought of.
📌 Quick Refrigerator Dill Pickles recipe that stays crunchy for weeks — save this for your next backyard burger night or summer sandwich fix.
Quick Refrigerator Dill Pickles That Are Crunchy and Ready in 24 Hours
Equipment
- 1-quart wide-mouth mason jar
- Small saucepan
- Sharp knife and cutting board
- Measuring cups and spoons
- Cheesecloth or fine-mesh strainer (optional)
Ingredients
- 1 lb pickling cucumbers (Kirby or similar)
- 1 cup white vinegar
- 1 cup water
- 1 1/2 tbsp kosher salt (Diamond Crystal preferred)
- 1 tbsp sugar
- 4-6 cloves garlic, smashed
- 1 bunch fresh dill (at least 10 sprigs)
- 1 tsp black peppercorns
- 1 tsp coriander seeds
- pinch red pepper flakes (optional)
- 2 fresh grape leaves (optional)
Instructions
- Wash the cucumbers well. Trim a thin slice off both ends – this removes the enzymes that cause softening. Cut into spears (quarter lengthwise for medium cucumbers, sixths for fat ones).
- Layer dill, garlic, spices, and cucumber spears in a clean 1-quart wide-mouth jar. Pack them in tightly – they’ll settle as the brine works. Dill fronds visible against the glass make for a beautiful jar.
- Combine vinegar, water, salt, and sugar in a small saucepan. Bring to a boil, stirring until salt and sugar dissolve. Remove from heat.
- Pour the hot brine over the cucumbers, leaving about ½ inch headspace. Tap the jar gently on the counter to release air bubbles. Add a few more dill sprigs on top if desired.
- If you have a glass fermentation weight, use it to keep everything submerged. Otherwise, press the lid on tight. The top pickles might float – flip the jar every few hours for the first day to redistribute.
- Leave at room temperature for a few hours (or overnight if your kitchen is cool), then refrigerate. The flavor develops best after 24 hours, but you can sneak a spear at hour 12.
Notes
Related Recipes:
 The Perfectly Pillowy Chocolate Chip Milk Buns (Tangzhong Method)
 Cheesy Hamburger Casserole Bake That’s Ready in 40 Minutes (No Canned Soup Here)
 Texas Roadhouse Style Baked Salmon with Sweet and Savory Glaze — Ready in Under 30 Minutes
 Moist Lemon Zucchini Bread with a Crunchy Lemon Sugar Top
 Strawberry Shortcake Rice Krispie Treats That Actually Taste Like Shortcake — Ready in 15 Minutes
 Blueberry Oatmeal Cookies That Stay Soft for Days — in Under 30 Minutes