
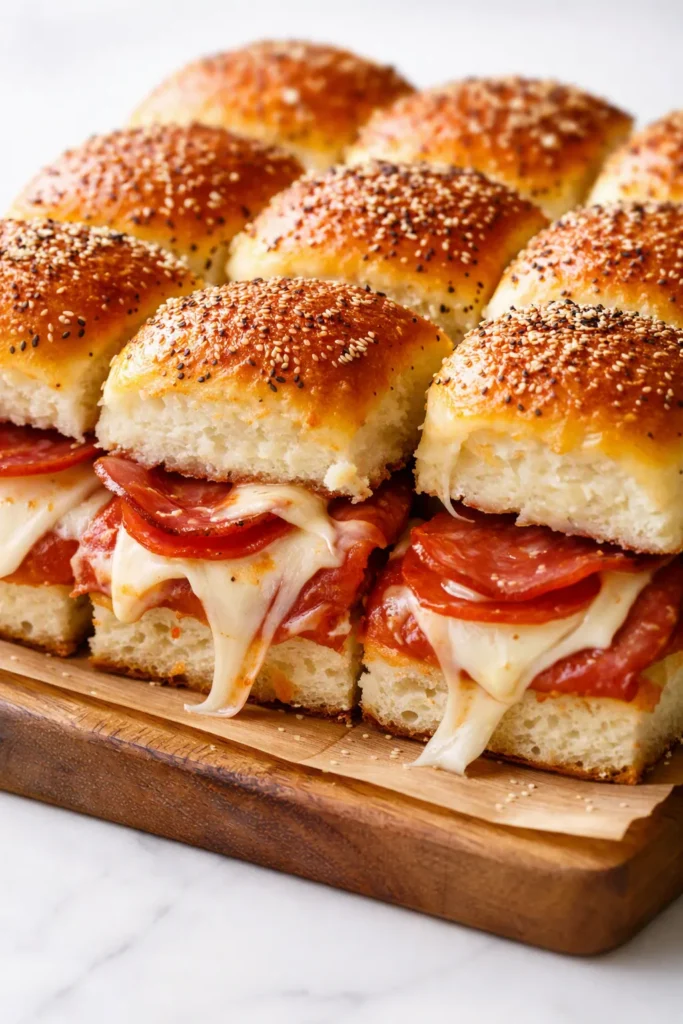
The first pull is the whole show. Cheese stretches from the bun, pepperoni creases curl into little crispy cups, and the garlic-butter glaze on top catches the kitchen light like it knows it’s the star. My kids have called these pepperoni pizza sliders “Friday rolls” for two years now—and honestly, that’s exactly what they taste like. Friday. Pizza party. Something a little bit special, even when it’s just a regular Tuesday and we need dinner on the table fast.
The short version: Fifteen minutes of hands-on work, ten in the oven, and I’ve never seen leftovers at our table.
I’ve made these pepperoni pizza sliders at least thirty times—for school nights, Super Bowl Sunday, and one book club meeting where four other moms stood in my kitchen eating them straight from the pan. They’ve never once let me down, and neither has the recipe. So here it is, exactly the way I make it.
- Serves: 12 as an appetizer (or 6 hungry folks as a main)
- Hands-On Time: 15 min | Total Time: 25 min
- Difficulty: Easy, even on a school night
- Cost per serving: ~$1.50
- Calories: ~290 per slider
- Dietary Notes: Not gluten-free, but easy to adapt for dairy-free (swap the cheese and butter)
(Photo above: overhead shot of the slider pan on a wooden cutting board, one slider pulled away mid-stretch with cheese stringing from the center, the tops brushed glossy golden with garlic butter, a small bowl of marinara for dipping in the corner, warm evening light from the left.)
The Three Little Things That Make These Sliders Disappear
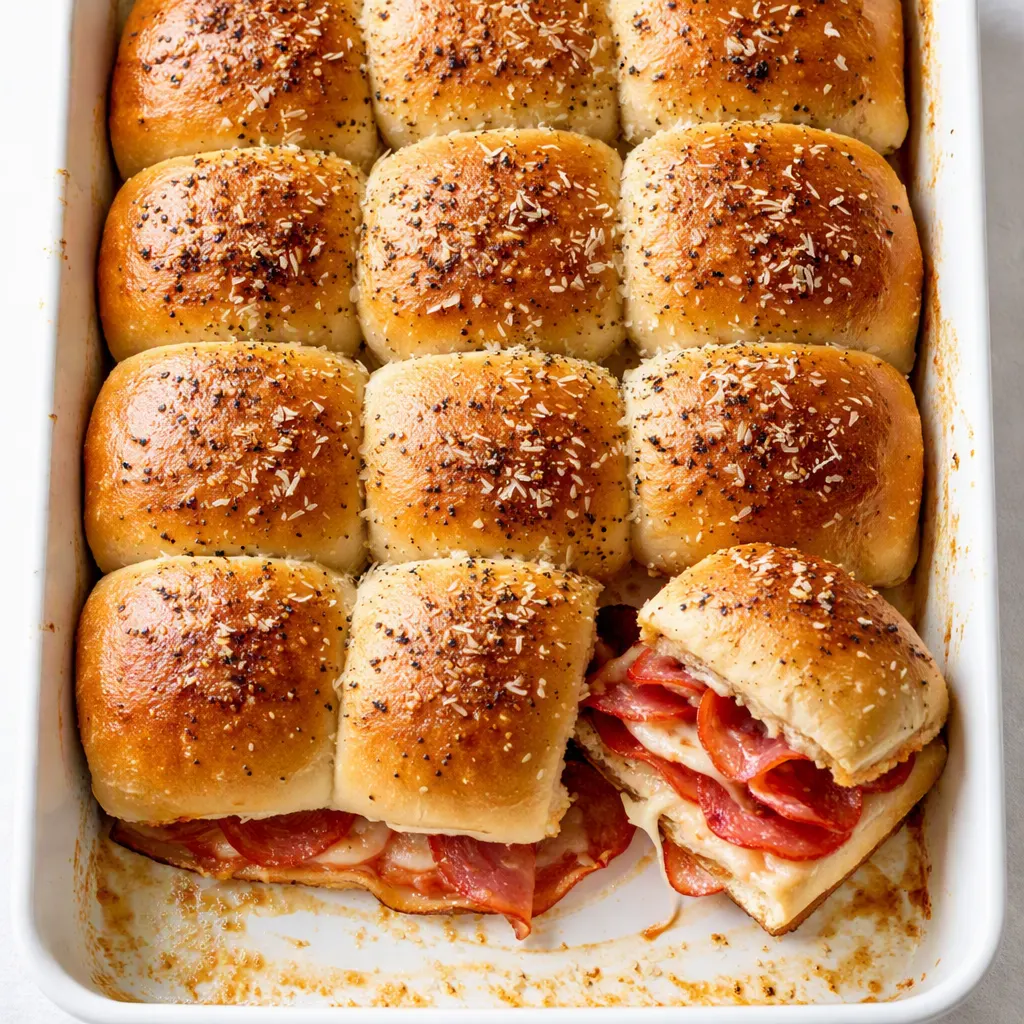
First, the butter goes everywhere. I brush the garlic butter over the top slab before baking, but I also pour the extra right down the sides and seams so the cut edges of the buns soak it up. That’s what keeps every single bite buttery and soft instead of dry around the edges. Dry edges are the number one slider fail—I learned that the hard way after way too many sad crusty corners.
Second, it’s a cheese blend, not just one cheese. Mozzarella alone gives you the stretch but not much flavor punch. Cheddar alone gets greasy and sharp. Together? They’re like a pepperoni-pizza dream team. The mozzarella pulls and the cheddar brings the actual personality. I measure them in the same bowl and my kids never even notice there’s cheddar in there—they just know the sliders taste “better than school pizza,” which is honestly all I’ve ever wanted to hear.
Third, we bake them uncovered—and brush the butter twice. The first coat sinks into the buns and keeps them tender. The second coat, brushed on halfway through, is what turns the tops golden and glossy instead of pale and dry. Skip the second brush if you’re rushing, but it’s a sixty-second step that changes the whole look. It’s the difference between “pretty good” and “oh my gosh, can you bring those to the party?”
What Goes In (Plus My Honest Notes)
- 1 package (12-count) Hawaiian rolls: They’re soft and faintly sweet, and that little bit of sugar balances the salty pepperoni perfectly. Don’t swap in dense pretzel buns or regular sandwich rolls—the pull-apart magic is all about those soft, tender little squares. My kids can tell when I use a different brand. I’m not joking. There is one brand that they’ve decided is “the real ones” and I don’t argue.
- 20–24 slices pepperoni: Regular-sized slices, not the giant sandwich ones. If you can find the kind that cups up when it cooks, grab those—they make little crispy bowls of pepperoni flavor. I lay mine overlapping because my daughter Riley insists on pepperoni in every single bite. She tests it. Every time.
- 2 cups shredded low-moisture mozzarella: The kind in the bags that melts slow and stretches like a dream. Do NOT buy the fresh mozzarella balls in water for this one—they’re too wet and they’ll make the bottom of the buns soggy. Trust me on this, I learned the soggy way so you don’t have to.
- ½ cup shredded sharp cheddar: This is the “secret ingredient” that makes the cheese actually taste like something. Use sharp, not mild—mild cheddar disappears into the mozzarella and does nothing.
- ½ cup marinara or pizza sauce: Store-bought is completely fine. Just pick one that’s on the thicker side, not watery. I buy the jarred pizza sauce from the pasta aisle because it’s seasoned exactly right and never turns the sliders soggy.
- Garlic butter glaze: 4 tablespoons salted butter, 2 cloves garlic (minced), 1 teaspoon Italian seasoning: Melted and mixed together, this is the thing that makes the tops smell like a pizzeria. Fresh garlic matters here—the jarred kind has a sharper, almost bitter taste. My husband can smell the difference the moment he walks in the door. He said “did you use fresh garlic this time?” once. He was right.
- Grated Parmesan, for the top: The kind in the green can is honestly fine here, don’t judge me. It gets golden and nutty in the oven and adds that little salty finish.
What to Pull Out Before You Start
- A 9×13 baking dish, or any rimmed baking sheet—you need the edges so the butter doesn’t run everywhere
- A serrated knife for slicing the rolls in one piece (this matters more than you’d think)
- A small bowl for the garlic butter and a pastry brush (or just a spoon you tilt patiently—I’ve done both)
- A spatula for spreading the sauce evenly
If you don’t have a pastry brush, a silicone spatula works great to smear the butter around. The goal is just getting an even coat, not perfection.
Let’s Make It—Step by Step
Read this once through before you start, because everything moves fast once the oven’s hot.
- Preheat: Set the oven to 375°F. Lightly butter or spray the bottom of your 9×13 baking dish so the rolls don’t stick.
- Slice: Keep all 12 rolls connected in the slab. Using your serrated knife, slice the whole block in half horizontally, like you’re splitting one giant bun. Lift the top half off in one piece and set it aside. (📸 Photo tip: You should be able to lift the entire top slab in one clean motion—if it’s tearing, use a lighter touch with the sawing motion.)
- Sauce: Spread the marinara evenly over the bottom slab, keeping it about ¼ inch away from the outside edges so the buns don’t get soggy at the seams. A small offset spatula or the back of a spoon works great.
- Layer: Sprinkle both cheeses evenly over the sauce, then lay the pepperoni slices over the top. Don’t bother being neat here—the sloppier the layer, the more every bite gets a little bit of everything. This is the step where my youngest “helps” and I just let it happen. It’s hot from the oven either way.
- Top and glaze: Set the top slab back on. Pour about half of the garlic butter over the top and brush it all over, including the cut edges peeking out around the sides. Then sprinkle the Parmesan over everything.
- Bake—first half: Bake uncovered for 5 minutes. Pull the dish out, leaving the oven on, and brush the remaining garlic butter over the tops. This second brush is the trick—it’s what makes those glossy golden tops instead of pale dry ones.
- Bake—second half: Return to the oven for 5 more minutes, until the cheese is fully melted and the tops are golden brown. You’ll know it’s ready when the pepperoni edges have crisped up a little and your whole kitchen smells like a pizza place. (📸 Photo tip: Pull one slider away from the group with a fork—the cheese should stretch before it breaks. That stretch is your money shot.)
- Rest and serve: Let the sliders rest in the pan for 2–3 minutes. I know it’s hard, but it lets the cheese set just enough that they hold together when you pull them apart. Then serve warm with extra marinara for dipping.
Make-Ahead Notes (Because We’re All Busy)
I make a double batch on Sunday nights—we eat half that night and I wrap the rest for the week. Honestly, they reheat better than they have any right to, which is why this recipe has survived my family’s busiest seasons.
- Fridge: Store leftovers in an airtight container in the fridge for up to 3 days. Reheat in the air fryer at 350°F for 3–4 minutes, or in the oven at 350°F for 5–6 minutes.
- Freezer: Yes! Freeze the baked and cooled sliders in a single layer in a freezer-safe bag for up to 2 months. Reheat from frozen at 350°F for 8–10 minutes. They won’t be quite as glossy as fresh, but they’ll still disappear fast.
- Reheat: The air fryer is the absolute winner here—crispy edges, melty centers. The microwave works in a pinch but it softens the buns and makes the pepperoni rubbery, so I only use it when I’m desperate.
Things I Wish I’d Known the First Time
- Don’t use fresh mozzarella balls: I get it, the fresh stuff feels fancier. But it’s full of water and it turns the bottom of the sliders into a puddle. Shredded low-moisture mozzarella is the way, and the flavor difference is honestly hard to notice once the pepperoni and butter are involved.
- Saw, don’t press, with the knife: A serrated knife with a gentle sawing motion keeps the soft rolls intact. Pressing down with a regular chef’s knife smashes the buns flat and you’ll be pulling apart sad little squashed sliders. My husband flattened them the very first time he made these—bless him, he was trying to be fast.
- The halfway butter brush is non-negotiable: The first coat of butter soaks into the buns and keeps them tender. The second coat, brushed on at the 5-minute mark, is what browns and glazes the tops. Even if you skip it, they’ll still taste good—I’ve done it. But you’ll wish you hadn’t.
- Pepperoni goes inside, not on top: I’ve seen recipes that put pepperoni on the top of the buns before baking. Don’t do it—it turns into leather. Inside the slider, the pepperoni stays juicy and flavors the cheese as it renders. The edges still crisp up where they peek out between the buns.
Make It Yours—Versions My Family Has Tested
- Dairy-Free: Use dairy-free mozzarella shreds (look for one that specifically says “melts well”) and a dairy-free butter stick for the glaze. This is the version I make for my nephew Ben, and he always asks for seconds, which tells me it works.
- Spicy Grown-Up: Drizzle hot honey over the top before the last 3 minutes of baking, or use pepperoni that’s been seasoned with chili flakes. My husband and I do this version after the kids go to bed—with extra pepperoni and the leftover marinara laced with hot sauce.
- Veggie: Swap the pepperoni for a jar of sliced roasted red peppers, well drained. Add sautéed mushrooms if you’ve got them. My kids are pepperoni loyalists, but this version is the one I pack for my own lunch all week.
- Meatball-Style: Swap the pepperoni for 12 small cooked meatballs, cut in half so they sit flat in the cheese. It tastes like a meatball sub. This was born out of an empty pepperoni drawer one desperate evening, and honestly, it’s a top-three fiasco-to-favorite story in my kitchen.
Questions I Get About These Sliders All the Time
Q: Why did my sliders come out soggy on the bottom?
A: Ugh, I’ve been there—the soggy bottom is the saddest slider moment. It usually means the sauce was too watery, the rolls were assembled too far ahead of baking, or the fresh mozzarella got involved. Use a thicker marinara, spread it thin, and don’t assemble more than 30 minutes before you bake. You’ve got this next time!
Q: Can I make these gluten-free?
A: Yes! Use your favorite gluten-free slider buns from the bakery section. The assembly steps are identical—just shorten the bake time by a couple minutes if your buns are thinner, and keep a close eye on the tops. I’ve tested this with a few different GF brands and the brioche-style ones work best.
Q: How long do these last? Can I freeze them?
A: They’ll keep in the fridge for up to 3 days in an airtight container—if they survive that long. Freeze the baked sliders in a single layer in a freezer bag for up to 2 months. When you want them, the air fryer at 350°F for 3–4 minutes is pure magic. The microwave works in a pinch, but it softens the buns, so I only use it when I’m really in a hurry.
Q: What do you serve with pepperoni pizza sliders?
A: My kids love them with a simple green salad with ranch dressing, or a plate of cucumber slices with salt and a squeeze of lemon. When the weather turns cold, we do tomato soup on the side—dipping slider corners in soup is a whole new level of comfort food. For parties, set out a bowl of extra marinara and pickled jalapeños so grown-ups can customize.
More Recipes My Family Makes on Repeat
If this one’s a hit at your house, here are a few others that get the same reaction at our table:
- [INTERNAL LINK PLACEHOLDER: Garlic Parmesan Chicken Tenders] — the crispy oven-baked ones my kids request for every birthday dinner, no exceptions.
- [INTERNAL LINK PLACEHOLDER: Sheet Pan Sausage and Peppers] — one pan, twenty minutes, tastes like you spent all afternoon tending a grill.
- [INTERNAL LINK PLACEHOLDER: Slow Cooker Meatballs] — the recipe my sister texts me about every single holiday season, without fail.
I hope these pepperoni pizza sliders turn your Friday—or your Tuesday, or whatever day desperately needs pizza energy—into something that feels like a celebration. If you make them, come back and tell me what your family said. I genuinely love reading the comments and hearing about the cheese pulls.
📌 Pepperoni pizza sliders that taste like Friday night—save this 25-minute recipe for your next pizza-and-movie night!
Pepperoni Pizza Sliders That Taste Like Friday Night—Ready in 25 Minutes
Equipment
- 9×13-inch baking dish
- Serrated Knife
- Small Bowl
- Pastry brush
- Spatula
Ingredients
For the Sliders
- 1 package Hawaiian rolls (12-count)
- 20 to 24 slices pepperoni
- 2 cups shredded low-moisture mozzarella
- 1/2 cup shredded sharp cheddar
- 1/2 cup marinara or pizza sauce
For the Garlic Butter Glaze
- 4 tablespoons salted butter
- 2 cloves garlic, minced
- 1 teaspoon Italian seasoning
For the Topping
- to taste grated Parmesan cheese
Instructions
- Preheat the oven to 375°F. Lightly butter or spray the bottom of a 9×13-inch baking dish so the rolls don’t stick.
- Keep all 12 rolls connected in the slab. Use a serrated knife to slice the whole block in half horizontally, like splitting one giant bun. Lift the top half off in one piece and set it aside.
- Spread the marinara evenly over the bottom slab, keeping it about 1/4 inch away from the outside edges so the buns don’t get soggy at the seams.
- Sprinkle both cheeses evenly over the sauce, then lay the pepperoni slices on top. Don’t worry about being neat; the more casual the layer, the more every bite gets a little of everything.
- Set the top slab back on. Pour about half of the garlic butter over the top and brush it over the entire surface, including the cut edges peeking out around the sides. Sprinkle with Parmesan.
- Bake uncovered for 5 minutes. Pull the dish out, leaving the oven on, and brush the remaining garlic butter over the tops. This second brush creates the glossy golden finish.
- Return to the oven for 5 more minutes, until the cheese is fully melted and the tops are golden brown. The pepperoni edges should be crisped and the kitchen should smell like a pizzeria.
- Let the sliders rest in the pan for 2 to 3 minutes so the cheese sets enough to hold together, then serve warm with extra marinara for dipping.
Notes
Related Recipes:
 Cheesy Hamburger Casserole Bake That’s Ready in 40 Minutes (No Canned Soup Here)
 Creamy Garlic Tagliatelle That Looks Like a Restaurant Dish in 20 Minutes
 Texas Roadhouse Style Baked Salmon with Sweet and Savory Glaze — Ready in Under 30 Minutes
 Easy Italian Meatloaf That’s Actually Juicy (Not Dry) — in 1 Hour
 The Biscuits and Gravy Casserole That’s Actually Crispy on Top (And Ready in 40 Minutes)
 Air Fryer Chicken and Vegetables That Don’t Taste Like a Regret (30 Minutes, One Pan)