
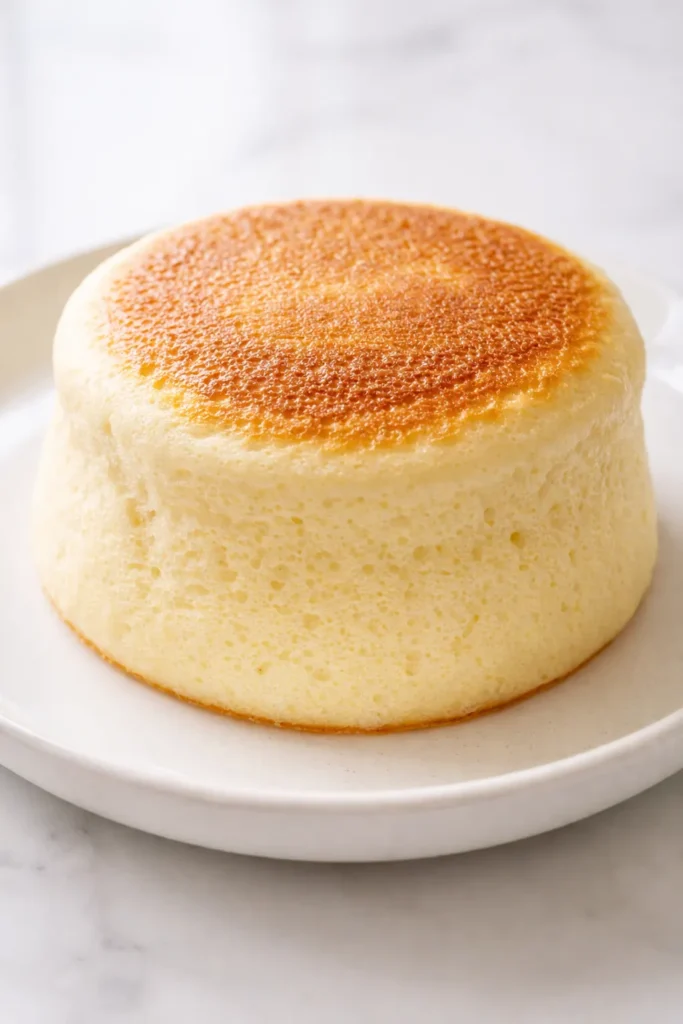
Golden on the outside, jiggly in the middle, and toweringly tall on your plate — these Japanese soufflé pancakes are the rare breakfast project that actually delivers on its viral promise. They look like something from a Tokyo café window, but they come together in a standard home kitchen with a non-stick pan, a mixer, and a little patience. I’ve tested these at least a dozen times to figure out exactly what makes them hold their shape instead of collapsing into a flat, sad custard. The trick, it turns out, has almost nothing to do with a special ingredient and everything to do with how you handle the whites.
The short version: Tall, jiggly, cloud-like pancakes made from a buttermilk batter folded into a stiff meringue. Cooked low and slow with a splash of water in the pan to steam them to perfection.
I tested these every weekend for a month straight — my family was thrilled, my waistline less so. This version has never failed me since.
- Serves: 4 (makes 8 small pancakes)
- Hands-On Time: 25 min | Total Time: 45 min
- Difficulty: Medium — requires a gentle touch and a good non-stick pan
- Cost per serving: ~$2.50
- Calories: ~280 per serving
- Dietary Notes: Vegetarian. Can be made gluten-free with cup-for-cup flour.
(Photo above: A stack of three tall soufflé pancakes on a minimalist white plate, a small pat of butter melting on the top pancake, natural light from a window catching the steam rising off the stack, a small dish of maple syrup on the side.)
The Two Things That Changed Everything About My Soufflé Pancakes
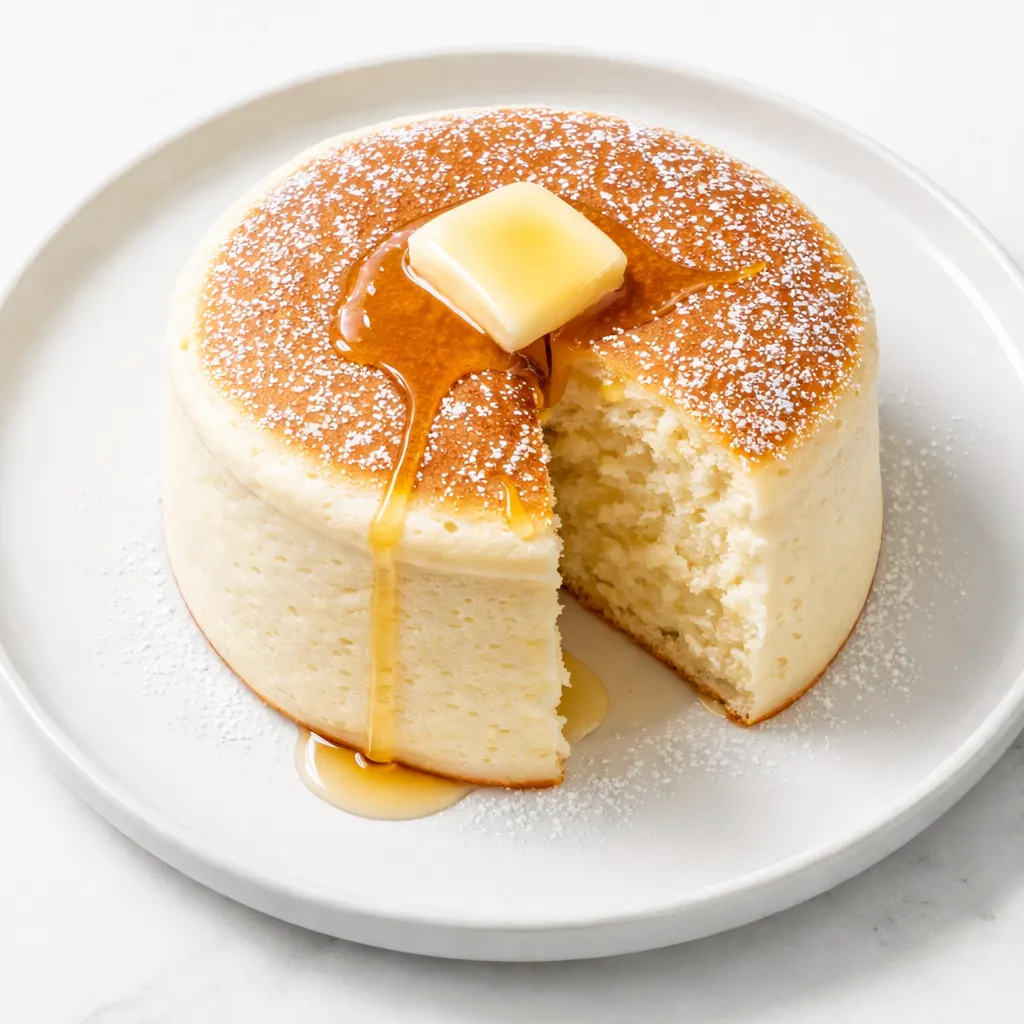
The meringue needs to be stiff — I mean bowl-over-your-head stiff — before you even think about folding. Anything less and you’re making dense little discs, not fluffy clouds. The second non-negotiable is the steam dome. A tight lid and a tablespoon of water create a micro-environment that cooks the center without browning the outside too fast. Skip the lid and you’ll have burnt bottoms and raw middles. I learned this the hard way on batch number three.
Together, these two steps produce a pancake that rises like a perfect soufflé and sets into a custardy interior that’s just barely cooked through — the signature jiggle that makes these worth every minute of effort.
The Grocery List (With My Honest Notes)
- 2 large eggs (separated): The colder the eggs, the easier they separate. Do it while they’re straight from the fridge, then let the whites come to room temp for the best volume. My nine-year-old nephew can split an egg now after watching me do this on repeat — it’s a genuinely useful party trick.
- 1 1/2 cups cake flour (210g): Cake flour gives the tenderness you want here. All-purpose works in a pinch but the texture is slightly chewier. If you’re out of cake flour, measure a cup of AP, remove 2 tablespoons, and add 2 tablespoons of cornstarch. I’ve done it at 7 AM on a Saturday.
- 3 tbsp whole milk + 1 tbsp water: The water thins the batter just enough to fold without crushing the bubbles. Whole milk is non-negotiable here — skim will make the batter too thin. My husband once tried it with oat milk and the pancakes barely rose. Stick with whole milk.
- 2 tbsp sugar (25g): Fine granulated sugar dissolves fastest. Don’t sub powdered sugar — it contains cornstarch that can weigh down the whites.
- 1 tsp vanilla extract: Pure, not imitation. The flavor difference is genuinely noticeable in such a simple batter.
- 1/4 tsp cream of tartar: Stabilizes the egg white foam. If you don’t have it, a squeeze of lemon juice does the same job. I keep cream of tartar in my pantry exclusively for this recipe.
- Pinch of salt: Balances the sweetness.
The Tools That Make It Easier
- Electric hand mixer or stand mixer (you can whisk by hand but your arm will hate you)
- Large non-stick skillet with a tight-fitting lid
- Piping bag or quart-sized ziplock bag (for perfect rounds)
- Spatula (preferably thin, for gently flipping)
- 1/2 cup or 4-inch ring molds (optional but ideal for height)
Let’s Make Them (Step by Step)
Get everything measured and ready. These come together fast once the mixer starts running.
- Make the batter base: Whisk the flour, salt, and egg yolks together. Add the milk, water, and vanilla. Stir until just combined — a few lumps are fine. Overmixing will develop gluten and make the pancakes dense. (📸 Photo tip: The batter should look like a thick pancake batter — smooth but not runny, around the consistency of loose yogurt.)
- Whip the egg whites: In a completely clean, dry bowl, beat the egg whites with cream of tartar on medium speed until frothy. Increase to high and slowly add the sugar. Continue until stiff peaks form — the whites should stand straight up when you lift the beater. This is the step that determines everything. Under-whipped whites = flat pancakes. Get them stiff.
- Fold the meringue into the batter: Add one-third of the meringue to the egg yolk mixture and fold gently with a spatula. Add the remaining meringue and fold just until no streaks remain. Do not overmix or you’ll deflate the air you just whipped in. (📸 Photo tip: The final batter should look pale, aerated, and slightly billowy — like a thick mousse.)
- Transfer to your piping bag: Scoop the batter into your piping bag or ziplock. Snip the tip to create a 1-inch opening.
- Begin cooking (low and slow): Heat your non-stick skillet over the lowest possible heat. Lightly grease with butter or oil. Pipe the batter into tall rounds — about 3 inches wide and 2 inches high. If using ring molds, pipe the batter into the molds and fill them to the top. Don’t swirl the bag, just pipe straight down in one continuous motion.
- Add the water and cover: Immediately add 1 tablespoon of water to the pan (avoiding the pancakes), cover tightly with the lid, and cook for 6–7 minutes. The water creates steam that cooks the center without browning the bottom too quickly.
- Flip and repeat: After 6 minutes, carefully flip each pancake using your thin spatula. Gently press down to flatten slightly. Add another tablespoon of water to the pan, re-cover, and cook for another 6–7 minutes. When I’m feeling lazy, I just check that they spring back when lightly pressed.
- Serve immediately: These deflate within minutes, so serve them hot. Dust with powdered sugar, add a pat of butter, and drizzle with maple syrup or whipped cream.
Can You Make These Ahead? (Sort Of)
These are best made fresh — like, right-before-you-eat-them fresh. But here’s how to get a head start so your morning runs smoothly.
- Fridge: The batter doesn’t hold well. Make the components separately the night before (separate eggs, measure dry ingredients) and whip the whites fresh in the morning.
- Freezer: Not recommended. The texture gets gummy. If you absolutely must, freeze cooled pancakes between layers of wax paper and reheat in a 300°F oven for 5 minutes. They won’t be as jiggly but they’ll still be pleasant.
- Reheat: Skip the microwave — it turns the texture to rubber. A toaster oven on low is your best bet.
Things I Wish Someone Had Told Me Before I Made These
- Low heat is your friend, not your enemy. I know it feels like nothing is happening. Trust the process. Medium heat will brown the bottom before the center sets. The lowest heat setting on your stove plus a covered pan is exactly what you want.
- Don’t skip the lid. The steam is what creates that custard-like interior. Without the lid, you’re just making thick pancakes. With it, you get the signature jiggle that makes these so satisfying to eat.
- Keep your piping bag upright. When you pipe the batter into the pan, keep the bag straight up and down. Angling it creates lopsided pancakes that brown unevenly on the flatter side. Yes, it matters.
- Even if they’re not perfect, they’re still good. I’ve made plenty of batches that weren’t Insta-worthy. They still tasted like fluffy, eggy, vanilla-scented clouds — and my family ate every single one. Don’t stress about the jiggle factor. The taste delivers no matter what.
Make It Yours (Easy Swaps That Actually Work)
- Gluten-Free: Use 1 1/2 cups of a high-quality cup-for-cup gluten-free flour blend. I’ve tested this with King Arthur Measure for Measure and it works beautifully. My sister-in-law has celiac and she gives these a full five stars.
- Lactose-Free / Dairy-Free: Use full-fat oat milk or lactose-free whole milk in place of the whole milk. Avoid thin milks like almond or rice milk — they’ll make the batter too watery.
- Matcha Soufflé Pancakes: Add 2 tsp of culinary-grade matcha powder to the flour mixture. Sift it well to avoid green clumps. This is my teenager’s favorite version. They look incredibly fancy for basically zero extra effort.
- Chocolate Version: Replace 2 tbsp of the cake flour with 2 tbsp of unsweetened cocoa powder. Serve with a light dusting of powdered sugar and fresh berries.
- Child-Friendly Serving Suggestions: Set up a toppings bar. My kids go crazy for mini chocolate chips, rainbow sprinkles, and a dollop of whipped cream.
The Soufflé Pancake Questions I Get Asked All The Time
Q: Why did my pancakes deflate as soon as I flipped them?
A: Ugh, I’ve been there. Most likely the egg whites weren’t stiff enough, or the heat was too high and the outside cooked before the inside had a chance to set. Make sure your peaks are bowl-over-your-head stiff and your heat is on the absolute lowest setting. A proper steam dome should stabilize them.
Q: Can I make these egg-free?
A: Unfortunately, no. This recipe is essentially a meringue folded into a cake batter, and the structure relies entirely on the egg proteins. I haven’t found an egg substitute that creates the same lift and jiggle. If you’re looking for a fluffy egg-free pancake, a traditional buttermilk pancake with extra baking powder is a better bet.
Q: How long do these last? Can I reheat them the next day?
A: They lose their magic within about 2 hours. The jiggle fades and they settle into a denser texture. If you have leftovers, store them in an airtight container in the fridge, and reheat them gently in a toaster oven or low oven (300°F for 5 minutes). The microwave makes them rubbery, so I’d avoid it.
Q: What do you serve with these for a full brunch?
A: Because they’re lightly sweet on their own, I pair them with savory sides. Crispy bacon or breakfast sausage is a non-negotiable at our table. A simple arugula salad with a lemon vinaigrette cuts through the richness beautifully. For drinks, cold brew coffee or a fresh grapefruit juice spritzer works perfectly.
More Breakfast Recipes My Family Loves
If you’re into this whole “patient weekend cooking” thing, here are a few others that get the same reaction at our table:
- Classic Buttermilk Pancakes — The no-fuss version for when you want pancakes but don’t want to babysit a steam dome.
- Crispy French Toast Casserole — The one I make for holiday mornings when I want to pretend I did real work.
- Fluffy Dutch Baby with Lemon Sugar — Dramatic, puffed, and on the table in 20 minutes flat.
These pancakes are a project. I’ll never tell you they’re a quick weekday breakfast. But for a slow Saturday morning, when you want something that feels like an event, they are exactly the thing. My kids hover around the pan waiting for them to be done, and they’re gone within five minutes of hitting the plate. That’s the whole point of a recipe like this — not speed, but spectacle. And maybe a little jiggle.
If you try these fluffy Japanese soufflé pancakes, drop a comment and let me know how they turned out! I love hearing about the wins (and the learning curves).
📌 Fluffy Japanese soufflé pancakes recipe that stays tall and jiggly every time — save it for your next special weekend brunch at home.
Fluffy Japanese Soufflé Pancakes That Stay Tall and Jiggly Every Time
Equipment
- Electric Hand Mixer
- Non-Stick Skillet with Lid
- Piping Bag
- Spatula
- Ring Molds (optional)
Ingredients
For the Pancake Batter
- 2 large eggs, separated
- 1 1/2 cups cake flour (210g)
- 3 tbsp whole milk
- 1 tbsp water
- 2 tbsp sugar (25g)
- 1 tsp vanilla extract
- 1/4 tsp cream of tartar
- pinch salt
For Cooking and Serving
- Butter or oil for greasing
- Powdered sugar, for dusting
- Maple syrup, for serving
- Whipped cream, optional
Instructions
- Make the batter base: Whisk the flour, salt, and egg yolks together. Add the milk, water, and vanilla. Stir until just combined — a few lumps are fine. Overmixing will develop gluten and make the pancakes dense.
- Whip the egg whites: In a completely clean, dry bowl, beat the egg whites with cream of tartar on medium speed until frothy. Increase to high and slowly add the sugar. Continue until stiff peaks form — the whites should stand straight up when you lift the beater.
- Fold the meringue into the batter: Add one-third of the meringue to the egg yolk mixture and fold gently. Add the remaining meringue and fold just until no streaks remain. Do not overmix.
- Transfer to piping bag: Scoop the batter into your piping bag or ziplock. Snip the tip to create a 1-inch opening.
- Begin cooking: Heat your non-stick skillet over the lowest possible heat. Lightly grease with butter or oil. Pipe the batter into tall rounds — about 3 inches wide and 2 inches high. If using ring molds, fill to the top.
- Add water and cover: Immediately add 1 tablespoon of water to the pan (avoiding the pancakes), cover tightly with the lid, and cook for 6–7 minutes.
- Flip and repeat: After 6 minutes, carefully flip each pancake. Add another tablespoon of water, re-cover, and cook for another 6–7 minutes. They should spring back when lightly pressed.
- Serve immediately: Dust with powdered sugar, add a pat of butter, and drizzle with maple syrup or whipped cream. These deflate within minutes, so serve them hot.
Notes
Related Recipes:
 The Perfectly Pillowy Chocolate Chip Milk Buns (Tangzhong Method)
 Cheesy Hamburger Casserole Bake That’s Ready in 40 Minutes (No Canned Soup Here)
 Creamy Garlic Tagliatelle That Looks Like a Restaurant Dish in 20 Minutes
 Texas Roadhouse Style Baked Salmon with Sweet and Savory Glaze — Ready in Under 30 Minutes
 Easy Italian Meatloaf That’s Actually Juicy (Not Dry) — in 1 Hour
 Moist Lemon Zucchini Bread with a Crunchy Lemon Sugar Top