
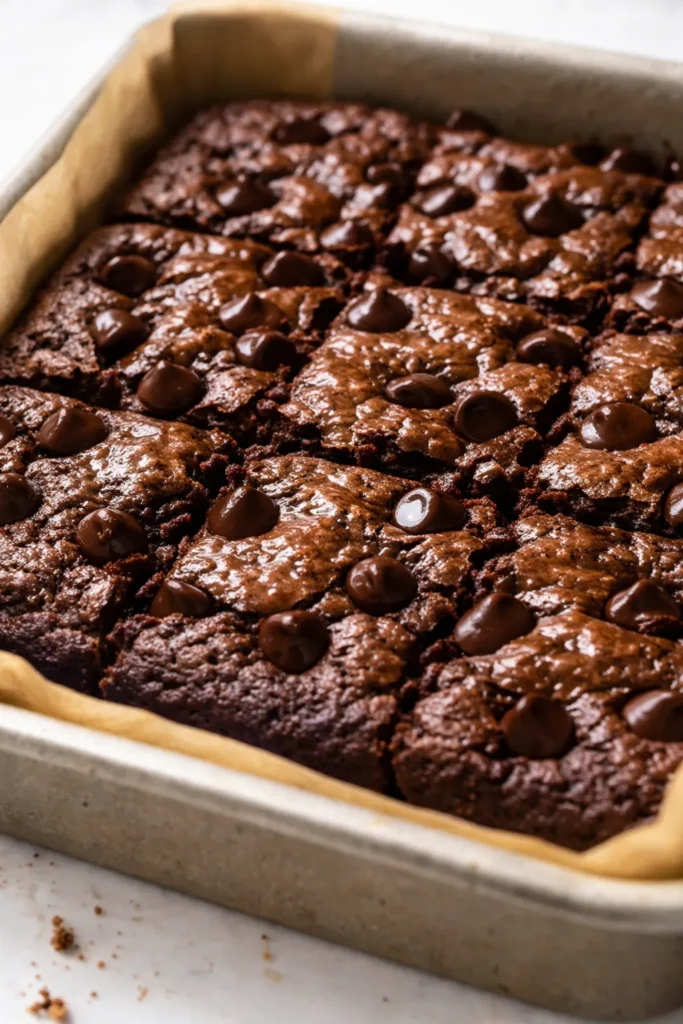
I’ve made a lot of disappointing “healthy” brownies in my time. The dry kind that crumble into dust. The gummy kind that taste vaguely of sadness. These are not those. These are deeply chocolate, impossibly fudgy, and sweet enough from two very ripe bananas that you barely miss the sugar. My kids go through a batch in about 36 hours, and they have absolutely no idea they’re eating something that’s actually good for them.
The short version: Flourless, sweetened mostly by bananas, and ready in 30 minutes flat.
I’ve tested this about a dozen times to get the texture right — dense and moist without being heavy, with that classic crackly top that makes a brownie look like a brownie. It’s my go-to Sunday meal prep treat for the whole week.
- Serves: 9 to 12 brownies
- Hands-On Time: 10 min | Total Time: 30 min
- Difficulty: Easy enough for a Tuesday afternoon with a toddler underfoot
- Cost per serving: ~$0.50
- Calories: ~110 per brownie
- Dietary Notes: Naturally gluten-free, dairy-free, refined sugar-free, nut-free option
(Photo above: Overhead shot of an 8×8 glass dish filled with dark, fudgy brownies. The top has a beautiful, classic crackled skin. One brownie is pulled back to show the dense, moist, chocolatey crumb. A pile of walnuts sits casually on the wooden board in the corner.)
The Secret to Fudgy (Not Dry) Healthy Brownies
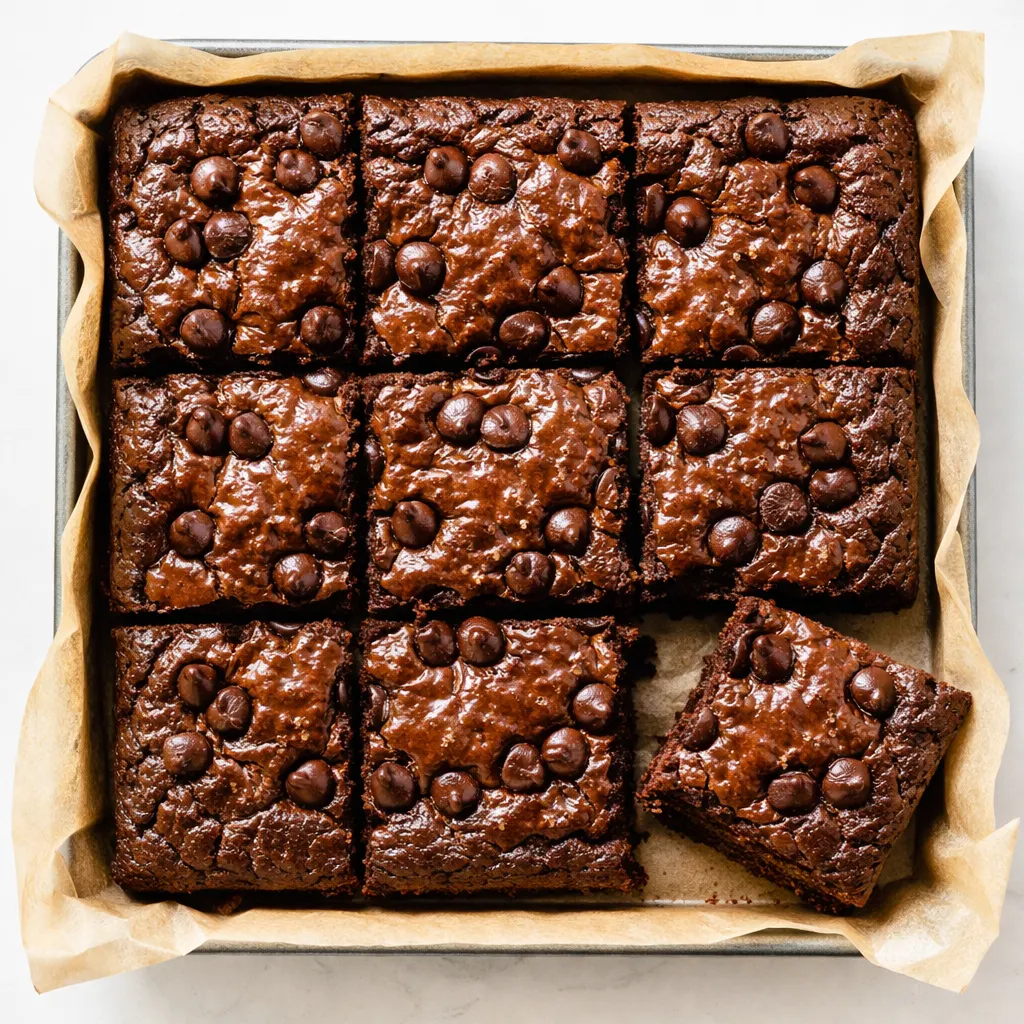
The problem with most healthy brownies is almost always the texture. They’re either gummy from too much banana or dry as dust from oat flour. The trick here is using super ripe bananas — the ones covered in brown spots that you almost threw away — for maximum natural sweetness and moisture. That lets me cut the added sugar way down without losing anything in flavor.
The second non-negotiable? Pulling them from the oven at exactly the right moment. The toothpick should come out with a few moist crumbs clinging to it, not clean. Clean means over-baked. The carryover cooking finishes the job while they cool in the pan. Trust me on this one — I’ve ruined plenty of batches by being impatient.
And honestly? Good cocoa powder does the heavy lifting here. It’s the main flavor event, so skip the cheap stuff. A Dutch-processed cocoa gives a deeper, more fudgy result.
Ingredients That Pull Their Weight
- 2 large very ripe bananas (about 1 cup mashed): Brown spots are mandatory. They bring the sweetness and the moisture. If your bananas aren’t spotty, the brownies won’t be sweet enough — let them sit on the counter for a few more days.
- 1/3 cup melted coconut oil (or unsalted butter): Gives that rich, buttery mouthfeel without dairy (if using oil).
- 1/2 cup unsweetened cocoa powder: Use a good quality one here. It makes or breaks the chocolate flavor. I use Dutch-processed and have never looked back.
- 1/3 cup maple syrup or honey: Just enough to nudge the sweetness over the edge without overwhelming the banana.
- 2 large eggs: For structure and that shiny, crackly top that makes a brownie look like a brownie.
- 1/4 cup almond flour (or oat flour): Keeps them tender and gluten-free. My kids ate the oat flour version for a full month before I told them it was “healthy.” They didn’t believe me.
- 1 tsp vanilla extract, 1/4 tsp salt, 1/2 tsp baking soda: The supporting cast that makes everything else taste better.
- 1/3 cup dark chocolate chips (optional): Because sometimes “healthy” needs a little help. My 9-year-old calls these “the best thing I’ve ever eaten.”
What You’ll Need
- 8×8-inch baking dish (metal or glass both work — if using glass, check it a few minutes early)
- Parchment paper (for easy lift-out — non-negotiable if you want clean edges without a fight)
- A large bowl and a whisk. You don’t need a mixer for this.
Let’s Make Them (Step by Step)
Preheat your oven to 350°F. Line your 8×8 dish with parchment paper, leaving a couple of inches hanging over the sides. This makes lifting the whole block out so much easier.
- Mash the bananas: In a large bowl, mash the bananas thoroughly until mostly smooth. A few tiny lumps are fine, but aim for a wet, uniform paste. Lumpy banana in a brownie just feels like a lump.
(📸 Photo tip: You want a thick, glossy paste with maybe one or two tiny specks of banana left.) - Mix the wet ingredients: Add the melted coconut oil, maple syrup, vanilla, and eggs to the bowl. Whisk vigorously until everything is fully combined and the mixture looks glossy and emulsified — about 30 seconds.
- Fold in the dry: Sift the cocoa powder, almond flour, salt, and baking soda over the wet mixture. Use a spatula to fold gently until just combined. Over-mixing here is the #1 cause of tough, cakey brownies. Stop when you can’t see streaks of flour anymore. Fold in the chocolate chips if you’re using them.
- Bake: Pour the thick batter into the prepared pan and spread it into an even layer. Bake for 20 to 24 minutes. The top should look set, shiny, and crackled. A toothpick inserted into the center should come out with a few fudgy crumbs — not wet batter, not clean.
(📸 Photo tip: The top should have that classic brownie crackle — it’s the sign of a good structure, even in a healthier version.) - Cool completely: This is the hardest step. Place the pan on a wire rack and let it cool for at least 20 minutes. The brownies continue to set as they cool. Cutting into them while warm turns them into a delicious pile of chocolate rubble. Once cool, lift the block out using the parchment paper and slice into 9 or 12 squares.
How I Keep Them on Hand All Week
I make a double batch on Sunday afternoons and we snack on them through the week. They actually get fudgier on day two, which is the best kind of problem to have.
- Fridge: Airtight container in the fridge for up to 5 days. I honestly prefer them cold — they taste like dense, fudgy brownie bites straight from the fridge.
- Freezer: Yes, they freeze beautifully. Wrap each brownie individually in plastic wrap, then stash them in a freezer-safe bag for up to 3 months. Thaw at room temp for about 10 minutes.
- Reheat: 10 seconds in the microwave if you want that just-baked warmth. But again, cold is highly underrated.
Things I Learned the Hard Way (So You Don’t Have To)
- Don’t skip the parchment paper: Getting a clean slice out of a healthy brownie pan without parchment is basically impossible. You’ll be scraping the bottom of the dish and swearing. I speak from experience.
- Ripe bananas are not a suggestion, they’re a rule: If your bananas aren’t covered in brown spots, the brownies won’t be sweet enough, and they’ll lean more toward ‘banana bread‘ territory. Let them ripen fully. Your patience will be rewarded.
- Under-bake slightly: 22 minutes is my sweet spot in a metal pan. 24 if I’m using glass. Every oven runs a little differently, so trust the toothpick test — a few moist crumbs is the goal.
- Mix-ins make everything better: A handful of dark chocolate chips, walnuts, or even a peanut butter swirl takes these from “great healthy snack” to “dessert I’d serve to actual guests without apology.”
Make Them Your Own (I’ve Tried All of These)
- Nut-Free: Swap the almond flour for oat flour. Use certified gluten-free oat flour if needed. The texture is slightly softer but still fudgy and delicious.
- Vegan: Use 2 flax eggs (2 tablespoons flaxseed meal mixed with 6 tablespoons water, let sit for 5 minutes) and stick with the coconut oil. They’ll be a touch denser, but the fudge factor is still there.
- Peanut Butter Swirl: Drop 4 or 5 spoonfuls of peanut butter on top of the batter before baking and swirl gently with a knife. My kids lose their minds over this version.
- Extra Fudgy: Add an extra egg yolk. It sounds weird, but it adds richness and tenderness without extra volume. I do this when I want them to feel truly decadent.
The Questions I Get About These Brownies All the Time
Q: Why did my brownies turn out cakey instead of fudgy?
A: You likely over-mixed the batter or baked them a few minutes too long. Fold just until the streaks disappear, and pull them from the oven when a toothpick still has a few moist crumbs. If you used oat flour, make sure you measured it correctly — too much flour is a common culprit.
Q: Can I make these without eggs?
A: Yes, and I do it all the time for my vegan friends. Flax eggs work well here. Just know that the top won’t get that shiny, crackly crust that real eggs provide. It’ll be a matte finish, but the inside will still be fudgy and delicious.
Q: How long do these last? Can I freeze them?
A: They keep in the fridge for about 5 days in an airtight container. Freeze them for up to 3 months — I wrap each brownie individually so I can pull one out for lunchboxes or late-night cravings. Thaw on the counter for 10 minutes, or microwave for 15 seconds.
Q: What do you serve with these?
A: Honestly, they’re perfect on their own as a snack. But if I’m serving them as dessert, I’ll warm one up and add a scoop of vanilla ice cream, a dollop of Greek yogurt with a drizzle of honey, or just a tall glass of cold oat milk.
More Recipes My Family Makes on Repeat
If you liked these, here are a few others that disappear just as fast at our table:
- Flourless Peanut Butter Cookies — 3 ingredients, 20 minutes, and zero complaints from anyone.
- Gluten-Free Banana Muffins — The ones my kids actually ask for in their lunchboxes, no joke.
- One-Bowl Chocolate Chip Oatmeal Bars — My go-to for bake sales, playdates, and Sunday morning chaos.
These brownies are proof that you can have something rich and chocolatey without the sugar crash that usually follows. They’re the first thing to disappear from my meal prep containers every single week, and they make me look like I have my act together — even on the chaotic weeks.
If you make them, tag me on Pinterest or Instagram — I genuinely love seeing your bake and hearing how they turned out!
📌 Healthy banana brownies that are actually fudgy — save this easy, gluten-free recipe for your next clean-eating dessert craving.
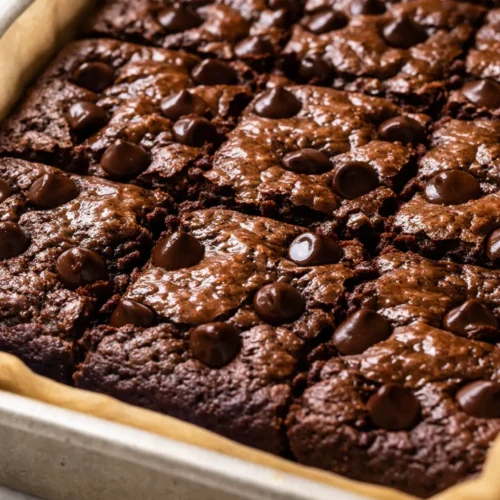
Healthy Banana Brownies That Are Actually Fudgy (Not Dry or Cakey)
Equipment
- 8×8-inch Baking Dish
- Parchment Paper
- Large bowl
- Whisk
Ingredients
- 2 large very ripe bananas, mashed (1 cup)
- 1/3 cup melted coconut oil (or unsalted butter)
- 1/2 cup unsweetened cocoa powder
- 1/3 cup maple syrup or honey
- 2 large eggs
- 1/4 cup almond flour (or oat flour)
- 1 tsp vanilla extract
- 1/4 tsp salt
- 1/2 tsp baking soda
- 1/3 cup dark chocolate chips (optional)
Instructions
- Mash the bananas in a large bowl until mostly smooth. A few tiny lumps are fine, but aim for a wet, uniform paste. (Photo tip: You want a thick, glossy paste with maybe one or two tiny specks of banana left.)
- Add the melted coconut oil, maple syrup, vanilla, and eggs to the bowl. Whisk vigorously until fully combined and glossy, about 30 seconds.
- Sift the cocoa powder, almond flour, salt, and baking soda over the wet mixture. Fold gently with a spatula until just combined. Over-mixing makes tough brownies. Fold in chocolate chips if using.
- Pour the thick batter into the prepared 8×8 pan and spread evenly. Bake at 350°F for 20 to 24 minutes. The top should look set, shiny, and crackled. A toothpick inserted should come out with a few moist crumbs – not clean.
- Cool completely in the pan on a wire rack, at least 20 minutes. The brownies continue to set. Lift out using the parchment paper and slice into 9 or 12 squares. They get fudgier on day two.
Notes
Related Recipes:
 Twice Baked Breakfast Potatoes for a Lazy Sunday: The Only Brunch Dish You Actually Want to Make
 The Starbucks Pink Drink Recipe with the Perfect Coconut Milk Float
 Starbucks Vanilla Bean Copycat Recipe That Costs a Fraction of the Drive-Thru — and Tastes Better
 The Perfectly Pillowy Chocolate Chip Milk Buns (Tangzhong Method)
 Baked Protein Pancake Bowls That Are Fluffy, Golden, and Ready in 25 Minutes (Hands-Free)
 Blueberry Crumble Cheesecake That’s Actually Worth the Oven Time