
The sound of a perfect pickle—that high-pitched snap when you break it in half—is one of the most satisfying things in my kitchen. And these refrigerator pickles deliver exactly that, every single time, without a single piece of canning equipment. Just a quick brine, some fresh dill from the garden (or the grocery store), and a little patience—24 hours, to be exact—and you’ve got the crunchiest, tangiest pickles this side of a deli counter. My kids have been known to eat them straight from the jar before I’ve even put it back in the fridge.
The short version: They come together in 10 minutes, rest overnight, and are basically the reason I now plant way too many cucumbers every summer.
I’ve made these so many times over the years that I don’t even pull out the measuring cups anymore—they’re that foolproof. Even my pickle-obsessed nine-year-old, who claims to be a “professional taste tester,” gives them two thumbs up.
- Serves: Makes 1 quart jar (about 6–8 pickle spears, depending on cuke size)
- Hands-On Time: 10 min | Total Time: 24 hours
- Difficulty: So easy you’ll memorize the brine ratio after one batch
- Cost per serving: ~$0.30 per pickle
- Calories: ~5 per spear
- Dietary Notes: Naturally vegan, gluten-free, and low-carb
(Photo above: overhead shot of a wide-mouth mason jar packed with upright cucumber spears, fresh dill fronds, and whole garlic cloves, the brine clear and golden, placed on a wooden cutting board with a few scattered peppercorns and a dish towel in the background—morning light streaming in from the left.)
The Secret to Guaranteed Crunch (No Mushy Pickles Here)
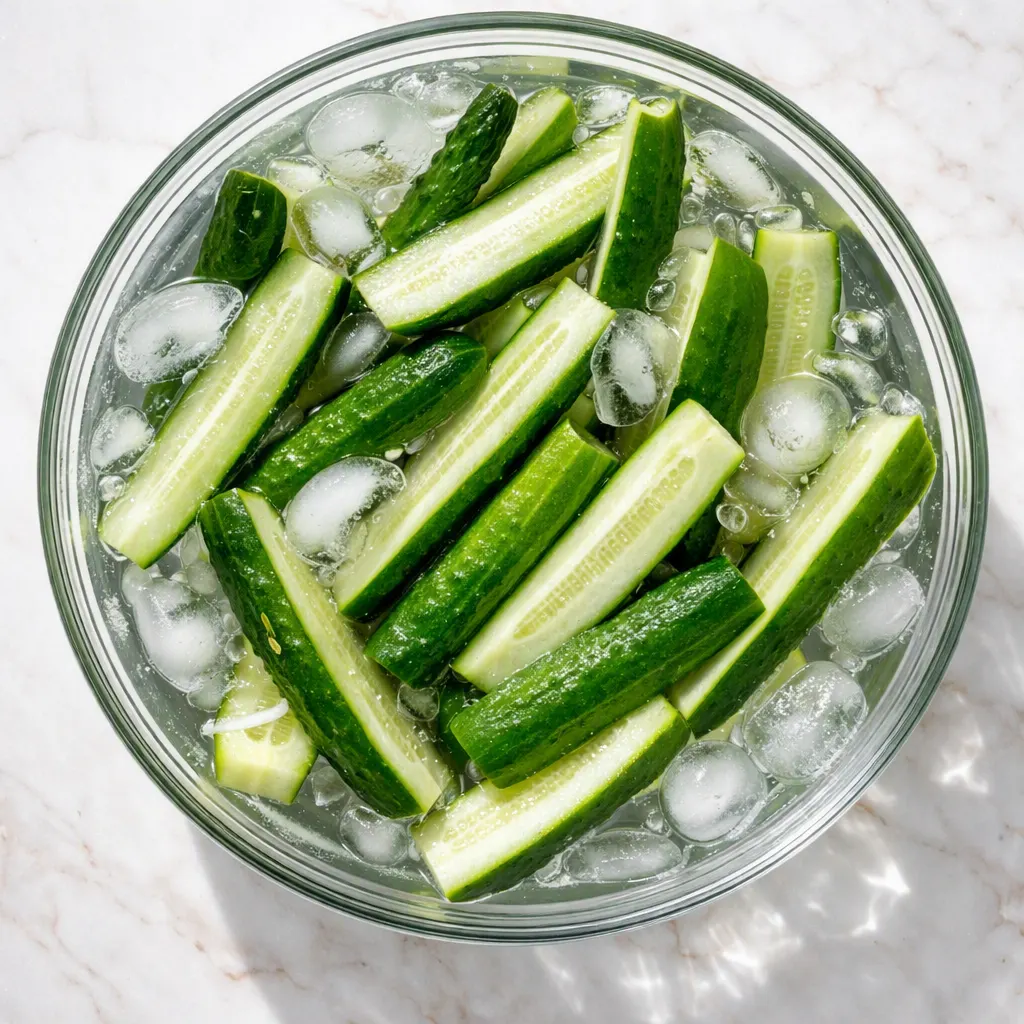
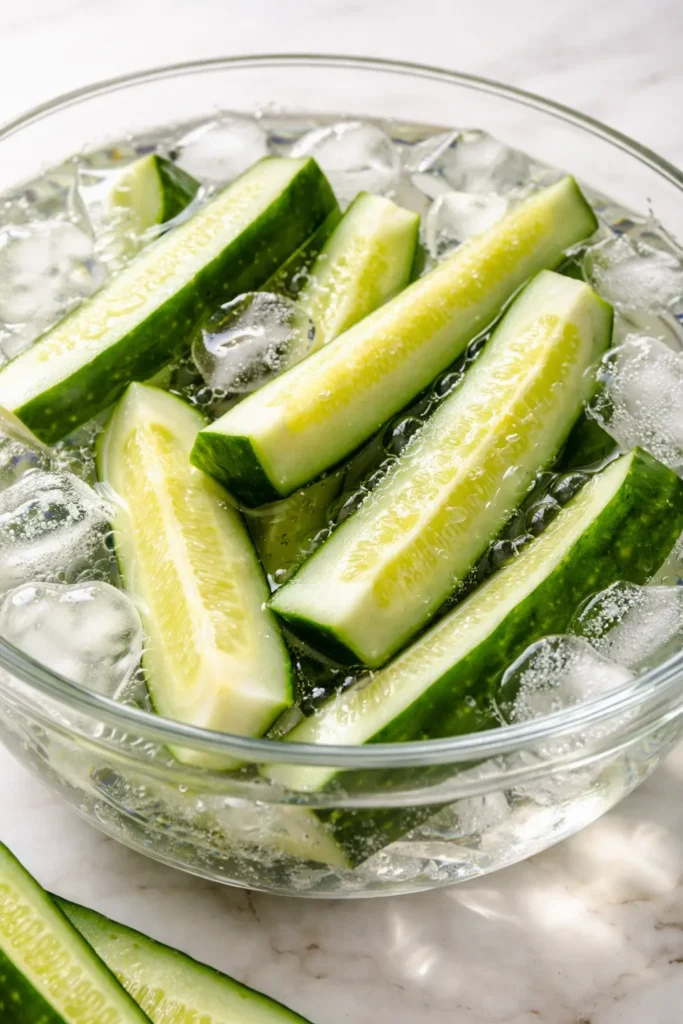
I tried a million methods before landing on this one, and the single biggest game-changer is the ice water soak. You take those cucumber spears and let them hang out in a bowl of icy water for 30 minutes before they even see the brine. It tightens them up and locks in that snap so they stay crispy for weeks. Skip this step, and you risk those sad, bendy pickles no one wants to eat. Trust me, I’ve been there.
The other thing I learned the hard way? You don’t need to boil the brine. Just warm it gently on the stove until the salt and sugar dissolve, then pour it over the cucumbers. Boiling-hot liquid can partially cook the outside of the cukes, which softens them almost immediately. A warm brine is all it takes to get that tangy, garlicky flavor to penetrate without sacrificing one bit of crunch. I’ve made batches both ways, and the warm pour wins every time.
That combination—an ice bath soak plus a warm, not scalding, brine—gives you pickles that crack when you bite them, never bend.
Everything You Need (Plus Why Dill Freshness Matters)
- 4–5 small pickling cucumbers (Kirby or similar): These are the firmest, least-seedy cukes, and they hold their shape beautifully. My kids call them “the bumpy ones”—which is accurate. If all you can find are regular slicing cucumbers, use them, but peel the skin and scoop out the seeds first so they don’t get mushy.
- 1 cup water: Tap is fine, but if your water tastes chlorinated, use filtered.
- ¾ cup white vinegar: That clean, sharp tang we all love. I keep a gallon jug in my pantry just for pickle-making all summer long.
- 1½ tablespoons kosher salt or pickling salt: Avoid iodized table salt—it can make the brine cloudy and slightly bitter. Pickling salt dissolves fast and keeps things crystal clear.
- 1 tablespoon sugar: Just enough to balance the acidity, not enough to make sweet pickles. You can leave it out if you prefer, but even a tiny bit rounds everything out.
- 4–6 sprigs fresh dill: The feathery fronds are where the flavor lives. Dried dill is fine in a pinch (use 1 teaspoon), but fresh tastes worlds brighter. My kids can smell the difference when I use the dried stuff, I’m not joking.
- 3–4 garlic cloves, peeled and gently smashed: They infuse the brine without overwhelming it. You can slice them for stronger garlic flavor if that’s your thing.
- 1 teaspoon whole black peppercorns: Adds subtle heat. I love how they look in the jar—like little pickling confetti.
- ½ teaspoon mustard seeds: A classic pickling spice that gives a tiny kick.
- Optional: 1 bay leaf or a small grape leaf: For extra crunch insurance—the tannins help the cukes stay firm. I throw one in every time because my grandma did, and it seems to work.
What to Pull Out Before You Start
- A wide-mouth quart-size mason jar (or any clean glass jar with a tight-fitting lid)
- A small saucepan for the brine
- A cutting board and chef’s knife
- A large bowl and ice cubes for the ice water bath
- Measuring cups and spoons
- A wooden spoon or spatula for stirring
No special equipment required—just the stuff you already have. If you’re making a double batch, a half-gallon jar works great too.
Let’s Make Them (Step by Step)
This goes fast, so read through once before you start. Most of the steps are just waiting around.
First, soak the cucumbers: Wash your cucumbers well. Trim off both ends—especially the blossom end (the one without the stem), because it contains enzymes that can cause softening. Cut them into spears lengthwise (quarters for small cukes, sixths for medium ones). Place them in a large bowl filled with ice water. Let them sit for 30 minutes while you prep everything else. This is the step that makes them extra crunchy, so don’t rush it.
- Make the brine: In a small saucepan, combine the water, vinegar, salt, and sugar. Heat over medium, stirring a few times, until the salt and sugar are completely dissolved. You don’t want it to boil—just barely steaming and crystal-free. Remove from heat and let it cool to lukewarm while you pack the jar.
(📸 Photo tip: A shot of the saucepan with the clear liquid just starting to steam, salt swirls visible on the bottom before they dissolve.) - Pack the jar: Drain the cucumber spears well and pat them dry with a clean kitchen towel. Stand them upright in your mason jar—they should fit snugly, like little soldiers. Tuck the garlic cloves, dill sprigs, peppercorns, mustard seeds, and bay leaf (if using) between the spears so the brine can reach everything. You can gently press the herbs against the glass so they look pretty and stay in place.
(📸 Photo tip: Spears standing upright in the jar, dill and garlic pressed against the glass, the label side of the jar facing forward.) - Pour in the brine: Slowly pour the lukewarm brine over the cucumbers, filling the jar to within about ½ inch of the top. You may not need every drop—just make sure all the spears are completely submerged. Use a wooden spoon or a chopstick to nudge any air bubbles out from between the spears.
(📸 Photo tip: Brine being poured from a measuring cup, the liquid just covering the top of the spears, a few spices floating up.) - Seal and cool: Screw the lid on tightly. Let the jar sit on the counter until it reaches room temperature—about an hour. Then transfer it to the refrigerator. The pickles need to chill for at least 24 hours before they’re ready. I know it’s tempting to sneak one after 12, but the flavor really needs that full day to develop. Patience, friend.
- Taste and adjust: After 24 hours, give a spear a try. It should be tangy, garlicky, and shatteringly crisp. If you want more salt or tang, you can add a pinch of salt to the jar and shake it up. The flavor deepens even more over the next few days. We usually finish our first jar by day three.
How I Meal Prep These for the Week
I often make a double batch on Sundays, and we’re set for packed lunches and after-school snacking until Wednesday at least. The key is keeping the pickles fully submerged in the brine—if part of a spear sticks out above the liquid, it’ll get soft and spoil faster. I just push them down with a clean fork whenever I open the jar.
- Fridge: Keep the sealed jar in the refrigerator. They’ll stay perfectly crisp for up to 2 weeks (maybe longer, but we’ve never had them last that long). Always use a clean utensil to fish one out to avoid introducing bacteria.
- Freezer: Nope, not for these. The cucumber’s texture turns to mush once frozen and thawed, so stick to fridge storage.
- Reheat: No reheating needed—they’re meant to be eaten cold, straight from the fridge. The cool, crisp bite is exactly the point.
Things I Wish I’d Known the First Time
- Don’t skip the ice bath. I know it sounds like an annoying extra step, but it’s truly the difference between a pickle that snaps and one that flops. Even 20 minutes helps enormously. My husband thought I was overcomplicating things until he tried a batch without—now he’s the one reminding me to set the timer.
- Cut off those ends. The blossom end of a cucumber (the rough, non-stem end) contains enzymes that naturally soften the fruit. Slicing off just a quarter inch removes most of them, so your pickles stay firm. A tiny detail with a big payoff.
- Use fresh dill if you can. Dried dill is a decent backup, but fresh dill gives a grassy, aromatic quality that makes these taste like they came from a fancy deli. I grab a bunch every time I’m at the store with pickles on my mind, and the leftover fronds get frozen for next time.
- Be patient with the 24-hour wait. I’ve sneaked one at the 12-hour mark, and it was good but not great. By day two, they’re incredible. The garlic and dill need that time to fully infuse the brine. Even if you mess up the brine ratio a tiny bit—say, a little too much salt—the final result will still be delicious after that overnight soak. I’ve done it.
Swaps That Actually Work
- Spicy version: Add a sliced jalapeño or a teaspoon of red pepper flakes to the jar before pouring in the brine. I do a separate jar like this for the adults after bedtime, and my kids’ jar stays mild.
- Bread and butter pickles: Swap the white vinegar for apple cider vinegar, increase the sugar to ⅓ cup, and add a pinch of turmeric and a couple of whole cloves. The result is sweet, tangy, and golden—perfect on burgers.
- Garlic lover’s dream: Double the garlic and slice it thick so the pieces are almost as good as the pickles themselves. My nephew eats the garlic cloves first—no pickle left behind.
- No-dill alternative: If you’re not a dill fan (or have a kiddo who insists they hate it), try coriander seeds and a strip of orange peel instead. It’s bright and unexpected, and my son calls them “the sunny pickles.”
- Quick carrot or green bean pickles: The same brine works beautifully for other crunchy vegetables. Just cut carrots into sticks or blanch green beans briefly, then proceed the same way. Ready in the same timeframe.
Questions I Get About This Recipe All the Time
Q: Why did my pickles turn out soft, not crunchy?
A: Ugh, I’ve been there. The most likely culprits are skipping the ice water soak, using overly ripe or waxed cucumbers, or pouring boiling-hot brine over them. Next time, soak those cukes in ice water for 30 minutes, trim the blossom ends, and let the brine cool to just warm before you pour. You’ve got this next batch.
Q: Can I use apple cider vinegar instead of white vinegar?
A: Absolutely. It gives the pickles a slightly fruitier, mellower tang. I use it when I want a more artisanal vibe. The pickles will be a shade darker, but still delicious. For a bread-and-butter style, definitely go with ACV—it’s my first choice.
Q: How long do they last in the fridge? Can I make a huge batch?
A: They stay crunchy for about two weeks, sometimes three if everything’s submerged and the lid’s on tight. After that, they start to soften a bit, but they’re still safe to eat. I wouldn’t freeze them—the texture will never recover. As for a big batch, go for it! Just keep the cucumbers in an ice bath in stages, and have multiple jars ready.
Q: What do you serve these with?
A: Honestly, we eat them as a straight-up snack most days. They’re also amazing chopped into potato salad or tuna salad, served alongside a charcuterie board, or piled onto a burger or pulled pork sandwich. My kids love them with grilled cheese—the crunch against the melty cheese is everything. For summer cookouts, I’ll slice them into thin rounds and toss them into a dill pickle pasta salad.
More Recipes My Family Makes on Repeat
If you liked these pickles, here are a few other quick-fix favorites that get the same reaction at our table:
- [INTERNAL LINK PLACEHOLDER: Quick Pickled Red Onions] — Ready in 30 minutes and they make any taco or salad feel restaurant-level.
- [INTERNAL LINK PLACEHOLDER: Spicy Pickled Carrots] — My husband’s favorite spicy-snack, and they’re gone in two days flat.
- [INTERNAL LINK PLACEHOLDER: Homemade Ranch Dressing] — Because what’s a crunchy pickle without something creamy to dip it in?
These refrigerator pickles have saved so many summer afternoons when the garden is overflowing and the kids need something cold and crunchy. I hope they become a staple in your kitchen the way they are in mine. If you try them, drop a comment below—I love hearing how yours turn out, and whether you went classic dill or tried a spicy twist! And if you snap a photo, tag me on Instagram so I can see your pickle jar shining in all its glory.
📌 Save this Refrigerator Pickles recipe that’s ready in just 24 hours and stays crispy for weeks—perfect for summer barbecues, school lunches, and when you need a tangy snack that everyone will fight over.
Refrigerator Pickles That Are Crunchier Than Any Jar — Ready in 24 Hours
Equipment
- Wide-mouth quart-size mason jar
- Small saucepan
- Large bowl
- Cutting board
- Chef’s knife
- Measuring cups and spoons
Ingredients
- 4-5 small pickling cucumbers (Kirby or similar)
- 1 cup water
- 3/4 cup white vinegar
- 1 1/2 tablespoons kosher salt or pickling salt
- 1 tablespoon sugar
- 4-6 sprigs fresh dill
- 3-4 cloves garlic, peeled and gently smashed
- 1 teaspoon whole black peppercorns
- 1/2 teaspoon mustard seeds
- 1 bay leaf or grape leaf (optional) extra crunch boost
Instructions
- Soak cucumber spears in a large bowl of ice water for 30 minutes. This step is essential for the crunchiest pickles.
- In a small saucepan, combine water, vinegar, salt, and sugar. Heat over medium, stirring until the salt and sugar fully dissolve. Do not boil. Remove from heat and let cool to lukewarm.
- Drain the cucumber spears and pat them dry. Pack them upright in a wide-mouth quart-size mason jar, tucking garlic cloves, dill sprigs, peppercorns, mustard seeds, and the optional bay/grape leaf between the spears.
- Slowly pour the lukewarm brine over the cucumbers until the jar is filled to about 1/2 inch from the top. Nudge out any air bubbles and ensure all spears are submerged.
- Screw the lid on tightly and let the jar cool to room temperature on the counter (about 1 hour). Then transfer to the refrigerator. Chill for at least 24 hours before tasting.
- After 24 hours, sample a spear. Adjust salt or acid if desired, then enjoy cold straight from the jar. Store in the fridge up to 2 weeks.
Notes
Related Recipes:
 Cheesy Hamburger Casserole Bake That’s Ready in 40 Minutes (No Canned Soup Here)
 Texas Roadhouse Style Baked Salmon with Sweet and Savory Glaze — Ready in Under 30 Minutes
 Moist Lemon Zucchini Bread with a Crunchy Lemon Sugar Top
 Strawberry Shortcake Rice Krispie Treats That Actually Taste Like Shortcake — Ready in 15 Minutes
 Blueberry Oatmeal Cookies That Stay Soft for Days — in Under 30 Minutes
 Air Fryer Chicken and Vegetables That Don’t Taste Like a Regret (30 Minutes, One Pan)