
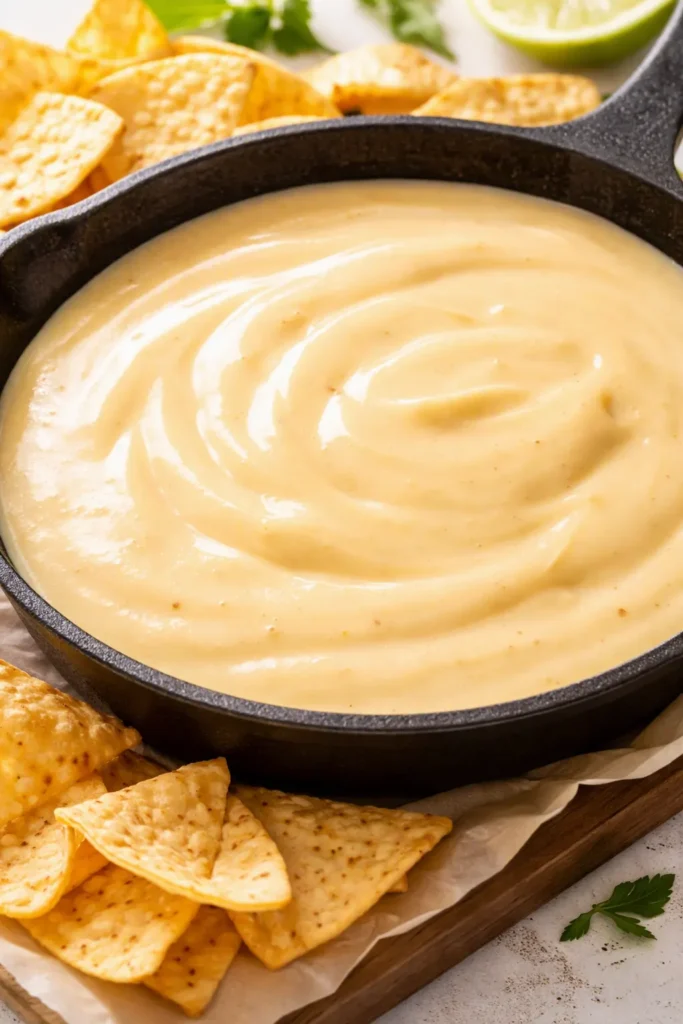
There’s a specific moment at any gathering when people stop pretending to mingle and start making their way toward the same bowl. My cowboy queso is why that happens. It’s beefy, creamy, a little smoky, and it doesn’t do that thing where the top turns oily and the cheese stiffens by the second hour. Thirty minutes, one skillet, and a bag of chips. That’s the whole pitch.
The short version: Ground beef, two cheeses, Rotel, beans, and corn in one skillet — smooth all night, gone in forty minutes.
I’ve made this for four Super Bowls, two birthdays, a housewarming, and one Tuesday that needed to feel like a party. The skillet version is the one I keep coming back to. It’s the dip people stand near, and the one that gets eaten down to the last scrapeable corner.
- Serves: 8–10 as a party dip
- Hands-On Time: 20 min | Total Time: 30 min
- Difficulty: Easy — just don’t rush the cheese
- Cost per serving: ~$1.75
- Calories: ~340 per serving
- Dietary Notes: Gluten-free as written; dairy-free swaps listed below
(Photo above: overhead shot of a cast-iron skillet full of queso on a dark wooden table, tortilla chips fanned on a cutting board beside it, a deliberate line of chopped cilantro and pickled jalapeño slices running across the top, warm afternoon light from the left.)
The One Step Everyone Skips (It’s What Keeps the Queso Smooth)
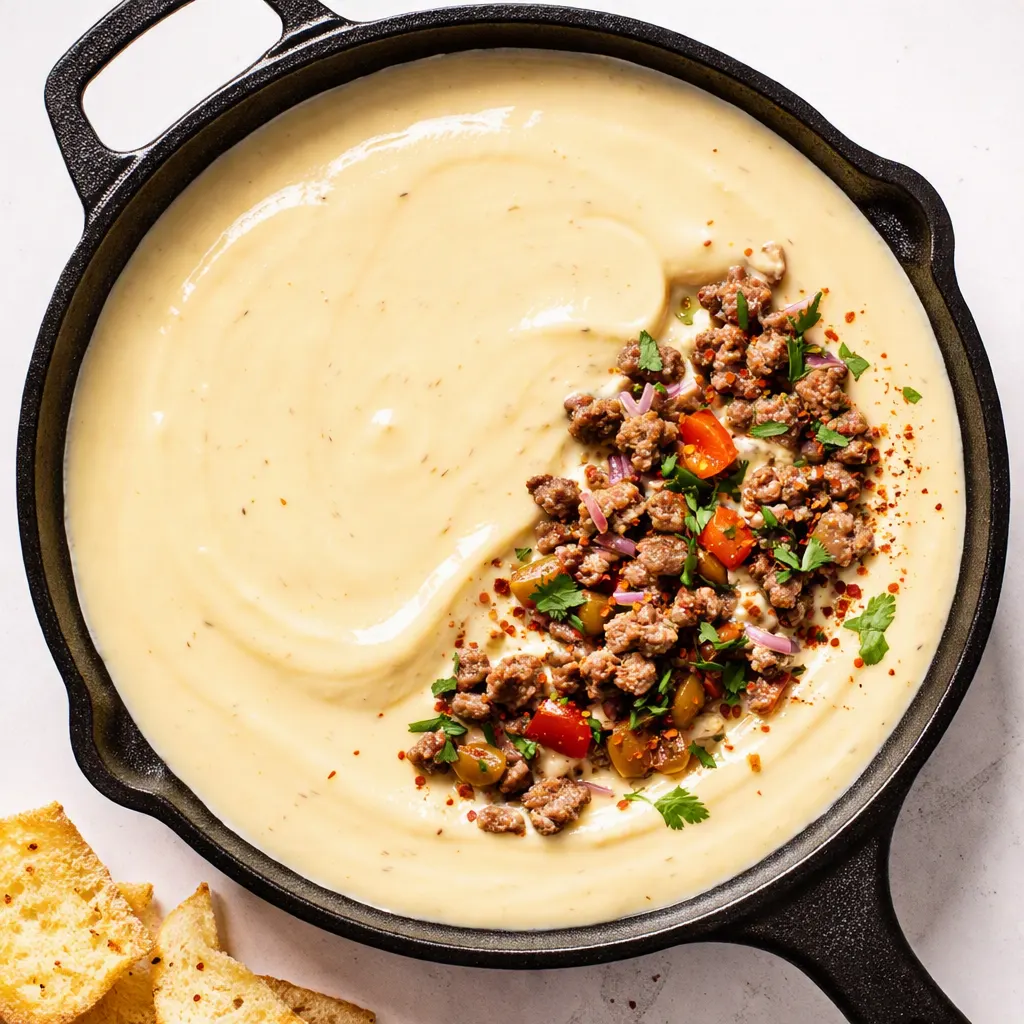
Most queso separates because the cheese gets too hot, too fast. The fix is almost insultingly simple: you melt the cheese after the heat is off. You brown the beef, let the tomatoes and seasonings simmer, then you kill the burner and stir the cheese in. The residual heat is plenty — it melts everything slowly and evenly, and keeps it creamy for the entire night instead of breaking into an oily slick.
The other thing I’ll insist on: shred the cheddar yourself. The bagged stuff has a fine powdery coating that keeps it from clumping in the bag, and it does the same thing in your queso — leaving it slightly grainy. A block of sharp cheddar and a box grater is two minutes of work and a texture difference you can feel on a chip.
The payoff: a dip that still moves slowly off the spoon at hour two, no frantic stirring every five minutes, no microwave rescue mission right before halftime.
What Goes In — Plus My Honest Notes
- 1 lb ground beef (80/20): The 80/20 is the sweet spot. Too lean and the beef turns dry and crumbly; too fatty and you’re draining a pool. I do spoon out the excess fat after browning — one spoonful left behind is flavor, the rest is just homework. My family can tell the difference when I use a leaner blend. It’s drier and less savory. Don’t do that.
- 1 small yellow onion, finely diced: The onion is the quiet foundation. It needs to cook until translucent, not just until it stops looking raw, so it melts into the queso instead of adding crunch where nobody asked for crunch. I’ve used shallots when the onion drawer was empty and it worked beautifully — slightly more elegant, same job.
- 3 cloves garlic, minced: Garlic goes in last, after the onion, and only gets about 30 seconds before the tomatoes arrive. That prevents it from burning and turning bitter. Pre-minced garlic from the jar is fine when you’re tired. I’m not here to police anyone’s garlic habits.
- 1 packet taco seasoning (or 2 tbsp of your own blend of chili powder, cumin, smoked paprika, garlic powder, and salt): The store-bought packet is dependable and I use it more than my pride would like to admit. If you make your own, include smoked paprika — it’s the ingredient that gives the dip a whiff of campfire without any actual fire. My dad makes his own blend and it’s the taste I grew up with — warm, a little spicy, never hot.
- 1 can (10 oz) Rotel diced tomatoes with green chiles, undrained: The whole can goes in, liquid and all. That liquid is doing two jobs: simmering down quickly and adding the acidity that keeps the cheese from feeling like a brick of fat. If you can’t find Rotel where you live, a can of diced tomatoes plus a small can of chopped green chiles is the exact same thing.
- 1 lb Velveeta, cut into cubes: I know it’s processed. It’s also the reason the queso stays smooth for hours instead of splitting into a science experiment. Think of it as the stabilizer that lets the real cheddar do the flavor work. I grab it without shame. The checkout clerk has seen me buy it before and we don’t speak of it.
- 8 oz sharp cheddar, shredded from the block: Shred it yourself. I keep saying this because it matters: the bagged kind has that powdery coating that turns melted queso grainy. On a chip, graininess is the difference between “what is this dip” and “make this again.” My kids help me shred it and they fight over the microplane. It’s a family activity now.
- 1 can (15 oz) black beans, drained and rinsed: They give the dip texture and make it feel like something you could call a meal if you’re the kind of person who considers chips a delivery vehicle for meals. I am that person. Rinsing matters — the can liquid thickens the queso in an unappealing way.
- 1 cup frozen corn (or one can, drained): Frozen corn goes straight into the pan, no thawing. The little pops of sweetness are doing quiet work against all that savory heat. My kids like to pick out the corn. It’s the only part of this dip they can identify.
- 1 tbsp pickled jalapeño brine: This is the move no one talks about. The brine adds acid and a slow, gentle warmth without making the dip taste like salsa. Stir it in at the very end, after the cheese melts, then taste — add a little more if you want more of a bite. I learned this from a bartender who used the same trick in his queso. Pickle brine logic, applied to cheese.
- For the top: pickled jalapeño slices, cilantro, a few extra black beans: The garnish here is not decoration — it’s acid, freshness, and color. Place it deliberately, in a line or a small cluster on one side. That’s the difference between a dip that looks like a pot of cheese and one that looks like someone thought about it. If you’re not a cilantro person — and I know some of you aren’t, you are valid — use sliced scallions instead.
What to Pull Out Before You Start
- 10 or 12-inch cast-iron skillet: Cast iron holds heat and looks like it means business on the table. A heavy stainless or nonstick skillet works fine too — just give the beef a good sear.
- Box grater: For the cheddar. You’ll need it. A food processor works if you’re making a double batch — say no to wrist fatigue.
- Wooden spoon or heat-safe spatula: For stirring and scraping the bottom of the pan. Wood is nice because it won’t scratch your skillet.
- Can opener, cutting board, chef’s knife: The boring essentials that make everything else possible.
Making Cowboy Queso, Start to Finish
This goes faster than you think, so read the whole thing once before you start. The good news: it’s one pan, and nothing here requires actual skill.
- Brown the beef: Heat the skillet over medium-high for a minute or two. Add the ground beef and break it into pieces with your spoon. Let it sit untouched for 2–3 minutes before stirring — that’s what gives you real color instead of gray mush. Season with the taco seasoning, then cook, stirring occasionally, until no pink remains, 6–7 minutes total. (📸 Photo tip: You should see deep brown bits crusted on the bottom of the skillet. That color is flavor, not burnt. Leave them.)
- Drain the fat: Push the beef to one side of the pan and tilt the skillet so the fat pools. Spoon it out, leaving about a tablespoon. A little fat carries flavor; the rest would make the queso greasy. When I’m truly exhausted, I skip this and just blot the beef with a folded paper towel. It works fine, and nobody has ever noticed.
- Cook the onion: Add the diced onion to the empty side of the skillet and cook over medium heat for 3–4 minutes, until it turns translucent and starts to smell sweet. Add the garlic and stir for 30 seconds, just until fragrant.
- Add the tomatoes, beans, and corn: Pour in the Rotel with its liquid, the drained black beans, and the corn. Scrape the bottom of the skillet with your spoon to lift all those browned bits back into the liquid — that’s where the beef flavor lives. Let it simmer for 5 minutes, until the liquid has thickened slightly. (📸 Photo tip: At this point it should look like a very chunky, dark red salsa. Totally fine.)
- Turn off the heat: This is the step everyone rushes. The pan should be bubbling gently, not violently. Turn off the burner and wait about 30 seconds so it stops boiling. If the liquid is aggressively boiling when you add the cheese, the heat breaks the emulsion and you get oily, clumpy queso. Patience costs nothing here.
- Melt the cheese: Add the Velveeta cubes and the shredded cheddar, and stir continuously. The residual heat melts everything in 2–3 minutes. Keep stirring until the queso is glossy and completely smooth, with no visible shreds. If it stops melting and leaves a stubborn lump, put the skillet back on the lowest heat for 20–30 seconds — no longer. (📸 Photo tip: The queso should fall off the spoon in a lazy ribbon — slow and glossy, not pouring like water and not sitting like pudding.)
- Finish with brine: Stir in the pickled jalapeño brine, then taste. You probably won’t need salt — the cheese and taco seasoning have it covered. But this is your dip. A pinch of salt is not a crime.
- Garnish and serve: Place the pickled jalapeño slices, the cilantro, and a few black beans in a deliberate line or cluster across the top. Place them — dropping them from a height is confetti. Then set the skillet on the table with chips and step back. People will find it. If your gathering stretches past an hour, keep the skillet on the lowest warming setting and give it a stir every 20 minutes or so.
Make-Ahead Notes (Because Party Day Is Chaotic)
The best way to make this for a crowd: brown the beef and cook the onion mixture the night before, store it covered in the fridge, and finish the cheese the day of. It takes about 10 minutes to finish and you arrive at your own party calm. I do a double batch in the slow cooker on warm for big game days — the flavors get friendlier over a few hours.
- Fridge: Airtight container, up to 4 days. Reheat in a skillet over low heat, stirring often, with a splash of milk or water if it’s too thick.
- Freezer: Yes — up to 3 months. Thaw overnight in the fridge, then reheat low and slow. The texture softens slightly, but it’s still genuinely good. Just know what you’re getting.
- Reheat: Stove top, low heat, stirring. The microwave works in a pinch but it can turn oily — I’d rather you know that now than find out at the office potluck.
Things I’ve Learned the Hard Way (So You Don’t Have To)
- Low heat is the entire game: Every time someone tells me their queso separated, the story involves high heat. Cheese is an emulsion, and you’re the one keeping it together. Melt it gently, off the heat, and you’re ninety percent of the way there.
- Shred your own cheddar: I’ve said it three times and I’ll say it once more: bagged shredded cheese has a coating that turns your queso gritty. A block and a grater takes two minutes. Trust me on this one — my husband thought I was overthinking it until he tried both versions side by side.
- The five-minute simmer matters: Letting the Rotel, beans, and corn simmer before the cheese does two things: it thickens the liquid so the queso isn’t runny, and it lets the flavors stop competing and start cooperating. Skip it and you’ll wonder why the dip tastes like a checklist of ingredients.
- Drain the beef with restraint: You want to remove the excess fat, but don’t polish the pan dry. One tablespoon left behind carries a deep, savory flavor. Fat is flavor — just not all of it.
- The rescue move: If you do mess up and the queso separates, don’t panic. Take it off the heat and stir in a splash of warm milk. It comes back together more often than not. And even if it doesn’t look perfect, chips don’t care as much as you do.
Swaps That Actually Work
- Dairy-Free: Use a dairy-free processed cheese alternative and a dairy-free cheddar shred. I’ve tested the major brands and the texture comes out a little looser than the original, but it’s still a solid dip — my dairy-free friend went back for thirds.
- Spicier: Add one diced jalapeño with the onion, use the hot version of Rotel, and finish with an extra teaspoon of the brine. This is the version I make after the kids go to bed.
- Mild / Kid-Friendly: Skip the pickled jalapeño brine and use mild Rotel. The taco seasoning gives a gentle warmth that most kids accept — my nephew refuses anything with visible heat and he worked through half a bag of chips without complaint.
- With Bacon: Cook 4 slices of bacon until crisp, crumble half into the queso, and reserve the rest for the top. Bacon is a garnish that also does the work. Just drain the skillet before browning the beef so you’re not combining bacon and beef fat.
- With Chorizo: Swap the ground beef for 1 lb of fresh chorizo, casings removed. Brown it the same way and skip the taco seasoning — chorizo brings its own spice and color. It makes a more aggressive, smoky dip. Good for an adults-only gathering.
The Queso Questions I Get Asked Every Single Time
Q: Why did my queso turn out grainy and separated?
A: Ugh, I’ve been there. It got too hot, too fast — that’s the whole cause. Cheese is an emulsion and high heat splits it. The fix is in the method: melt it off the heat as written, and if it separates anyway, stir in a splash of warm milk off the heat. It comes back together more often than not. You’ve got this next time.
Q: Can I make this without Velveeta?
A: You can, but you’ll need another way to keep it smooth. Evaporated milk is the most reliable swap — add about half a can when you add the tomatoes and it does a similar stabilizing job. I’ve also had readers report success with American cheese slices in place of part of the Velveeta. I haven’t tested every combination myself, but those two get the most enthusiastic reports.
Q: How long does cowboy queso last? Can I freeze it?
A: Fridge, airtight container, up to four days. Reheat low and slow on the stove with a splash of milk to bring back the texture. Freezer: yes, up to three months, but the texture softens on the thaw — it turns into a slightly looser, more chili-adjacent dip. Still delicious. Just know what you’re getting.
Q: What do you serve with cowboy queso besides chips?
A: Tortilla chips are the obvious answer and I’m not above it — warm them first, because cold chips against hot queso is a crime of temperature. Fritos scoops are my second pick because the crunch holds up better over time. And if there’s leftover queso, spoon it over a baked potato the next day. That’s a private move I stand behind completely.
More Recipes My Family Makes on Repeat
If this one lands on your regular rotation, these are the other dishes that get the same reaction at our table:
- [INTERNAL LINK PLACEHOLDER: Sheet-Pan Chicken Fajitas] — The weeknight classic that needs one pan and about ten minutes of actual effort.
- [INTERNAL LINK PLACEHOLDER: Smoky Black Bean Chili] — The colder-weather cousin with the same smoky warmth, built for a slow afternoon.
- [INTERNAL LINK PLACEHOLDER: The Best Guacamole You’ll Make at Home] — Because once the queso is out, the table needs its other half.
Make this for the next game, the next birthday, or the next Tuesday that needs a reason to feel like a party. Put the skillet in the middle of the table and let people find their way to it. They always do.
If you make it, drop a comment below and tell me how long it survived — I keep a running tally and the current record is 40 minutes! Tag me on Pinterest or Instagram so I can see your version on the table.
📌 Save this cowboy queso recipe for game day, parties, and every gathering where you want a dip that stays smooth until the last chip — it takes 30 minutes and one skillet.
Cowboy Queso
Equipment
- 10 or 12-inch cast-iron skillet
- Box grater
- Wooden spoon or heat-safe spatula
- Can opener
- Cutting board and chef’s knife
Ingredients
- 1 lb ground beef (80/20)
- 1 small yellow onion, finely diced
- 3 cloves garlic, minced
- 1 packet taco seasoning (or 2 tbsp homemade blend of chili powder, cumin, smoked paprika, garlic powder, and salt)
- 1 can (10 oz) Rotel diced tomatoes with green chiles, undrained
- 1 lb Velveeta, cut into cubes
- 8 oz sharp cheddar, shredded from the block
- 1 can (15 oz) black beans, drained and rinsed
- 1 cup frozen corn (or one can, drained)
- 1 tbsp pickled jalapeño brine
For the garnish
- pickled jalapeño slices
- cilantro leaves
- extra black beans
Instructions
- Heat the skillet over medium-high for a minute or two. Add the ground beef and break it up, then let it sit for 2–3 minutes before stirring. Season with the taco seasoning and cook until no pink remains, 6–7 minutes total.
- Push the beef to one side and tilt the skillet so the fat pools. Spoon out the excess, leaving about a tablespoon behind for flavor.
- Add the onion to the empty side and cook over medium heat for 3–4 minutes until translucent. Add the garlic and cook 30 seconds until fragrant.
- Pour in the Rotel with its liquid, the drained beans, and the corn. Scrape up the browned bits from the bottom and let it simmer for 5 minutes until slightly thickened.
- Turn off the heat and wait about 30 seconds so it stops bubbling. Patience here is what keeps the cheese smooth.
- Add the Velveeta cubes and shredded cheddar, then stir continuously off the heat until glossy and completely smooth, 2–3 minutes. If a stubborn lump remains, return to the lowest heat for 20–30 seconds.
- Stir in the pickled jalapeño brine and taste. You probably will not need salt, but a pinch is not a crime.
- Place the pickled jalapeño slices, cilantro, and extra black beans in a deliberate line or cluster across the top. Serve with warm tortilla chips and let people find their way to the skillet.
Notes
Related Recipes:
 Cheesy Hamburger Casserole Bake That’s Ready in 40 Minutes (No Canned Soup Here)
 Texas Roadhouse Style Baked Salmon with Sweet and Savory Glaze — Ready in Under 30 Minutes
 Moist Lemon Zucchini Bread with a Crunchy Lemon Sugar Top
 Strawberry Shortcake Rice Krispie Treats That Actually Taste Like Shortcake — Ready in 15 Minutes
 Blueberry Oatmeal Cookies That Stay Soft for Days — in Under 30 Minutes
 Air Fryer Chicken and Vegetables That Don’t Taste Like a Regret (30 Minutes, One Pan)