
The first time I made this at home, I actually checked the Starbucks app to see if I’d missed a secret ingredient. I hadn’t. It’s just quality espresso, real vanilla, and the right ratio of milk to ice — but the version you make yourself has one thing they can’t match: it’s exactly as strong and sweet as you want it. And it’s ready in the time it takes to tie your shoes. I haven’t waited in a drive-thru line for a latte since.
The short version: This iced vanilla latte comes together in five minutes, costs pocket change, and tastes like $5.
I’ve made this every morning for the last two months. My friends now text me before they come over to ask if I’ll have the syrup ready. I always do.
- Serves: 1 as a morning or afternoon pick-me-up
- Hands-On Time: 5 min | Total Time: 5 min
- Difficulty: So easy you’ll start making it on autopilot
- Cost per serving: ~$0.80
- Calories: ~180 (with 2% milk, varies by milk choice)
- Dietary Notes: Naturally vegetarian. Adaptable dairy-free, sugar-free.
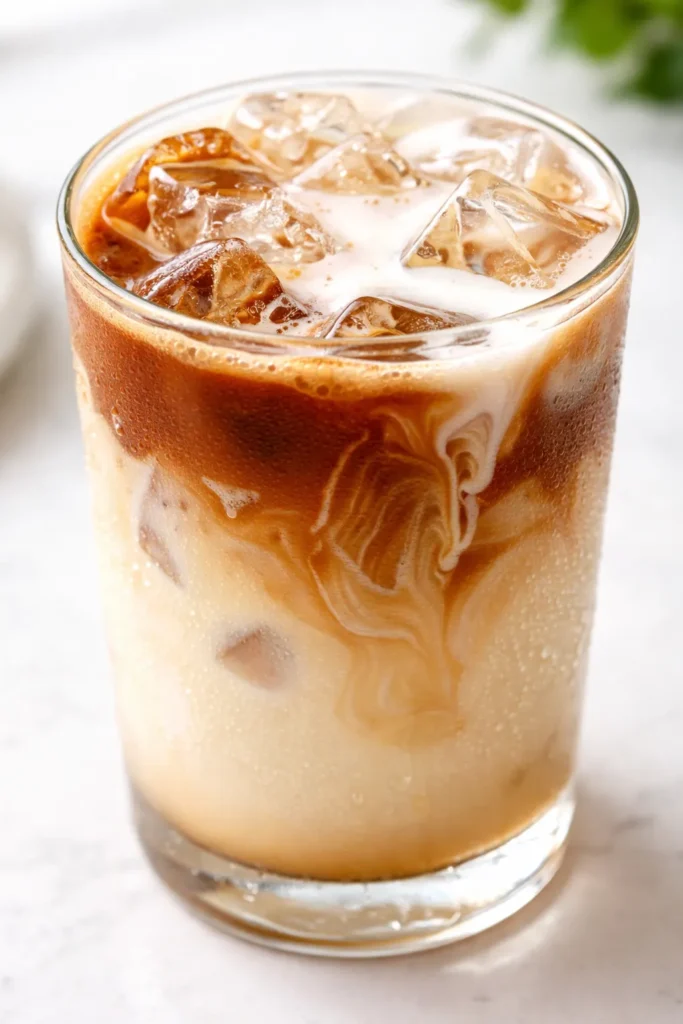
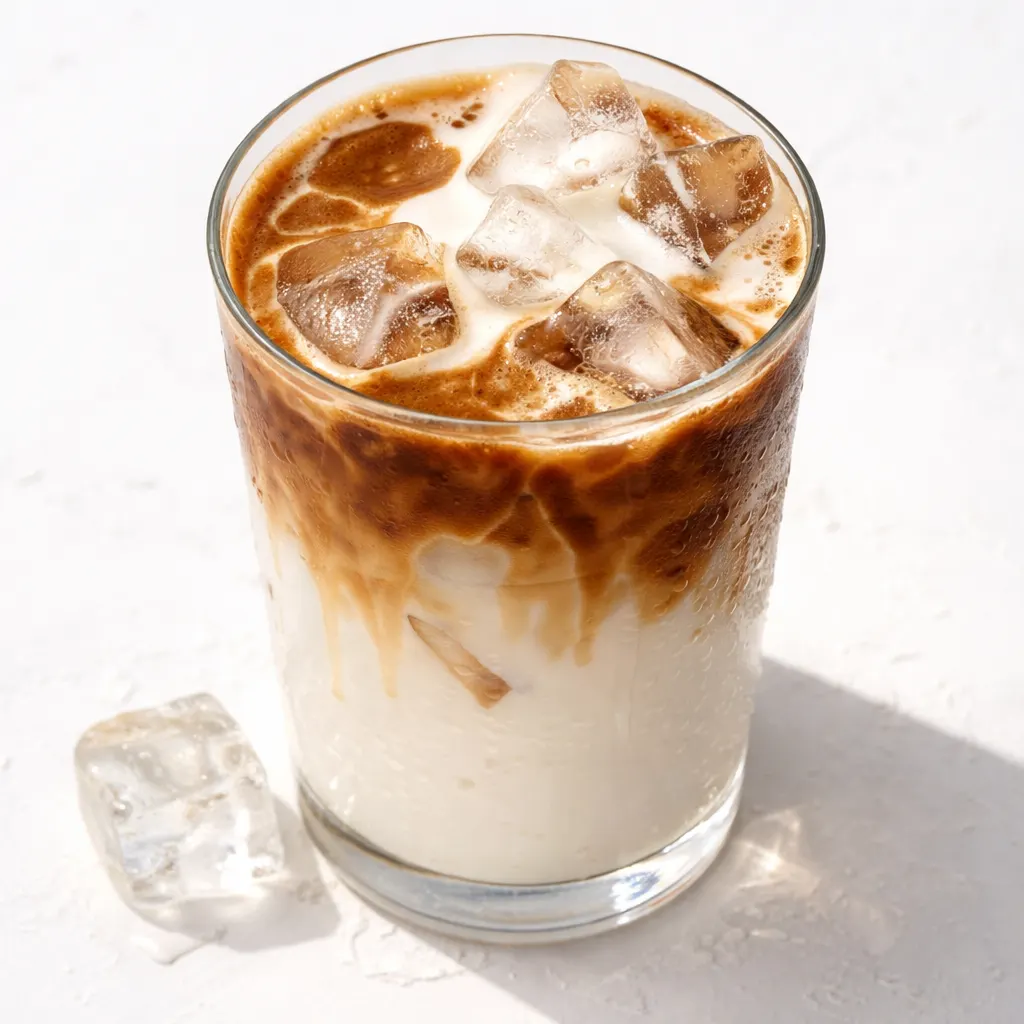
(Photo above: overhead shot of a tall glass of iced latte, condensation beading on the glass, a clear separation between dark espresso and creamy milk, ice cubes clustered at the top, morning light streaming in from a nearby window. A small glass pitcher of vanilla syrup sits to the side.)
The Thing That Makes This Better Than Starbucks
It comes down to the vanilla syrup. The bottled stuff at the grocery store is fine in a pinch, but it has a one-note sweetness that flattens the coffee. Homemade syrup — sugar, water, and a full tablespoon of real vanilla extract — adds a floral, slightly boozy depth that clings to the espresso. It takes exactly as long to make as it takes to boil a kettle, and you’ll have enough for two weeks of lattes.
The other move is shaking the hot espresso with the syrup and a little milk before you pour it over ice. That might sound fussy, but it’s the difference between a drink that tastes like iced coffee someone added milk to and a drink that feels like a proper café latte. The shaking chills the espresso instantly so it doesn’t melt the first layer of ice, and it gives the whole thing a faintly foamy texture that reads as fancy without any actual barista skill.
Skip either of these steps and you’ll still have a decent drink. Do both and you’ll wonder why you ever paid someone to make it for you.
Ingredients Worth Talking About
- 2 tablespoons homemade vanilla syrup (recipe below): This is the backbone. Make it once and you’ll never go back. I use Nielsen-Massey vanilla extract because it’s worth the extra dollar — the flavor is rounder and more caramel-y. Your latte will taste noticeably better.
- 1 double shot of espresso (about 2 ounces): Real espresso is ideal, but strong brewed coffee (double strength) works. I use a Moka pot most mornings — it’s $25 and delivers pressure-brewed coffee that’s close enough to espresso that I don’t miss my old machine.
- 1 cup milk of your choice: Whole milk gives the creamiest texture, but oat milk is my go-to for a dairy-free version that still froths nicely. Oatly Barista Edition is the one — it doesn’t separate in hot espresso.
- Ice cubes: Large cubes, not crushed or nugget ice. This is not being precious — smaller ice melts faster and waters down your drink before you’re halfway through. Use big cubes from a tray, not the bag from the gas station.
- Optional: splash of heavy cream or a pinch of salt: A tablespoon of cream over the ice before pouring the milk makes the mouthfeel extra luxurious. A tiny pinch of salt in the syrup emphasizes the vanilla without making it savory. I do the salt thing every time now — my friends think I’m being mysterious about it.
What to Pull Out Before You Start
- A small saucepan (for the syrup — you can also microwave it)
- A glass jar with a lid for storing the syrup
- An espresso maker, Moka pot, or Aeropress
- A cocktail shaker or a mason jar with a tight lid
- A tall glass (12–16 oz is perfect)
- A spoon or straw for stirring
If you don’t have a shaker, a mason jar works exactly the same. Just make sure the lid is secure — I learned this the hard way.
Here’s How I Do It
This goes fast once the syrup is made. The syrup takes about 10 minutes total, but you can make a big batch on Sunday and have lattes all week. The actual latte assembly is five minutes, start to finish.
Make the vanilla syrup (one-time prep):
- Combine: In a small saucepan, whisk together 1 cup water and 1 cup granulated sugar. Bring to a simmer over medium heat, stirring occasionally, until the sugar is completely dissolved — about 3 minutes.
- Add vanilla: Remove from heat and stir in 1 tablespoon pure vanilla extract. Let cool to room temperature. (Or add the seeds from one vanilla bean if you’re feeling extra — I do this for weekend batches.)
(📸 Photo tip: The syrup should look clear and amber, not cloudy. Transfer to a clean glass jar with a tight lid.) - Store: Refrigerate for up to 2 weeks. Shake before each use because the vanilla settles.
Assemble the iced latte:
- Brew the espresso: Make a double shot of espresso (about 2 ounces) using your preferred method. If using a Moka pot or Aeropress, do this while the syrup cools or right before you make the latte.
- Shake it: In a cocktail shaker or mason jar, combine the hot espresso, 2 tablespoons vanilla syrup, and a splash (about ¼ cup) of the milk. Add a handful of ice cubes — about 4–5 large ones. Shake vigorously for 10 seconds. The shaker will get cold; that’s the point.
(📸 Photo tip: After shaking, you should see a slightly foamy surface on the liquid, with the ice still intact.) - Fill the glass: Fill your serving glass with fresh ice cubes — don’t use the ice from the shaker, it’s already started melting. Pour the shaken espresso mixture over the fresh ice.
- Top with milk: Pour the remaining ¾ cup milk over the espresso mixture. Stir gently with a spoon or straw to combine. Taste and add more syrup if you like it sweeter.
- Finish (optional): Drizzle a little extra vanilla syrup over the top, or add a pinch of sea salt for a salted vanilla version. Serve immediately with a straw.
How I Meal Prep This for the Week
The syrup is the only part that needs prepping. I make a double batch every Sunday and keep it in the fridge. Then all week, I brew the espresso, shake it up, and pour — takes under five minutes, and I don’t have to think about it. If you’re really pressed for time, you can prep individual portions of espresso and syrup in a jar and just add milk and ice in the morning, but I find the shaking step is worth every second.
- Fridge: Vanilla syrup keeps for 2 weeks in a sealed jar. The assembled latte should be drunk immediately — don’t refrigerate it, the texture goes flat.
- Freezer: You can freeze the syrup in ice cube trays for individual portions. Thaw a cube per latte. Not ideal but works for camping or office.
- Reheat: Not applicable for a cold drink — but you can use the syrup in hot coffee too. Just stir it in and skip the ice.
Things I Wish I’d Known the First Time
- Don’t skip the shake: I know it’s one extra step and you’re busy. But the difference between shaking and just stirring is the difference between a drink that feels thin and a drink that feels like it was made by someone who cares. The shake gives it a microfoam layer on top that holds up as you drink. Trust me on this one.
- Fresh ice is non-negotiable: Use the ice directly from the freezer, not the ice that’s been sitting in the shaker. Reusing the shaker ice means your drink will be watery before you finish it. I keep a bag of big cocktail cubes in the freezer specifically for this — my ice cube tray is a dedicated coffee tool now.
- Real vanilla extract makes a real difference: The imitation stuff is fine for baking where it gets cooked, but in a cold drink, its flavor sits on the surface and disappears quickly. Spring for pure vanilla. A bottle lasts months, and your latte will taste noticeably richer.
- Even if you mess up the syrup ratio? Too sweet? Add a splash more milk or an extra ice cube. Not sweet enough? Stir in a teaspoon of syrup at the end. The beauty of making it yourself is that you can fix it on the spot.
Swaps That Actually Work
- Dairy-free: Use oat milk (full-fat, barista blend) for the closest texture. Almond milk is too thin and separates with hot espresso. Coconut milk works but adds a coconut flavor that some people love and others don’t. I default to oat milk for my friends with dairy issues — it’s the one that feels most like the original.
- Sugar-free: Replace the sugar in the syrup with allulose, monk fruit, or a 1:1 erythritol blend. The texture will be slightly thinner, and the flavor will be less rich, but it’s genuinely good. I make a sugar-free batch for my dad and he drinks it without complaint.
- Extra coffee kick: Use a ristretto shot (less water, same grounds) for a stronger flavor without more volume. Or add a second espresso shot and adjust the milk accordingly.
- Flavor variation: Add ½ teaspoon almond extract or a cinnamon stick to the syrup while it simmers. I do a lavender version by steeping 1 teaspoon dried lavender in the syrup for 5 minutes before straining — it’s my go-to for a Sunday brunch feeling.
- Hot version: Skip the shaking and ice. Just add hot espresso and syrup to a cup, then pour warm steamed milk over it. Same syrup, different vibe.
Questions I Get About This Recipe All the Time
Q: My latte came out watery — what did I do wrong?
A: That’s almost always the ice. You either used too-small ice (crushed or nugget ice) that melted fast, or you reused the shaker ice. Stick with big cubes, and always use fresh ice in the glass. Also make sure your espresso is very hot when you shake it — if it’s lukewarm, the mixture won’t chill properly and the ice will do the cooling work, diluting everything.
Q: Can I make this with decaf espresso?
A: Absolutely. I buy decaf beans for my Moka pot and it works exactly the same. Just follow the same brewing and shaking method. The flavor may be slightly less robust, but a good decaf blend will get you 90% of the way there. My pregnant friend uses this recipe and swears by it.
Q: How long does the finished latte last? Can I make it ahead?
A: Drink it immediately — within 15 minutes max. The ice will continue to melt and dilute the coffee. I don’t recommend making a batch in advance and refrigerating because the texture falls flat and the coffee gets bitter as it sits. If you need to prep, make the syrup and have it ready, then assemble fresh.
Q: What do you serve with this latte?
A: I love it with a simple almond croissant or a slice of banana bread. My go-to afternoon pairing is a small piece of dark chocolate and a handful of salted almonds — the bitter and salty notes contrast perfectly with the sweet vanilla. If it’s a lazy weekend morning, I’ll make a breakfast sandwich to go with it (I have a recipe for that on the blog too).
More Recipes My Family Makes on Repeat
If you liked this one, here are a few others that get the same reaction at our table:
- Chocolate Chip Milk Buns — The only French toast recipe that stays crispy on the outside and custardy in the middle, every time.
- No-Cook Creamy Chia Pudding — A grab-and-go breakfast that actually tastes good cold.
- Moist Zucchini Bread — These come together in 20 minutes and are the perfect excuse to make another latte.
That first sip — cold, creamy, with a punch of real vanilla and espresso — is the moment I know the morning is going to be okay. I hope it does the same for you. If you try it, drop a comment below — I love hearing how it goes, especially if you experiment with a new flavor.
📌 This iced vanilla latte recipe tastes better than Starbucks and costs under a dollar — save it for your next lazy Sunday morning.
Iced Vanilla Latte
Equipment
- Small saucepan
- Glass jar with lid
- Espresso maker or Moka pot
- Cocktail shaker or mason jar
- Tall Glass
- Spoon or straw
Ingredients
Vanilla Syrup
- 1 cup water
- 1 cup granulated sugar
- 1 tablespoon pure vanilla extract
For the Latte
- 2 tablespoons homemade vanilla syrup
- 1 double shot espresso (about 2 oz)
- 1 cup milk of your choice
- ice cubes (large)
- optional splash heavy cream or pinch of salt
Instructions
- In a small saucepan, whisk together 1 cup water and 1 cup granulated sugar. Bring to a simmer over medium heat, stirring occasionally, until sugar dissolves, about 3 minutes.
- Remove from heat and stir in 1 tablespoon pure vanilla extract. Let cool to room temperature.
- Transfer to a glass jar and refrigerate for up to 2 weeks. Shake before each use.
- Brew a double shot of espresso (about 2 oz) using your preferred method.
- In a cocktail shaker or mason jar, combine the hot espresso, 2 tablespoons vanilla syrup, and a splash (about 1/4 cup) of milk. Add a handful of large ice cubes. Shake vigorously for 10 seconds.
- Fill a serving glass with fresh ice cubes. Pour the shaken espresso mixture over the ice.
- Pour the remaining 3/4 cup milk over the espresso mixture. Stir gently. Taste and add more syrup if desired.
- Optional: Drizzle extra vanilla syrup on top or add a pinch of sea salt. Serve immediately with a straw.
Notes
Related Recipes:
 The Perfectly Pillowy Chocolate Chip Milk Buns (Tangzhong Method)
 Cheesy Hamburger Casserole Bake That’s Ready in 40 Minutes (No Canned Soup Here)
 Creamy Garlic Tagliatelle That Looks Like a Restaurant Dish in 20 Minutes
 Texas Roadhouse Style Baked Salmon with Sweet and Savory Glaze — Ready in Under 30 Minutes
 Moist Lemon Zucchini Bread with a Crunchy Lemon Sugar Top
 Strawberry Shortcake Rice Krispie Treats That Actually Taste Like Shortcake — Ready in 15 Minutes