
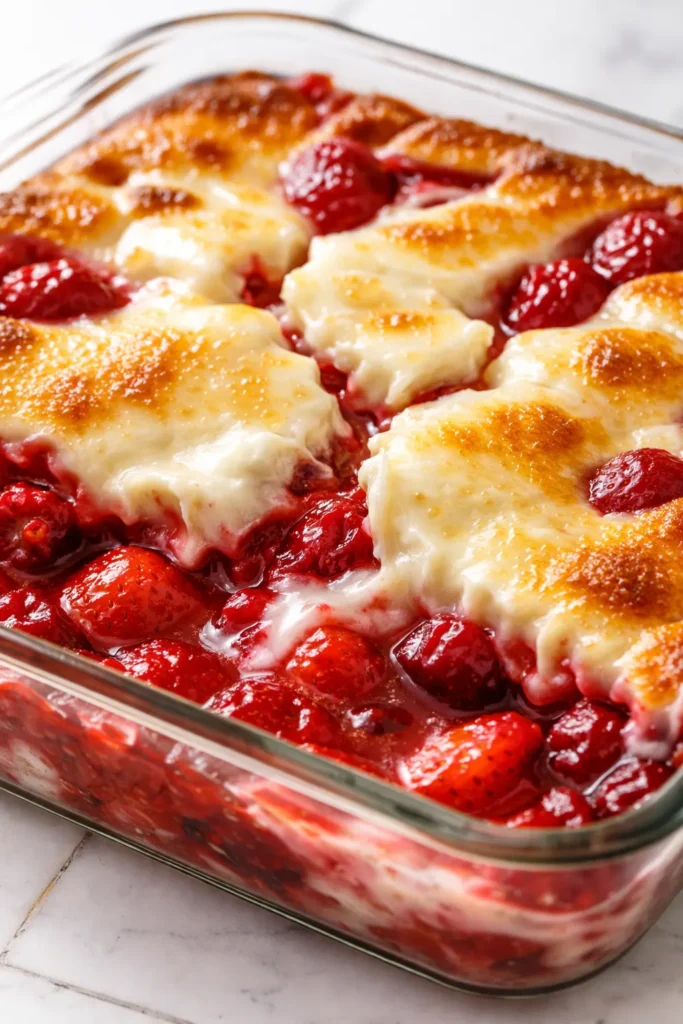
The first time I made this, I actually thought I’d messed up. The batter was lumpy, the cream cheese was sitting in visible dollops, and I was this close to calling it a loss and ordering pancakes. Then I pulled it out of the oven and saw it — cracks, deep magenta swirls, pockets of molten cheese bubbling up through a tender, golden crumb. It looked like a seismic event happened in my baking dish, and it was exactly right.
The short version: Fifteen minutes of work, one box of cake mix, and a cake that looks like you spent all morning perfecting a rustic bakery masterpiece.
I’ve made this for three different brunch crowds now, and every single time someone asks for the recipe before they finish their first bite. My picky nine-year-old asked for it three weekends in a row, which is basically a standing ovation in our house.
- Serves: 9 as a dessert or brunch sweet
- Hands-On Time: 15 min | Total Time: 50 min
- Difficulty: Easier than boxed brownies — I promise
- Cost per serving: ~$1.75
- Calories: ~380 per square
- Dietary Notes: Vegetarian. Easily adaptable for GF and dairy-free (see swaps below).
(Photo above: overhead shot of the cake in a 9×9 baking dish, showing the cracked, gooey top with strawberry jam and cream cheese swirls, a slice lifted out to reveal the tender, pink-stained crumb, natural daylight from a kitchen window.)
Why It Looks Like a Mess (And Why That’s the Right Call)
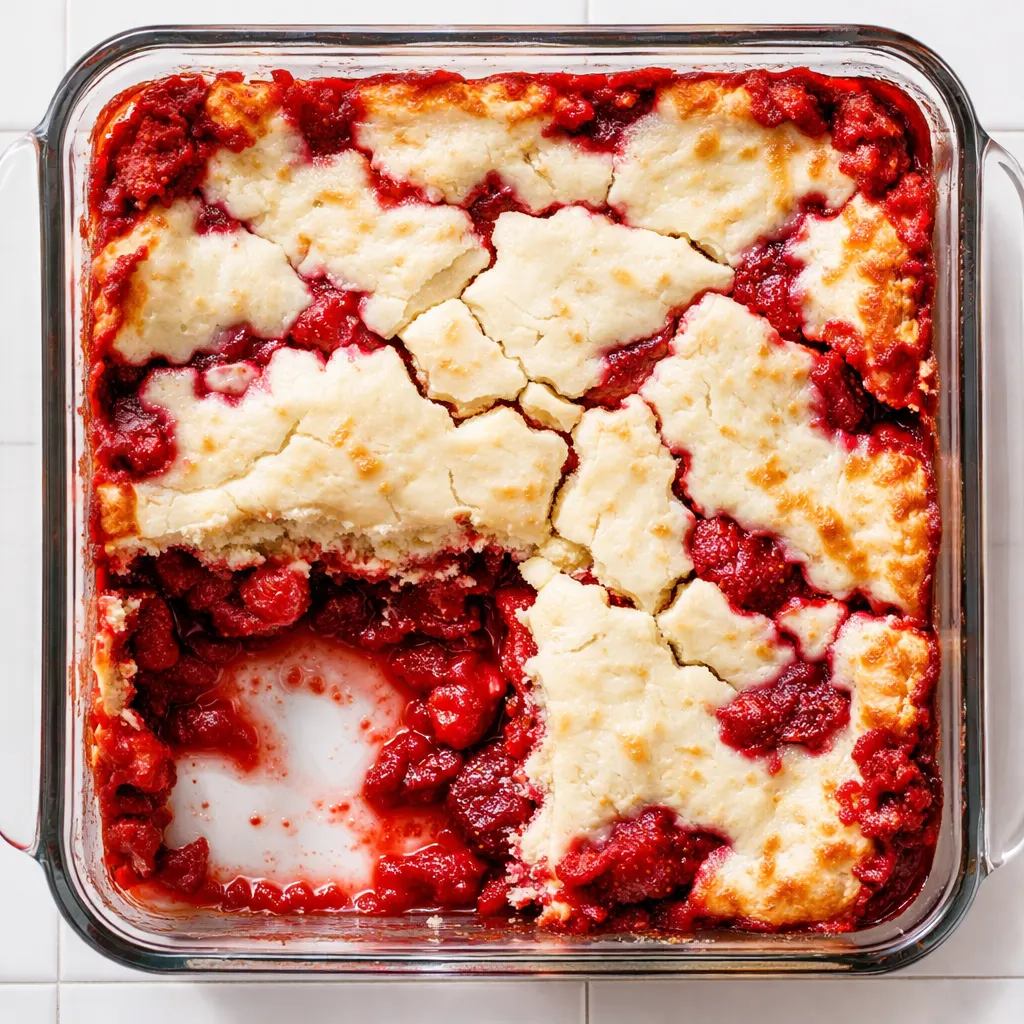
The entire genius of this cake is that you aren’t supposed to mix it smooth. You’re building layers — strawberries on the bottom, cream cheese in dollops in the middle, cake batter poured over the top. As it bakes, the heavier cream cheese sinks and bubbles up through the lighter batter, creating those signature cracks and gooey pockets. The tangy cheese cuts through the sweet, jammy strawberries and the fluffy cake, so you can eat more than one square without falling into a sugar coma.
If you smooth the cream cheese into an even layer, it bakes into a dense, singular stripe. Left in dollops, it creates molten pockets that are the whole reason to make this. The cracks are not a flaw — they are the feature. Trust the process.
It looks like you spent an hour perfecting a rustic cake. You spent fifteen minutes. The secret is in what you don’t mix.
What Goes In (Plus the Notes My Friends Always Text Me About)
- 1 lb fresh or frozen strawberries (hulled if fresh): If using frozen, do not thaw them first. They break down perfectly as they bake and leave behind the deepest magenta color you’ve ever seen. Fresh gives you firmer chunks of fruit. Both are correct, both are delicious.
- 1 standard box white cake mix (15.25 oz): The box mix is intentional here. Homemade cake batter is too dense and heavy — it doesn’t let the cream cheese bubble through the same way. Betty Crocker or Duncan Hines, doesn’t matter. My kids literally cannot tell the difference.
- 8 oz cream cheese, softened: Full fat or bust. Low-fat cream cheese seizes up in the heat and won’t create the same luscious, tangy pockets. This is not the place to diet.
- 1/2 cup unsalted butter, melted: Use the real thing. Margarine or vegan butter works in a pinch, but real butter is doing the heavy lifting for flavor and texture.
- 3 large eggs: Room temperature if you remember, straight from the fridge if you’re in a rush. This recipe is extremely forgiving.
- 1 tsp vanilla extract: A good one. It rounds out the sharpness of the cream cheese and makes the whole thing taste bakery-fresh.
- 1/4 cup granulated sugar + 2 tbsp for the strawberries: The 2 tbsp helps the berries macerate and get jammy. The rest goes into the cream cheese layer.
- Powdered sugar for dusting: Not for sweetness — for the visual. That snowy crackle effect is what makes people lean in.
The Setup (It’s Minimal, I Promise)
- A 9×9 baking dish — metal or glass. Glass lets you see the gooey bottom layer, which is oddly satisfying.
- Two mixing bowls — one medium, one large.
- A hand mixer or a strong arm — hand mixer makes the cream cheese silky smooth in thirty seconds. A whisk and some elbow grease work too.
- A spatula — for scraping every last bit of cream cheese into the dish.
Let’s Make It (Step by Step, No Fancy Skills Required)
This goes fast, so read through once before you start. The hardest part is waiting for it to cool.
Preheat & Prep: Set your oven to 350°F. Grease your 9×9 baking dish well — butter or cooking spray, doesn’t matter. Just don’t skip it.
- Macerate the berries: Toss the strawberries with 2 tablespoons of sugar in a small bowl. Let them sit for five minutes while you get the rest together. Spread them in an even layer in the bottom of the prepared dish.
- Make the cream cheese layer: Beat the softened cream cheese, 1/4 cup sugar, 1 egg, and vanilla extract together until smooth. Dollop it by the spoonful over the strawberries. Do not spread it — it needs to stay in irregular lumps. That’s where the gooey pockets come from. (📸 Photo tip: Big spoonfuls scattered evenly across the berries — it should look uneven and chunky, like you’re making a cobbler.)
- Make the cake batter: In a separate bowl, whisk the cake mix, melted butter, 2 eggs, and the water called for on the box (usually 1 cup) until just combined. Lumps are fine. Overmixing makes it tough. Pour the batter gently over the cream cheese dollops. Use a spatula to spread it evenly, but don’t stir it in. It’s okay if some cream cheese pokes through the top. (📸 Photo tip: Pour slowly so the batter settles around the cheese rather than pushing it all to one side of the dish.)
- Bake: Slide it into the oven and bake for 45 to 50 minutes. The edges should be golden brown and pulling away from the sides just slightly. The center will still look a little jiggly — that is the gooey center, and it’s exactly what you want.
- Cool (this is the hardest part): Let it cool in the dish for at least 20 minutes. I know your kitchen smells like a bakery. I know. But cutting it hot turns the gooey pockets into a puddle. The set happens as it cools.
- Finish and serve: Dust generously with powdered sugar right before serving. Serve warm or at room temperature — both are correct.
How I Make This Ahead (For Brunch Without the Morning Panic)
I make this the night before a weekend brunch all the time. It honestly might taste better on day two, once the flavors have had time to settle into each other.
- Fridge: Bake it, cool it completely, cover it tightly, and keep it in the fridge for up to 4 days. Reheat individual slices in the microwave for 15 seconds and everyone will think you just pulled it out of the oven.
- Freezer: Wrap the whole cooled cake (or individual slices) tightly in plastic wrap and foil. Freezes beautifully for up to 2 months. Thaw overnight in the fridge before serving or reheating.
- Reheat: 300°F oven for 10-15 minutes if you’re reheating the whole thing. The microwave works shockingly well for single slices if you’re being honest about your patience level.
The Mistakes I Made So You Don’t Have To
- Don’t overmix the cake batter. I know it feels wrong to leave lumps, but overmixing develops the gluten and makes the cake tough instead of tender. Lumps are your friend here.
- Don’t skip the cooling time. I cannot stress this enough. The center of this cake is a liquid magma field straight out of the oven. Twenty minutes on the counter transforms it into a silky, spoonable custard-like pocket. Cut it too early and it runs across the plate.
- Use frozen strawberries for extra jammy pockets. Frozen berries break down more aggressively than fresh, leaving behind deep magenta veins that stain the cake batter. My mom actually prefers it this way.
- Check for doneness at 45 minutes. Ovens vary wildly. If the center is still a liquid lake, give it five more minutes. If it’s just a gentle jiggle, it’s done. Even if you overbake it slightly, it will still be incredibly moist because of the cream cheese.
Make It Yours (The Versions I Keep Coming Back To)
- Gluten-Free: Use a GF yellow or white cake mix. I’ve tested this for a friend with celiac disease and she couldn’t believe it wasn’t regular cake. It works perfectly.
- Dairy-Free: Use dairy-free cream cheese (Tofutti or Kite Hill are my go-tos) and a plant-based butter. It’s not quite as gooey as the original, but it’s still genuinely delicious. My sister-in-law requests this version specifically.
- Spicy-Sweet: Add 1/4 teaspoon of cinnamon to the cake batter and a pinch of chili powder to the macerating strawberries. The heat makes the berry flavor pop in a way that feels very adult.
- Kid-Friendly Swaps: Use frozen raspberries, blackberries, or even a can of cherry pie filling instead of strawberries. My kids call this “breakfast lava cake” and they mean it as the highest compliment.
Questions I Get About This Cake All the Time
Q: Why did my cream cheese sink to the bottom?
A: That’s actually totally normal for this recipe. The cream cheese is heavier than the cake batter, so some of it will settle into a fudgy layer at the bottom. If it all sinks, don’t stress — next time, make sure your cream cheese is very soft so it incorporates into the batter just a little more during the pour.
Q: Can I use a different boxed cake mix?
A: Absolutely. Yellow cake, vanilla, strawberry, even chocolate (chocolate and strawberry is basically berries and cream cake, and it’s incredible). Just avoid “extra moist” or “pudding in the mix” varieties — they change the liquid ratios and throw off the bake time.
Q: How long does this cake last?
A: Covered in the fridge for up to 4 days. I actually like it cold from the fridge with a fork — the texture gets even more fudgy and dense as it sits. It’s dangerous to have in the house.
Q: What do you serve with it?
A: Honestly, nothing. It has everything — fruit, tangy cream cheese, sweet cake. But if I’m feeling fancy, a dollop of lightly sweetened whipped cream or a scoop of vanilla bean ice cream is never a bad idea. My husband wants it with a side of bacon to “balance it out” and I actually don’t hate the concept.
More Recipes My Family Makes on Repeat
If you liked this one, here are a few others that get the same reaction at our table:
- Microwave Mug Cookie — The cookie version of this same genius principle. Dangerously easy.
- Strawberry Shortcake — For when you want the strawberry fix in a handheld form that disappears before breakfast is over.
- No-Bake Brownies — The only fudge recipe that hasn’t failed me, even on my laziest days.
This is the cake you make when you want everyone to think you tried way harder than you did. Let them wonder.
If you make it, drop a comment below or tag me on social — I genuinely love seeing how the cracks turn out in different kitchens.
📌 This gooey strawberry earthquake cake is the easiest brunch dessert you’ll ever make — save it for your next lazy weekend morning when you want something that looks like a project but takes fifteen minutes.
The Gooey Strawberry Earthquake Cake That Cracks Open on Its Own
Equipment
- 9×9 Baking Dish
- Mixing Bowls (2)
- Hand Mixer or Whisk
- Spatula
Ingredients
- 1 lb fresh or frozen strawberries (hulled if fresh)
- 1 box white cake mix (15.25 oz)
- 8 oz cream cheese, softened
- 1/2 cup unsalted butter, melted
- 3 large eggs
- 1 tsp vanilla extract
- 1/4 cup granulated sugar (for cream cheese layer)
- 2 tbsp granulated sugar (for strawberries)
- 1 cup water (as called for on cake mix box)
For Garnish
- Powdered sugar for dusting
Instructions
- Preheat the oven to 350°F. Grease a 9×9 baking dish well with butter or cooking spray.
- In a small bowl, toss the strawberries with 2 tablespoons of sugar and let them sit for 5 minutes. Spread them evenly in the bottom of the prepared dish.
- In a medium bowl, beat the softened cream cheese, 1/4 cup sugar, 1 egg, and vanilla extract until smooth. Dollop the cream cheese mixture by spoonfuls over the strawberries. Do not spread it — leave irregular lumps.
- In a large bowl, whisk together the cake mix, melted butter, 2 eggs, and the water called for on the box (usually 1 cup) until just combined. Lumps are fine. Pour the batter gently over the cream cheese dollops. Spread it evenly with a spatula but do not stir it in.
- Bake for 45 to 50 minutes, until the edges are golden and pulling away from the sides. The center will look slightly jiggly — that’s the gooey center and it’s exactly what you want.
- Let the cake cool in the dish for at least 20 minutes. This is crucial — cutting it hot will turn the gooey pockets into a puddle.
- Dust generously with powdered sugar right before serving. Serve warm or at room temperature.
Notes
Related Recipes:
 The Perfectly Pillowy Chocolate Chip Milk Buns (Tangzhong Method)
 Cheesy Hamburger Casserole Bake That’s Ready in 40 Minutes (No Canned Soup Here)
 Creamy Garlic Tagliatelle That Looks Like a Restaurant Dish in 20 Minutes
 Texas Roadhouse Style Baked Salmon with Sweet and Savory Glaze — Ready in Under 30 Minutes
 Easy Italian Meatloaf That’s Actually Juicy (Not Dry) — in 1 Hour
 Moist Lemon Zucchini Bread with a Crunchy Lemon Sugar Top