
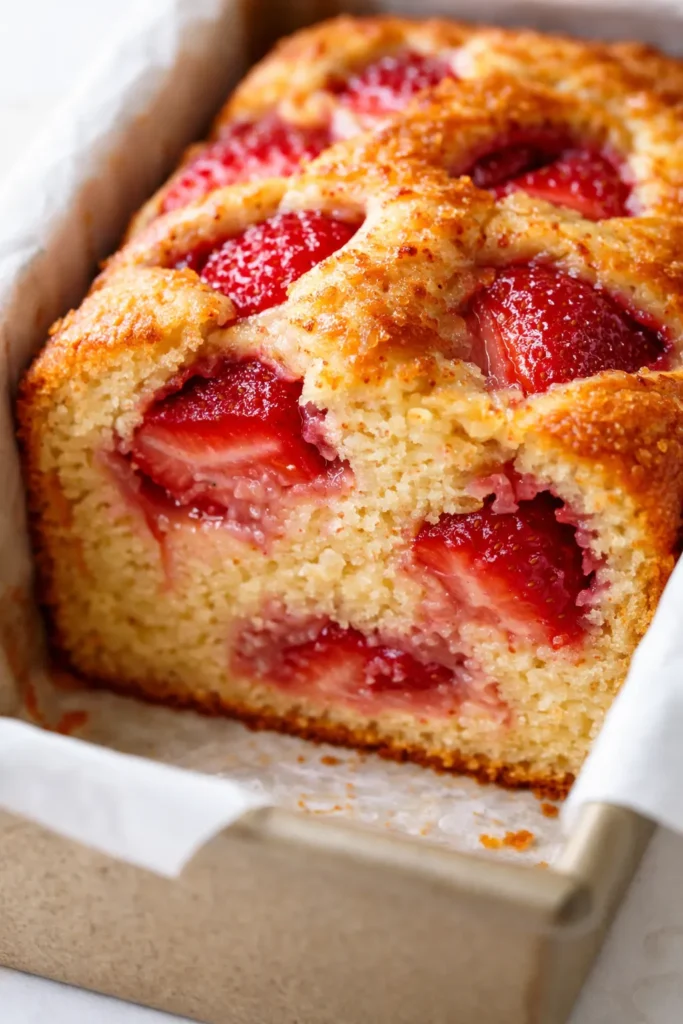
This strawberry yogurt cake is the kind of thing you make when you want dessert but don’t want to feel like you had dessert. It’s tender, it’s actually good for you, and it comes together in about 15 minutes of active time. The yogurt does all the heavy lifting — keeping the crumb soft and tangy without needing a stick of butter.
The short version: A one-bowl, perfectly moist cake that uses Greek yogurt for protein and keeps strawberries from sinking to the bottom.
I’ve tested this with full-fat, low-fat, and nonfat yogurt. The texture holds up every single time. My favorite version is with 2% — it’s the sweet spot between richness and lightness.
- Serves: 8-10 as a snack, breakfast, or brunch centerpiece
- Hands-On Time: 15 min | Total Time: 1 hr
- Difficulty: Easy enough for a weekday baking project
- Cost per serving: ~$1.50
- Calories: ~210 per slice
- Dietary Notes: High-protein, lower sugar, easily adaptable to gluten-free
(Photo above: golden loaf cake sliced to show a tight crumb studded with jammy pockets of strawberry, dusted with powdered sugar, morning light from a side window.)
The Trick That Keeps It from Getting Soggy (It’s So Simple)
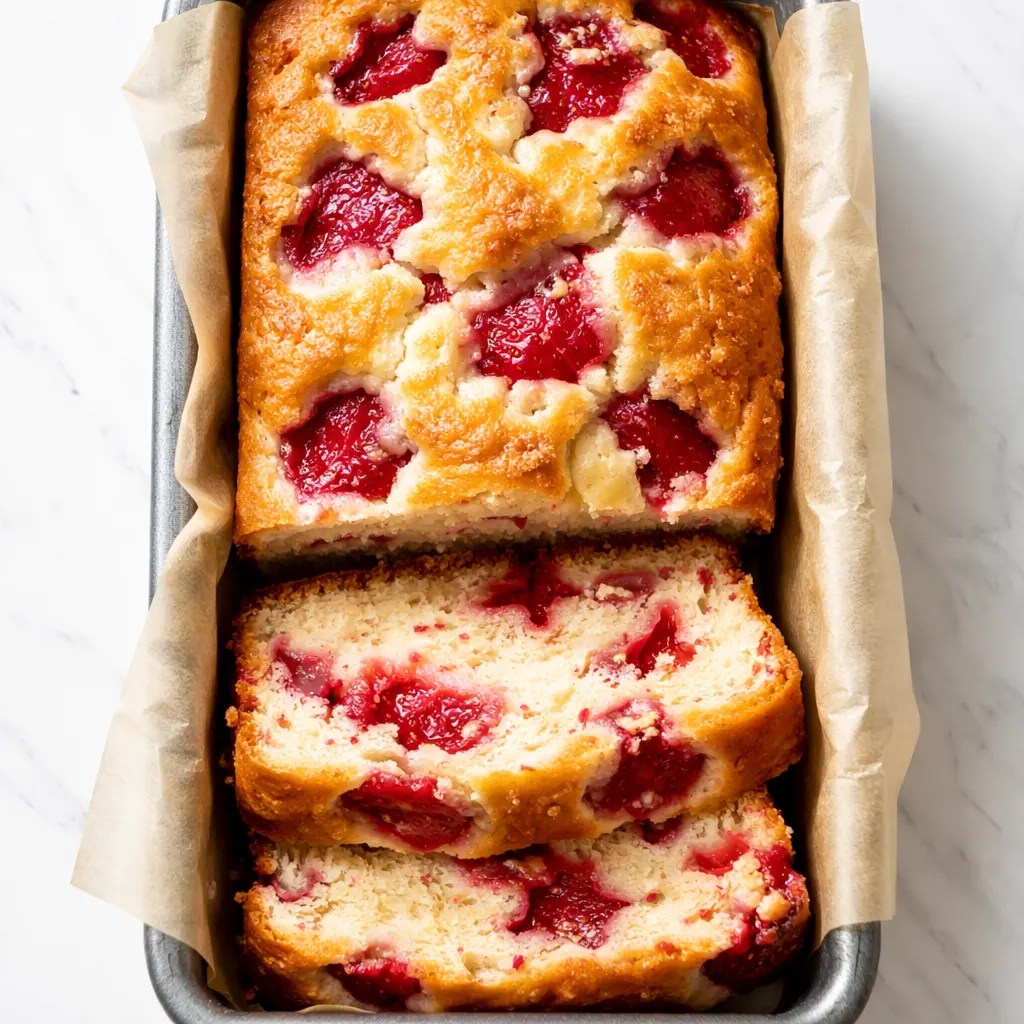
Yogurt replaces most of the butter or oil in this cake. That means you get a crumb that’s tender and light instead of dense and greasy. The acidity in the yogurt also does something nice to the flour — it keeps the gluten from overdeveloping, so the cake stays soft even after a day or two on the counter.
Strawberries are basically little water balloons. If you fold them directly into the batter without prep, they release all that moisture as the cake bakes. That’s how you get a wet, sunken streak at the bottom and a gummy texture around each berry. Tossing them in a tablespoon of flour before folding them in creates a thin barrier that absorbs the released moisture and keeps each strawberry suspended evenly throughout the loaf.
The result is a cake that looks like you spent way more time on it than you did. It’s not trying to be a fancy layer cake — it’s better because it isn’t one.
Ingredients Worth Talking About (Plus a Few Notes)
- 1 ½ cups all-purpose flour, plus 1 tablespoon for the berries: The extra tablespoon is for coating the strawberries. Do not skip it. It’s the difference between jammy pockets and a soggy bottom.
- 1 cup plain Greek yogurt (full-fat or 2%): The star of the show. Nonfat works if that’s your priority, but the texture won’t be as luxurious. I use full-fat Fage and never look back.
- ¾ cup granulated sugar: You need enough for structure, but this is a genuinely low-sugar cake compared to most. If you like things less sweet, you can drop it to ⅔ cup without issues.
- ¼ cup neutral oil (avocado or grapeseed): Olive oil works too if you want a slightly fruity note. My kids can’t tell the difference either way.
- 2 large eggs: Room temperature. Set them on the counter while you preheat the oven. It takes two minutes and makes the batter come together smoothly.
- 1 tsp vanilla extract: Don’t skip it. It rounds out the tanginess of the yogurt.
- 1 ½ tsp baking powder: Make sure it’s fresh. Expired baking powder is the number one reason cakes don’t rise.
- ½ tsp baking soda: Helps neutralize the acid in the yogurt so the cake isn’t overly tangy.
- ¼ tsp salt: Balances the sweetness and brings out the strawberry flavor.
- 8 oz fresh strawberries, hulled and quartered: Frozen works too. If you use frozen, don’t thaw them — toss them in the flour frozen.
What to Pull Out Before You Start
- 9×5-inch loaf pan — metal or glass both work fine.
- Parchment paper — a sling makes lifting the cake out infinitely easier.
- Large mixing bowl and a small bowl for the berries.
- Whisk and a rubber spatula — no electric mixer required.
Let’s Make It (Step by Step)
This goes fast, so read through once before you start. Most of these steps take less than a minute each.
- Preheat the oven to 350°F. Line your loaf pan with parchment paper, leaving a bit of overhang on the long sides. Lightly grease the exposed ends.
- Whisk the dry base: In a large bowl, whisk together the 1 ½ cups flour, baking powder, baking soda, and salt. Set aside.
- Mix the wet ingredients: In the same bowl you’ll use for everything (or a separate medium bowl if you’re nervous about overmixing), whisk together the yogurt, sugar, oil, eggs, and vanilla until smooth and pale yellow. (📸 Photo tip: The mixture should be completely uniform with no streaks of yogurt or egg — this takes about 30 seconds of whisking.)
- Fold the dry into the wet: Pour the wet ingredients into the dry. Fold gently with a rubber spatula until just combined. A few lumps are totally fine — treat this like muffin batter. Overmixing develops gluten and makes the cake tough.
- Prep the strawberries: In the small bowl, toss the quartered strawberries with the reserved 1 tablespoon flour. Fold them into the batter with 3 or 4 strokes of the spatula. (📸 Photo tip: You want the berries evenly distributed but the batter should not turn pink. Pink batter = overmixed = grayish cake.)
- Bake: Pour the batter into the prepared pan and smooth the top. Bake for 45 to 55 minutes, until the top is deeply golden, the edges are pulling away from the pan, and a toothpick inserted in the center comes out clean (a little melted strawberry juice is fine — you’re looking for no raw batter).
- Cool: Let the cake cool in the pan for 10 minutes, then lift it out using the parchment sling and transfer to a wire rack. Cool completely before slicing. I know it’s tempting, but slicing it warm will give you strawberry mush.
Sunday Prep = Stress-Free Breakfast or Snack
I make a double batch on Sunday mornings and we’re set for the week. My kids grab a slice for breakfast, and I keep one in the freezer for when the 3pm slump hits.
- Fridge: Wrap tightly in plastic wrap. It stays perfectly moist for 4 days. Honestly, day 2 is even better than day 1 — the flavors settle beautifully.
- Freezer: Yes. Slice it first, wrap each slice individually in plastic, and store them in a zip-top bag for up to 3 months. A single slice defrosts in about 20 minutes on the counter.
- Reheat: Toaster oven or microwave for 15 seconds. A warm slice of this cake with a drizzle of honey is dangerously good.
Things I Wish I’d Known the First Time
- Don’t overmix the batter. I say this about every quick bread, but I mean it here. A few streaks of flour left in the batter are fine. Overmixing gives you a tough, dense cake that doesn’t rise properly. My first attempt was a brick — a tasty brick, but a brick.
- Coat those berries. It’s the one non-negotiable step. I tested this recipe without the flour coating once, and the bottom third of the cake was basically strawberry pudding. Good for a parfait, bad for a sliceable cake.
- Let it cool completely. I know the smell is incredible. But the cake is still setting up as it cools. Cutting it warm collapses the crumb structure and creates a gummy texture. Set a timer, walk away, and trust the process.
- Yogurt brands vary in thickness. If your batter looks thicker than a typical cake batter — more like a thick muffin batter — that’s correct. If it’s thin and runny, your yogurt was too watery. Drain some whey off next time or switch to a thicker brand.
Swaps That Actually Work
- Gluten-Free: Use a 1:1 gluten-free baking flour (the one with xanthan gum). I’ve tested this with Bob’s Red Mill and King Arthur, and both work beautifully. The texture is slightly more delicate, so let it cool fully before slicing.
- Dairy-Free: Use a thick coconut or soy yogurt. Add 1 teaspoon of lemon juice to replicate the acidity of Greek yogurt. My sister-in-law is dairy-free and this is the version I make for her — she never feels like she’s getting the short end of the stick.
- Kid-Friendly: Swap half the strawberries for chocolate chips. My kids request this version on repeat. Mini chocolate chips distribute more evenly than regular sized ones.
- Fancy Guest Version: Top with a simple lemon glaze (1 cup powdered sugar + 2 tablespoons fresh lemon juice) and a few thin slices of fresh strawberry right before serving. It takes 2 minutes and makes the cake look like it came from a bakery.
Questions I Get About This Recipe All the Time
Q: Why did my strawberries sink to the bottom?
A: Ugh, I’ve been there. The flour coating is the most common fix, but if they were particularly ripe and soft, they can still drop. Tossing them in flour while they’re still cold (or frozen) helps them hold their shape. Also check that your batter isn’t too thin — if your yogurt was watery, the batter won’t be thick enough to suspend the berries.
Q: Can I use frozen strawberries?
A: Yes, and I do it all the time when fresh berries aren’t in season. Do not thaw them first. Toss them in the flour while they’re still frozen and fold them in quickly. The bake time stays the same — maybe add 5 minutes if your oven runs cool.
Q: How long does strawberry yogurt cake last?
A: On the counter, tightly wrapped, 2 days. In the fridge, 5 days. I actually prefer it cold from the fridge — the texture firms up and the strawberry flavor concentrates. To reheat, pop a slice in the toaster oven for 5 minutes at 300°F.
Q: What do you serve with this cake?
A: For breakfast, a dollop of extra yogurt and a handful of fresh berries. For dessert, a light dusting of powdered sugar or the lemon glaze. For a truly excellent snack, a slice with a generous spread of salted butter and a cup of hot coffee. My kids eat it plain and call it “the good cake.”
More Recipes My Family Makes on Repeat
If you liked this one, here are a few others that get the same reaction at our table:
- Blueberry Olive Oil Cake — The one I make when I want to feel fancy without actually trying.
- Lemon Yogurt Muffins — The breakfast version of this cake, perfect for school mornings.
- Simple Banana Bread — The classic that lives in my freezer year-round.
This is the cake you make when you want something that feels like a treat but doesn’t leave you in a sugar coma. It’s my favorite kind of baking — simple, beautiful, and genuinely good for you.
If you make this strawberry yogurt cake, drop a comment below and let me know how it turned out. I love hearing which version you try — the kid-friendly chocolate chip version is a perennial favorite, but I’m always curious.
📌 Easy healthy strawberry yogurt cake recipe that stays perfectly moist — save it for your next weekend baking project.
Strawberry Yogurt Cake That’s Perfectly Moist & Light — in One Bowl
Equipment
- 9×5-inch loaf pan
- Parchment Paper
- Large Mixing Bowl
- Small Bowl
- Whisk
- Rubber Spatula
- Wire Rack
Ingredients
- 1½ cups all-purpose flour
- 1 tablespoon all-purpose flour (for berries)
- 1 cup plain Greek yogurt (full-fat or 2%)
- ¾ cup granulated sugar
- ¼ cup neutral oil (avocado or grapeseed)
- 2 large eggs (room temperature)
- 1 teaspoon vanilla extract
- 1½ teaspoons baking powder
- ½ teaspoon baking soda
- ¼ teaspoon salt
- 8 oz fresh strawberries, hulled and quartered
Instructions
- Preheat the oven to 350°F. Line your loaf pan with parchment paper, leaving a bit of overhang on the long sides. Lightly grease the exposed ends.
- In a large bowl, whisk together the 1½ cups flour, baking powder, baking soda, and salt. Set aside.
- In the same bowl (or a separate medium bowl), whisk together the yogurt, sugar, oil, eggs, and vanilla until smooth and pale yellow — about 30 seconds.
- Pour the wet ingredients into the dry. Fold gently with a rubber spatula until just combined. A few lumps are fine — do not overmix.
- In a small bowl, toss the quartered strawberries with the reserved 1 tablespoon flour. Fold them into the batter with 3 or 4 strokes of the spatula.
- Pour the batter into the prepared pan and smooth the top. Bake for 45 to 55 minutes, until the top is deeply golden and a toothpick inserted in the center comes out clean.
- Let the cake cool in the pan for 10 minutes, then lift it out using the parchment sling and transfer to a wire rack. Cool completely before slicing.
Notes
Related Recipes:
 The Perfectly Pillowy Chocolate Chip Milk Buns (Tangzhong Method)
 Cheesy Hamburger Casserole Bake That’s Ready in 40 Minutes (No Canned Soup Here)
 Creamy Garlic Tagliatelle That Looks Like a Restaurant Dish in 20 Minutes
 Texas Roadhouse Style Baked Salmon with Sweet and Savory Glaze — Ready in Under 30 Minutes
 Easy Italian Meatloaf That’s Actually Juicy (Not Dry) — in 1 Hour
 Moist Lemon Zucchini Bread with a Crunchy Lemon Sugar Top