
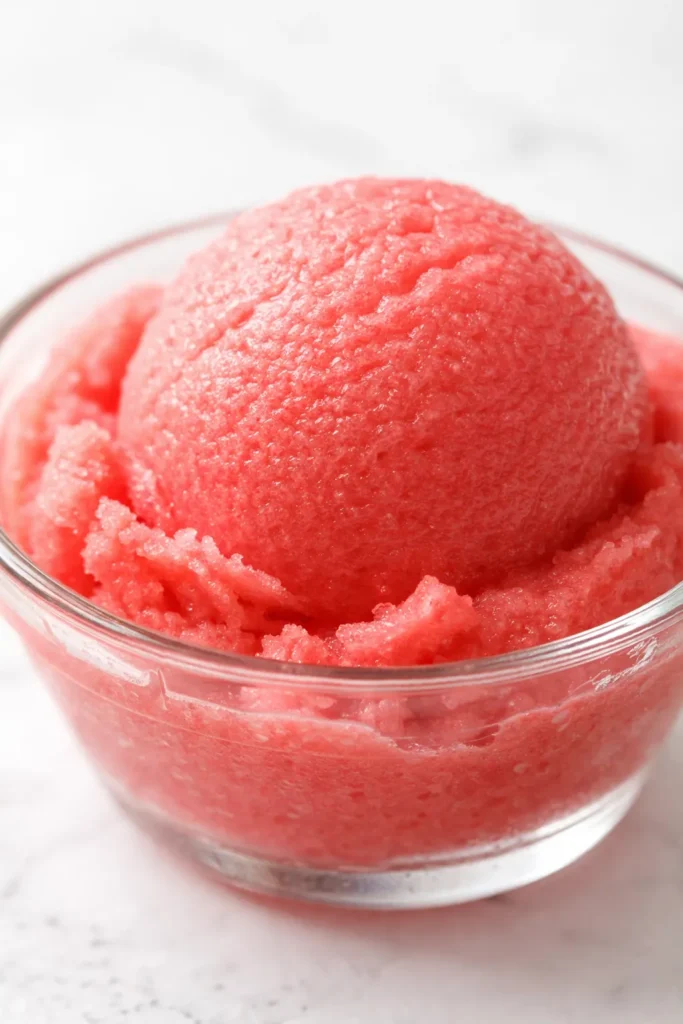
The first time I made this, I honestly felt like I’d wasted my 20s buying mediocre sorbet that tastes like sugar and regret. This one tastes like the best watermelon you’ve ever had — concentrated, icy-cold, and somehow more watermelon-y in frozen form than it was before it went in. It’s the most refreshing thing I eat all summer, and it takes about fifteen minutes of actual effort.
The short version: Three ingredients, fifteen minutes of work, and the most hydrating thing you’ll eat all summer — with a texture that actually holds up.
I tested this with four different types of watermelon last July because I’m exactly that person. Seedless, seeded, yellow, heirloom. They all work. The seedless one just makes the straining step slightly less annoying, which matters on a hot day when your patience is thin.
- Serves: 6-8 as sorbet
- Hands-On Time: 15 min | Total Time: 4 hr 15 min (or 25 min with ice cream maker)
- Difficulty: Easy enough for a Tuesday — seriously, it’s blending and waiting
- Cost per serving: ~$1.25
- Calories: ~85 per serving
- Dietary Notes: Naturally vegan, gluten-free, and can be made with no refined sugar
(Photo above: A close-up overhead shot of two perfect scoops of vivid pink sorbet in a simple white bowl, scattered with a few grains of flaky salt and a tiny curl of lime zest. Natural window light coming from the left, casting a soft shadow. It looks expensive. It’s not.)
The One Step That Keeps It From Being a Fancy Ice Cube
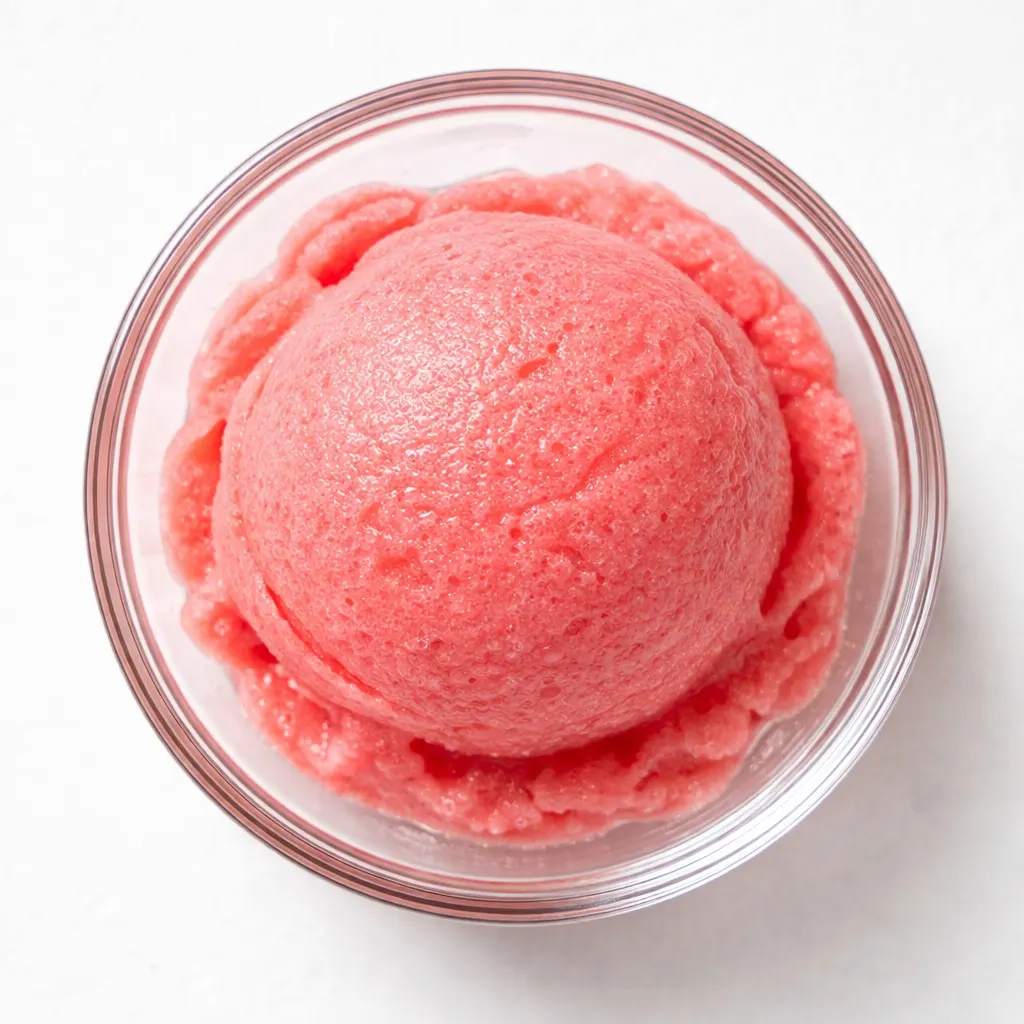
Most people just blend frozen watermelon. You know what you get? Watery crystals that taste like a sad memory of summer. No thanks. The texture is wrong, the sweetness is muted, and it melts into a puddle before you’re even halfway through the bowl.
The trick is drawing out the water content before freezing, concentrating the natural sugar and flavor into something that feels like a real treat, not a punishment. That fine-mesh strainer step isn’t optional — it’s the entire point. It removes the fibrous pulp that turns into icy shards and leaves behind pure, concentrated watermelon essence.
And that bit of lime zest and flaky salt isn’t just garnish — it’s a contrast layer that makes the sweetness taste sweet, not cloying. Salt suppresses bitterness and amplifies fruit flavor. Lime stops the whole thing from feeling one-note. Together, they turn a simple frozen puree into something that tastes like it required actual thought.
What You Need (And a Few Notes From My Kitchen)
- 1 medium seedless watermelon (about 4-5 cups cubed): The sweeter the melon, the better the sorbet. Smell the bottom — it should smell like a watermelon patch. If it doesn’t smell like anything, it won’t taste like anything either. My kids can smell a good melon from across the kitchen, I’m not kidding.
- 1 large lime: Juice goes into the sorbet. Zest goes on top. Non-negotiable. It’s the backbone that keeps the whole thing from tasting flat. Don’t use bottled lime juice. I will know.
- 1/2 cup simple syrup (or 1/4 cup honey): This is what gives it that smooth, scoopable texture instead of a hard block of ice. Sugar interferes with crystal formation. Skip it at your own risk. If you’re using honey, pick a mild one — wildflower or orange blossom. Not buckwheat. That’s too aggressive for watermelon.
- Flaky salt (a pinch): Maldon or similar. It hits your tongue before the sweetness does and changes everything about how your brain perceives the flavor. I put this on every single scoop. Every. Single. One.
- Optional but recommended: A splash of coconut water (adds to the hydrating angle and a whisper of extra complexity) or 2 tbsp mint simple syrup. I do the mint version when I’m trying to impress someone. It works every time.
The Setup (It’s Minimal, I Promise)
- Blender or food processor — a Vitamix is ideal but a $30 Oster works fine.
- Fine-mesh sieve — this is the most important tool. Trust me. Don’t use a colander. The holes are too big.
- Loaf pan or shallow baking dish — for the still-freeze method.
- A fork — for the scraping step. A spoon works but a fork is better.
- Ice cream maker — optional. I’ll give you both methods so you can choose your own adventure.
Let’s Make the Best Watermelon Sorbet of Your Summer
This goes fast, so read through once before you start. Most of the time is just waiting for the freezer to do its job.
Prep the melon: Cube the watermelon into rough chunks, about 2 inches each. Remove any seeds you see — nobody wants to bite into a frozen seed.
- Blend: Working in batches if needed, blend the watermelon cubes until completely smooth. No water. No ice. Just melon. (📸 Photo tip: You should have a vibrant pink liquid with a slightly frothy top — that’s how you know it’s fully broken down.)
- Strain (The Crucial Step): Pour the puree through a fine-mesh sieve set over a large bowl. Use a spatula to press the pulp firmly against the mesh, extracting every drop of liquid. Discard the fibrous solids that remain. This is what removes the watery texture that ruins most homemade sorbet. Don’t rush this. Press hard. Get every last drop. Your future self will thank you.
- Sweeten and acidify: Stir in the simple syrup and lime juice. Taste it. It should taste slightly too sweet and noticeably limey — freezing dulls both sweetness and acidity, so you need to overcompensate now. Add a tiny pinch of salt to the base and stir. Taste it again. Adjust if needed. This is your last chance before the freezer takes over. (📸 Photo tip: The color should be a deep, translucent pink — almost like a rosé. If it’s pale, your melon wasn’t ripe enough.)
- Freeze (Method A – Still Freeze): Pour the mixture into a loaf pan or shallow baking dish. Freeze for 1 hour. Take it out and scrape it thoroughly with a fork, breaking up any frozen edges. Return to the freezer. Repeat this scraping process every hour for 3-4 hours, until the texture is light, fluffy, and icy — like a granita-sorbet hybrid. This method works best if you’re home and can do the scraping thing while you’re doing other stuff.
- Freeze (Method B – Ice Cream Maker): If you have an ice cream maker, chill the base in the fridge for at least 2 hours (or overnight). Pour it into the machine and churn according to the manufacturer’s instructions — usually 20-25 minutes. It’ll come out looking like soft serve. Transfer to a container and freeze for at least 2 more hours to firm up.
- The Tiffany Finish: Let the sorbet sit on the counter for 5 minutes before scooping. It needs that tiny bit of softening to get the perfect round scoop. Top with a generous pinch of flaky salt and a fresh curl of lime zest. It’ll look like it came from a shop in Brooklyn that charges $8 a scoop.
How I Make a Batch Last All Week
This is the ultimate “make it on Sunday, enjoy it all week” dessert. It takes fifteen minutes of active time, and then the freezer does the rest of the work. I make a double batch on Sundays during peak watermelon season, and we’re set for days.
- Fridge: The base can be stored in the fridge for up to 2 days before churning or freezing. Just give it a quick whisk before you proceed to redistribute any settling.
- Freezer: Store finished sorbet in an airtight container with a layer of plastic wrap pressed directly onto the surface to prevent ice crystals. It keeps beautifully for 2-3 weeks — if it lasts that long.
- Reheat (aka Soften): Let it sit on the counter for 5-10 minutes before scooping. Do not microwave. I’m begging you. A microwave will turn it into watermelon soup in seconds.
Things I Wish I’d Known Before My First Batch
- The Sugar Rule: Taste the base before freezing. If it’s not sweet enough, it’ll be bland frozen. Adjust now. You can always add a tablespoon more simple syrup or a squeeze more lime, but you can’t take it out once it’s frozen.
- The Salt Trick: A tiny pinch of salt in the base before freezing doesn’t make it salty — it makes the watermelon taste ten times more like watermelon. It’s wild science that you don’t need to understand fully, just trust it. I’ve done side-by-side tests and the salted one wins every time.
- The Texture Fix: If you forget to scrape it (Method A) and it freezes into a solid block, don’t panic. Chop it into chunks and re-blend it in the food processor. It’ll come right back to life. I’ve done this at least three times and it works like a charm.
- The Water Factor: Don’t add water. I know it feels wrong to blend something without liquid, but watermelon is already 92% water. Adding more just dilutes the flavor and creates more ice crystals. Trust the melon.
Make It Your Own (The Easy Swaps)
- No refined sugar: Substitute simple syrup with agave or honey. If you’re using honey, use a mild one like orange blossom or clover so it doesn’t overpower the delicacy of the watermelon. This is the version I make for my friend who does Whole30 — she brings her own bowl over.
- Spicy watermelon: Add a pinch of cayenne or a generous sprinkle of Tajín to the base before freezing. The spicy-sweet-sour thing is dangerously addictive. My husband thinks he doesn’t like spicy desserts. I made this once without telling him and he asked for seconds. The secret is to use just enough heat to feel it, not to fight it.
- Strawberry-watermelon: Replace 1 cup of the watermelon with fresh strawberries. The color gets even more outrageously pink, and the flavor gets a little more complex. This is the version my kids request for summer birthdays.
- Creamy watermelon: Add 1/2 cup of full-fat coconut milk to the base before freezing. It turns into a dairy-free creamsicle situation that is devastatingly good. Pour this into popsicle molds instead of freezing it in a pan, and you’ve got the perfect poolside snack.
Questions I Get About This Recipe All the Time
Q: Why is my sorbet rock hard and icy instead of smooth?
A: Ugh, I’ve been there. The two most common culprits are skipping the simple syrup (sugar is what keeps it scoopable by interfering with ice crystal formation) or not straining the pulp properly. Both are easy fixes for next time! For this batch, let it sit out on the counter for 10 minutes to soften before scooping — it’ll still taste incredible, just a little less elegant.
Q: Can I make this without a blender?
A: Yes, absolutely. Grate the watermelon using a box grater (it’s messy but it works), or just mash it vigorously with a potato masher in a large bowl until it releases its juices. Strain the mixture through your sieve as usual. I’ve done the potato masher method at a friend’s cabin when I forgot my blender — it took a little more elbow grease but the result was just as good.
Q: How long does homemade sorbet actually last in the freezer?
A: In an airtight container with a layer of plastic wrap pressed directly onto the surface, it’s at its best for about 2 to 3 weeks. After that, it might start to develop ice crystals and lose some of its vibrant flavor. The good news is that it rarely lasts that long in my house — we usually finish it within the first week. If you’re making a big batch for a later date, I recommend freezing it in individual portions so you’re not thawing and refreezing the whole thing.
Q: What do you serve with this to make it feel like a real dessert?
A: I love this question. Shortbread cookies are my go-to — the buttery crunch is a perfect textural contrast to the icy sorbet. A splash of vodka or tequila poured over the top turns it into an incredibly sophisticated adult float. And if I’m feeling fancy, I’ll serve a scoop next to a thin slice of pound cake or a few fresh berries. But honestly, a perfect scoop in a chilled bowl with that flaky salt on top is already a complete dessert in my book.
More Recipes My Family Makes on Repeat
If you loved this easy summer dessert, I think you’ll really enjoy these other fool-proof favorites that get the same reaction at our table:
- [INTERNAL LINK PLACEHOLDER: 3-Ingredient Lemon Sorbet] — The citrus cousin to this recipe. Just as hydrating, just as easy, and just as dangerously scoopable.
- [INTERNAL LINK PLACEHOLDER: Creamy Coconut Popsicles] — The “set it and forget it” option for super busy weeks. My kids ask for these every single Sunday.
- [INTERNAL LINK PLACEHOLDER: The Best Simple Syrup] — An essential guide. Learn the 3:2:1 ratio and you can make any sorbet, any cocktail, any sweetener-adjacent thing that comes your way.
Summer is too short for bad desserts. Make a batch of this, keep it in the freezer, and pretend you’re at a beachside cafe every single night. It honestly changes the mood of a whole week.
If you try it, I’d love to hear how it turned out — drop a comment below or tag me over on Pinterest so I can see your beautiful scoops. Nothing makes my day like seeing someone else nail that perfect scoop with the salt on top.
📌 Hydrating watermelon sorbet recipe that tastes like pure summer — save this pin for your next hot afternoon when you need the most refreshing treat that looks like it cost way more than three ingredients.
Hydrating Watermelon Sorbet
Equipment
- Blender or food processor
- Fine-Mesh Sieve
- Loaf pan or shallow baking dish
- Fork
- Ice cream maker (optional)
Ingredients
For the Sorbet Base
- 1 medium seedless watermelon (cubed to 4-5 cups)
- 1 large lime
- 1/2 cup simple syrup (or 1/4 cup honey)
- 1 pinch flaky salt
Optional Add-Ins
- 2 tbsp coconut water or mint simple syrup
For Garnish
- Flaky salt and lime zest
Instructions
- Cube the watermelon into rough 2-inch chunks, removing any seeds.
- Working in batches, blend the watermelon until completely smooth. No water added.
- Pour the puree through a fine-mesh sieve set over a large bowl. Press the pulp firmly with a spatula to extract all liquid. Discard solids.
- Stir in the simple syrup and lime juice. Taste and adjust – it should be slightly too sweet and noticeably limey. Add a tiny pinch of salt.
- Freeze Method A (still freeze): Pour mixture into a loaf pan. Freeze for 1 hour, then scrape thoroughly with a fork. Repeat scraping every hour for 3–4 hours until light and fluffy. For Method B (ice cream maker): Chill the base for at least 2 hours, then churn according to manufacturer instructions (20–25 minutes). Transfer to a container and freeze 2 hours to firm up.
- Before serving, let the sorbet sit at room temperature for 5 minutes. Scoop and top with a generous pinch of flaky salt and a fresh curl of lime zest.
Notes
Related Recipes:
 The Perfectly Pillowy Chocolate Chip Milk Buns (Tangzhong Method)
 Bagel Breakfast Sliders That Taste Like a Diner Breakfast — in 25 Minutes
 Cheesy Hamburger Casserole Bake That’s Ready in 40 Minutes (No Canned Soup Here)
 Creamy Garlic Tagliatelle That Looks Like a Restaurant Dish in 20 Minutes
 Texas Roadhouse Style Baked Salmon with Sweet and Savory Glaze — Ready in Under 30 Minutes
 Easy Italian Meatloaf That’s Actually Juicy (Not Dry) — in 1 Hour