
The first time I tasted my grandmother’s fire cider, I was seven years old, standing on a step stool at her kitchen counter with tears streaming down my face. She handed me a spoonful of something warm, golden, and impossibly spicy, and told me it would “scare the cold right out of you.” She was right, and I’ve been hooked ever since. This traditional fire cider recipe is the exact one she made every fall, the one I’ve now made for over twenty years, and the one my own kids actually ask for when their throats get that scratchy feeling in September.
The short version: Chop, pack, pour, and wait — 30 minutes of work today and four weeks of vinegar doing its thing.
I’ve made a batch every single autumn since my grandmother taught me the summer I turned sixteen. I’ve gifted jars at Christmas, brought it over to friends with the sniffles, and — no exaggeration — my picky nine-year-old takes his daily spoonful without a fight. That alone should tell you it’s something special.
- Serves: Makes about 3 cups (24 doses) as a daily wellness tonic
- Hands-On Time: 30 min | Total Time: 4 weeks (includes steeping)
- Difficulty: Easy enough for beginners — the only hard part is waiting
- Cost per serving: ~$0.50 per 1-tablespoon serving
- Calories: ~15 per 1-tablespoon serving
- Dietary Notes: Gluten-free, dairy-free, paleo-friendly (skip the honey for a vegan version)
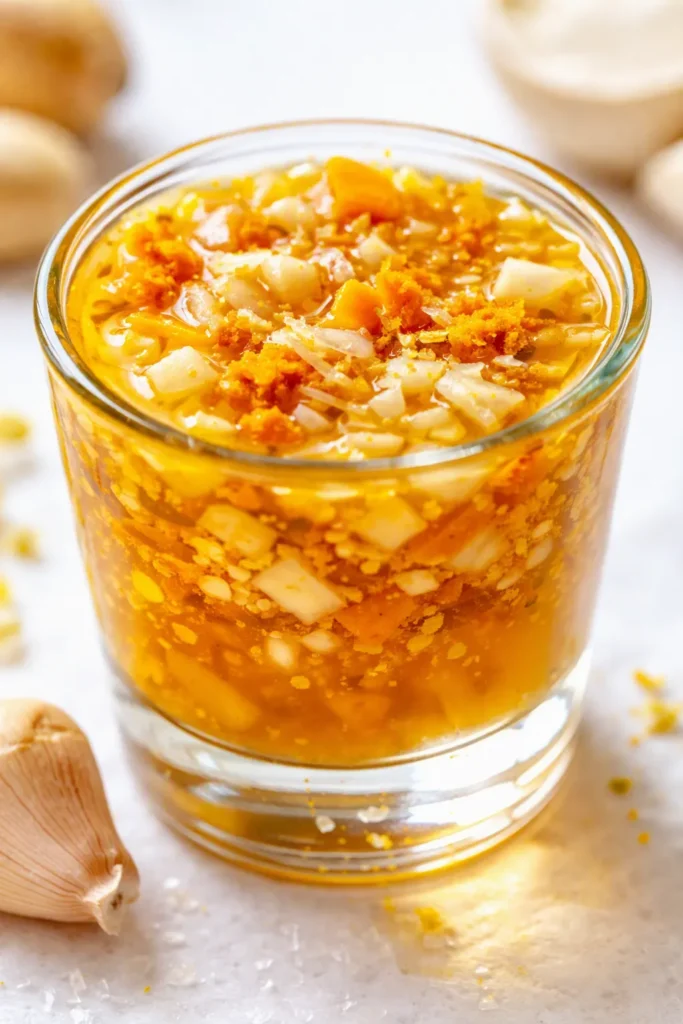
(Photo above: A rustic glass quart jar of golden fire cider sitting on my grandmother’s worn wooden counter, a flour sack kitchen towel draped beside it. The handwritten label says “Fire Cider — Oct,” and you can see bits of ginger, garlic, and horseradish suspended in the amber vinegar. Warm afternoon light from the window makes the jar glow — the kind of photo that smells like fall.)
Why This Traditional Fire Cider Is Worth the Four-Week Wait
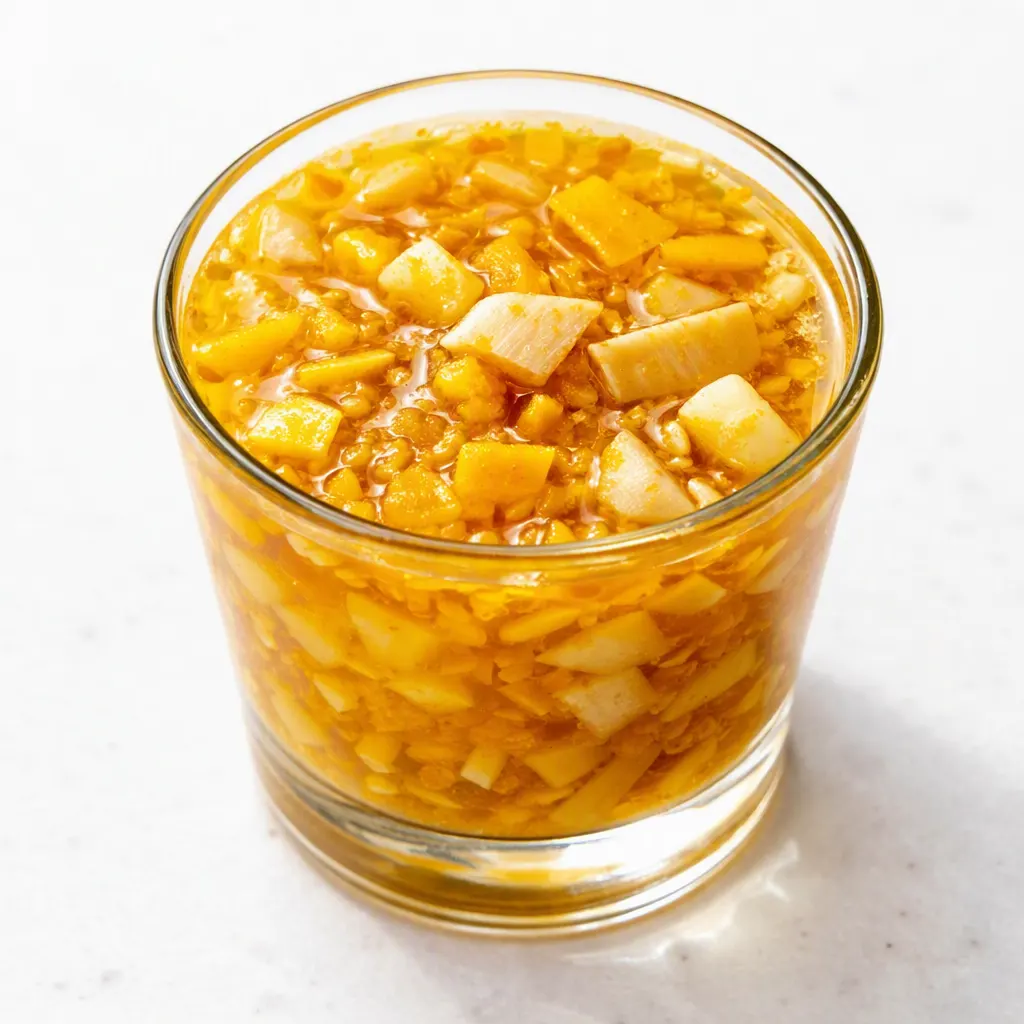
The magic here isn’t complicated, and it isn’t some fancy kitchen technique. It’s patience. When you let fresh horseradish, garlic, ginger, and onion soak in raw apple cider vinegar for a month, the vinegar pulls those sharp, spicy, warming compounds right out of the roots. My grandmother used to say the vinegar does the work while you go about your day — and honestly? That’s exactly what happens. You shake the jar whenever you walk past it, and four weeks later you’ve got something that tastes like fall in a glass. This is the traditional Appalachian version, the one herbalist Rosemary Gladstar helped bring back into the spotlight back in the seventies. My grandmother just called it “the vinegar tonic.”
Don’t skip the raw honey at the end. It’s not only for sweetness — though it does round everything out beautifully — it’s the soothing finish that makes the whole thing go down easy. Without it, the cider is so sharp it feels like it’s doing push-ups on your tongue. With it? It’s still got a kick, but you’ll actually look forward to your daily spoonful.
And here’s what makes this version different from the store-bought bottles: you control everything. Your vinegar, your peppers, your honey. My batch has a serious kick because I use a full habanero — but I’ll give you the milder, kid-approved version below, too.
What Goes In (Plus My Honest Notes)
- 1 quart raw apple cider vinegar, with the mother: The cloudy, unfiltered kind with the cobwebby stuff floating at the bottom. This is the base of everything. My grandmother called it “living vinegar,” and I won’t use anything else. Pasteurized white vinegar comes out tasting thin and harsh — trust me, I made that mistake once.
- 1/2 cup fresh horseradish root, peeled and chopped: The star of the show. Fresh horseradish is a completely different creature from the jarred stuff in the fridge section — hotter, brighter, and so much more aromatic. If your eyes water while you chop it, you’re doing it right. That’s how you know it’s fresh.
- 1 medium onion, chopped: Yellow, sweet, red — any of them work beautifully. The onion adds a savory depth that balances all that heat. I just grab whatever’s sitting in my pantry bin. My husband has never once noticed a difference.
- 1 whole head of garlic, cloves peeled and lightly crushed: A full head, not just two or three cloves. We’re not playing around here. My kids can smell the garlic from across the kitchen. That’s how we know it’s working.
- 1/4 cup fresh ginger, peeled and chopped: Warming, bright, and slightly sweet — ginger keeps the horseradish from being the only voice in the room. If you have a knob sitting in the back of your fridge, great. No need for a special grocery run.
- 1/4 cup fresh turmeric, peeled and chopped (or 1 tbsp dried): This gives the fire cider its gorgeous golden color and an earthy depth you’d miss if you skipped it. Fair warning: turmeric stains your fingers orange for a day. Wear gloves if you’re fancy. I never do.
- 1–2 fresh hot peppers, chopped: Jalapeño for a mild batch, serrano if you want a middle ground, or a habanero for the full, tear-jerking experience. My grandmother always used whatever happened to be growing in the garden. One year it was an escaped Thai bird’s eye that sprouted wild by the compost pile, and ohhh boy — that batch cleared more sinuses than a box of tissues.
- 1 teaspoon black peppercorns: Just a few to add warmth. My grandmother never told me why, but it turns out black pepper helps your body absorb the turmeric better. I read it in a magazine twenty years later, and now I add it every single time.
- 1/4 cup raw honey, or more to taste: Added after steeping, never before. Local honey is worth seeking out here — I buy a big jug at the farmers market every August and it’s the only honey I’ll use.
- Optional: 2 sprigs fresh rosemary or thyme: I toss these in whenever I remember to grab them from the garden. They add a gentle herbal note that makes the whole jar smell like a fall afternoon.
What to Pull Out Before You Start
- A clean 1-quart glass jar with a tight-fitting lid — a wide-mouth mason jar is ideal for packing in the veggies.
- A mesh strainer lined with cheesecloth, or a nut milk bag, for straining the finished cider.
- A cutting board and a sharp knife (a box grater works too if you’d rather grate than chop).
- Measuring cups and spoons.
- A funnel and a clean glass bottle or jar for the finished cider.
One warning before we start: never let the vinegar touch a metal lid. The acid will eat away at it and leave a metallic taste in your whole batch. Use a plastic lid liner, a square of parchment paper between the jar and the lid, or a glass lid. Same goes for metal strainers — stick with cheesecloth or nylon mesh.
Let’s Make It (Step by Step)
This might be the easiest recipe you’ll make all year that takes a full month. Read through the steps once, then get your chopping done — the hands-on time is only about 30 minutes, I promise.
- Prep your roots: Peel the horseradish, ginger, and turmeric if using fresh. Chop everything into roughly 1/2-inch pieces — no need for pretty, uniform cuts. The smaller you chop, the more surface area the vinegar has to work with, so don’t be shy.
- Smash and peel the garlic: Lay each clove flat and press down with the side of your knife to loosen the skin. Peel, then give each clove a light crush with the broad side of your knife — you want them broken up, not minced. (📸 Photo tip: Right now your jar should be a colorful pile of roots, garlic, and peppers at the bottom — see the orange turmeric and pale horseradish peeking out? That’s your “before vinegar” shot.)
- Pack the jar: Layer the horseradish, onion, garlic, ginger, turmeric, fresh peppers, peppercorns, and herbs (if using) into your clean quart jar. Pack it snug — your jar should be about 3/4 full of solid goodness.
- Pour in the vinegar: Pour the raw apple cider vinegar over all the ingredients until the jar is completely full and everything is fully submerged. Leave about 1/2 inch of headspace at the top. If your lid is metal, place a small square of parchment paper over the jar mouth before screwing on the lid.
- Seal, label, and shake: Screw on the lid, label with the date, and give the jar a good shake. I always write “Fire Cider — ready [date four weeks out]” so I don’t get antsy and open it too early. I’ve made that mistake exactly once.
- Steep for 4 weeks: Store the jar in a cool, dark place — a pantry shelf or a kitchen cabinet works great. Shake it every day if you remember, or whenever you happen to walk past. You’ll notice the vinegar deepening in color within the first week; that’s the goodness leaching out of all those roots. (📸 Photo tip: After a week, the vinegar turns a gorgeous golden-amber and goes slightly cloudy, and the ingredients settle into a pretty layered pattern inside the jar. This is the shot I always snap right before I strain it.)
- Strain it: After the full 4 weeks, set your strainer lined with cheesecloth over a large bowl. Pour in the entire jar, then gather the corners of the cheesecloth and squeeze every last drop of liquid from the solids. Don’t be polite here — wring that bundle out like it owes you money. The liquid you squeeze out is the strongest, most concentrated part of the whole batch.
- Stir in the honey: Start with 2 tablespoons of raw honey and whisk it in. Keep tasting and adding more until you hit that perfect balance of fiery and sweet. I usually land right around 1/4 cup. If the cider is cold, the honey will be stubborn — let it sit at room temperature for 15 minutes first, or whisk like you mean it.
- Bottle and refrigerate: Funnel the finished traditional fire cider into a clean glass bottle or jar, cap it, and tuck it in the fridge. It keeps for up to 6 months, though in our house it never, ever lasts that long. The flavor only deepens with time, so there’s no rush to finish it.
How I Prep a Season’s Supply (Because One Batch Never Lasts)
Since this is literally a make-ahead recipe, I always do a double batch in September — one for our pantry and one for my sister-in-law. It’s the only “meal prep” I actually get excited about: one afternoon of chopping, and we’re set through cold season.
- Fridge: Bottled fire cider stays great in the fridge for up to 6 months. Shake well before each use, since the honey and herb bits settle over time.
- Freezer: Yes, you can freeze it! Pour the finished cider into ice cube trays and pop the frozen cubes into a zip-top bag. Thaw individual cubes as needed. The honey may crystallize slightly, but a good stir brings it right back.
- Reheat: You don’t heat fire cider — you take it cold as a shot. Or, for a cozy evening version, stir a tablespoon into hot water with a squeeze of lemon and an extra drizzle of honey. That’s my December sick-day ritual.
Things I Wish I’d Known the First Time
- Metal is the enemy: I know I said this above, but I’ll say it again because I ruined a whole batch this way — vinegar and metal lids do not mix. It causes rust and a bitter, almost coppery taste. Use a plastic lid liner, parchment paper, or a glass lid. Save yourself the heartbreak.
- Fresh horseradish is non-negotiable: If there’s one ingredient you should never swap for the jarred kind, it’s this. Jarred horseradish is already pickled in vinegar, so it won’t release any of its heat into your cider. You’ll end up with a batch that barely tickles your nose. Stick with the fresh root.
- Taste before you sweeten: Horseradish varies wildly from season to season — one year it’s mild and sweet, the next it clears every sinus you’ve got. Start with 2 tablespoons of honey and add more gradually. The “right” amount changes every single batch.
- Don’t toss the solids: After you strain and squeeze the vegetables, don’t throw them away! The spent roots and garlic are still full of flavor. I chop them fine and add them to soups, stews, and stir-fries. Nothing gets wasted at my house.
- It only gets better with time: The day you bottle it, the cider is still a little wild and sharp. Give it another week or two in the fridge and the flavors mellow, deepen, and blend together beautifully. And don’t stress about perfect measurements — I’ve made this with “generous handfuls” more times than I’ve actually measured, and it comes out delicious every single time.
Swaps That Actually Work
- For kids (or the heat-averse): Use just one jalapeño with the seeds removed, or skip the hot pepper entirely, and bump up the honey a bit. My kids take their dose mixed into a little orange juice. It’s still got that zing, but it’s genuinely pleasant.
- The “brave” version: Swap in a whole habanero, seeds and all, and add an extra handful of horseradish. This is my husband’s preferred batch. He sweats when he takes it and looks unreasonably proud of himself about it.
- No turmeric? Just skip it. The color will be paler and the flavor slightly less earthy, but the cider will still be fabulous — I’ve made plenty of turmeric-free batches in my life.
- Citrus twist: Add the zest of one lemon and one orange to the jar before steeping. It brightens everything up and makes the whole kitchen smell incredible for a month.
- Honey-free version: If you don’t use honey, make the cider without it and sweeten each dose individually with a tiny drop of maple syrup when you take it. It’s not quite the same, but it works in a pinch.
Questions I Get About Fire Cider All the Time
Q: Why did my fire cider come out tasting too mild?
A: Ugh, I’ve been there with my very first batch. The most common culprit is using jarred horseradish — it’s already spent and pickled, so it can’t release any heat into the vinegar. The second is not letting it steep long enough. If you only waited two weeks, give it the full four. You’ve got this — it’s nearly impossible to ruin this recipe, and even a mild batch makes a great salad dressing.
Q: Can I use regular white vinegar instead of raw apple cider vinegar?
A: I honestly wouldn’t. Raw apple cider vinegar with the mother is what gives this tonic its character — it’s slightly sweet, a little apple-y, and almost alive in a way that regular white vinegar isn’t. White vinegar works in a pinch but comes out tasting thin and harsh, and you lose all the good stuff. If you can find it, Bragg’s or any unfiltered brand works beautifully.
Q: How long does fire cider last? Can I freeze it?
A: It keeps in the fridge for about 6 months, and yes, you can absolutely freeze it. I pour leftover batches into ice cube trays and thaw a cube whenever I need one. The honey might crystallize a little after freezing, but a good shake or stir brings it right back. Honestly, it never lasts that long in our house — a batch barely survives the winter.
Q: How do you actually take fire cider? What do you serve with it?
A: The classic way is a 1 to 2 tablespoon shot, straight up — that’s my grandmother’s standard, and mine on most mornings. But you can also sparkle it up: a splash in sparkling water with a little lemon is genuinely tasty, or whisk a spoonful into a vinaigrette for a spicy salad dressing. On a cold night, I stir it into hot water with extra honey and a squeeze of lemon — that’s my favorite way to finish the last of the jar. My kids do theirs with orange juice and call it “spicy lemonade.”
More Recipes My Family Makes on Repeat
If you liked this one, here are a few others that get the same reaction at our table:
- [INTERNAL LINK PLACEHOLDER: Grandma’s Spicy Pickled Garlic] — Same pantry magic, ready in a week instead of a month, and perfect on a charcuterie board.
- [INTERNAL LINK PLACEHOLDER: Golden Turmeric Ginger Tea] — The cozy winter sipper I make when the fire cider shot isn’t quite hitting the spot.
- [INTERNAL LINK PLACEHOLDER: Fermented Jalapeño Hot Sauce] — For the folks who like their food with a serious attitude and a side of gut-friendly goodness.
Y’all, this traditional fire cider is one of those recipes that makes me feel like a proper grown-up — the kind my grandmother handed down with a wink and a warning that I’d better not lose it. Now it’s yours. Whether you’re making it for the first time or the fiftieth, I really hope it brings the same warmth to your kitchen that it’s brought to mine for twenty years.
If you try it, come back and leave a comment below — I love hearing how it goes for you, and I answer every single question. And tag me in your jar photos on Instagram so I can cheer you on. Nothing makes me happier than seeing your pantry shelves full of golden goodness.
📌 Don’t lose this traditional fire cider recipe! Save it to your Herbal Remedies board now so you’re ready when cold season hits — make a double batch, you’ll thank yourself in January.
Traditional Fire Cider the Way My Grandmother Made It
Equipment
- 1-quart glass jar with tight-fitting lid
- Mesh strainer lined with cheesecloth or nut milk bag
- Cutting board and sharp knife (or box grater)
- Measuring cups and spoons
- Funnel and clean glass bottle or jar
Ingredients
Roots & Aromatics
- 1 quart raw apple cider vinegar, with the mother
- 1/2 cup fresh horseradish root, peeled and chopped
- 1 medium onion, chopped
- 1 head garlic, cloves peeled and lightly crushed
- 1/4 cup fresh ginger, peeled and chopped
- 1/4 cup fresh turmeric, peeled and chopped (or 1 tbsp dried)
- 1-2 fresh hot peppers, chopped (jalapeño, serrano, or habanero)
- 1 teaspoon black peppercorns
- 2 sprigs fresh rosemary or thyme (optional)
Finishing
- 1/4 cup raw honey, or more to taste (add after steeping)
Instructions
- Prep your roots: Peel the horseradish, ginger, and turmeric if using fresh. Chop everything into roughly 1/2-inch pieces — no need for pretty, uniform cuts. The smaller you chop, the more surface area the vinegar has to work with.
- Smash and peel the garlic: Lay each clove flat and press down with the side of your knife to loosen the skin. Peel, then give each clove a light crush.
- Pack the jar: Layer the horseradish, onion, garlic, ginger, turmeric, fresh peppers, peppercorns, and herbs into your clean quart jar. Pack it snug — the jar should be about 3/4 full.
- Pour in the vinegar: Pour the raw apple cider vinegar over all ingredients until the jar is full and everything is submerged, leaving about 1/2 inch of headspace. Protect a metal lid with parchment paper.
- Seal, label, and shake: Screw on the lid, label with the date, and shake the jar. Write ‘Fire Cider — ready [date four weeks out]’ so you don’t open it too early.
- Steep for 4 weeks: Store the jar in a cool, dark place and shake it daily if you remember. The vinegar will deepen in color within the first week.
- Strain it: After a full 4 weeks, pour the jar into a cheesecloth-lined strainer set over a bowl. Gather the corners and squeeze out every last drop — the squeezed liquid is the strongest part.
- Stir in the honey: Start with 2 tablespoons of raw honey, whisk it in, and keep tasting until you hit the perfect balance of fiery and sweet. Let a cold batch sit at room temperature for 15 minutes first if needed.
- Bottle and refrigerate: Funnel the finished traditional fire cider into a clean glass bottle or jar, cap it, and tuck it in the fridge. It keeps for up to 6 months.
Notes
Related Recipes:
 Cheesy Hamburger Casserole Bake That’s Ready in 40 Minutes (No Canned Soup Here)
 Texas Roadhouse Style Baked Salmon with Sweet and Savory Glaze — Ready in Under 30 Minutes
 Moist Lemon Zucchini Bread with a Crunchy Lemon Sugar Top
 Strawberry Shortcake Rice Krispie Treats That Actually Taste Like Shortcake — Ready in 15 Minutes
 Blueberry Oatmeal Cookies That Stay Soft for Days — in Under 30 Minutes
 Air Fryer Chicken and Vegetables That Don’t Taste Like a Regret (30 Minutes, One Pan)