
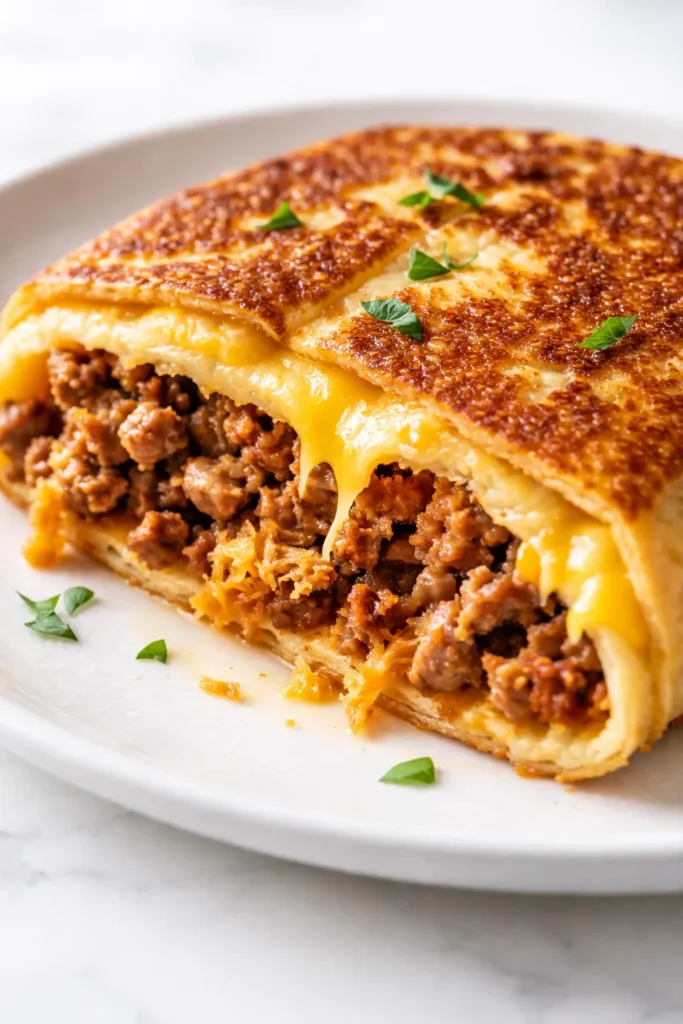
I spent the first six months of keto dreaming about the Crunchwrap Supreme. The texture, the layers, the way the cheese fused to the tortilla. Then I realized I could just make it at home without the 50 grams of carbs. It took some trial and error — and more than a few structural failures that ended up as sad bowl meals — but this version holds its shape, delivers on the crunch, and honestly tastes better than the drive-thru version.
The short version: Golden, crispy, and completely keto-friendly — this crunchwrap stays together and tastes like the real thing.
I’ve made this exact recipe about 20 times, mostly because my friends keep requesting it for game nights. It’s the one keto dish nobody realizes is keto.
At-A-Glance
- Serves: 4 as a main
- Hands-On Time: 25 min | Total Time: 35 min
- Difficulty: Easy, even on a busy weeknight
- Cost per serving: ~$4.50
- Calories: ~420 per crunchwrap
- Dietary Notes: Keto-Friendly, Low-Carb, Gluten-Free (depending on tortilla brand)
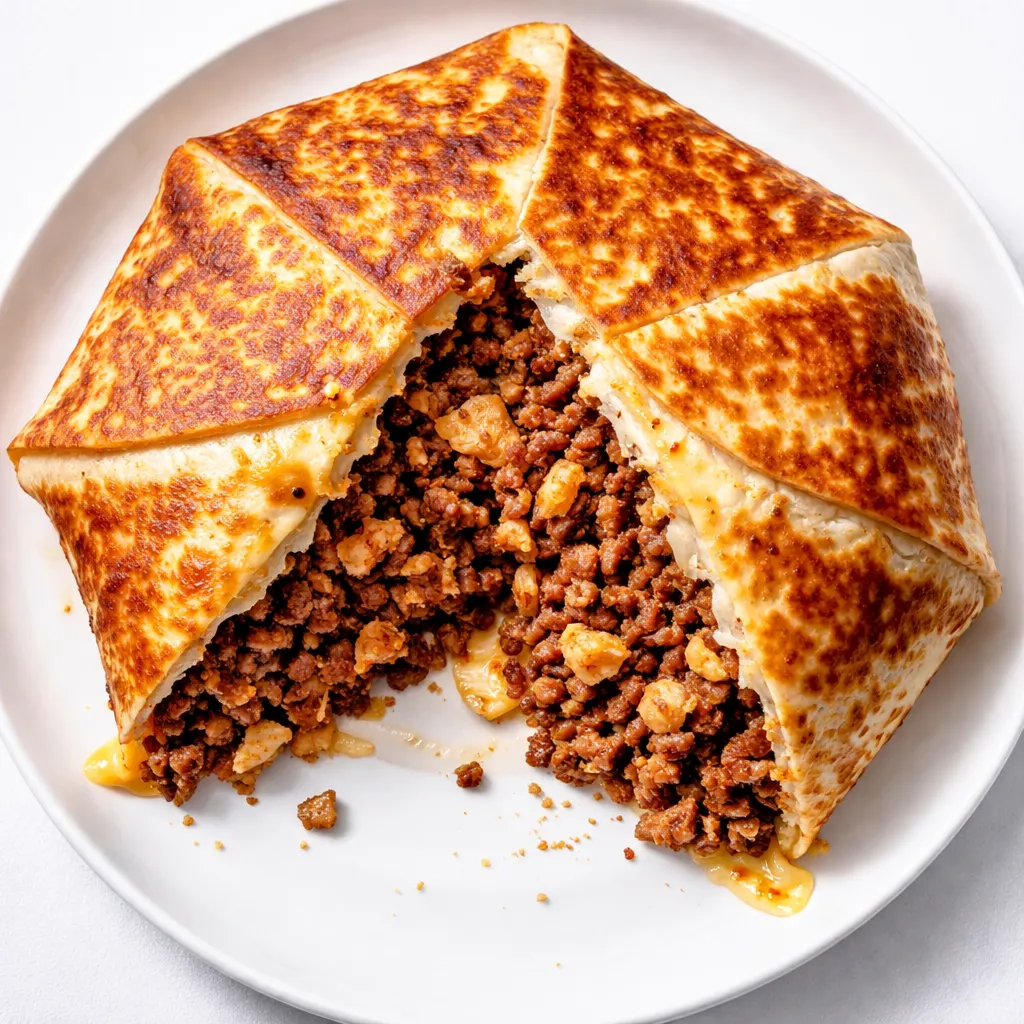
(Photo above: Cross-section of the keto crunchwrap on a rustic wooden board, showing the distinct layers — seasoned beef, melted cheddar, and crushed pork rinds — inside a perfectly browned tortilla. Natural light from a side window. My dining table, which I promise is usually cleaner.)
The Trick That Keeps It Crunchy (Not Soggy)
Pork rinds are the unsung heroes of keto cooking. Here, they absorb the juices from the seasoned beef without turning into a paste. They stay crunchy, they take on the seasoning, and they provide the exact textural counterpoint you need to trick your brain into thinking you’re biting into a fried shell.
Cheese is the glue. Literally. A generous layer of cheddar or Monterey Jack melts into a barrier that fuses the top and bottom tortillas together. This is what keeps your crunchwrap from falling apart when you flip it. I put cheese on top of the filling and under the top fold — a double seal.
Low heat is non-negotiable. If the pan is too hot, the tortilla burns before the cheese has time to melt and form the seal. I learned this the hard way. Twice.
The resting period. Letting it sit for 2 minutes after cooking allows the cheese structure to set. Cutting into it immediately is the #1 cause of crunchwrap collapse. I know it’s hard to wait. Do it anyway.
What You’ll Need (Plus My Honest Notes)
The ingredient list is short, but every single item is doing work. No filler here.
- 1 lb ground beef (80/20): You need the fat for flavor and to keep the filling from drying out. I’ve tried 93/7 and the result was dry and crumbly. Not worth it.
My grocery store runs sales on the 80/20 packs every other week — I stock up and freeze what I don’t use. - 1 tbsp keto taco seasoning: Use your favorite brand or make your own with 1 tsp each: cumin, chili powder, garlic powder, onion powder, salt, and pepper.
Most store-bought packets have sugar or maltodextrin, so check the label if you’re strict keto. - 4 large low-carb tortillas: Burrito size. Mission Carb Balance is my go-to. If they’re too small, you cannot fold the top over the filling, and that is a structural failure you cannot recover from.
I once tried a different brand and they cracked when I folded them. Mission is the most pliable in my experience. - 1.5 cups shredded cheddar or Monterey Jack: Cheddar for flavor, Monterey Jack for melt. I do a 50/50 mix.
Shred it yourself if you have the energy — pre-shredded has anti-caking agents that slow melting. I use pre-shredded on Tuesdays and freshly grated on Sundays. Both work. - 1 cup crushed pork rinds (plain): This is your crunch. Do not skip this. I tried almond flour, crushed nuts, and even crushed cheese crisps. Nothing gives you the neutral crunch and structural integrity of plain pork rinds.
I crush them in the bag with my hands. Less mess, more satisfying. - 1 tbsp avocado oil: For frying. Avocado oil has a high smoke point and neutral flavor.
- For serving (optional): Sour cream, avocado, salsa verde, pickled jalapeños.
What to Pull Out Before You Start
- 12-inch non-stick or cast iron skillet: Cast iron gives you the best crust, but non-stick is easier to manage if you’re nervous about sticking.
- Fish spatula: Thin enough to slide under the delicate tortilla without tearing it. A regular spatula works, but the fish spatula is better.
- Cutting board and sharp knife: For the final cut. A dull knife will squish the layers.
- Bowl for the filling: So you can assemble in an assembly line.
Let’s Make It (Step by Step)
This goes fast once you start searing, so read through the whole process once before you begin. Most of these steps are under a minute each.
Prep: Set out your tortillas, shredded cheese, crushed pork rinds, and cooled beef before you start assembling. You want everything within arm’s reach.
- Brown the beef: Heat a large skillet over medium-high heat. Add the ground beef and cook, breaking it up with a spatula, until browned — about 5-6 minutes. Drain off excess fat, leaving about 1 tablespoon in the pan. Add the taco seasoning and 2 tablespoons of water. Cook for 1-2 minutes, until the liquid is absorbed and the mixture is slightly thickened. Remove from heat and let it cool for 5 minutes. If the beef is too hot when you assemble it, the steam will soften the pork rinds before they hit the pan. Cooling matters.
(📸 Photo tip: The finished beef should look like a thick, seasoned taco filling — not swimming in liquid, but not dry either. Drag your spatula through it and it should hold the line.) - Layer the filling: Lay one tortilla flat on your cutting board. Spread 1/4 of the beef mixture into an even circle in the center, leaving a 2-inch border around the edge. Sprinkle 2 tablespoons of cheese over the beef. Add a generous handful of crushed pork rinds (about 1/4 cup). Top with another 2 tablespoons of cheese. The double cheese layer is what creates the seal — don’t skimp here.
- Fold it with intention: Working your way around the filling, fold the edges of the tortilla up and over the center, creating a pleated seal. Press gently to adhere. If the tortilla cracks, microwave it for 15 seconds next time to make it pliable. You should not be able to see the filling when you’re done. If you can see it, you didn’t leave a wide enough border.
(📸 Photo tip: The folded side should look like a giant, slightly lumpy dumpling. It doesn’t need to be perfect — the pan will fix the shape.) - Sear to golden perfection: Heat 1 tbsp avocado oil in a large non-stick or cast iron skillet over medium-low heat. Place the crunchwrap, seam-side down, in the hot oil. Cook for 3-4 minutes, pressing gently with a spatula or a smaller pan, until the bottom is deeply golden and crisp. Medium-low is key. If your heat is too high, the tortilla will brown before the cheese inside has time to melt. Be patient.
- Flip and finish: Carefully flip the crunchwrap with a fish spatula. Cook for another 3-4 minutes on the second side, until golden and the cheese is melted and just barely oozing at the edges. If cheese oozes out, that’s fine — it creates a crispy cheese skirt that is the best part of the whole thing.
- Rest (this is not optional): Transfer the crunchwrap to a cutting board and let it rest for 2 full minutes. This allows the cheese to firm up and hold the structure together. Cutting into it immediately will cause the filling to slide out. I know you’re hungry. Wait the two minutes.
- Cut and serve: Cut in half with a sharp knife using a clean, decisive motion. The cross-section should reveal distinct, beautiful layers. Serve with sour cream, avocado, salsa, or pickled jalapeños on the side.
How to Meal Prep These for the Week
I make a double batch on Sundays and my partner and I eat them for lunch all week. The trick is to under-cook the tortilla slightly on the first sear, then finish them in a hot skillet or air fryer right before eating. It takes 10 minutes from fridge to table.
- Fridge: Wrap individually in foil or parchment. They keep for 4-5 days.
- Freezer: Yes. Wrap tightly in foil, then freeze in a zip-top bag for up to 3 months. Do not thaw before reheating — reheat directly from frozen.
- Reheat: Air fryer at 350°F for 5-6 minutes is the best method. Skillet over medium-low heat with a splash of water and the lid on for 3-4 minutes works too. The microwave will make the tortilla soggy — I don’t recommend it unless you’re in a genuine emergency.
Things I Learned the Hard Way So You Don’t Have To
- Don’t overfill. I know it’s tempting to pile on the beef and cheese. Overstuffing is the #1 reason crunchwraps fall apart. Leave that 2-inch border. It’s there for a reason.
- Pork rinds are not optional. I tried almond flour, crushed nuts, even shredded lettuce (don’t ask). Nothing gives you that neutral, structural crunch except pork rinds. They absorb the beef drippings without turning into a paste.
- Low heat is your friend. High heat burns the tortilla before the cheese has time to melt and seal the seam. I’ve ruined more crunchwraps this way than I care to admit. Medium-low, three to four minutes per side. Trust the process.
- Weight it down. When searing, place a smaller skillet or a bacon press on top of the crunchwrap. This ensures even contact with the pan and a perfect golden crust. If you don’t have one, just press gently with your spatula.
- The fish spatula is the right tool. It’s thin enough to slide under the delicate tortilla without tearing it. A regular spatula is too thick and will push the filling out. I bought a fish spatula specifically for this recipe and I use it for everything now.
Easy Swaps (For Picky Eaters and Empty Fridges)
- Chicken Crunchwrap: Use shredded rotisserie chicken mixed with 4 oz cream cheese and taco seasoning. This is what I make when I don’t feel like browning beef.
- Breakfast Crunchwrap: Scrambled eggs, crispy bacon or sausage, and cheddar. Fold it up and sear it. This is my Saturday morning tradition.
- Vegetarian Crunchwrap: Riced cauliflower, black soybeans (rinsed well), and extra cheese. The soybeans are lower in carbs than regular black beans and work surprisingly well here.
- Carnitas Crunchwrap: Leftover carnitas, pickled red onions, and Oaxaca cheese. This is the fancy version I make when friends come over.
- Dairy-Free: Use your favorite dairy-free cheese shreds. The melt won’t be as dramatic, but the flavor will still be there. I’ve tested this with a few brands and it works.
Questions I Get About This Recipe All the Time
Q: Why did my crunchwrap fall apart in the pan?
A: A few things can go wrong: too much filling, not enough cheese to act as glue, or you flipped it too early. Make sure you leave that 2-inch border and let the cheese fully melt before you try to move it. If you’re really nervous, add an extra tablespoon of cheese to the top layer.
Q: Can I use a different tortilla?
A: Mission Carb Balance is the gold standard for this. Other brands can be too small, too brittle, or too high in carbs. If your tortilla cracks when you fold it, microwave it for 15 seconds to make it pliable. That one trick solves 90% of folding problems.
Q: Can I air fry these instead of pan-frying?
A: Yes. Air fry at 370°F for 6 minutes per side. Spray with a little oil first so the tortilla gets golden. They come out incredibly crispy — almost like they’re fried. I actually prefer this method when I’m making a batch.
Q: What do you serve with these?
A: Sour cream for fat, pickled jalapeños for acid, and a side of avocado for color. That’s the holy trinity of crunchwrap accompaniments. My partner likes them with a simple side salad dressed in lime juice, which I admit balances out the richness perfectly.
More Recipes My Family Makes on Repeat
If this crunchwrap solved your dinner dilemma, here are a few others that get the same reaction at our table:
- Keto Nachos Recipe — The same crunchy, cheesy energy in a shareable bowl. Perfect for game days.
- Chicken Bacon Ranch Casserole — The one dish every single person at the table agrees on. I’ve never had leftovers.
- Cheesy Sausage Stuffed Peppers — Perfect for meal prep and packed with flavor. They freeze beautifully.
This is the crunchwrap that finally works for keto — crispy, satisfying, and way easier than it looks. I’ve made it in my tiny Brooklyn kitchen and in my mom’s suburban dream kitchen. It works everywhere.
If you try it, drop a comment below. I genuinely want to know how your seal held up — and if you found the courage to flip it without a safety net.
📌 This keto crunchwrap recipe stays perfectly crisp and folds up like a dream — save it for your next low-carb meal prep Sunday.
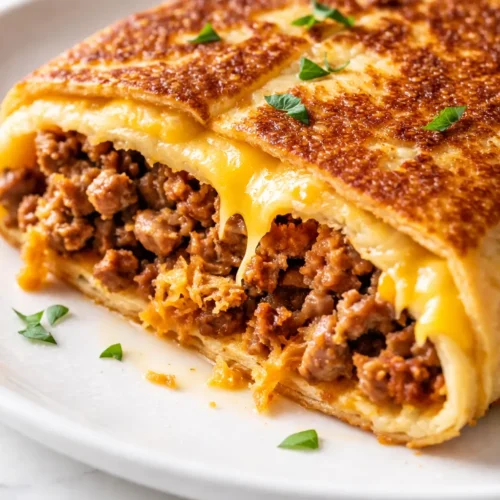
Keto Crunchwrap Recipe That’s Actually Crispy (And Won’t Fall Apart)
Equipment
- Large skillet (non-stick or cast iron)
- Fish spatula
- Cutting board and sharp knife
- Bowl for filling
Ingredients
- 1 lb ground beef (80/20)
- 1 tbsp keto taco seasoning
- 4 large low-carb tortillas (burrito size)
- 1.5 cups shredded cheddar or Monterey Jack
- 1 cup crushed pork rinds (plain)
- 1 tbsp avocado oil
Instructions
- Brown the beef: Heat a large skillet over medium-high heat. Add the ground beef and cook, breaking it up with a spatula, until browned — about 5-6 minutes. Drain off excess fat, leaving about 1 tablespoon in the pan. Add the taco seasoning and 2 tablespoons of water. Cook for 1-2 minutes, until the liquid is absorbed and the mixture is slightly thickened. Remove from heat and let it cool for 5 minutes.
- Layer the filling: Lay one tortilla flat on your cutting board. Spread 1/4 of the beef mixture into an even circle in the center, leaving a 2-inch border around the edge. Sprinkle 2 tablespoons of cheese over the beef. Add a generous handful of crushed pork rinds (about 1/4 cup). Top with another 2 tablespoons of cheese.
- Fold it with intention: Working your way around the filling, fold the edges of the tortilla up and over the center, creating a pleated seal. Press gently to adhere. If the tortilla cracks, microwave it for 15 seconds next time to make it pliable.
- Sear to golden perfection: Heat 1 tbsp avocado oil in a large non-stick or cast iron skillet over medium-low heat. Place the crunchwrap, seam-side down, in the hot oil. Cook for 3-4 minutes, pressing gently with a spatula or a smaller pan, until the bottom is deeply golden and crisp.
- Flip and finish: Carefully flip the crunchwrap with a fish spatula. Cook for another 3-4 minutes on the second side, until golden and the cheese is melted and just barely oozing at the edges.
- Rest (this is not optional): Transfer the crunchwrap to a cutting board and let it rest for 2 full minutes. This allows the cheese to firm up and hold the structure together. Cutting into it immediately will cause the filling to slide out.
- Cut and serve: Cut in half with a sharp knife using a clean, decisive motion. Serve with sour cream, avocado, salsa, or pickled jalapeños on the side.
Notes
Related Recipes:
 Peach Arugula Salad with Brown Butter Pecans: The 15-Minute Summer Dinner I Make on Repeat
 Cheesy Hamburger Casserole Bake That’s Ready in 40 Minutes (No Canned Soup Here)
 Lemon Capellini Salad for Late Summer Evenings: Bright, Tangy, Ready in 20 Minutes
 Creamed Cabbage and Ground Beef Casserole That’s Rich, Tender, and Done in 45 Minutes
 Grilled Peach Burrata Salad That Tastes Like a Fancy Restaurant — at Home in 20 Minutes
 Dolly Parton’s Easy 5-Ingredient Casserole That Feeds a Crowd in 45 Minutes